Everything you need to know about creating perfect grain spawn for your mushroom growing projects
You’ve decided to grow mushrooms at home, but you’re wondering how to make grain spawn that actually works. Here’s the step-by-step process that transforms ordinary grains into the foundation of your mushroom cultivation success.
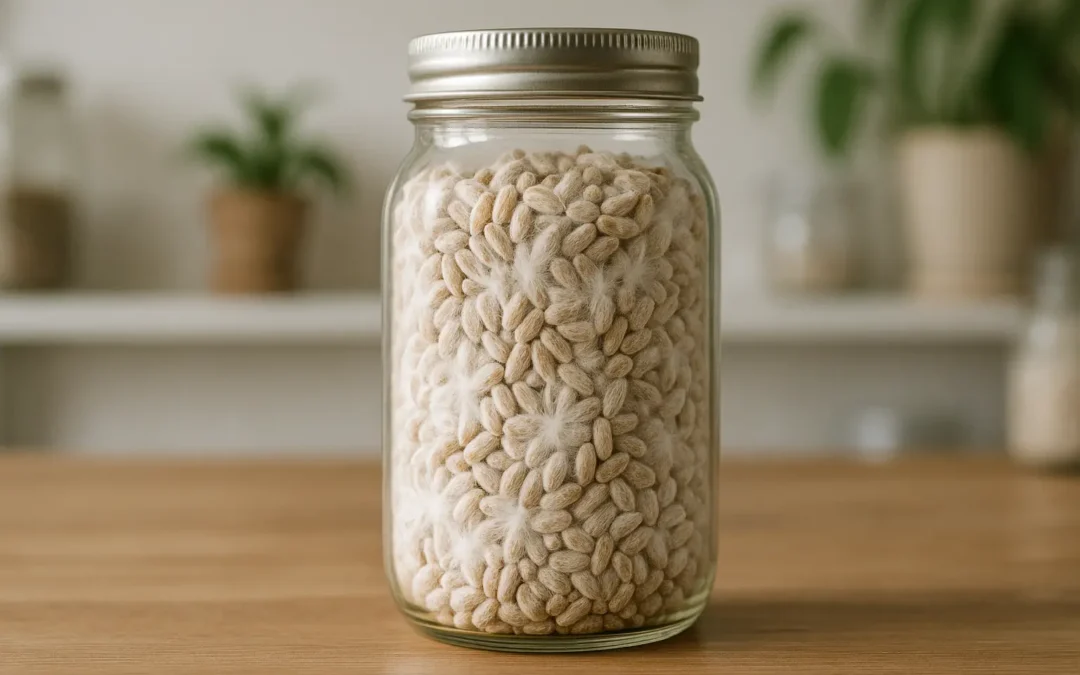
Grain spawn acts like seeds in your mushroom garden – it’s sterilized grain that’s been inoculated with mushroom mycelium. When you get this right, you’ll have the building blocks for pounds of fresh mushrooms.
Why you need perfect grain spawn preparation
Your grain spawn quality determines everything that follows in mushroom cultivation. The North American Mycological Association (NAMA) emphasizes that proper grain spawn preparation prevents contamination and ensures strong mycelium growth.
You’re aiming for three critical conditions: complete water saturation inside each grain, a dry exterior surface, and intact kernels. When grains explode or break apart, bacteria can easily consume the porridge-like material while your mushroom mycelium struggles.
What grains work best for mushroom cultivation
Rye grain stands out as the preferred choice for most home cultivators. It offers exceptional nutritional density and water absorption properties, though it requires more careful preparation than alternatives.
You can also use these grain spawn alternatives:
Sorghum and millet – smaller grains that colonize faster
Wheat – readily available and nutritious
Oats – popular for low cost and easy sourcing
Brown or white rice – works well for various mushroom species
Choose organic grains whenever possible. Conventional grains often contain fungicides that prevent fungal growth – exactly what you don’t want when growing mushrooms. Plus, mushrooms bioaccumulate environmental toxins at much higher levels than their growing environment.
Step-by-step grain spawn preparation process
Step 1: Clean and soak your grains
Start by rinsing your grains thoroughly to remove debris and floating materials. You’ll soak them for 12-24 hours to allow gradual moisture absorption.
Adjust soaking time based on your climate – longer soaking in cooler weather (below 60°F/15°C), shorter in warmer conditions (above 75°F/24°C).
Step 2: Cook grains to perfect moisture levels
Bring your soaked grains to a full rolling boil using high heat. Cook until they reach an al dente state – translucent exterior with a slightly raw center. This typically takes 10-20 minutes depending on grain type.
Here’s what you’re looking for: grains that are fully saturated inside but won’t turn to mush when you handle them.
Step 3: Drain and dry the surface
Strain your hot grains and spread them on clean towels or screens. The surface moisture evaporates as steam, creating that ideal dry exterior with saturated interior condition. This process takes 1-2 hours.
Don’t rush this step – proper surface drying prevents contamination during sterilization and inoculation.
Step 4: Load containers and prepare lids
Fill sterilized mason jars or grow bags to about 2/3-3/4 capacity, leaving room for shaking during colonization. You’ll need specialized lids with injection ports and breathable filter patches for sterile inoculation.
Cover everything with aluminum foil during sterilization to protect the filters.
Sterilization: Your grain spawn safety checkpoint
Pressure cooking requirements for grain spawn
You must sterilize at 15 PSI for 90 minutes minimum. This combination reaches 250°F (121°C), eliminating all potential contaminants while preserving grain integrity.
Military and academic research confirms that properly operated home pressure cookers achieve sterilization equivalent to professional autoclaves. Studies show 100% sterility when maintaining 15 PSI for appropriate durations.
Using an Instant Pot? These units typically operate at 13 PSI, so extend cooking time by 30 minutes for reliable sterilization.
Always verify your pressure cooker reaches proper pressure and temperature
Contact your local extension office for pressure cooker testing services
How you inoculate grain spawn for best results
Why liquid culture beats spore syringes
Liquid culture inoculation provides superior results compared to spore syringes every time. You’ll see faster colonization (2-3 weeks ahead of spore methods), reduced contamination risk, and consistent results with established mycelium cultures.
Standard inoculation ratios:
1-2ml per quart (946ml) jar of prepared grain
5-10ml per 5-pound (2.3kg) bag of sterilized grain
Shake gently after inoculation for even distribution
Creating optimal incubation conditions
Maintain these environmental parameters during colonization:
Temperature: 68-75°F (20-24°C) for most species
Humidity: Natural humidity within sealed containers
Light: Dark or minimal diffuse lighting
Duration: 14-45 days depending on species and conditions
You won’t need to add moisture during this phase – your sealed containers maintain perfect humidity levels.
Advanced technique: Break and shake method for faster colonization
When and how to shake your grain spawn
The “break and shake” technique dramatically speeds up colonization by creating multiple inoculation points throughout your grain spawn. Apply this method when you see 20-30% colonization (some growers prefer waiting until 40-50%).
Benefits you’ll see:
2-3 week reduction in total colonization time
More uniform mycelium distribution
Increased inoculation points throughout the substrate
Prevention of slow-colonizing dead zones
Proper technique: Gently but thoroughly agitate containers to break mycelium clumps, then redistribute colonized grains completely. One application typically provides sufficient acceleration for most cultivations.
Troubleshooting common grain spawn problems
Identifying healthy vs. contaminated grain spawn
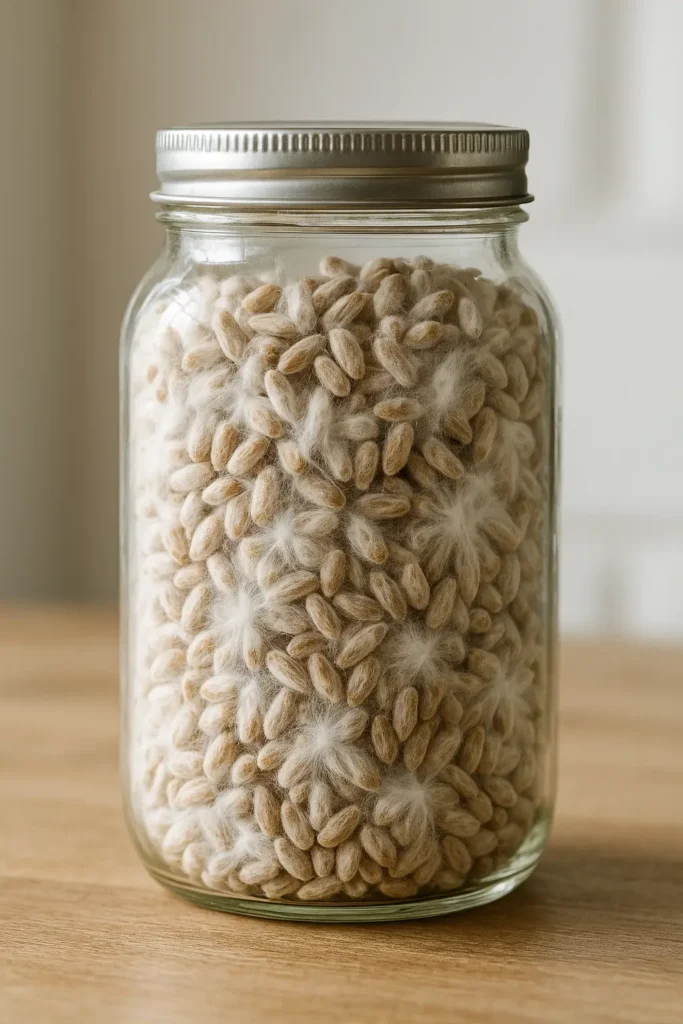
Successful grain spawn shows:
Dense white mycelium coating individual grains
Rope-like mycelial structures rather than fluffy growth
Pleasant mushroom aroma without sour or ammonia odors
Firm substrate consistency with intact grain structure
Warning signs of contamination:
Bright green patches (Trichoderma mold) that spread rapidly
Slimy, wet areas with foul odors (bacterial contamination)
Slow colonization usually results from insufficient temperature, inadequate moisture, or poor air exchange. Any contamination requires immediate isolation and disposal.
Scaling grain spawn production for larger projects
Mathematical approach to consistent batches
For larger operations, use this proven scaling method: Calculate your baseline ratio by dividing total dry grain weight by total wet weight after cooking. For rye grain, this typically equals 0.58.
Total target weight – Soaked grain weight = Additional water needed
This eliminates guesswork and ensures consistent moisture ratios across batches of any size.
Frequently asked questions about grain spawn
Q: How long does grain spawn take to fully colonize? A: Most grain spawn takes 2-6 weeks under ideal conditions of 68-75°F (20-24°C), depending on species and inoculation method.
Q: What’s the best grain for beginners? A: Start with organic rye grain if available, or oats for a more forgiving option. You’ll need about 2-4 pounds (0.9-1.8kg) of dry grain per 5-pound growing project.
Q: When should I use my finished grain spawn? A: Use fresh grain spawn within 1-2 months for optimal viability. Refrigerated storage extends shelf life, though some species like Pink Oyster prefer room temperature.
Q: Can I store grain spawn long-term? A: Fresh grain spawn works best, but properly stored spawn lasts 2-3 months refrigerated at 35-40°F (2-4°C).
Your next step: Gather organic grains, a pressure cooker, and mason jars with modified lids. Start with small batches to perfect your technique.
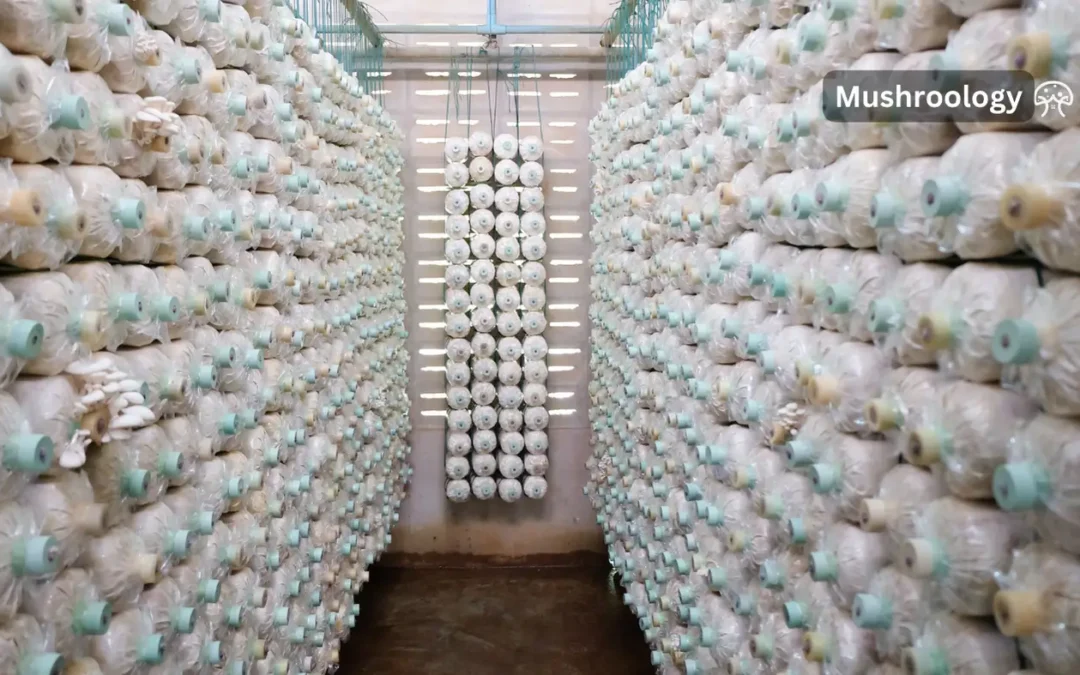
What you need to know about vertical mushroom farming
You’ve probably seen those expensive mushrooms at the grocery store and wondered if you could grow them yourself. Here’s the thing: mushroom towers let you produce 6.5 to 10 kilograms per square meter weekly—that’s 14-22 pounds (6.5-10 kg/m²) of fresh mushrooms in a space smaller than your kitchen table.
What you need to know about mushroom tower systems
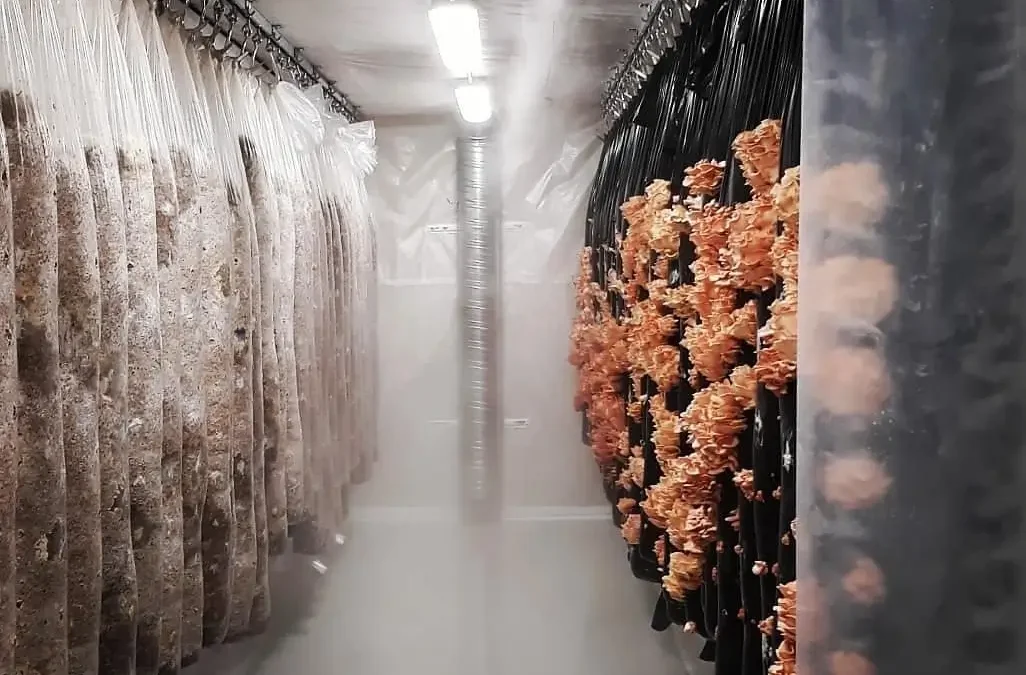
When you’re starting with mushroom towers, you’re basically stacking your growing space vertically instead of spreading it horizontally. These vertical cultivation structures use wire mesh or specialized containers filled with substrate where mushrooms grow out the sides. You’ll get 2-4 times more mushrooms from the same floor space compared to traditional methods.
The science is simple: mushrooms don’t need soil—they need organic matter, moisture, and the right environment. Tower systems give you all three while maximizing your growing area. Modern indoor facilities can produce 12,000 pounds (5,443 kg) monthly using these configurations.
Types of mushroom towers you can build
Outdoor straw towers work great for beginners. You’ll need hog wire fencing, fresh hardwood chips, and mushroom spawn. These towers need partial shade and protection from direct sun. Rain actually helps—it provides natural irrigation.
Indoor controlled towers give you year-round production. You control temperature, humidity, and air circulation precisely. Yes, they cost more upfront, but you’ll harvest mushrooms every week regardless of weather.
Smart automated systems use IoT sensors and AI to monitor growing conditions. They track temperature, humidity, CO2 levels, and moisture content in real-time. Fancy? Sure. But they can double your yields.
How you prepare substrates for mushroom towers
Your substrate choice determines your success. Different mushroom species need different materials. For shiitake (Lentinula edodes), mix 1 kilogram hardwood sawdust with 250 grams wheat bran and 1.6 liters water. Oyster mushrooms (Pleurotus species) aren’t picky—they’ll grow on straw, sawdust, or fresh wood chips.
Why you must sterilize your substrate
Here’s what kills most beginner grows: contamination. You need to sterilize or pasteurize your substrate to eliminate competing organisms. Boil your materials for 5-10 minutes or pressure cook them. Skip this step and you’ll grow mold instead of mushrooms.
The squeeze test tells you if moisture levels are right. Grab a handful of substrate and squeeze hard. You want just a few drops of water—not a stream, not bone dry. Too wet? You’ll get contamination. Too dry? Your mycelium won’t colonize properly.
Safety Warning
Never eat wild mushrooms without 100% positive identification
Some mushrooms have toxic look-alikes that can be fatal
Join your local mycological society for proper training
When in doubt, throw it out
What environmental conditions your mushroom towers need
Temperature control makes or breaks your operation. Oyster mushrooms need 75°F (24°C) during colonization, then 64°F (18°C) for fruiting. Shiitake prefers 77°F (25°C) for spawn run and 61°F (16°C) to fruit. Stay within ±3.6°F (±2°C) of these targets.
Evaporative cooling systems can drop your temperature by 9°F (5°C) while raising humidity by 10%. That’s often all you need for perfect growing conditions.
How to manage humidity and air flow
You need 80-95% humidity, but here’s the trick: you also need fresh air. Mushrooms breathe oxygen and release CO2, just like us. Without proper ventilation, they’ll grow long stems with tiny caps—what growers call “fuzzy feet.”
Aim for 3-5 complete air changes per hour. During colonization, CO2 levels can reach 5,000-8,000 parts per million (ppm). But when fruiting starts, drop that to 800-1,200 ppm. Professional operations use specialized nozzles and ductwork to ensure even air distribution.
How you build mushroom towers step by step
Start with basic materials: food-grade wire mesh with 4-6 inch (10-15 cm) openings, organic substrate, mushroom spawn, and support structures. Budget $200-500 for a small system or $10,000-30,000 for commercial automation.
Your tower construction process
Form a circular wire enclosure 3-4 feet (0.9-1.2 m) in diameter
Place cardboard at the base to block soil fungi
Add 6 inches (15 cm) of moistened substrate
Sprinkle spawn at 1:5 ratio (1 part spawn to 5 parts substrate by weight)
Repeat layers until tower reaches 4-5 feet (1.2-1.5 m) tall
Top with plastic to retain moisture during colonization
For indoor systems, integrate sensors that monitor conditions 24/7. Wireless networks using machine learning algorithms predict optimal irrigation timing and environmental adjustments.
Which mushroom varieties work best in towers
Not all mushrooms suit vertical growing. Here’s what actually works:
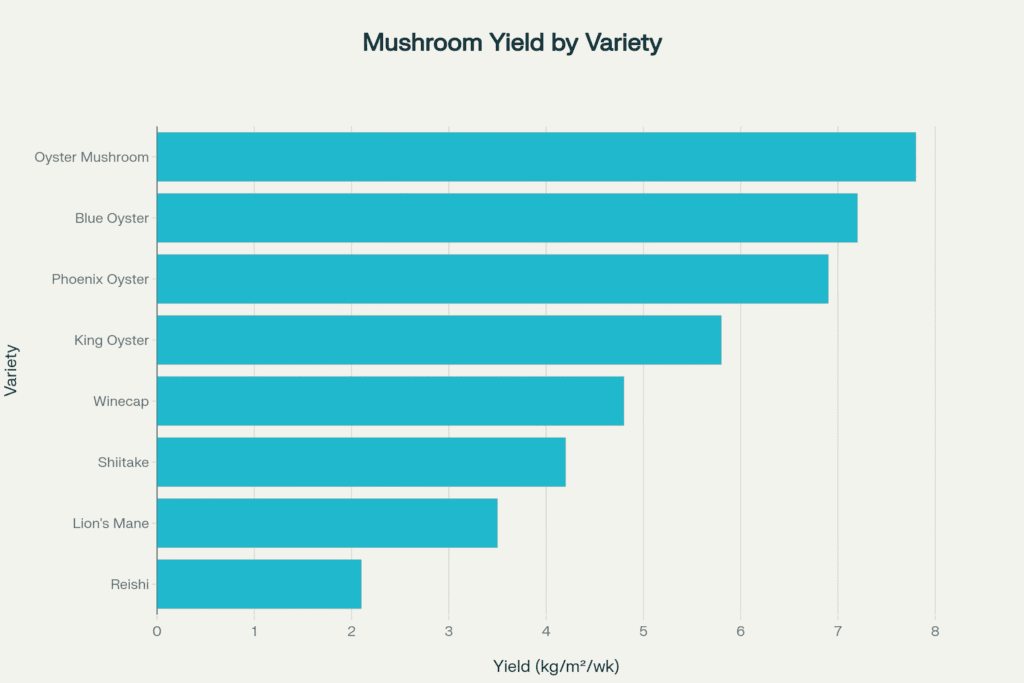
Oyster mushrooms (Pleurotus ostreatus) remain the champions of tower cultivation. You’ll harvest 7.8 kg per square meter weekly (1.6 lbs/sq ft). Blue oysters yield 7.2 kg/m²/week, phoenix oysters produce 6.9 kg/m²/week. They tolerate temperature swings and grow on almost anything organic.
Shiitake mushrooms (Lentinula edodes) take longer—45 days per cycle—but command $25 per kilogram ($11.34/lb) at market. They yield 4.2 kg/m²/week on hardwood substrates. Keep log temperatures at 72-77°F (22-25°C) for best results.
Specialty mushrooms for premium markets
Lion’s mane(Hericium erinaceus) looks like a white waterfall and tastes like seafood. You’ll get 3.5 kg/m²/week at 90% humidity, but they sell for $35 per kilogram ($15.88/lb).
King oyster(Pleurotus eryngii) produces thick, meaty stems perfect for slicing. Expect 5.8 kg/m²/week on straw supplemented with nitrogen. Wine cap (Stropharia rugosoannulata) thrives outdoors, yielding 4.8 kg/m²/week at $20 per kilogram ($9.07/lb).
Equipment and infrastructure you’ll need
Your infrastructure investment depends on scale and automation level. Small operations need $2,500 for basic towers, while large commercial systems require $25,000 just for structures.
Climate control breaks down like this:
Temperature regulation: $3,000-45,000
Ventilation equipment: $1,500-18,000
Humidity control: $800-8,000
Monitoring sensors: $600-8,000
Advanced robotic systems reduce labor by 60-70%. They handle substrate prep, inoculation, and harvesting, cutting labor hours from 45 to 15 per 100kg production.
Setting up monitoring and automation
Modern towers use comprehensive sensor networks tracking every environmental parameter. IoT-enabled sensors provide real-time data and automated adjustments. You’re looking at $600-8,000 for monitoring equipment, depending on sophistication.
Start simple with basic temperature/humidity sensors, then upgrade as you grow. Even basic automation beats manual monitoring every time.
Why mushroom towers make economic sense
Initial investments range from $10,000-150,000 depending on your goals. Small operations generating $48,400 annually achieve 30% profit margins. Medium and large facilities see margins exceeding 150% with proper management.
The global mushroom market hit $18.74 billion in 2024 and projects growth to $25.41 billion by 2030. You can sell button mushrooms for $1.65/kg, while specialty varieties command premium prices.
Understanding your operational costs
Annual expenses include:
Substrate materials: $300-4,000
Spawn inoculation: $200-3,000
Labor: $1,000-12,000
Energy for climate control: varies by region
Tower systems achieve 12.8 kg/m² space efficiency versus 3.2 kg/m² for horizontal growing. Water usage drops from 4.5 L/kg to 1.2 L/kg with advanced technology. Those numbers translate directly to your bottom line.
How to troubleshoot common mushroom tower problems
Contamination kills more mushroom grows than any other factor. Healthy mycelium looks white and smells fresh. Brown, black, green, orange, or pink colors mean contamination. Remove affected areas immediately—don’t wait.
Maintain sterile conditions with 70% isopropyl alcohol on all tools and surfaces. One contaminated batch can spread spores throughout your operation.
Managing environmental issues
Moisture problems show up fast. Too dry? Mushrooms crack and shrivel. Too wet? Bacterial blotch appears as slimy brown spots. Aim for that perfect balance—moist but not dripping.
CO2 buildup causes “fuzzy feet”—long stems with underdeveloped caps. Increase ventilation immediately. Light deficiency creates similar symptoms, so provide 12 hours of reading-level light daily.
Wrong spawn ratios wreck yields. Use 20% spawn to 80% substrate by weight for most species. Less spawn means slower colonization and contamination risk. More spawn wastes money without improving yields.
How mushroom towers support sustainability
Mushroom production uses just 1.8 gallons water per pound (15 liters/kg) compared to much higher requirements for other proteins. You’re recycling agricultural waste—straw, sawdust, coffee grounds—into food.
The carbon footprint stays minimal. Mushroom farming produces lower greenhouse gas emissions than crops, fruits, or animal proteins. Energy use ranges from 1.2-2.1 kWh per kilogram depending on system sophistication.
Creating circular economy systems
Every kilogram of mushrooms produces three kilograms of compostable organic matter. This spent substrate enriches garden soil, supports microalgae cultivation, and treats wastewater.
Integrate mushroom towers with other agricultural systems. Use spent substrate for soil improvement, supporting biodiversity while creating valuable secondary products.
What’s next for mushroom tower technology
AI-powered systems now optimize growing conditions through predictive analytics. Machine learning algorithms analyze cultivation data, identifying optimal parameters and predicting harvest timing.
Biotechnology advances create disease-resistant strains with enhanced yields. These innovations expand cultivation possibilities in varying climates while improving economic viability.
Meeting market demands
Consumer preferences favor sustainably produced foods. Rising vegetarian and vegan populations drive demand for mushroom-based proteins. Medicinal mushroom supplements represent the fastest-growing market segment.
Urban agriculture loves mushroom towers. Minimal space requirements and controlled environments make them perfect for city farming. You’re looking at local food security with reduced transportation costs.
Frequently asked questions about mushroom tower cultivation
Q: How much space do I need to start mushroom tower cultivation? A: You can start with as little as 20 square feet (1.9 m²) for a small tower system. Commercial operations typically need 200-1,600 square meters (2,150-17,200 sq ft) for profitable production.
Q: What’s the average yield from mushroom towers compared to traditional growing? A: Tower systems produce 6.5-10+ kg per square meter weekly, while traditional horizontal methods yield 2-3 kg/m²/week. That’s 2-4 times more mushrooms from the same floor space.
Q: How long before I see my first mushroom harvest? A: Oyster mushrooms fruit in 10-14 days after inoculation. Shiitake takes 45-60 days. Most varieties produce multiple flushes over 2-3 months.
Q: What’s the minimum investment for a profitable mushroom tower operation? A: Small profitable operations start around $10,000-15,000 initial investment. You’ll need $200-500 for a hobby system, or $25,000+ for automated commercial production.
Q: Which mushroom variety offers the best return on investment? A: Oyster mushrooms provide the best ROI for beginners—high yields (7.8 kg/m²/week) and moderate prices. Specialty varieties like lion’s mane offer higher prices ($35/kg) but lower yields (3.5 kg/m²/week).
What you need to know about mushroom bag cultivation
You’ve probably wondered if you can grow fresh mushrooms at home without expensive equipment. Here’s what works: mushroom bag cultivation offers one of the most reliable methods for producing oyster, shiitake, lion’s mane, and other gourmet mushrooms. Based on research from Cornell University’s Small Farms Program and cultivation experts like Paul Stamets, this method yields 1-2.5 pounds (0.45-1.13 kg) per bag.
Why you should grow mushrooms in bags
When you’re starting mushroom cultivation, bags offer several advantages over other methods. North American Mycological Association (NAMA) recommends bag cultivation for beginners because it reduces contamination risks by 50-70% compared to open-air methods. You’ll need less space than log cultivation and can harvest mushrooms in 2-4 weeks instead of waiting 6-12 months.
According to research from Penn State Extension, bag cultivation produces the highest biological efficiency—the ratio of fresh mushrooms to dry substrate weight. You can achieve 100-200% biological efficiency with properly prepared bags, meaning 5 pounds (2.3 kg) of substrate can yield 5-10 pounds (2.3-4.5 kg) of fresh mushrooms.
What makes bag cultivation different
You control every aspect of the growing environment when you use bags. The filter patch technology allows gas exchange while preventing contamination. These specialized polypropylene bags withstand sterilization temperatures of 250°F (121°C) without melting, as confirmed by Unicorn Bags.
Here’s what experienced growers know: Filter patch size matters. Use 0.2 micron filters for aggressive species prone to contamination. Choose 0.5 micron filters for oyster mushrooms that need more air exchange. The 5 micron filters work for straw-based substrates but increase contamination risk by 30-40%.
How you select the right mushroom species for bags
Not all mushrooms grow equally well in bags. Based on yield data from FreshCap Mushrooms and commercial growers, here are your best options:
Your substrate choice directly impacts yields. The “Master’s Mix” developed by TR Davis from Earth Angel Mushrooms combines equal parts hardwood sawdust and soybean hulls. This mixture consistently produces the highest yields according to Fungi Ally research.
What you need to prepare mushroom growing bags
You’ll need specific materials and equipment for successful bag cultivation. Here’s your essential list based on Cornell’s Seven Stages of Cultivation:
Autoclavable polypropylene bags with filter patches
Substrate (sawdust, straw, or supplemented mixtures)
Mushroom spawn (grain or sawdust)
Gypsum (calcium sulfate) for pH buffering
Water
Equipment:
Pressure cooker or autoclave reaching 15 PSI
Scale for measuring ingredients
Mixing container
Heat sealer or zip ties
Spray bottle for misting
Thermometer and hygrometer
How you calculate substrate moisture content
Proper moisture content determines your success. According to Atlas Scientific, substrates need 50-70% moisture content. Here’s the calculation:
Weigh your dry substrate
Add water at 60-65% of dry weight
Mix thoroughly and squeeze test
Only 1-2 drops should come out when squeezed
For example: 10 pounds (4.5 kg) dry sawdust needs 6-6.5 pounds (2.7-2.9 kg) of water, which equals about 0.7-0.8 gallons (2.6-3 liters).
How to sterilize mushroom bags properly
Sterilization kills competing organisms that would otherwise contaminate your bags. Paul Stamets’ research and university studies confirm these requirements:
Temperature: 250°F (121°C) Pressure: 15 PSI Time: 90-120 minutes for 5-pound (2.3 kg) bags
Safety Warning
Never leave bags unattended in pressure cooker
Keep bags away from metal sides using jar rings
Allow complete pressure release before opening
Bags touching the bottom or sides may melt
The Shroomery community recommends wrapping bags in aluminum foil to prevent melting. Place jar rings between bags to ensure steam circulation.
Critical sterilization mistakes to avoid
You risk contamination if you rush sterilization. Common errors include:
Overfilling bags past the filter patch
Sealing 0.2 micron bags before sterilization (they’ll burst)
Insufficient sterilization time
Opening the pressure cooker too soon
When and how you inoculate mushroom bags
Timing matters when you inoculate. Wait until bags cool to 70-80°F (21-27°C) before adding spawn. Higher temperatures kill the mycelium.
Inoculation rates from Cornell research:
High rate (safer): 1 pound spawn per 4 pounds substrate (20%)
Standard rate: 1 pound spawn per 10 pounds substrate (10%)
After inoculation, place bags at optimal colonization temperatures. Most species colonize best at 70-75°F (21-24°C). Full colonization takes:
Oyster mushrooms: 10-14 days
Shiitake mushrooms: 45-90 days
Lion’s mane: 14-21 days
Monitor these conditions:
Temperature: Use digital thermometer
No light needed during colonization
Check for contamination daily
Don’t disturb bags unnecessarily
Initiating mushroom fruiting from bags
You trigger fruiting by changing environmental conditions. Cut 2-4 inch (5-10 cm) X-shaped slits in the bag where you see pins forming. According to North Spore’s ShroomTek guide:
Fruiting requirements:
Temperature drop: 5-10°F (3-6°C)
Humidity: 80-95%
Fresh air exchange: 4-8 times per hour
Light: 12 hours daily (reading-level intensity)
CO2: Below 1,000 ppm
Mist the slits 2-3 times daily. You’ll see pins in 3-7 days.
Why contamination happens and how you prevent it
Green mold (Trichoderma) ruins more bags than any other contaminant. Research from PMC’s contamination study shows sterilized substrates remain most vulnerable during spawning.
Contamination appears as:
Green sporulation (Trichoderma)
Orange/pink growth (Neurospora)
Black spots (Aspergillus)
Slimy, sour-smelling areas (bacterial)
If you spot contamination, remove the bag immediately. Don’t open contaminated bags indoors—spores spread everywhere. The Fungi Academy recommends burying contaminated bags in your garden.
Advanced contamination prevention strategies
Professional growers use these methods:
HEPA filtration in growing rooms
Positive pressure environments
UV-C sterilization between crops
pH adjustment to 6.0-6.5
Prophylactic peroxide treatment
How to maximize your mushroom yields
You can harvest multiple flushes from each bag. The circular economy research shows proper management extends production:
First flush: 50-60% of total yield Second flush: 25-30% of total yield Third flush: 10-15% of total yield
Between flushes, let bags rest 7-14 days. For shiitake, soak blocks in cold water for 12-24 hours to trigger the next flush.
Troubleshooting common growing problems
When mushrooms don’t develop properly, check these factors:
Long, thin stems: Increase fresh air exchange Small caps: Lower CO2 levels below 800 ppm Dry, cracked caps: Raise humidity to 85-90% Slow growth: Check temperature ranges Yellow mushrooms: Reduce light exposure
What happens to spent mushroom bags
After 2-3 flushes, your substrate becomes “spent.” But don’t throw it away. Penn State’s spent substrate guide shows this material improves garden soil.
Uses for spent substrate:
Garden compost addition
Mulch for acid-loving plants
Worm bin food
Livestock bedding supplement
Second-run mushroom cultivation
The sustainability research indicates over 100 million tons of spent substrate need recycling annually.
Economic considerations for bag cultivation
Your costs per 5-pound (2.3 kg) bag:
Substrate materials: $1.50-3.00
Spawn: $2.00-4.00
Bag: $0.50-1.00
Utilities: $0.50-1.00
Total: $4.50-9.00
With 1.5 pounds (0.68 kg) average yield selling at $10-16 per pound, you’ll gross $15-24 per bag.
Frequently asked questions about mushroom bag cultivation
Q: How long do mushroom bags take to produce mushrooms? A: Most oyster mushrooms fruit within 10-14 days after inoculation. Shiitake takes 45-90 days. Lion’s mane produces in 14-21 days at 65-75°F (18-24°C).
Q: What’s the best filter patch size for beginners? A: Start with 0.5 micron filter patches. They balance contamination prevention with adequate gas exchange. You’ll need about 1 filter per 5 pounds (2.3 kg) of substrate.
Q: Can you reuse mushroom grow bags? A: No, don’t reuse bags after mushroom production. The plastic weakens during sterilization and harbors contaminants. Fresh bags cost $0.50-1.00 and ensure success.
Q: Why do my mushroom bags keep getting contaminated? A: Check your sterilization time and temperature first. Ensure 90-120 minutes at 250°F (121°C). Also verify spawn quality and improve sterile technique during inoculation.
Q: What size bags work best for home cultivation? A: Use bags measuring 8″ x 5″ x 18″ (20 x 13 x 46 cm) for 5-pound (2.3 kg) blocks. You can fit 6 bags in a standard 23-quart pressure canner.
What you need to know about growing fresh gourmet mushrooms at home using simple bucket containers
You’ve probably wondered if you can cultivate mushrooms in buckets right at home. The answer is absolutely yes, and it’s one of the most reliable methods for beginners. This approach scales from hobby growing to commercial production.
Buckets are easy to come by. The buckets can be reused, reducing the amount of plastic waste produced, as opposed to growing mushrooms in bags. Buckets are self-supporting and do not require additional support like larger grow bags. When you cultivate mushrooms in buckets, you’ll get consistent results with minimal equipment investment.
How you can cultivate mushrooms in buckets successfully
When you’re starting to cultivate mushrooms in buckets, you’ll want to focus on oyster mushrooms first. Oyster mushrooms are the greatest choice for bucket growing. They grow quickly, are less sensitive to environmental factors than many other mushrooms, and maybe grown on a variety of substrates. These forgiving mushrooms will give you confidence before trying more challenging species.
Growing oysters on pasteurized straw or cottonseed hulls is the highest yield per substrate method of oyster mushroom production. According to research from Penn State Extension, the spawn appears as a white to blue-white mass throughout the compost after fusion has occurred when colonization succeeds.
What you should expect when you cultivate mushrooms in buckets
You won’t see results immediately, but the process moves faster than you might think. Complete colonisation should take 10-14 days at room temperature. Cornell Small Farms research shows that specialty mushrooms are defined by USDA as any species not belonging to the genus Agaricus (button, crimini, portabella), and oyster mushrooms are perfect for this method.
The optimal temperature for incubation when you cultivate mushrooms in buckets is between 18 and 24 degrees Celsius or 64-75°F. You’ll need to maintain consistent temperatures throughout the colonization period.
Critical Safety Warning
Never eat any wild mushroom without 100% expert identification
Contact your local mycological society for hands-on training
Always use food-grade buckets that haven’t contained chemicals
The North American Mycological Association emphasizes proper identification training
Why you need proper substrate preparation to cultivate mushrooms in buckets
Here’s what most people don’t realize about successful bucket cultivation. Pasteurization is the process used to reduce the number of harmful competitor organisms in a mushroom substrate before inoculating it with mushroom spawn. Research from GroCycle shows this gives your mushrooms a crucial head start.
It involves submerging your substrate in hot water between 149 and 167°F (65 and 75°C) for one to two hours. This temperature range kills harmful competitors while preserving beneficial bacteria that help your mushrooms thrive.
Equipment you’ll need to cultivate mushrooms in buckets:
Food-grade 5-gallon (19-liter) bucket with lid
Drill with 1/2-inch (1.3 cm) bit
Wheat or oat straw (avoid hay)
Oyster mushroom grain spawn
Large pot for pasteurization
Thermometer
Micropore tape or polyfill
Best substrate choices when you cultivate mushrooms in buckets
You’ll have several substrate options, but straw works best for beginners. Oyster mushrooms can grow on a variety of things including wood logs, cottonseed hulls, corn cobs or office paper, but in North America, cereal straws are the substrate of choice (wheat and oat straw do particularly well).
One 4 lb. bag of grain spawn is enough to inoculate approximately 8 5-gallon buckets or 4-5 oyster bag. This translates to about 1 small bale of straw. This ratio ensures proper colonization when you cultivate mushrooms in buckets.
Research from Fungi Ally found that the highest biological efficiency achieved, 65% used the lime soak and Pleurotus ostreatus Elm A. Of the 8 bags inoculated in total 15 pounds was harvested. Their studies show yields of 2-3 pounds (0.9-1.4 kg) per 5-gallon (19-liter) bucket.
Step-by-step process to cultivate mushrooms in buckets
Step 1: Prepare your bucket Buckets need to be drilled all the way around in 8-12 places, which is where the mushrooms will eventually grow from. The holes should be at least 4″ from the top and bottom, and at least 4 inches apart from each other. Use a 1/2-inch (1.3 cm) bit and stagger holes to prevent mushrooms from growing into each other.
When growing in buckets the mushrooms need a way to breath. Drill two 1/2″ holes in the lid. You can stuff the holes with Poly-fil or purchase PTFE filter stickers to stick on them, both will work just fine.
Step 2: Pasteurize your straw Chop straw into 1-3 inch (2.5-7.6 cm) pieces first. Before using any of these techniques, you should first cut your straw into 1 to 3-inch segments. Use a lawnmower, blender, or any other machine that will do the job. This dramatically improves colonization speed.
Heat water to 160-170°F (71-77°C) in a large pot. Pasteurization involves heating the substrate to a temperature range of 140°F to 160°F (60°C to 71°C) for a period of time sufficient to kill harmful bacteria, fungi, and pests, while preserving a significant portion of the beneficial microorganisms. Submerge straw for 60-90 minutes.
Step 3: Cool and drain Be sure to let it cool completely, because if it is even warm to the touch it will kill the mushroom mycelium. Allow straw to cool to room temperature, around 70°F (21°C) or below, before proceeding.
Step 4: Inoculate your substrate Layer the bucket with 1 inch of the pasteurized straw, then sprinkle some spawn on top of the straw. Add another couple of inches of straw to the bucket and repeat the inoculation process layering in the spawn. Use about 1 pound (454g) of spawn per 5-gallon (19-liter) bucket.
Step 5: Incubation period Place the buckets in a dark place between 75F and 80F. Make sure the air in the room is cycled, especially if you are doing multiple buckets. This translates to 24-27°C for optimal colonization.
After 4 days lift the lid on one of the buckets to check it’s progress. You’ll see white, cottony mycelium spreading through the straw when colonization succeeds.
Fruiting your bucket-cultivated mushrooms
You’ll know it’s time for fruiting when you should see pins, or small clusters of mushroom-shaped structures poking through some of the holes in the bucket. Fruiting has begun! This typically occurs 10-21 days after inoculation.
Move your buckets to a location with:
Temperature: 55-75°F (13-24°C)
Humidity: 80-90%
Indirect light
Fresh air circulation
Try this: Mist around your buckets (not directly on mushrooms) 2-3 times daily to maintain humidity. Place buckets on elevated surfaces for better air circulation.
Frequently asked questions about cultivating mushrooms in buckets
Q: How long does it take to cultivate mushrooms in buckets from start to harvest?
A: Most oyster mushrooms take 2-4 weeks (14-28 days) from inoculation to first harvest when maintained at optimal temperatures of 65-75°F (18-24°C).
Q: What’s the best bucket material for beginners to cultivate mushrooms?
A: Start with food-grade polypropylene buckets. You’ll need about 5 gallons (19 liters) capacity with tight-fitting lids that can be drilled safely.
Q: When is harvesting time for bucket mushroom cultivation?
A: Harvest oyster mushrooms when caps flatten out but before they become tough, typically when clusters reach 3-6 inches (7.6-15 cm) across.
Q: How many flushes can you get when you cultivate mushrooms in buckets?
A: Most buckets produce 2-3 flushes over 6-8 weeks, with yields decreasing each time as nutrients deplete.
Q: What mushroom species work best for bucket cultivation besides oysters?
A: Lion’s mane and oyster mushrooms are examples of wild mushrooms that grow on trees and would sprout sideways. Wine cap mushrooms also work well on straw substrates.
Alternative substrates for cultivating mushrooms in buckets
Beyond straw, you can cultivate mushrooms in buckets using coffee grounds. One of the main advantages to using coffee grounds as a substrate is that the brewing process pasteurises the grounds, allowing you to skip the additional steps needed for other substrates. Mix coffee grounds 50/50 with cardboard or sawdust for best results.
For wood-loving species, try supplemented sawdust. If you’d like to grow a wider range of mushrooms on sterilized substrate, try a supplemented sawdust mix of 60% hardwood sawdust, 20% wood chips, 18% bran and 2% gypsum. This requires pressure sterilization at 15 PSI (121°C) for 90-120 minutes.
Now you understand how to cultivate mushrooms in buckets successfully using research-backed methods. You’ll see better results if you start with oyster mushrooms and pasteurized straw before advancing to more challenging species and substrates.
Your next step: Source food-grade buckets and oyster mushroom spawn from reputable suppliers, or contact your local mycological society for hands-on workshops.
Your complete guide to Trametes versicolor health benefits, backed by clinical research
You’ve probably heard about Turkey tail mushrooms supporting cancer treatment and immune health. But what does current science actually prove? After reviewing thousands of studies, researchers have identified specific compounds in Turkey tail (Trametes versicolor) that show measurable health benefits, particularly for immune function and gut health.
Bottom Line: Clinical studies show Turkey tail mushroom’s PSK and PSP compounds can support cancer treatment outcomes when used alongside conventional therapy. Research also confirms prebiotic benefits for gut health and immune system modulation, but you shouldn’t use Turkey tail as a replacement for medical treatment.
What makes Turkey tail mushroom benefits unique
Turkey tail mushrooms contain two scientifically validated compounds that set them apart from other medicinal fungi. Polysaccharide-K (PSK) and polysaccharide peptide (PSP) have been studied in over 400 clinical trials since the 1970s.
According to the National Cancer Institute, PSK is approved as an anticancer drug in Japan and has been used as adjuvant therapy in thousands of cancer patients since the mid-1970s. This makes Turkey tail one of the most researched medicinal mushrooms in the world.
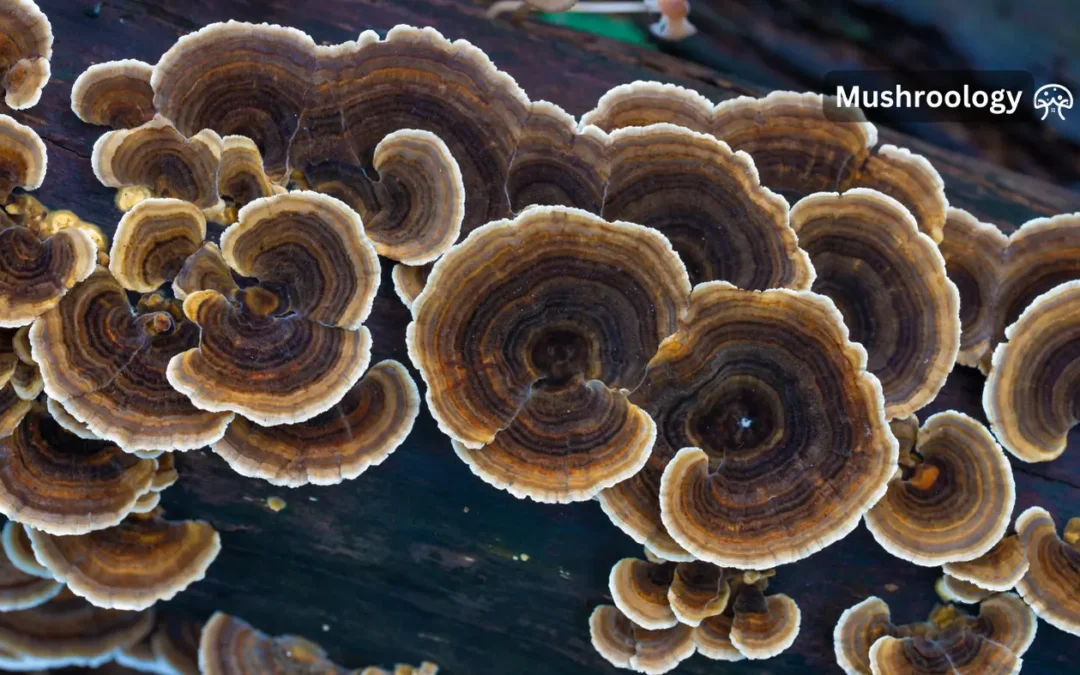
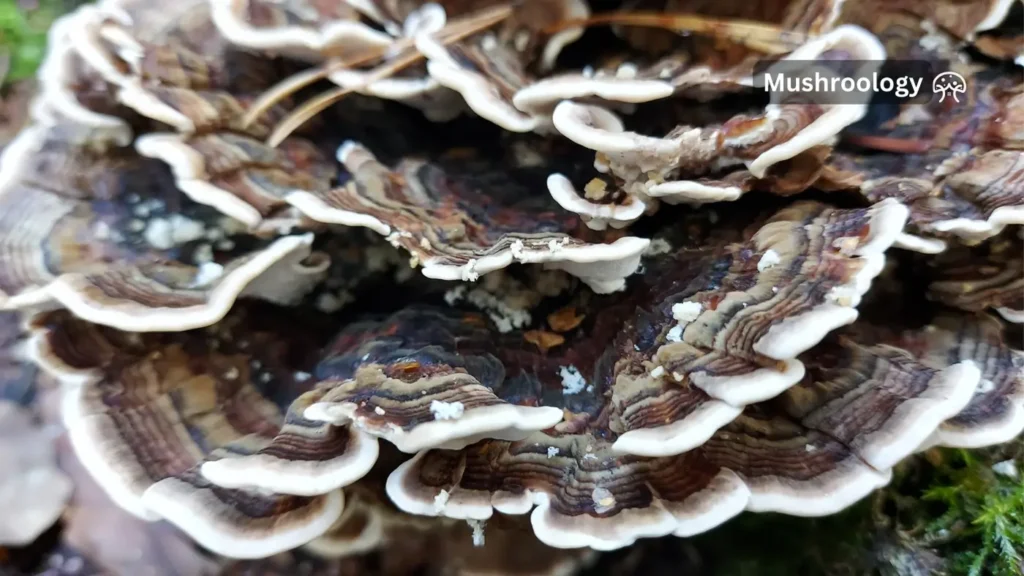
The mushroom’s fan-shaped appearance resembles a turkey’s tail, hence the name. In traditional Chinese medicine, it’s called Yun Zhi (cloud mushroom), while Japanese practitioners know it as kawaratake. These colorful brackets grow on dead hardwood trees throughout North America and are among the most common mushrooms you’ll find in forests.
Key bioactive compounds:
PSK (polysaccharide-K or krestin): 100 kDa protein-bound polysaccharide
PSP (polysaccharide peptide): Similar structure, different protein composition
Beta-glucans: Immune-modulating polysaccharides
Phenolic compounds: Over 35 different antioxidant molecules
How Turkey tail mushroom benefits your immune system
Turkey tail mushrooms work as immune modulators, meaning they help balance rather than simply boost immune function. Clinical research published in 2024 shows these mushrooms can increase cancer-fighting cells in the immune system.
The mechanism involves specific recognition of beta-glucans by immune receptors in your digestive tract. When these receptors detect Turkey tail’s unique polysaccharides, they trigger increased surveillance and antibody production against harmful pathogens.
Proven immune benefits:
Increased natural killer (NK) cell activity
Enhanced T-cell and B-cell function
Improved white blood cell counts during treatment
Better recovery of immune function after radiation therapy
A 2012 clinical trial found breast cancer patients taking Turkey tail capsules recovered immune function after radiation therapy more quickly than those who didn’t. UCLA Health research confirms Turkey tail acts as a nonspecific immune modulator, supporting overall immune system balance.
Turkey tail mushroom benefits for cancer support
Turkey tail shows the strongest scientific evidence for supporting conventional cancer treatment. Six randomized clinical trials in lung cancer patients found that those receiving PSK improved in immune function, body weight, well-being, and survival outcomes.
Cancer types with research support:
Gastric cancer: PSK improved survival when added to chemotherapy
Colorectal cancer: Better 10-year survival rates with PSK plus standard treatment
Lung cancer: Enhanced immune function and quality of life
Breast cancer: Faster immune recovery after radiation therapy
Recent 2024 analysis shows modest evidence for better survival among cancer patients when Turkey tail is used alongside conventional treatment. However, Turkey tail extract doesn’t treat cancer on its own – it works as a complementary therapy under medical supervision.
Important: The FDA hasn’t approved Turkey tail for cancer treatment in the United States. In Japan, PSK is prescription medication used with chemotherapy, not a replacement for conventional treatment.
Safety Warning
Turkey tail supplements can’t replace cancer treatment medications
Always consult your oncologist before using Turkey tail during cancer therapy
Some compounds may interact with chemotherapy drugs like cyclophosphamide and tamoxifen
The North American Mycological Association emphasizes medical supervision for therapeutic mushroom use
Turkey tail mushroom benefits for gut health
Turkey tail acts as a prebiotic, feeding beneficial bacteria in your gut microbiome. 2024 research reviews confirm Turkey tail can alter your microbiome composition and help your body regulate its own bacterial balance.
Your gut houses 70-80% of immune cells, making gut health directly connected to immune function. Turkey tail’s prebiotic effects support both digestive wellness and immune system strength.
Gut health research findings:
Increases beneficial Bifidobacterium and Lactobacillus bacteria
Reduces harmful Clostridium and Staphylococcus populations
Improves gut bacterial diversity over 8-week supplementation
Acts similarly to commercial prebiotic supplements
A randomized clinical trial published in Gut Microbes gave healthy volunteers 3,600 mg (3.6 grams) of Turkey tail PSP daily for eight weeks. Results showed increased beneficial bacteria and suppressed growth of potentially harmful microorganisms.
Test-tube studies confirm Turkey tail extract significantly increases helpful bacteria while reducing populations of problem bacteria that can cause infections and digestive issues.
How Turkey tail mushroom benefits work as prebiotics
Unlike probiotics (live beneficial bacteria), prebiotics are food for the good bacteria already in your gut. Turkey tail’s PSP and PSK compounds can’t be digested by human enzymes, but gut bacteria can ferment them into beneficial metabolites.
Think of your gut microbiome like a garden – probiotics are like planting new flowers, while prebiotics like Turkey tail are the fertilizer that helps existing plants thrive. Research shows PSP in Turkey tail improves gut health through this prebiotic activity.
Prebiotic mechanisms:
Selective fermentation by beneficial bacteria strains
Production of short-chain fatty acids that feed intestinal cells
Enhanced gut barrier function and reduced inflammation
Improved nutrient absorption and metabolic health
Turkey tail mushroom side effects you should know
Turkey tail mushrooms are generally well-tolerated, but you should understand potential side effects before starting supplementation. Clinical safety data from 2024 shows few adverse events in healthy adults.
Common side effects (rare):
Mild digestive upset or constipation
Flu-like symptoms in sensitive individuals
Darkened nail beds (harmless but noticeable)
Serious side effects requiring medical attention:
Allergic reactions in people with mushroom or mold allergies
Potential anaphylaxis in severely allergic individuals
Interactions with prescription medications
WebMD’s clinical database reports that some cancer patients receiving both chemotherapy and PSK experienced nausea, vomiting, low white blood cell counts, and liver problems. However, it’s unclear whether these effects came from chemotherapy or PSK supplementation.
Turkey tail mushroom interactions with medications
Turkey tail can interact with several medication types. Recent pharmaceutical research identifies specific drug interactions you need to know about.
Medications that may interact:
Chemotherapy drugs: May alter how cyclophosphamide and tamoxifen are processed
Immunosuppressants: Could counteract medications for autoimmune conditions or organ transplants
Blood thinners: May increase bleeding risk when combined with warfarin or similar drugs
Diabetes medications: Could cause blood sugar to drop too low
Why interactions occur: Turkey tail’s immune-stimulating properties can interfere with immunosuppressive medications. The compounds may also affect liver enzymes that process certain drugs, changing how quickly medications are eliminated from your body.
Memorial Sloan Kettering Cancer Center emphasizes consulting healthcare providers before combining Turkey tail with any medications, especially cancer treatments.
Turkey tail mushroom benefits during pregnancy and breastfeeding
Current safety data doesn’t support Turkey tail use during pregnancy or breastfeeding. Clinical safety reviews note insufficient research to establish safety for pregnant or nursing women.
Pregnancy considerations:
No established safe dosage for pregnant women
Immune system changes during pregnancy make effects unpredictable
Potential interactions with prenatal vitamins or medications
Risk-benefit analysis favors avoiding use until after breastfeeding
Breastfeeding concerns:
Unknown whether PSK or PSP compounds pass into breast milk
Potential effects on nursing infant’s developing immune system
No clinical trials in breastfeeding mothers
The cautious approach is avoiding Turkey tail supplements during pregnancy and breastfeeding. Focus on proven safe immune support like adequate sleep, nutrition, and stress management instead.
How to use Turkey tail mushroom safely
Turkey tail supplements come in various forms with different concentrations of active compounds. Dosage research from clinical trials provides guidance for safe use.
PSK extract: 3,000-9,000 mg (3-9 grams) daily in cancer studies
PSP extract: 1,080-3,600 mg (1.08-3.6 grams) daily for gut health
Safety guidelines:
Start with small doses to test tolerance
Take with food to reduce digestive upset
Choose products from reputable manufacturers with third-party testing
Store in cool, dry places away from direct sunlight
Quality considerations include looking for standardized extracts that specify PSK or PSP content. The FDA doesn’t regulate supplements like prescription drugs, so product quality varies significantly between manufacturers.
Best time to take Turkey tail mushroom
Clinical studies used various dosing schedules, but consistent daily use shows better results than sporadic supplementation. Research timing suggests:
Optimal timing:
Morning with breakfast for immune support
Split doses throughout the day for gut health benefits
Consistent daily use for 8+ weeks to see measurable effects
Cycling periods (4 weeks on, 1 week off) for long-term use
Timing to avoid:
Right before bedtime (may cause mild stimulation)
During acute illness without medical supervision
Immediately before or after immunizations (discuss with doctor)
Frequently asked questions about Turkey tail mushroom benefits
Q: How long does it take to see Turkey tail mushroom benefits? A: Research shows gut health improvements within 2-4 weeks, while immune function benefits may take 6-8 weeks of consistent use. Cancer support studies used 6 months to several years of supplementation.
Q: What are the main Turkey tail mushroom benefits for cancer patients? A: Clinical studies show PSK can improve survival rates, immune function, and quality of life when used alongside conventional cancer treatment. It’s approved as prescription medication in Japan for this purpose.
Q: Can Turkey tail mushroom benefits help with autoimmune diseases? A: Turkey tail acts as an immune modulator rather than simply boosting immunity. However, people with autoimmune conditions should consult doctors before use, as it may interfere with immunosuppressive medications.
Q: Are Turkey tail mushroom side effects dangerous? A: Most people tolerate Turkey tail well. Serious side effects are rare but can include allergic reactions in people with mushroom allergies and medication interactions. Always consult healthcare providers before starting.
Q: How do Turkey tail mushroom benefits compare to other medicinal mushrooms? A: Turkey tail has the most extensive clinical research for cancer support, while reishi and lion’s mane have stronger evidence for other conditions. Turkey tail excels specifically in immune modulation and gut health.
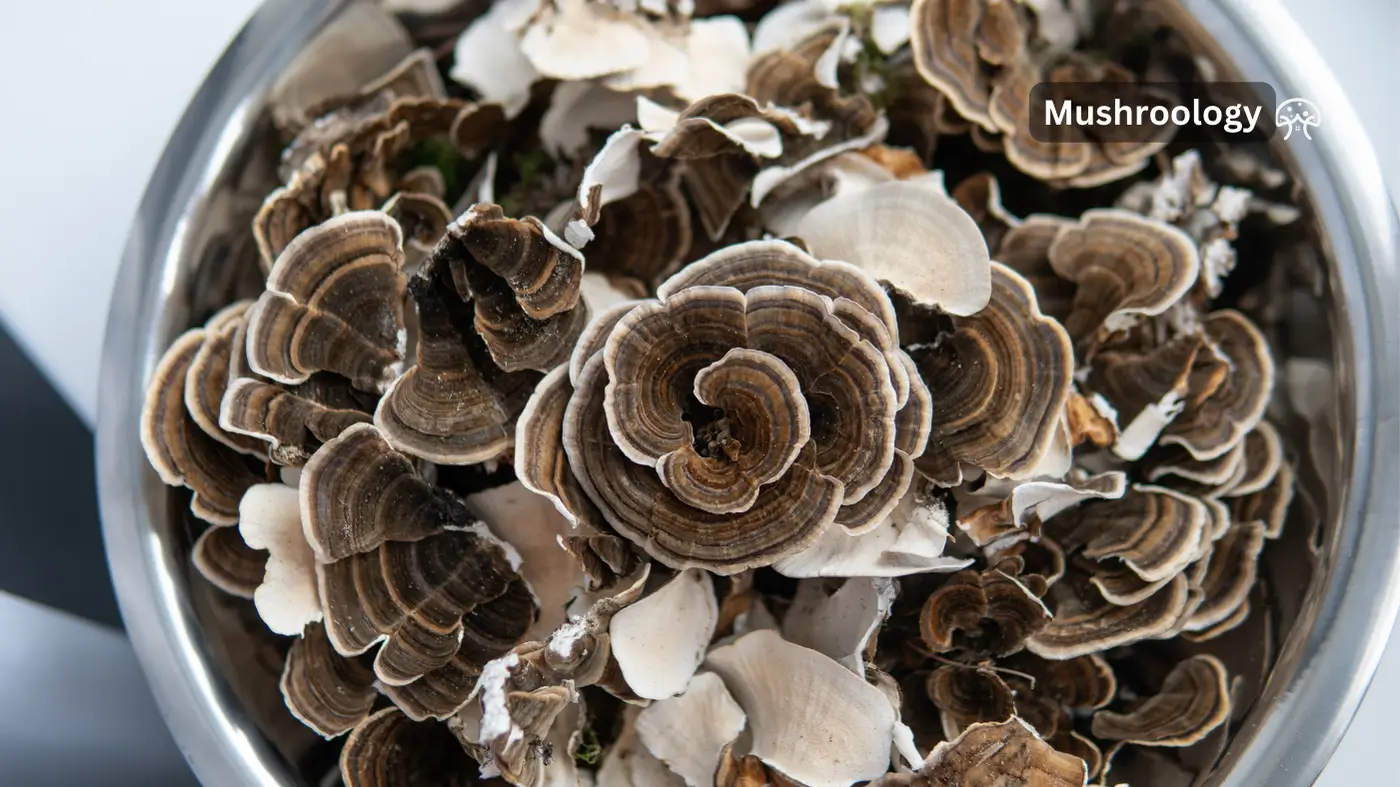
Q: Can you get Turkey tail mushroom benefits from eating whole mushrooms? A: Wild Turkey tail mushrooms are too tough and woody to eat. Supplements use extraction methods to concentrate the beneficial PSK and PSP compounds that aren’t available from eating raw mushrooms.
Helpful resources for Turkey tail mushroom information
Local oncologists and integrative medicine practitioners
Recommended books:
“Mycelium Running” by Paul Stamets
“The Fungal Pharmacy” by Robert Rogers
“Healing Mushrooms” by Tero Isokauppila
Now you understand what current science says about Turkey tail mushroom benefits. You’ll see better results if you choose quality extracts, use appropriate dosages, and work with healthcare providers when using Turkey tail for serious health conditions.
Your step-by-step roadmap to growing mushrooms at home successfully
You’ve probably walked past expensive gourmet mushrooms at the store and wondered if you could grow them yourself. The truth? Growing mushrooms at home is easier than most people think. You don’t need a farm, fancy equipment, or years of experience to get started.
Bottom Line: Beginner mushroom growers can harvest their first crop within 2-4 weeks using simple methods. Start with oyster mushrooms – they’re nearly foolproof and grow in temperatures between 65-75°F (18-24°C) with basic equipment costing under $50.
Why you should start growing mushrooms at home
Growing mushrooms at home gives you control over quality and freshness that store-bought varieties can’t match. Fresh mushrooms lose flavor and nutrients quickly, but homegrown ones stay at peak quality until you harvest them.
You’ll save money too. Gourmet oyster mushrooms cost $8-12 per pound in stores, but you can grow them for under $2 per pound at home. One growing kit produces 1-2 pounds (0.5-0.9 kg) of mushrooms over multiple harvests.
The North American Mycological Association reports that mushroom cultivation has grown 300% among hobby growers in the past decade. More families are discovering how satisfying it is to grow their own food, especially something as unique as mushrooms.
Health benefits you can’t ignore: Homegrown mushrooms contain higher levels of nutrients than store-bought varieties. They’re packed with protein, B vitamins, potassium, and antioxidants while being naturally low in calories and fat.
What mushrooms should beginners grow first
Not all mushrooms are equal for beginners. Some species forgive mistakes while others demand precision. Here’s what works best when you’re starting out:
Best beginner mushrooms:
Oyster mushrooms (Pleurotus ostreatus): Grow fast, tolerate temperature swings, high success rate
Shiitake (Lentinula edodes): Take longer but very forgiving, excellent flavor
Wine cap mushrooms (Stropharia rugosoannulata): Grow outdoors on wood chips, almost maintenance-free
Oyster mushrooms are your best bet for first success. They grow in 2-3 weeks, tolerate temperatures from 55-75°F (13-24°C), and fruit reliably even with beginner mistakes.
How oyster mushrooms make the perfect beginner choice
Oyster mushrooms adapt to many growing conditions and substrates. Research from the American Mushroom Institute shows oyster varieties have the highest success rate among new cultivators – over 85% get successful harvests on their first attempt.
They’re also aggressive growers that outcompete most contaminants. This means small sterility mistakes won’t necessarily ruin your crop like they would with finicky species.
Basic equipment you need for mushroom growing
You don’t need expensive equipment to start growing mushrooms. Most beginners spend $30-60 on initial supplies and can reuse everything for multiple growing cycles.
Growing containers (plastic storage tubs work fine)
Spray bottle for misting
Thermometer and humidity gauge
Growing substrate (straw, sawdust, or coffee grounds)
Mushroom spawn (like seeds for mushrooms)
Clear plastic bags with filter patches
Optional but helpful:
Pressure cooker for sterilizing substrate
Heat mat for temperature control
Timer for misting schedules
You can find most supplies at hardware stores or order mushroom-specific items from specialty suppliers. Avoid buying expensive “mushroom growing systems” until you know you enjoy the hobby.
Safety Warning
Never eat any mushroom you can’t identify with 100% certainty
Only grow mushrooms from reputable spawn suppliers
Contact your local mycological society for identification help
The North American Mycological Association provides comprehensive safety guidelines for mushroom cultivation
Three proven methods for growing mushrooms at home
You can grow mushrooms using several different methods. Each has advantages depending on your space, budget, and goals.
Method 1: Ready-to-fruit growing kits (easiest)
Growing kits are perfect for absolute beginners. The substrate comes pre-colonized with mushroom mycelium – you just add water and wait for mushrooms to appear.
How growing kits work:
Cut holes in the plastic bag following kit instructions
Mist the cut areas 2-3 times daily
Maintain humidity by covering with a humidity tent
Harvest mushrooms in 7-14 days
Kits cost $15-25 and typically produce 1-2 pounds (0.5-0.9 kg) of mushrooms. They’re great for testing your interest before investing in equipment.
Method 2: Substrate bags (intermediate)
This method gives you more control and better value. You’ll prepare substrate, inoculate it with spawn, and grow mushrooms from start to finish.
Basic process:
Prepare and sterilize substrate (straw, sawdust, coffee grounds)
Mix cooled substrate with mushroom spawn
Pack mixture into growing bags
Incubate at proper temperatures until colonization completes
Create fruiting conditions to trigger mushroom growth
This method costs less per pound of mushrooms and teaches you the complete process. Expect 4-6 weeks from start to harvest.
Method 3: Log cultivation (outdoor growing)
Log cultivation works great for shiitake and oyster mushrooms. You’ll inoculate hardwood logs with mushroom spawn and harvest mushrooms for 3-5 years.
Log growing basics:
Cut fresh hardwood logs 3-8 inches (7.6-20 cm) in diameter
Drill holes and insert mushroom plugs
Seal holes with food-grade wax
Keep logs moist and wait 6-18 months for first mushrooms
This method requires more patience but produces mushrooms for years. One log can yield 1-2 pounds (0.5-0.9 kg) of mushrooms annually.
Step-by-step process for your first mushroom crop
Let’s walk through growing oyster mushrooms using the substrate bag method. This gives you hands-on experience with the complete process.
Step 1: Prepare your substrate
Wheat straw works excellently for oyster mushrooms. You’ll need about 2-3 pounds (0.9-1.4 kg) of dry straw for one growing bag.
Substrate preparation:
Chop straw into 2-4 inch (5-10 cm) pieces
Pasteurize by soaking in 160°F (71°C) water for 2 hours
Drain and cool to room temperature
Squeeze out excess water – aim for 60-70% moisture
The substrate should feel like a wrung-out sponge. Too wet causes anaerobic conditions; too dry prevents mycelium growth.
Use about 10-20% spawn by weight for fastest colonization. For 2 pounds (0.9 kg) of substrate, you’ll need 3-6 ounces (85-170g) of spawn.
Inoculation process:
Work in a clean area wiped down with alcohol
Mix spawn thoroughly through cooled substrate
Pack mixture into clear plastic growing bags
Seal bags leaving some air space
Don’t worry about perfect sterility at home. Oyster mushrooms are aggressive enough to outcompete most contaminants with good technique.
Step 3: Incubation phase
Place inoculated bags in a dark, warm location at 70-80°F (21-27°C). A closet, basement, or spare room works perfectly.
What happens during incubation:
White mycelium appears within 3-5 days
Complete colonization takes 10-21 days
Substrate turns completely white when ready
Don’t disturb bags during this phase. The mycelium needs stable conditions to establish itself throughout the substrate.
Step 4: Trigger fruiting
Once bags show complete white colonization, you’ll create conditions that trigger mushroom formation.
Fruiting setup:
Cut 2-3 inch (5-7.6 cm) X-shaped slits in colonized bags
Place bags in area with indirect light
Maintain 80-90% humidity
Provide fresh air exchange 4-6 times daily
You can create a simple fruiting chamber using a plastic storage tub with holes drilled for air exchange. Mist the walls (not directly on mushrooms) 3-4 times daily.
Step 5: Harvest your mushrooms
Oyster mushrooms are ready when caps flatten out and edges become wavy. This usually happens 5-10 days after pins appear.
Harvesting tips:
Cut or twist entire clusters at the base
Harvest before spores drop (mushrooms turn dusty)
Process immediately or refrigerate in paper bags
Expect 2-4 flushes over 6-8 weeks
Your first flush typically produces the largest mushrooms. Subsequent flushes may have smaller but more numerous mushrooms.
Common beginner mistakes and how you can avoid them
Most beginners make predictable mistakes that lead to failed crops. Here’s how to avoid the most common problems:
Mistake 1: Poor sterility during inoculation
Problem: Contamination takes over before mushrooms establish
Solution: Clean work area, use alcohol, work quickly but carefully
Mistake 2: Wrong temperature during incubation
Problem: Slow or no colonization
Solution: Use thermometer, maintain consistent 70-80°F (21-27°C)
Mistake 3: Not enough humidity during fruiting
Problem: Mushroom pins abort or grow poorly
Solution: Mist regularly, use humidity chamber, monitor with hygrometer
Mistake 4: Too much or too little air exchange
Problem: Long stems with small caps, or no fruiting
Solution: Balance fresh air with humidity retention
Mistake 5: Harvesting too late
Problem: Tough, spore-covered mushrooms
Solution: Harvest when caps are full but edges haven’t turned up
How much you can expect to harvest
Realistic expectations help you judge success and plan future growing cycles. Here’s what experienced home growers typically achieve:
Oyster mushroom yields:
Growing kits: 1-2 pounds (0.5-0.9 kg) total
Substrate bags: 20-40% of substrate dry weight
First flush usually largest, 2-4 additional smaller flushes
Timeline expectations:
Kit to harvest: 1-2 weeks
Substrate preparation to harvest: 4-6 weeks
Log inoculation to harvest: 6-18 months
Quality factors:
Homegrown mushrooms stay fresh 7-10 days refrigerated
Flavor peaks within 24 hours of harvest
Nutritional content higher than store-bought varieties
Your yields will improve with experience. Most beginners see 50-75% of optimal yields initially, reaching full potential after 3-4 growing cycles.
Scaling up your mushroom growing operation
Once you’ve successfully grown your first crop, you might want to expand production. Here’s how to scale gradually:
Small expansion (2-4 bags):
Use same techniques with more substrate bags
Stagger inoculation dates for continuous harvests
Investment: $50-100 additional
Medium operation (5-20 bags):
Build dedicated growing space
Add temperature and humidity controls
Consider multiple mushroom varieties
Investment: $200-500
Commercial consideration:
Requires significant space and equipment
Need reliable markets for product
Consider local regulations and permits
Investment: $2,000+
Most home growers find 4-8 bags provide plenty of mushrooms for family use plus some to share with friends.
Frequently asked questions about mushroom growing for beginners
Q: How long does it take to grow mushrooms from start to harvest?
A: Oyster mushrooms take 4-6 weeks from substrate preparation to harvest. Growing kits produce mushrooms in 1-2 weeks since colonization is already complete.
Q: What’s the easiest mushroom for absolute beginners to grow?
A: Oyster mushrooms are most forgiving for beginners. They tolerate temperature swings of 55-75°F (13-24°C) and have high success rates even with minor mistakes.
Q: How much space do you need for growing mushrooms at home?
A: A closet or spare room corner is sufficient. One growing bag needs about 1 square foot (0.09 m²) of space during fruiting.
Q: What equipment costs should beginners expect for mushroom growing?
A: Initial setup costs $30-60 for basic equipment. Growing kits cost $15-25 each. Ongoing substrate and spawn costs run $2-4 per pound of mushrooms produced.
Q: How do you know when mushrooms are ready to harvest?
A: Harvest oyster mushrooms when caps flatten out and edges become wavy, typically 5-10 days after pins appear. Avoid waiting until spores drop.
Q: Can you grow mushrooms year-round indoors? A: Yes, indoor growing allows year-round production with temperature control. Maintain 70-80°F (21-27°C) for incubation and 65-75°F (18-24°C) for fruiting.
“The Mushroom Cultivator” by Paul Stamets and J.S. Chilton
“Growing Gourmet and Medicinal Mushrooms” by Paul Stamets
Local mycological society chapters for hands-on workshops
Next steps for continued learning:
Join local mushroom clubs for community support
Attend mushroom forays to learn about wild varieties
Experiment with different substrate materials
Try log cultivation for outdoor growing experience
Now you have everything needed to start growing mushrooms successfully. You’ll see better results if you begin with oyster mushrooms and focus on maintaining proper temperature and humidity.