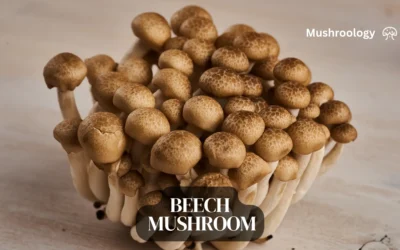
The Poplar Mushroom, or Pioppino or Black Poplar Mushroom, is the edible fungus Agrocybe aegerita. This delicious mushroom has a unique sweet, nutty flavour and meaty texture. Poplar Mushrooms typically grow on dead hardwood trees and stumps in the wild. However, they can also be easily cultivated at home, both indoors and outdoors.
This article provides step-by-step instructions for beginners on how to grow Poplar Mushrooms at home using ready-made grow kits or homemade substrates.
Overview of Growing Conditions
Poplar Mushrooms require the following growing conditions:
- Temperature: 50-68°F (10-20°C). The ideal range is 55-65°F (13-18°C).
- Humidity: Above 90%
- Light: Indirect sunlight or artificial light
Maintaining the proper temperature and humidity levels is key for a successful harvest. A grow tent, humidity dome, or shotgun fruiting chamber can help regulate the environment.
Growing Poplar Mushrooms Indoors
Growing Poplar Mushrooms indoors typically involves using either a pre-colonized grow kit or inoculating your own substrate.
Using a Grow Kit
Grow kits provide an easy introduction to mushroom cultivation for beginners. Kits come pre-colonized with mycelium and are ready to fruit when you receive them.
Here are the basic steps when using a Poplar Mushroom grow kit:
- Select a growing area – Choose a spot between 55-65°F (13-18°C) with indirect sunlight.
- Set up the grow kit – Carefully open the grow kit, following any specific instructions. Stand the block upright and loosen the bag to allow air flow.
- Maintain humidity – Mist the inside of the bag 1-2 times daily to keep humidity levels above 90%. Avoid directly spraying the mushrooms.
- Harvest mushrooms – Use scissors to cut mature mushroom clusters away from the block gently—target clusters where caps have just started to flatten. Store freshly harvested mushrooms in paper bags in the refrigerator for up to 14 days.
- Subsequent flushes – Keep the kit in ideal growing conditions to produce 1-2 more flushes. Yield will decrease with each flush. Discard after the 3rd flush.
Using Your Own Substrate
You can also grow Poplar Mushrooms by inoculating your sterilized hardwood substrate, such as sawdust, wood chips, or straw. This involves a few more steps but allows you to reuse the substrate for multiple grow cycles.
Here is the basic homemade substrate process:
- Choose a substrate – Hardwood sawdust, wood pellets, or chopped straw work well. Submerge in water for 24 hours to hydrate.
- Pasteurize – Pasteurize the substrate to kill contaminants by submerging in 160-180°F (71-82°C) water for 1-2 hours. Allow to cool overnight.
- Inoculate – Mix pre-colonized grain or liquid mushroom spawn into the cooled substrate in a ratio of at least 10% spawn. Transfer to jars, bags, or other containers.
- Colonize – Store inoculated containers around 75°F (24°C) for 14-30 days until the spawn fully colonises the substrate.
- Fruit – Once colonized, move containers to a humidity chamber or tent. Maintain 55-65°F (13-18°C) and above 90% humidity. Harvest mushrooms as they mature.
- Repeat flushes – Keep ideal fruiting conditions to produce 1-3 flushes. Each flush will be smaller than the last.
Growing Poplar Mushrooms Outdoors
Growing Poplar Mushrooms outdoors involves inoculating logs or beds of wood chips or straw. This takes more time and effort than indoor cultivation but can provide an ongoing supply once established.
The basic outdoor cultivation steps are:
- Obtain substrate – Use untreated hardwood logs or wood chips/straw for mushroom beds.
- Pasteurize (optional) – Soak logs in water for 24 hours or heat wood chip beds to 160°F (71°C) for 6 hours to kill competitors.
- Inoculate – Insert grain or sawdust mushroom spawn into drilled holes in logs or mix spawn into mushroom beds. Seal with wax (logs) or cover with burlap (beds).
- Colonize – Leave inoculated logs/beds undisturbed for 12-24 months until fully colonized by mycelium. Mist occasionally.
- Fruit – Move colonized logs or uncover beds once pinheads start to form. Maintain moisture. Harvest mushrooms as they mature.
- Repeat flushes – Inoculated logs and beds will continue fruiting for years with proper care and moisture.
Growing tasty Poplar Mushrooms at home is an enjoyable hobby and a great way to add nutrient-rich mushrooms to your diet. With the right temperature, humidity, and substrate conditions, beginners and experts can cultivate a successful harvest. Start with a grow kit or make your own substrate for a fun gardening project!
Storing Your Harvest: Best Practices for Poplar Mushroom Longevity
After harvesting, it’s crucial for me to store my poplar mushrooms properly to ensure they retain their flavor and potent nutrients. I share with fellow growers my experience and guidelines for storing poplar mushrooms, ensuring they can enjoy their harvest well after the picking season concludes.
Refrigeration and Short-term Storage Solutions
For a brief window post-harvest, I recommend refrigeration to maintain the freshness of the mushrooms. Storing these delicate fungi in a breathable container and placing them in the cooler part of the fridge can significantly decelerate spoilage. This method of storing poplar mushrooms allows me to enjoy their earthy goodness in dishes I wish to prepare shortly after harvest.
Preserving Techniques: Drying and Freezing
To extend their usability beyond a mere few days, I’ve found that preserving poplar mushrooms through drying and freezing is an effective method. Drying desiccates the fungi, thwarting any mold wishing to take up residence. This technique gives me a ready-to-use ingredient that I can easily rehydrate when the recipe calls for it.
Alternatively, freezing is another viable way I keep my poplar mushroom harvest. Simple steps like cleaning, slicing, and flash-freezing individual pieces before transferring them to airtight containers have proven both practical and convenient.
FAQ
How long does it take Poplar Mushrooms to grow from inoculation to harvest?
It takes 14-30 days for Poplar Mushroom spawn to fully colonize the substrate. Once colonized, pinheads and mushrooms develop in 7-14 days in ideal conditions. Total grow time is 3-8 weeks.
What is the ideal light condition for fruiting Poplar Mushrooms?
Indirect natural light or regular room lighting for 8+ hours per day works best. Avoid direct sunlight.
Can I grow Poplar Mushrooms at normal room temperature?
No, Poplar Mushrooms require cooler temperatures between 50-68°F (10-20°C) to fruit well. Use a grow tent, wine cooler, or other methods to maintain this temperature range.
How often should I mist or fan the Poplar Mushrooms?
Mist 1-2 times per day to maintain humidity above 90%. Fan only if excessive moisture builds up. Avoid directly spraying developing mushrooms.
What is the average yield per flush when growing Poplar Mushrooms?
On average, you can expect 200-450g (0.4-1lb) fresh weight of mushrooms per flush when using a commercial grow kit or quality homemade substrate.
Can I grow Poplar Mushrooms outdoors?
Yes, inoculate hardwood logs or beds of wood chips/straw. This takes 12-24 months before producing mushrooms though.
How do I harvest Poplar Mushrooms?
Carefully twist or cut mushroom clusters away from the substrate when caps start to flatten out. Store freshly picked mushrooms in the refrigerator.
What is the shelf life of freshly harvested Poplar Mushrooms?
Properly stored in the refrigerator, fresh Poplar Mushrooms typically last 7-14 days in a paper bag or loose plastic bag.
Can I reuse substrate from a Poplar Mushroom grow kit to cultivate more mushrooms?
No, commercial grow kits are designed for 1-3 flushes of mushrooms. Make your own reusable hardwood substrate instead.
Is it safe to grow edible mushrooms at home?
Yes, with proper pasteurization, clean technique, and consistent environmental conditions, it is generally safe to cultivate edible mushrooms at home.


