Chaga mushrooms are packed with antioxidants and immune-boosting compounds
They may help fight inflammation, lower cholesterol, and support overall health
Proper harvesting and preparation are crucial for maximizing chaga’s benefits
Consult a healthcare professional before adding chaga to your wellness routine
Sustainable harvesting practices are essential for preserving this valuable resource
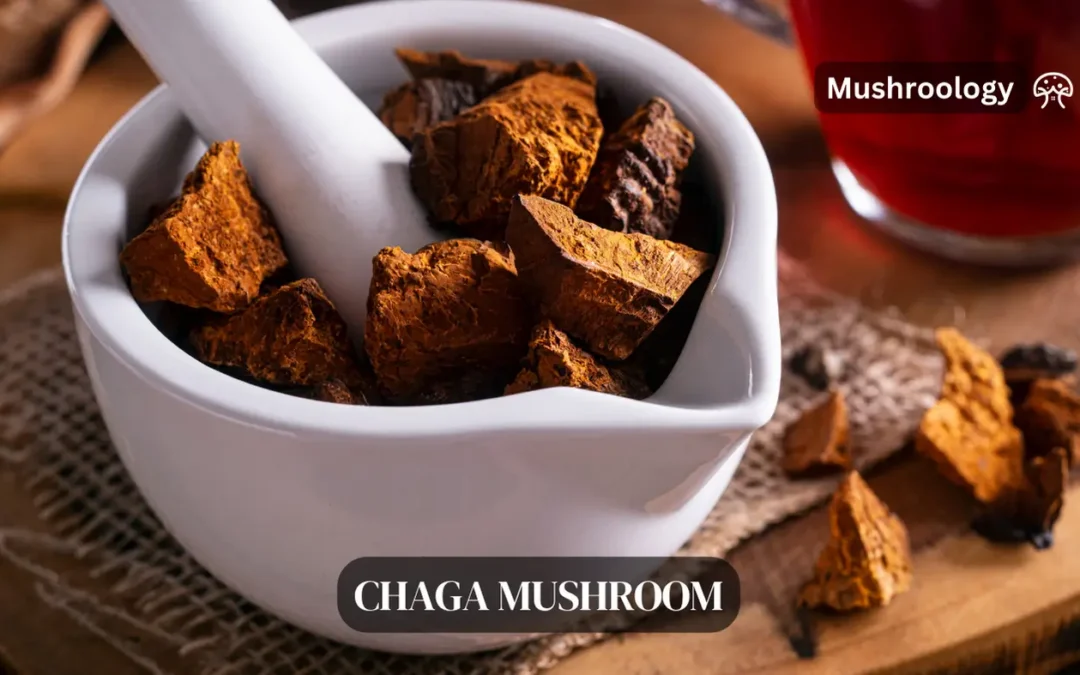
What Exactly is Chaga, and Why Should You Care?
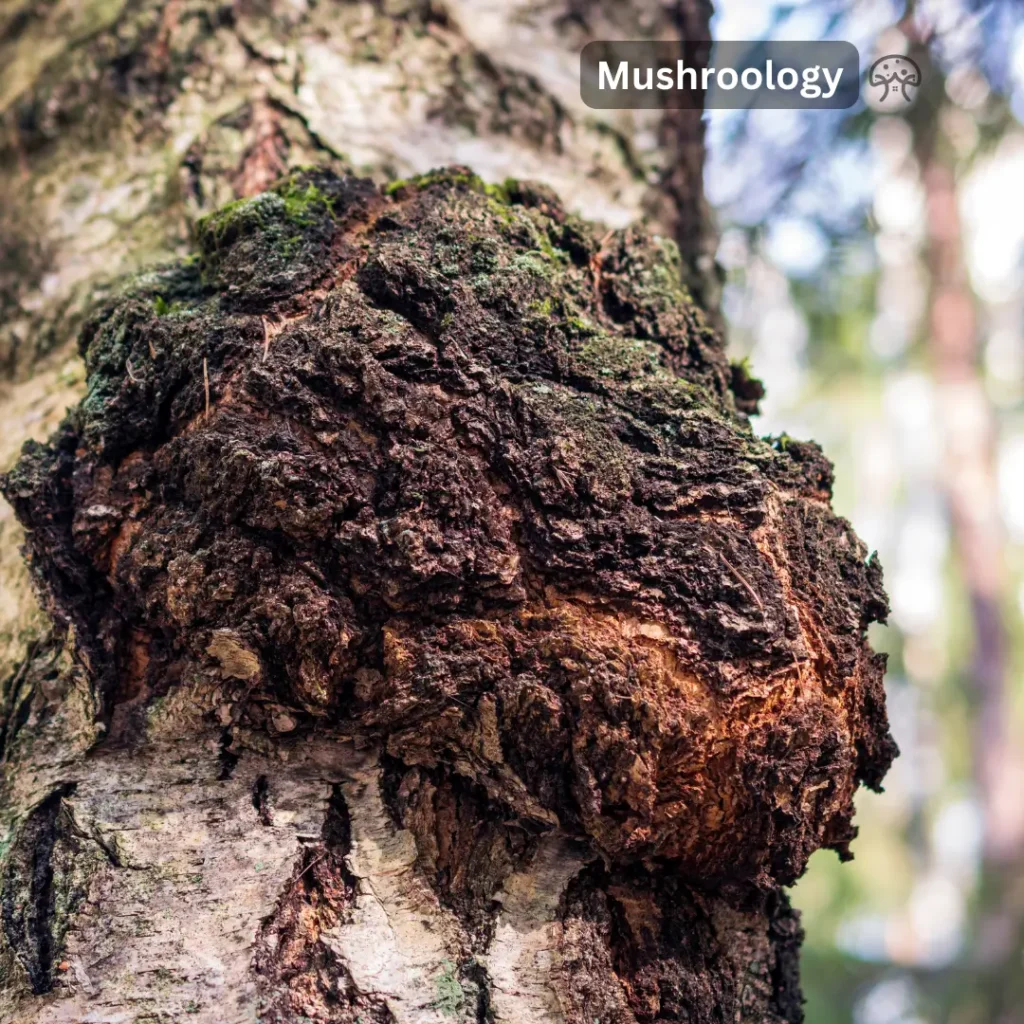
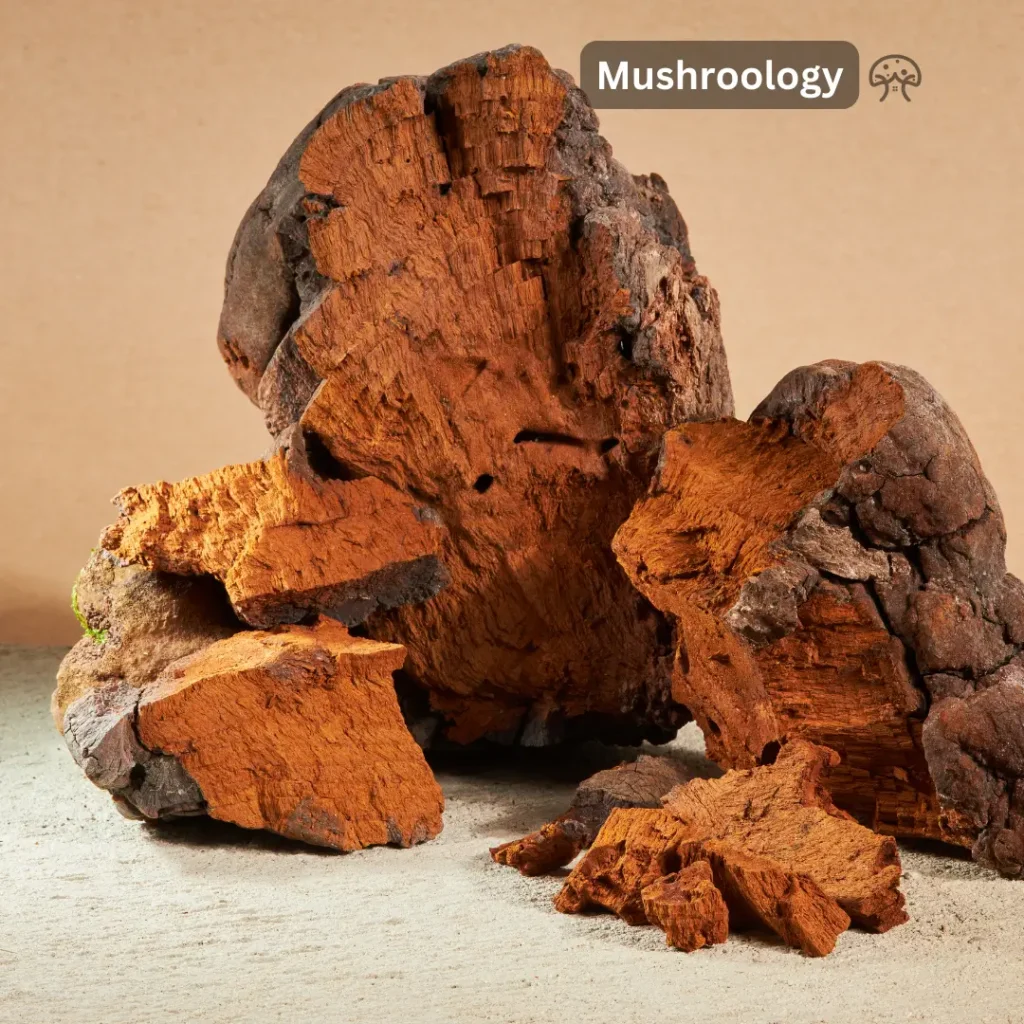
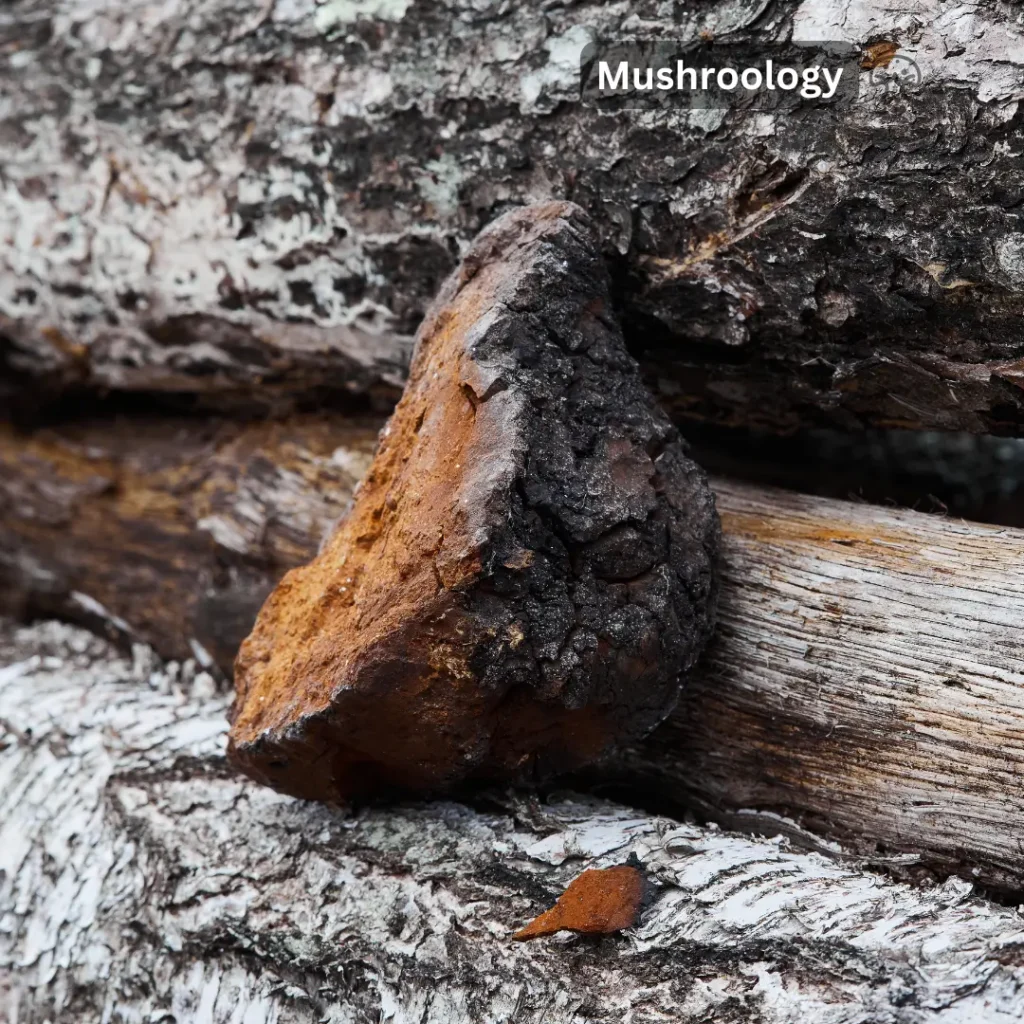
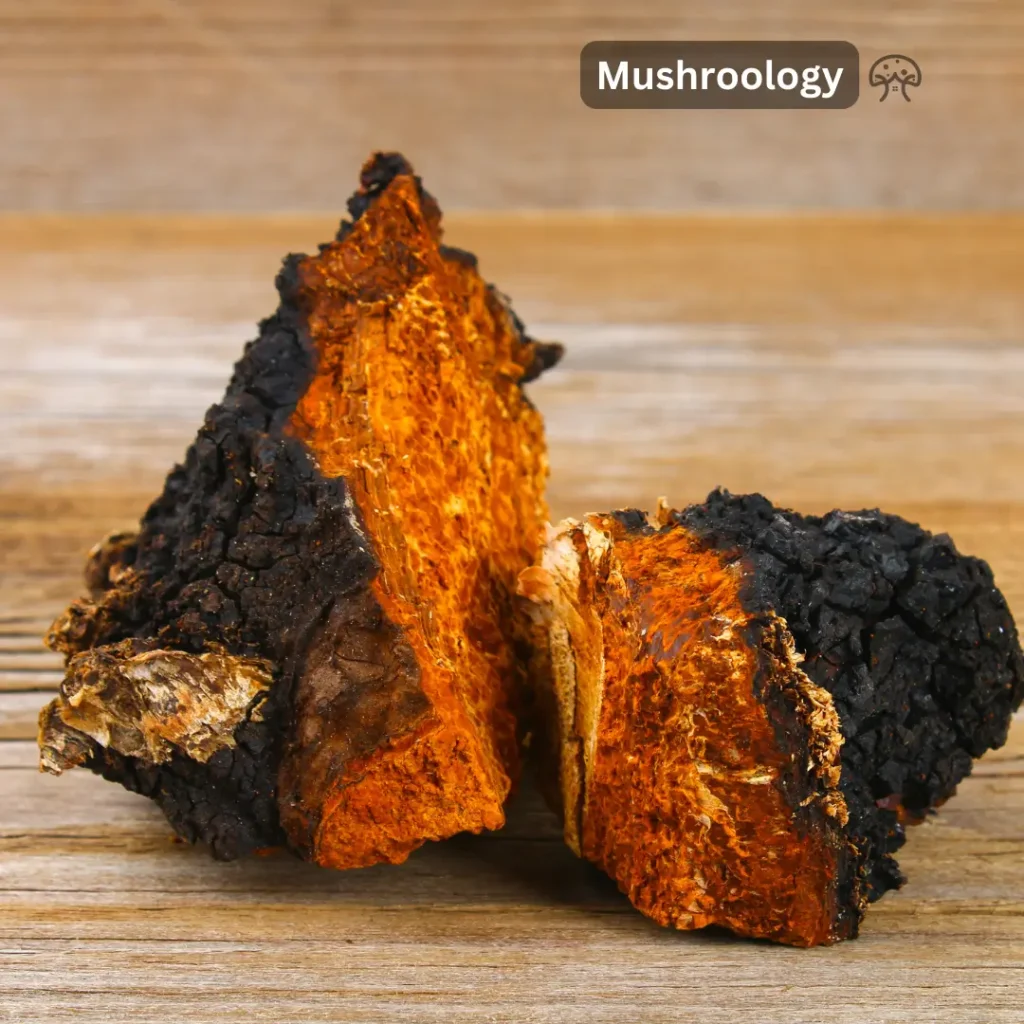
Before we explore the incredible benefits of chaga, let’s take a moment to understand what it is. Chaga mushroom (Inonotus obliquus) is a type of fungus that primarily grows on birch trees in cold climates, such as Siberia, Northern Canada, and Alaska. Unlike typical mushrooms, chaga doesn’t have a cap or stem. Instead, it forms a dark, crusty growth on the tree that resembles burnt charcoal.
But don’t let its unappealing appearance fool you! Beneath that rough exterior lies a goldmine of nutrients and bioactive compounds that have been prized for their medicinal properties for generations. Now, let’s uncover the amazing health benefits that make chaga such a valuable addition to your wellness arsenal.
The Powerful Health Benefits of Chaga Mushrooms
1. Supercharged Immune Support
One of the most celebrated chaga mushroom benefits is its ability to give your immune system a serious boost. Chaga is rich in beta-glucans, which are complex sugars that have been shown to stimulate the immune system. These compounds help activate immune cells, making your body more efficient at fighting off potential threats.
But that’s not all – chaga also contains a variety of other immune-boosting compounds, including polysaccharides and triterpenes. These work together to support your body’s natural defense mechanisms, potentially helping you stay healthier and more resilient against common illnesses.
2. Antioxidant Powerhouse
When it comes to antioxidants, chaga is a true champion. In fact, it’s been found to have one of the highest ORAC (Oxygen Radical Absorbance Capacity) scores of any natural food – even higher than blueberries or acai berries! This means that chaga is incredibly effective at neutralizing harmful free radicals in your body.
Why does this matter? Free radicals are unstable molecules that can damage your cells and contribute to aging and various diseases. By consuming foods high in antioxidants like chaga, you’re giving your body the tools it needs to combat oxidative stress and protect your cells from damage.
3. Inflammation Fighter
Chronic inflammation is at the root of many modern health issues, from arthritis to heart disease. Chaga mushrooms have shown promising anti-inflammatory properties that could help combat this widespread problem. The compounds found in chaga, particularly betulinic acid, have been observed to reduce inflammation markers in various studies.
By incorporating chaga into your diet, you might be able to support your body’s natural anti-inflammatory processes, potentially easing symptoms of inflammatory conditions and promoting overall health.
4. Potential Cancer-Fighting Properties
While more research is needed, early studies on chaga’s potential anti-cancer properties are exciting. Some laboratory and animal studies have shown that chaga extracts may help slow the growth of certain types of cancer cells or even cause them to self-destruct.
It’s important to note that these studies are preliminary, and chaga should never be used as a replacement for conventional cancer treatments. However, the potential for chaga to play a role in cancer prevention and supportive care is an area of ongoing research that holds promise for the future.
5. Heart Health Support
Your heart might just love chaga as much as the rest of your body does! Some studies have suggested that chaga could help lower LDL (bad) cholesterol levels while increasing HDL (good) cholesterol. This balance is crucial for maintaining a healthy cardiovascular system and reducing the risk of heart disease.
Additionally, the antioxidant and anti-inflammatory properties of chaga may contribute to overall heart health by protecting blood vessels and reducing inflammation in the cardiovascular system.
6. Blood Sugar Regulation
For those concerned about blood sugar levels, chaga might offer some help. Some animal studies have shown that chaga extracts can help lower blood glucose levels and improve insulin sensitivity. While human studies are still needed to confirm these effects, the potential for chaga to support healthy blood sugar levels is another exciting aspect of its benefits.
7. Liver Support
Your liver works hard to detoxify your body and keep you healthy, and chaga might be a valuable ally in supporting liver function. Some studies have suggested that chaga could help protect liver cells from damage and may even support the regeneration of liver tissue.
This potential liver-protective effect is thought to be due to the high antioxidant content of chaga, which helps neutralize harmful compounds that could otherwise damage liver cells.
How to Prepare and Consume Chaga
Now that you’re excited about all the potential chaga mushroom benefits, you’re probably wondering how to incorporate this superfood into your daily routine. Don’t worry – we’ve got you covered with some easy and delicious ways to enjoy chaga!
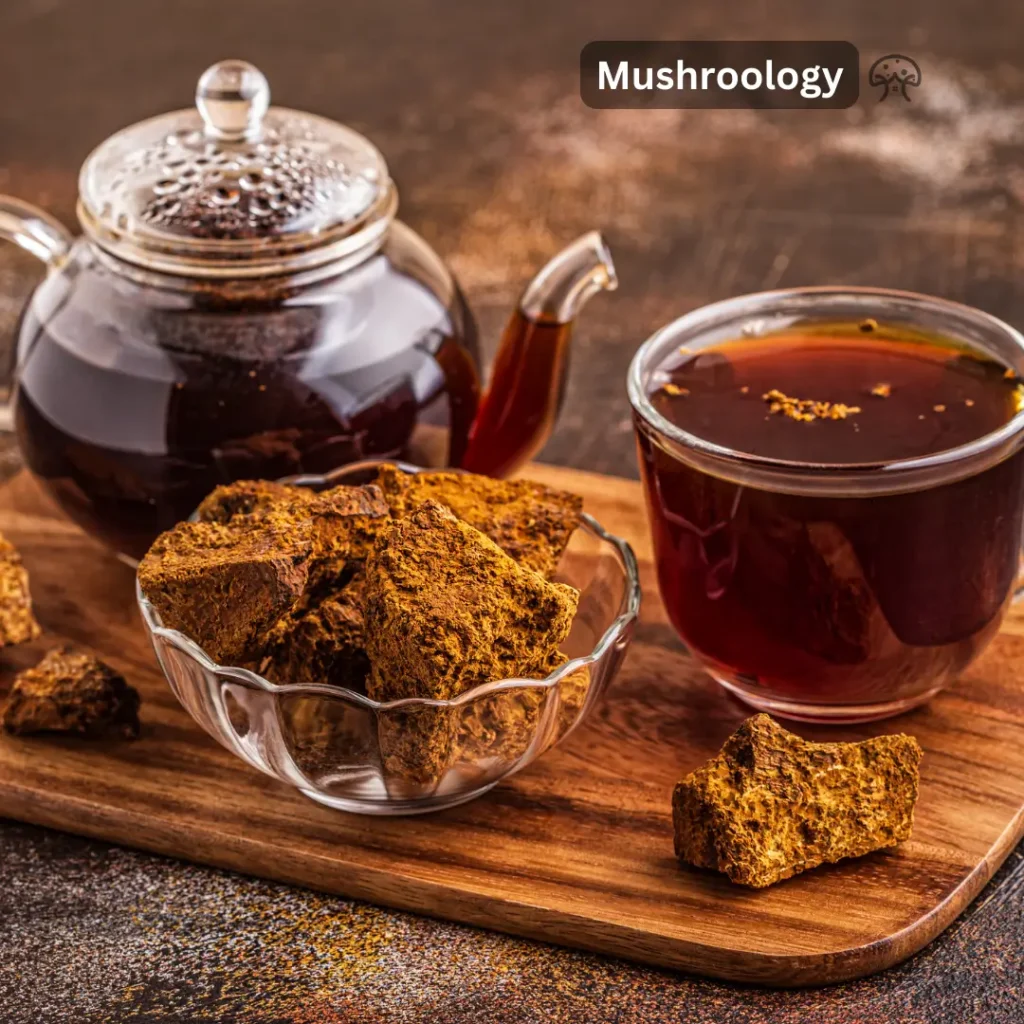
Chaga Tea: The Classic Approach
The most traditional and popular way to consume chaga is as a tea. Here’s a simple method to make your own chaga tea:
Start with small chunks of dried chaga (about 1-2 tablespoons per cup of water).
Simmer the chaga in water for 15-20 minutes.
Strain the liquid and enjoy your earthy, slightly sweet chaga tea.
You can drink chaga tea hot or cold, and feel free to add honey, lemon, or your favorite natural sweetener to enhance the flavor.
Chaga Tinctures: Concentrated Power
For a more concentrated form of chaga, you might want to try a tincture. Chaga tinctures are made by soaking chaga in alcohol to extract its beneficial compounds. You can find pre-made tinctures or make your own at home (though this process takes several weeks).
To use a chaga tincture, simply add a few drops to water, tea, or your favorite beverage. It’s a quick and easy way to get your daily dose of chaga.
Chaga Powder: Versatile and Convenient
Chaga powder is another popular option that offers versatility in how you consume it. You can add chaga powder to smoothies, coffee, or even use it in baking recipes. Start with a small amount (about 1/2 teaspoon) and gradually increase as you become accustomed to the flavor.
Chaga Supplements: Easy and Consistent
If you’re looking for a convenient way to incorporate chaga into your routine, supplements might be the way to go. Chaga supplements come in various forms, including capsules and tablets. These offer a consistent dose and are easy to take on the go.
Harvesting and Sustainability: Protecting Nature’s Gift
While the benefits of chaga are exciting, it’s crucial to approach its use with respect for nature and sustainability in mind. Chaga grows very slowly, taking years to form, and overharvesting can threaten its availability and the health of forest ecosystems.
If you’re interested in harvesting chaga yourself, here are some important guidelines to follow:
Only harvest from dead or fallen birch trees to avoid damaging living trees.
Take only a portion of the chaga growth, leaving some to continue growing.
Use proper tools and techniques to minimize damage to the tree and surrounding area.
Check local regulations, as harvesting chaga may be restricted in some areas.
Better yet, consider purchasing chaga from reputable suppliers who follow sustainable harvesting practices. This ensures you’re getting a high-quality product while supporting responsible stewardship of our natural resources.
Potential Risks and Precautions
While chaga is generally considered safe for most people, there are some important considerations to keep in mind:
Blood Thinning: Chaga may have blood-thinning properties, so it’s important to consult with your doctor if you’re taking blood-thinning medications.
Autoimmune Conditions: Because chaga stimulates the immune system, people with autoimmune disorders should consult their healthcare provider before using it.
Diabetes Medication Interactions: Chaga might affect blood sugar levels, so if you’re taking diabetes medications, monitor your blood sugar closely and consult your doctor.
Oxalate Content: Chaga contains oxalates, which can be problematic for people prone to kidney stones. Moderation is key.
Pregnancy and Breastfeeding: There’s not enough research on the safety of chaga for pregnant or breastfeeding women, so it’s best to avoid it during these times.
As with any new supplement or natural remedy, it’s always a good idea to talk to your healthcare provider before adding chaga to your routine, especially if you have any existing health conditions or are taking medications.
Embrace the Power of Chaga
As we’ve explored, the chaga mushroom benefits are truly remarkable. From boosting your immune system and fighting inflammation to potentially supporting heart health and even showing promise in cancer research, chaga is a natural powerhouse that deserves attention in the world of health and wellness.
By incorporating chaga into your daily routine – whether through a soothing cup of tea, a convenient supplement, or a creative culinary addition – you’re tapping into centuries of traditional wisdom backed by modern scientific research. Just remember to approach chaga use with respect for nature and your own body, always prioritizing sustainable practices and consulting with healthcare professionals when needed.
As you embark on your chaga journey, keep an open mind and listen to your body. Everyone’s experience with natural remedies can be different, and what works wonderfully for one person might not have the same effect for another. Be patient, consistent, and mindful as you explore the potential benefits of this fascinating fungus.
Who knows? Chaga might just become your new favorite superfood, supporting your health and well-being in ways you never imagined. So why not give it a try? Your body (and maybe even your taste buds) might thank you for it!
People Also Ask
Q: How long does it take to see the benefits of chaga mushroom? A: The time it takes to experience chaga mushroom benefits can vary from person to person. Some people report feeling more energized or noticing improved immune function within a few weeks of regular use. However, for more significant health benefits, it may take several months of consistent consumption. It’s important to remember that natural remedies often work gradually, and patience is key.
Q: Can chaga mushrooms interact with medications? A: Yes, chaga mushrooms can potentially interact with certain medications. They may enhance the effects of blood-thinning medications and insulin, and could interact with some immunosuppressant drugs. It’s crucial to consult with your healthcare provider before adding chaga to your routine, especially if you’re taking any medications or have existing health conditions.
Q: Is it safe to consume chaga mushroom daily? A: For most healthy adults, consuming moderate amounts of chaga mushroom daily is generally considered safe. However, it’s best to start with small amounts and gradually increase your intake. Long-term safety studies are limited, so it’s wise to take occasional breaks from daily use. As always, consult with a healthcare professional for personalized advice.
Q: What’s the best way to consume chaga for maximum benefits? A: The most popular and traditional way to consume chaga is as a tea, which allows for easy absorption of its beneficial compounds. However, tinctures and powders can also be effective. The “best” method can vary depending on individual preferences and health goals. Consistency is key, so choose a method that you can easily incorporate into your daily routine.
Q: Can chaga mushrooms help with weight loss? A: While chaga mushrooms are not directly marketed as a weight loss aid, they may indirectly support weight management efforts. Their potential to regulate blood sugar levels and reduce inflammation could contribute to a healthier metabolism. Additionally, chaga tea is a calorie-free beverage that can be a good substitute for sugary drinks. However, chaga should be part of a balanced diet and healthy lifestyle for optimal results.
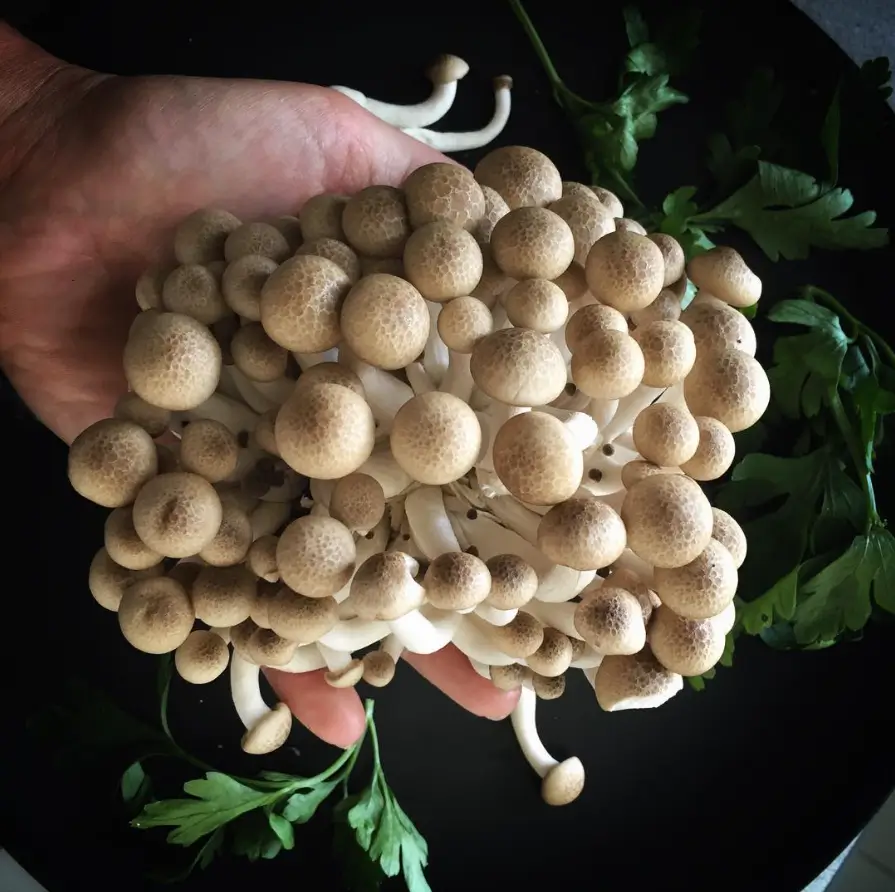
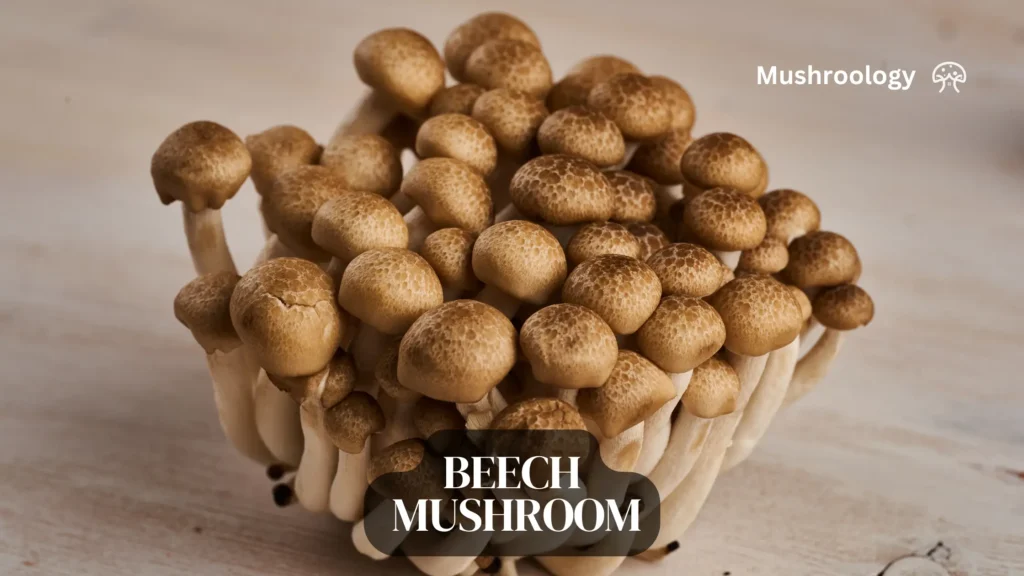
Brown beech mushrooms, scientifically known as Hypsizygus tessulatus, are a type of edible mushroom native to East Asia. They are also commonly referred to as Buna-shimeji or brown clamshell mushrooms. These mushrooms are known for their small, brown caps and creamy white stems, and they grow in clusters on hardwood trees, particularly beech trees, which is how they got their name.
Brown Beech Mushrooms (Buna-shimeji)
Brown beech mushrooms, also known as Buna-shimeji, are characterized by their brown caps and long, slender stems. They grow in clusters, often referred to as “bouquets.” These mushrooms have a slightly nutty flavor that intensifies when cooked, offering a tender texture that complements a variety of dishes.
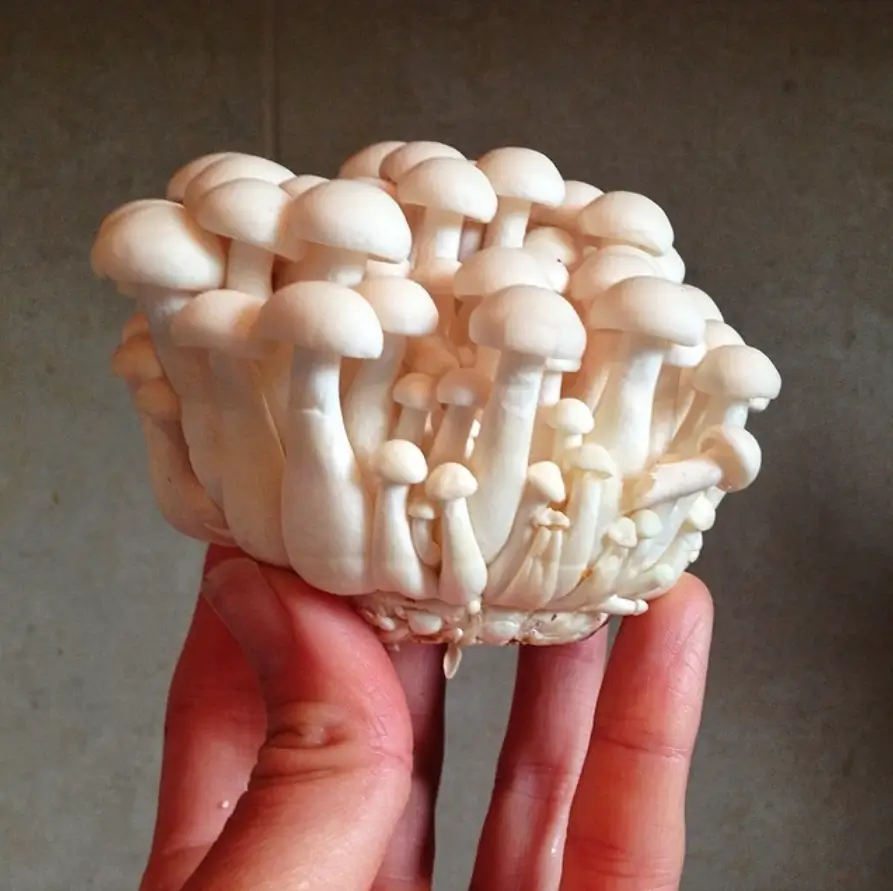
White Beech Mushrooms (Bunapi-shimeji)
White beech mushrooms, or Bunapi-shimeji, are a mutation of the brown beech mushrooms and are not commonly found in the wild. They are cultivated for their uniform white color and delicate flavor. Like their brown counterparts, they grow in clusters and have a firm texture that holds up well in cooking.
Instagram @amyshertzer
Beech mushroom growth habitat
Beech mushrooms are commonly found growing on decaying beech trees, which is where they get their name. They thrive in cool, damp environments, making them suitable for cultivation in controlled settings.
Key Takeaways
Identify the right substrate is critical for successful beech mushroom cultivation.
Create a breathable environment with a quarter-inch hole in jar lids can lead to an ideal cultivation set-up.
Sterilization of jars at specific temperatures and pressures is a non-negotiable step in the growing process.
Indoor beech mushroom cultivation offers a rewarding and flavorful harvest accessible from the comfort of your home.
Adequate preparation and a clear guide can simplify the beech mushroom growing at-home experience for enthusiasts.
“Mycelium is the dark matter of the soil: unseen and often ignored, yet vital to the cycle of life and growth.”
Let’s delve deeper and juxtapose the different approaches within beech mushroom farming techniques. Below is a compiled breakdown of various substrates and their corresponding benefits:
Substrate
Benefits
Notes
Hardwood Sawdust
Mimics natural habitat leads to robust mycelial networks
Widely available and cost-effective
Supplemented Substrates (e.g., soy hulls)
Enriches nutrition, increases yield
It may require additional preparation
Logs
Long-term cultivation, gradual mushroom growth
Suitable for outdoor setups
Beech Mushroom Growing Guide
Instagram @asia.wysoczynska
The Mushroom Grower’s Toolkit
Here’s a list of items you’ll want to gather before you begin:
Substrate materials (we’ll discuss this in detail later)
Sterilization equipment (pressure cooker or large pot)
Grow bags or containers
Beech mushroom spawn
Thermometer and hygrometer
Spray bottle for misting
Clean workspace and gloves
Remember, cleanliness is key when it comes to mushroom cultivation. You’ll want to make sure all your equipment is properly sanitized to prevent contamination. Trust me, your future mushrooms will thank you!
Choose the Right Substrate for Beech Mushrooms
One of the most crucial aspects of growing beech mushrooms is selecting and preparing the right substrate. The substrate is essentially the food source for your mushrooms, providing them with the nutrients they need to grow and thrive.
Ideal Substrate for beech mushrooms
For beech mushrooms, a hardwood-based substrate works best. Here’s a popular mix that many growers swear by:
• 50% hardwood sawdust (beech or oak works well)
• 30% wheat bran
• 20% wood chips
• Water (to achieve proper moisture content)
The key is to create a substrate that’s nutrient-rich but also allows for proper air exchange. It’s like creating the perfect mushroom buffet!
Preparing Your Substrate: A Step-by-Step Guide
Now that you’ve got your ingredients, it’s time to prep your substrate. This process might seem a bit intimidating at first, but don’t worry – we’ll break it down into easy-to-follow steps.
Mix your dry ingredients thoroughly.
Gradually add water until the mixture holds its shape when squeezed (but isn’t dripping).
Fill your grow bags or containers with the substrate mixture.
Sterilize the filled bags in a pressure cooker or large pot for about 2-3 hours.
Allow the sterilized substrate to cool completely before inoculation.
Remember, patience is a virtue in mushroom cultivation. Taking the time to properly prepare and sterilize your substrate will pay off in healthier, more abundant mushrooms down the line.
Inoculation: Introduce Beech Mushroom Spawn
Excited? You should be! We’re about to bring your substrate to life with beech mushroom spawn. This is where the magic really begins.
Choose Quality Spawn
First things first – make sure you’re starting with high-quality beech mushroom spawn. Look for reputable suppliers who specialize in mushroom cultivation. Good spawn is the foundation of a successful grow, so it’s worth investing in quality.
The Inoculation Process
In a clean, still-air environment, open your sterilized substrate bag.
Carefully add your beech mushroom spawn to the substrate.
Mix thoroughly to distribute the spawn evenly.
Seal the bag, leaving a small opening for air exchange.
Think of this process as planting seeds in a garden. You’re setting the stage for your mushrooms to colonize and flourish!
Create the Perfect Growing Environment for Beech Mushrooms
Alright, green thumbs (or should I say, fungal fingers?), it’s time to create the ideal home for your beech mushrooms. These little guys can be a bit particular about their living conditions, but don’t worry – with a few simple tricks, you’ll have them feeling right at home in no time.
Temperature and Humidity: The Dynamic Duo
Beech mushrooms thrive in specific temperature and humidity ranges. Here’s what you need to aim for:
Maintaining these conditions is crucial for healthy mycelium growth and fruiting. Consider using a thermometer and hygrometer to monitor these factors closely. You might even want to create a mini greenhouse effect by covering your grow bags with a clear plastic tent – just be sure to allow for some air circulation!
Lighting Conditions
While beech mushrooms don’t need light for photosynthesis (they’re fungi, after all!), they do benefit from some indirect light during their fruiting stage. A few hours of soft, ambient light each day can help guide their growth and improve their color.
The Waiting Game: Monitoring Mycelium Growth
Now comes the part that tests every mushroom grower’s patience – waiting for the mycelium to colonize the substrate. But don’t worry, this is where things get really interesting!
Signs of Healthy Colonization
As your beech mushroom mycelium grows, you’ll start to see white, thread-like structures spreading through the substrate. This is a good sign! Here’s what to look out for:
• Even, white growth throughout the substrate
• A slightly sweet, mushroomy smell
• No signs of contamination (unusual colors or odors)
Remember, good things come to those who wait. Colonization can take anywhere from 2-4 weeks, depending on conditions. Use this time to learn more about mushroom cultivation – you’re on your way to becoming a fungi expert!
Fruiting: Help Your Beech Mushrooms to Grow
Congratulations! If you’ve made it this far, your patience is about to pay off. Once your substrate is fully colonized, it’s time to initiate fruiting. This is where you’ll start to see those clusters of beech mushrooms forming – exciting, right?
Initiate the Fruiting Process
To encourage your beech mushrooms to fruit:
Introduce fresh air by opening the grow bag or moving to a fruiting chamber.
Lower the temperature slightly (55-65°F or 13-18°C).
Increase humidity to 90-95% by misting regularly.
Provide indirect light for 6-8 hours a day.
Think of this as creating autumn-like conditions – it’s when beech mushrooms naturally fruit in the wild. You’re essentially tricking them into thinking it’s the perfect time to produce mushrooms!
Harvest Your Beech Mushrooms: Timing is Everything
The moment you’ve been waiting for is almost here – harvest time! But hold your horses, eager mushroom farmer. Knowing when and how to harvest is crucial for getting the best out of your beech mushrooms.
When to Harvest
Beech mushrooms are ready to harvest when:
• The caps are fully formed but not yet flattened
• The clusters are tight and compact
• They’re about 1-2 inches in height
Pro tip: It’s better to harvest a bit early than too late. Overripe mushrooms can become tough and lose flavor.
Harvesting Techniques
To harvest your beech mushrooms:
Gently grasp the base of the cluster.
Twist and pull the entire cluster from the substrate.
Avoid leaving stumps, as these can be sites for contamination.
Remember, a clean harvest sets the stage for future flushes. Your substrate can produce multiple harvests, so treat it with care!
Enjoy the Fruits of Your Labor!
You’ve done it! You’ve successfully grown your own beech mushrooms. Now comes the most rewarding part – enjoying your harvest. Beech mushrooms have a delightful texture and a mild, nutty flavor that shines in a variety of dishes.
Common Mistakes and How to Avoid Them
Poor Sterilization Techniques
Mistake: Not properly sterilizing the substrate can lead to contamination. Solution: Always sterilize the substrate thoroughly using a pressure cooker or autoclave.
Inadequate Air Circulation
Mistake: Poor air circulation can lead to contamination and poor mycelium growth. Solution: Ensure adequate air circulation by using fans or placing the containers in a well-ventilated area.
Incorrect Temperature and Humidity
Mistake: Not maintaining the correct temperature and humidity levels can hinder mushroom growth. Solution: Use a thermometer and hygrometer to monitor and maintain the ideal conditions.
Impatience
Mistake: Rushing the process can lead to poor results. Solution: Be patient and allow the mycelium to fully colonize the substrate before inducing fruiting.
Pro Tips for Growing Beech Mushrooms
Use High-Quality Spawn: Purchase spawn from a reputable supplier to ensure high success rates.
Monitor Conditions Regularly: Regularly check and adjust the temperature, humidity, and air circulation.
Experiment with Substrates: Try different substrate combinations to see what works best for your setup.
Keep a Growing Journal: Document your growing process to track what works and what doesn’t.
Why Grow Beech Mushrooms?
Growing beech mushrooms at home offers a multitude of benefits that span freshness, cost-effectiveness, health advantages, and sustainability. Here’s a comprehensive look at why you should consider cultivating these nutritious fungi:
Freshness
One of the most compelling reasons to grow beech mushrooms at home is the unparalleled freshness you can achieve. When you cultivate your own mushrooms, you can harvest them at their peak, ensuring the best flavor and texture. Freshly harvested beech mushrooms have a nutty, slightly sweet taste and a firm, crunchy texture that can elevate any dish. This freshness is often lost in store-bought mushrooms, which may have been harvested days or even weeks before reaching your kitchen.
Cost-Effective
Growing beech mushrooms at home can be a cost-effective alternative to purchasing them from specialty stores or markets. While the initial investment in growing kits or supplies might seem significant, the long-term savings are substantial. A single grow kit can yield multiple harvests, providing a steady supply of mushrooms at a fraction of the cost of buying them regularly. Additionally, by growing your own, you avoid the markup prices often associated with gourmet mushrooms.
Health Benefits
Beech mushrooms are a nutritional powerhouse, offering a range of health benefits:
Rich in Vitamins and Minerals: Beech mushrooms are an excellent source of vitamins B and D, which are crucial for maintaining healthy bones, teeth, and immune function. They also contain significant amounts of copper, selenium, and potassium, which support various bodily functions, including red blood cell formation, thyroid health, and blood pressure regulation.
High in Antioxidants: These mushrooms are packed with antioxidants that help protect the body from oxidative stress, reducing the risk of chronic diseases such as cancer and heart disease. Antioxidants neutralize free radicals, preventing cell damage and inflammation.
Immune System Boost: Beech mushrooms have been used in traditional Chinese medicine for their immune-boosting properties. They can stimulate the production of white blood cells, enhancing the body’s natural defenses against infections and diseases.
Low in Calories and Fat: Beech mushrooms are low in calories and fat, making them an excellent addition to a healthy diet. They are also high in dietary fiber, which aids in digestion and helps maintain a healthy weight.
Sustainability
Growing your own beech mushrooms is an environmentally friendly practice that contributes to sustainability in several ways:
Reduced Carbon Footprint: By cultivating mushrooms at home, you eliminate the need for transportation and packaging, significantly reducing your carbon footprint. Commercially grown mushrooms often travel long distances before reaching consumers, contributing to greenhouse gas emissions.
Organic and Chemical-Free: Home cultivation allows you to control the growing conditions, ensuring that no harmful pesticides or synthetic fertilizers are used. This not only benefits your health but also protects the environment from chemical contamination.
Waste Reduction: Growing your own food encourages the use of imperfect produce that might otherwise be discarded. This practice reduces food waste and promotes a more sustainable food system.
Biodiversity and Soil Health: Home gardening practices such as composting and crop rotation enhance soil health and promote biodiversity. These practices create a balanced ecosystem that supports beneficial insects and wildlife, contributing to a healthier environment.
FAQ
What exactly are beech mushrooms?
Beech mushrooms, or Hypsizygus tessulatus, are edible fungi with a small brown cap and a creamy white stem. They’re known for their rich, buttery flavour and can be a delicious addition to many recipes. They’re also packed with nutrients and have been recognized for their potential medicinal benefits.
Can I grow beech mushrooms at home?
Absolutely! You can grow beech mushrooms indoors with the right setup. You’ll need a suitable substrate, which could be hardwood sawdust or a combination of sawdust and soy hulls, proper environmental conditions such as temperature, humidity, and ventilation, and, of course, beech mushroom spawn for inoculation.
What kind of substrate is best for growing beech mushrooms?
Beech mushrooms thrive on a substrate made from hardwood sawdust, but for an even better yield, you can add soy hulls, which provide additional nutrients. Ensure the substrate is finely ground for the best results in the cultivation process.
What are the optimal conditions for mycelium colonization?
The ideal temperature for mycelium growth is between 50-60 degrees Fahrenheit with a humidity level of 80-90%. Make sure your growing area is dark and provides ample room temperature for the best colonization.
What is the inoculation technique for beech mushrooms?
Inoculation involves adding grain spawn to your substrate. This should be done under sterile conditions to avoid contamination. After adding the spawn, it’s crucial to maintain the temperature and humidity levels to encourage the growth of the mycelium.
How do I create the ideal indoor farming environment?
To create the ideal environment for growing beech mushrooms, you need to control the temperature, usually between 14.5 to 16 degrees Celsius, and maintain high humidity levels around 96-98%. Additionally, you’ll want to ensure proper ventilation to manage carbon dioxide levels and provide low-level lighting to stimulate growth.
How do I know when it’s time to harvest my beech mushrooms?
Beech mushrooms are typically ready to harvest approximately 3-4 weeks after the initial fruiting begins. They should be plump, with caps fully developed but not fully unfolded. The exact timing can depend on your specific growing conditions, so keep an eye on them as they develop.
What maintenance is required during the beech mushroom growing process?
During the growth process, you’ll need to monitor temperature and humidity levels closely, adjust ventilation as necessary, and mist the mushrooms to maintain proper humidity if you’re in the fruiting phase. It’s essential to monitor for any signs of contamination and address them promptly.
Are there any common issues to watch out for when growing beech mushrooms?
Common issues include contamination by mold or bacteria, which can result from improper sterilization or environmental conditions. Fluctuating temperatures or incorrect humidity levels can also hinder the growth of your beech mushrooms. Maintaining a consistent environment is key to successful cultivation.
Can I grow beech mushrooms all year round?
Yes, you can grow beech mushrooms year-round if you provide them with the controlled environment they need. This makes indoor cultivation especially appealing since you’re not dependent on outdoor weather conditions.
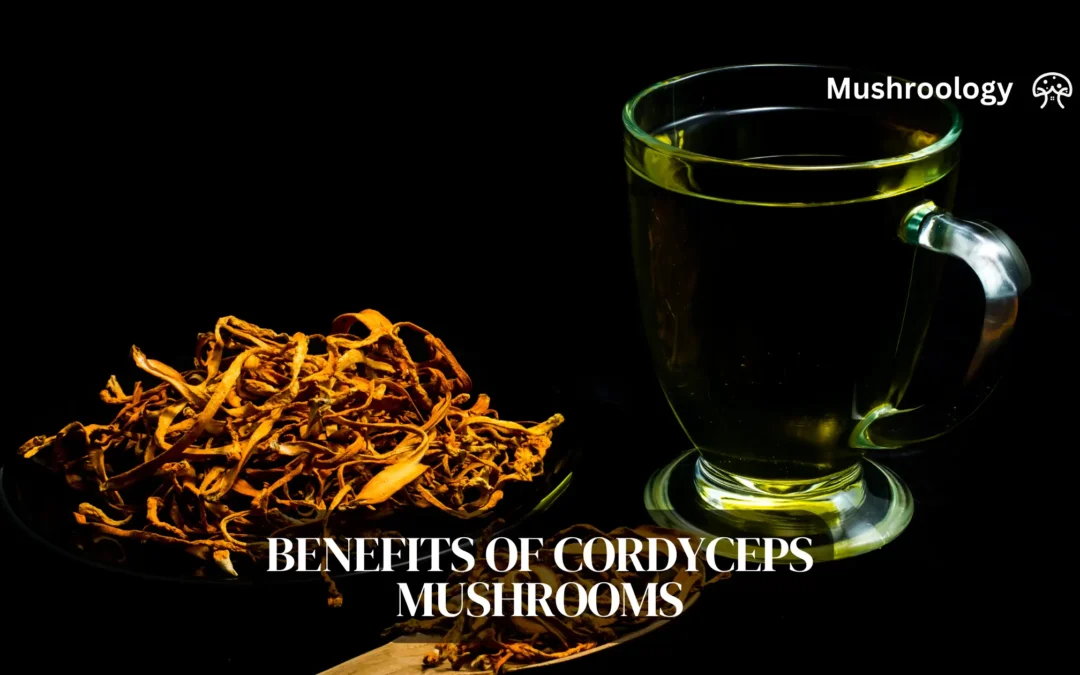
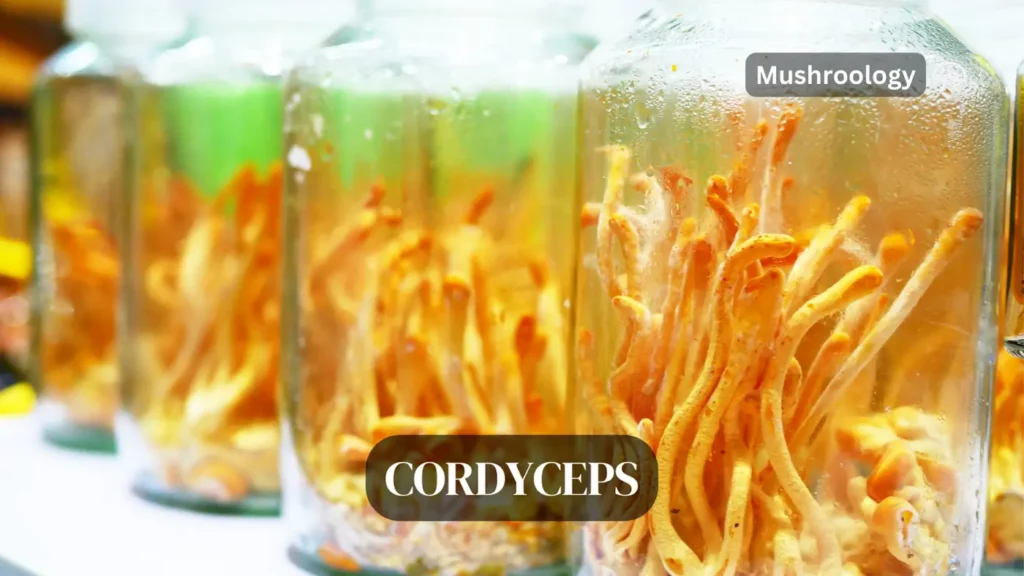
Here are the key scientific findings and research related to the potential health benefits of cordyceps mushrooms:
Cordyceps benefits for athletes
Several studies suggest cordyceps can boost exercise performance and reduce fatigue:
A 2016 study found that three weeks of cordyceps militaris supplementation significantly improved tolerance to high-intensity exercise in healthy adults.
Cordyceps may increase VO2 max (maximum oxygen consumption) and ventilatory threshold, allowing more oxygen uptake and less fatigue during exercise.
Cordyceps contains adenosine and cordycepin which are thought to increase ATP production, providing more energy to muscles.
However, benefits may be greater in less-trained individuals compared to elite athletes.
Cordyceps anti-aging and antioxidant affects
Cordyceps demonstrates anti-aging potential, likely due to its antioxidant properties:
Studies in aged mice show cordyceps boosted antioxidant levels, and improved sexual function and memory.
Mice given cordyceps lived longer compared to control groups in some studies.
Research presented by Nu Skin Enterprises found cordyceps sinensis opposed age-related changes in gene expression in muscle and brain tissue of mice.
The antioxidant effects may combat oxidative stress and damage that contributes to aging.
Animal studies show cordyceps lowers total cholesterol, LDL cholesterol and triglyceride levels.
Cordyceps may help regulate arrhythmia (irregular heartbeat) based on one clinical study.
The anti-inflammatory and antioxidant effects are also cardioprotective.
Cordyceps Mushroom for Blood Sugar Management
Cordyceps contains unique polysaccharides that may benefit blood sugar control and diabetes management:
Animal and human studies indicate cordyceps improves insulin sensitivity and reduces blood sugar levels.
One study in diabetic mice found cordyceps extract as effective as the drug metformin.
More clinical trials are needed to confirm these antidiabetic effects in humans.
While many of the studies are preclinical, they provide compelling evidence for cordyceps’ potential to enhance physical performance, combat ageing, reduce inflammation, protect the heart, and manage blood sugar. More human clinical trials will help further validate these effects.
The main bioactive compounds in Cordyceps mushrooms
The main bioactive compounds in Cordyceps mushrooms that contribute to their various health benefits include:
1. Cordycepin (3′-deoxyadenosine) – This nucleoside analog is one of the most well-known and studied compounds in Cordyceps, especially C. militaris. It has been associated with antitumor, antioxidant, anti-inflammatory, antiviral, and ergogenic (performance-enhancing) effects.
2. Polysaccharides – Cordyceps contains unique polysaccharides that exhibit immunomodulatory, antioxidant, anti-inflammatory, antitumor, and hypoglycemic activities.
3. Ergosterol – This sterol, abundant in Cordyceps, has been linked to antitumor properties.
4. Adenosine and other nucleosides – In addition to cordycepin, Cordyceps contains adenosine and other nucleosides that may contribute to its energy-boosting and adaptogenic effects.
5. N6-(2-hydroxyethyl)-adenosine (HEA) – Another nucleoside found in Cordyceps that has received research interest for its potential biological activities.
6. Cordymin – A peptide from C. militaris with anti-inflammatory effects.
7. Amino acids and proteins – Cordyceps is a source of amino acids and bioactive proteins that may support its medicinal properties.
8. Vitamins and minerals – The presence of vitamins (E, K, B1, B2) and minerals in Cordyceps may also play a role in its health effects.
9. Other compounds – Additional constituents like cordycepic acid, γ-aminobutyric acid (GABA), and ergothioneine have been identified in Cordyceps and may have biological activities.
The medicinal properties of Cordyceps mushrooms can be attributed to a wide range of bioactive compounds, with cordycepin, polysaccharides, ergosterol, and other nucleosides being some of the most prominent and well-researched. The combination and synergy of these diverse constituents likely contribute to the multifaceted health benefits associated with Cordyceps in traditional and modern medicine.
Dosage of cordyceps supplements
Based on the information provided in the research results, the recommended dosage of cordyceps supplements can vary depending on the specific product and the reason for use. However, there are some general guidelines:
1. Most human studies have used cordyceps dosages ranging from 1,000 to 3,000 milligrams (1-3 grams) per day.
2. For cordyceps mushroom extract supplements, a typical dose is 0.5-1 gram per day.
3. When using whole cordyceps mushroom products, a common dose is 1-3 grams daily.
4. Therapeutic doses may be higher, around 3-6 grams per day, while maintenance doses are often lower at 1-3 grams daily.
5. It’s best to start with the lowest effective dose, such as 1 gram per day, and gradually increase if needed. Follow the dosing instructions on the specific supplement you are using.
6. Consult with a healthcare provider to determine the optimal dose for your individual needs, especially if you have any underlying health conditions or are taking medications.
While dosages can vary, most people take between 1-3 grams of cordyceps supplements per day, with some taking up to 6 grams for therapeutic purposes under medical supervision. It’s important to use high-quality products and start with a low dose, increasing gradually to assess your tolerance and response.
Age restrictions for taking cordyceps supplements
There are no specific age restrictions mentioned for taking cordyceps supplements. However, there are some important considerations and precautions to keep in mind:
Children should avoid taking cordyceps supplements, as there is no evidence of their effect on children. The safety and appropriate dosage for children has not been established.
Pregnant and breastfeeding women should avoid using cordyceps to stay on the safe side, as there is not enough reliable information about the safety of taking cordyceps during pregnancy and while nursing.
Elderly individuals can take cordyceps, and some studies have even focused on the benefits in older populations. One study gave 999 mg of Cs-4 cordyceps extract per day to healthy elderly individuals aged 50-75 with positive results. However, it’s always best to consult with a healthcare provider to determine if cordyceps is appropriate for an older individual, especially if they have any underlying health conditions or are taking medications.
In general, it’s recommended that people with certain autoimmune diseases like lupus, multiple sclerosis, and rheumatoid arthritis avoid cordyceps or use it cautiously, as it may stimulate the immune system and potentially worsen symptoms. People with bleeding disorders or upcoming surgery should also be cautious.
Effects of cordyceps supplements
The time it takes to see the effects of cordyceps supplements can vary, but some key findings include:
1. One study found that healthy young adults who received 4g of Cordyceps militaris daily improved tolerance to high-intensity exercise after one week. The benefits were even greater (increased maximum oxygen consumption and ventilatory threshold) when supplementation continued for an additional two weeks.
2. Research and feedback from OM Mushrooms customers suggest that results may be seen in as little as one week of cordyceps use, with the best benefits seen with regular use of the recommended daily dose.
3. Since most of the beneficial compounds in cordyceps, including cordycepin, are water-soluble, you may notice the effects almost immediately. The water-soluble substances are absorbed within 24-48 hours, while lipid-soluble substances take 2-4 days to fully absorb.
3. In a study on the effects of cordyceps sinensis supplementation during 12 weeks of aerobic training, improvements in aerobic performance were seen at 12 weeks.
4. Another study found that a one-week supplementation period had minimal effects on physical performance, suggesting that greater benefits may require a longer supplementation period.
Some effects may be noticed as early as one week, the most significant benefits of cordyceps supplementation are typically seen with consistent use over a longer period, such as several weeks to a few months. The time to see results can also depend on the specific benefits being sought and individual factors like dosage and overall health status.
Potential risks and precautions to consider when taking cordyceps supplements
There are a few potential risks and precautions to consider when taking cordyceps supplements, especially for elderly individuals:
1. Bleeding risk: Cordyceps may act as a blood thinner and increase the risk of bleeding, especially in those with bleeding disorders or upcoming surgery. It could also enhance the effects of blood thinning medications. Elderly individuals on blood thinners should be cautious and consult their doctor before taking cordyceps
2. Hypoglycemia: Cordyceps may lower blood sugar levels. When combined with diabetes medications or insulin, it could potentially cause blood sugar to become too low (hypoglycemia). Elderly people with diabetes should be careful and monitor their blood glucose closely if taking cordyceps.
3. Interactions with immunosuppressants: Cordyceps may stimulate the immune system. This could interfere with immunosuppressive drugs taken after organ transplants to prevent rejection. Elderly transplant recipients should avoid cordyceps.
4. Gastrointestinal side effects: Some people may experience mild digestive issues like nausea, vomiting, diarrhea or dry mouth when taking cordyceps supplements. Elderly individuals may be more sensitive to these GI side effects.
5. Lack of safety data: There is limited research on the long-term safety of cordyceps use, especially in elderly populations. More studies are needed to fully understand any potential risks with chronic supplementation in older adults.
6. Quality concerns: Cordyceps supplements are not well regulated, so quality and potency can vary significantly between products. Elderly people should use caution and look for reputable brands to avoid contamination risks.
In summary, while cordyceps is generally considered safe, elderly individuals should be aware of potential risks like bleeding, hypoglycemia, drug interactions, and gastrointestinal side effects. It’s always best for older adults to consult their healthcare provider before starting any new supplements to weigh the potential benefits and risks for their individual medical situation.
Cordyceps mushrooms have been making waves in the health and wellness community, and for good reason. These fascinating fungi are packed with potential benefits, from boosting energy levels to supporting immune function. But why settle for store-bought supplements when you can grow your own? Let’s dive into the wonderful world of Cordyceps and learn how to cultivate these powerhouse mushrooms right in your own home.
Key Takeaways:
Cordyceps mushrooms offer numerous health benefits
Home cultivation is possible with the right knowledge and setup
Understanding the lifecycle of Cordyceps is crucial for successful growth
Proper substrate preparation and sterilization are key to avoiding contamination
Patience and attention to detail are essential for a bountiful Cordyceps harvest
Cordyceps mushrooms: Nature’s Little Miracle
Before we get our hands dirty (literally!), let’s take a moment to appreciate what makes Cordyceps so special. These unique mushrooms have a pretty wild origin story that’ll make you see them in a whole new light.
The Cordyceps Lifecycle: From Caterpillar to Super-Shroom
In the wild, Cordyceps have a rather unusual lifecycle. They start as spores that infect certain species of caterpillars, eventually taking over the insect’s body and sprouting a fruiting body from its head. Don’t worry, though – we won’t be using any caterpillars in our home cultivation!
While this might sound like something out of a sci-fi movie, it’s just nature doing its thing. This unique lifecycle has led to Cordyceps being highly prized in traditional medicine for centuries, particularly in Tibet and China.
The Health Benefits That’ll Make You a Cordyceps Convert
Now, you might be wondering why anyone would want to grow these funky fungi at home. Well, buckle up, because the potential health benefits of Cordyceps are pretty impressive:
Energy Boost: Feeling sluggish? Cordyceps might just be your new best friend. Many people report increased energy and stamina after taking Cordyceps supplements.
Immune Support: These mushrooms are known for their immune-boosting properties, helping your body fight off pesky invaders.
Athletic Performance: Some studies suggest that Cordyceps might improve oxygen utilization, potentially enhancing athletic performance.
Antioxidant Powerhouse: Cordyceps are packed with antioxidants, which can help protect your cells from damage caused by free radicals.
Potential Anti-Aging Effects: While more research is needed, some studies indicate that Cordyceps might have anti-ageing properties.
With all these potential benefits, it’s no wonder you’re excited to start growing your own Cordyceps at home!
Getting Started: Set Up Your Cordyceps Cultivation Space
Alright, now that we’re all fired up about Cordyceps, let’s talk about setting up your grow space. Don’t worry – you don’t need a state-of-the-art laboratory to get started. A clean, dedicated area in your home will do just fine.
Here’s what you’ll need to get started on your Cordyceps cultivation journey:
Pressure cooker or autoclave: This is crucial for sterilizing your substrate and equipment.
Glass jars or grow bags: These will house your growing Cordyceps.
Substrate materials: We’ll get into the specifics later, but think brown rice, grains, or specialized Cordyceps substrates.
Cordyceps spawn or liquid culture: This is your “seed” material.
Isopropyl alcohol (70%): For sterilizing your workspace and tools.
Gloves and face mask: Keeping things clean is key!
HEPA air filter: Optional, but helpful for reducing airborne contaminants.
Thermometer and hygrometer: To monitor temperature and humidity.
Grow tent or dedicated growing space: To maintain optimal conditions.
Creating the Perfect Environment for Your Cordyceps to Thrive
Cordyceps mushrooms are a bit particular about their living conditions. Here’s what they like:
Temperature: Aim for 20-25°C (68-77°F) during colonization, and slightly cooler (18-22°C or 64-72°F) during fruiting.
Humidity: Keep it high! 80-90% humidity is ideal.
Light: Indirect light is best. Cordyceps don’t need much, but a little helps with fruiting body formation.
Air exchange: Good ventilation is important, but avoid direct drafts.
Creating this environment might take some trial and error, but don’t get discouraged. Remember, every mushroom grower was a beginner once!
The Cordyceps Cultivation Process: From Spore to Spectacular
Now that we’ve got our space set up, it’s time to dive into the nitty-gritty of Cordyceps cultivation. Buckle up, because this is where the magic happens!
Choose Your Cordyceps Species: Militaris vs. Sinensis
When it comes to home cultivation, Cordyceps militaris is your best bet. It’s easier to grow and more forgiving than its famous cousin, Cordyceps sinensis (which is notoriously difficult to cultivate). Don’t worry, though – C. militaris still packs a powerful health punch!
While there are over 400 species of cordyceps worldwide, C. militaris and C. sinensis are the main ones used in herbalism and supplements. However, C. militaris is much more practical for home cultivation, as it doesn’t require insect hosts and techniques have been developed to grow it in substrate jars or bins.
Prepare Your Substrate: The Foundation of Success
Your substrate is basically the soil for your Cordyceps, providing all the nutrients they need to grow. Here’s a simple recipe to get you started:
2 cups brown rice
2 cups vermiculite
1.5 cups water
Mix these ingredients in your grow container. The substrate should be moist but not waterlogged – think wrung-out sponge consistency.
Sterilization: Keeping the Bad Guys Out
This step is crucial, folks! Sterilize your substrate in a pressure cooker at 15 PSI for 90 minutes. This kills off any competing organisms that might try to crash your Cordyceps party.
Inoculation: Introducing Your Cordyceps to Their New Home
Once your substrate has cooled to room temperature, it’s time for the fun part – inoculation! In a clean environment (ideally a still air box or laminar flow hood), add your Cordyceps spawn or liquid culture to the substrate. Aim for about 10% spawn-to-substrate ratio.
The Waiting Game: Colonization and Fruiting
Now comes the hard part – waiting! Place your inoculated containers in a warm, dark place and let the magic happen. You’ll start to see white mycelium spreading through the substrate. This process usually takes 2-3 weeks.
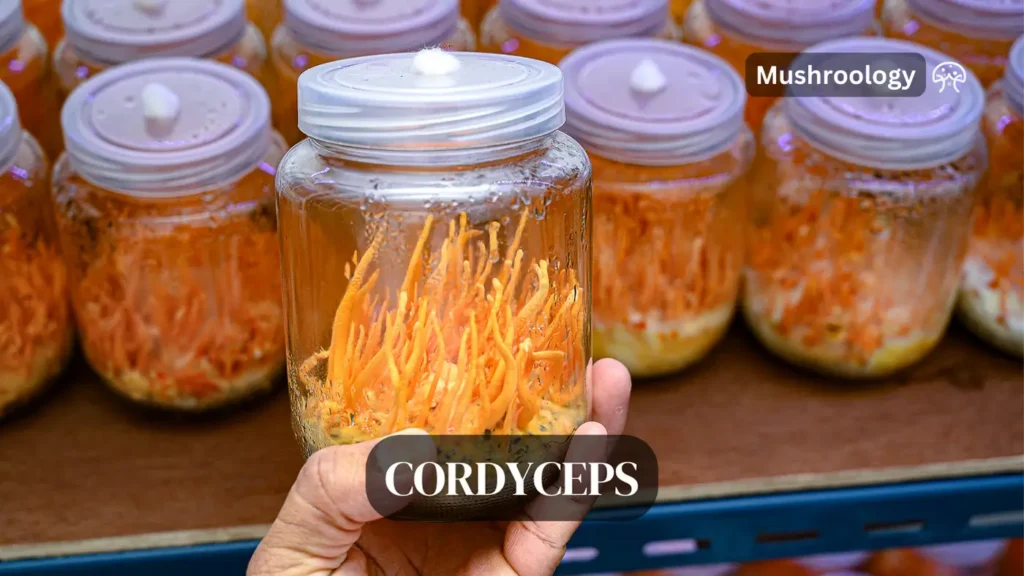
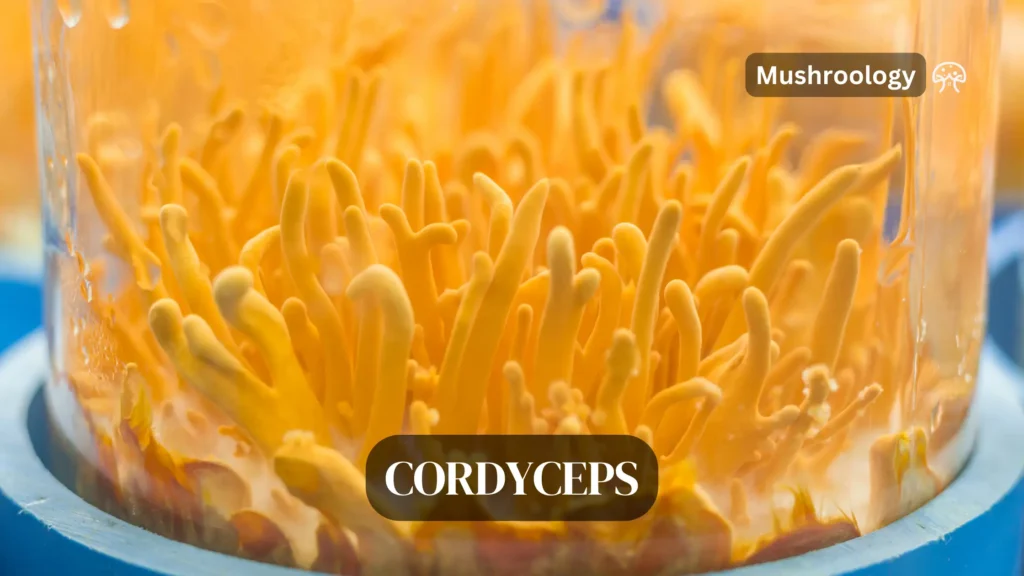
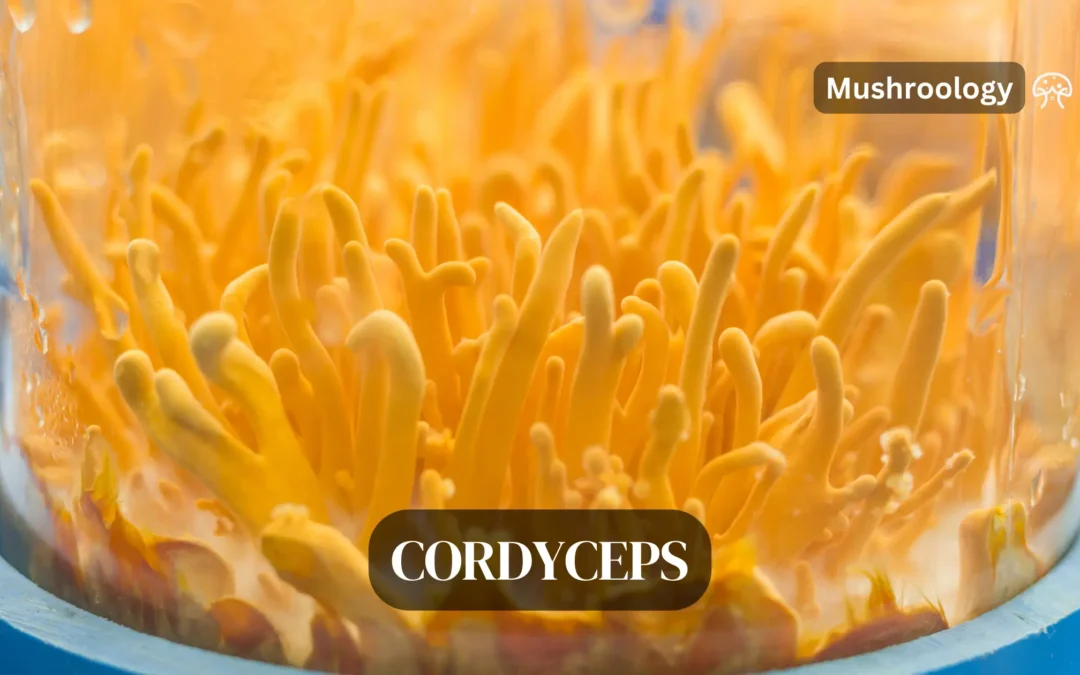
Once fully colonized, it’s time to induce fruiting. Move your containers to a slightly cooler area with indirect light. Keep the humidity high by misting regularly. In 1-2 weeks, you should start to see small, orange-red fruiting bodies emerging. Congratulations – you’re growing Cordyceps!
Harvest and Enjoy Your Homegrown Cordyceps
After all your hard work, it’s finally time to reap the rewards. Here’s how to harvest and use your homegrown Cordyceps:
When and How to Harvest your Cordyceps mushroom
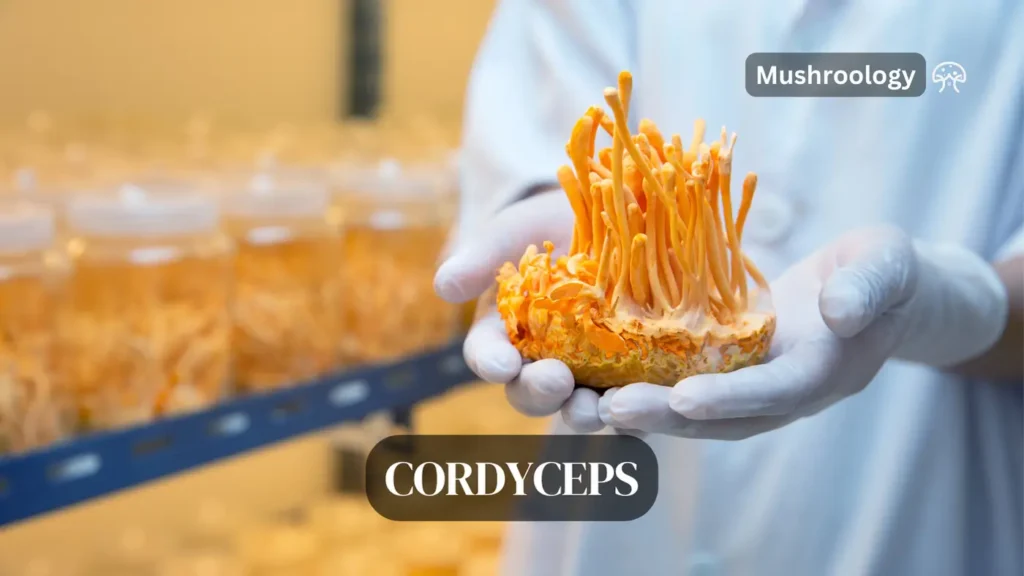
Harvest your Cordyceps when the fruiting bodies are 3-6 cm long, before they start producing spores. Gently twist and pull them from the substrate.
Drying and Storing Your Cordyceps
To preserve your harvest, dry the Cordyceps at a low temperature (around 35°C or 95°F) until they’re cracker-dry. Store in an airtight container in a cool, dark place.
Making the Most of Your Cordyceps
There are many ways to enjoy your homegrown Cordyceps:
Make a tea by steeping dried Cordyceps in hot water
Add powdered Cordyceps to smoothies or coffee
Incorporate them into soups or broths
Try your hand at making your own Cordyceps tincture
Remember, while Cordyceps are generally considered safe, it’s always a good idea to start with small amounts and consult with a healthcare professional, especially if you have any pre-existing conditions.
Troubleshooting: When Things Don’t Go According to Plan
Even experienced growers face challenges sometimes. Here are some common issues and how to address them:
Contamination: The Bane of Every Mushroom Grower
If you see any unusual colors or growth, especially green or black mold, isolate the container immediately. Prevention through strict sterile techniques is key.
Slow Growth: Patience is a Virtue
Be sure your temperature and humidity levels are correct. Consider using a heating mat if your space is too cool.
No Fruiting: Give Your Cordyceps a Nudge
Sometimes, a cold shock (lowering the temperature by 5°C for 24 hours) can trigger fruiting.
Weak Fruiting Bodies: Strengthen Your Cordyceps
This often indicates insufficient light or humidity. Adjust your conditions accordingly.
Remember, every setback is a learning opportunity. Don’t get discouraged – even the most experienced growers face challenges sometimes!
Take Your Cordyceps Cultivation to the Next Level
Once you’ve mastered the basics, why not explore some advanced techniques?
Create Your Own Liquid Culture
Liquid culture can lead to faster and more consistent inoculation. It’s a bit more advanced, but definitely worth exploring once you’re comfortable with the basics.
Experiment with Different Substrates
While brown rice is a great starting point, you might want to try other grains or even specialized Cordyceps substrates. Each can bring out different characteristics in your mushrooms.
Isolate and Propagate Strong Strains
Using agar plates, you can isolate and propagate the strongest mycelium strains, potentially leading to more vigorous and productive grows.
Join the Cordyceps Community
Remember, you’re not alone on this journey. There’s a whole community of Cordyceps enthusiasts out there, ready to share knowledge and experiences. Don’t be afraid to reach out, ask questions, and share your own successes (and failures) with others.
So, what are you waiting for? Grab your pressure cooker, roll up your sleeves, and dive into the wonderful world of Cordyceps cultivation. Your homegrown health boost is just a few spores away!
Remember, every expert was once a beginner. With patience, attention to detail, and a willingness to learn, you’ll be harvesting your own Cordyceps in no time. Happy growing, and may your Cordyceps thrive!
People Also Ask:
What are the health benefits of Cordyceps mushrooms?
Cordyceps mushrooms are associated with numerous potential health benefits, including increased energy and stamina, improved immune function, enhanced athletic performance, antioxidant properties, and potential anti-aging effects. They may also support respiratory health and have anti-inflammatory properties. However, more research is needed to fully understand and confirm these benefits.
How long does it take to grow Cordyceps mushrooms at home?
The entire process of growing Cordyceps mushrooms at home typically takes about 2-3 months from start to finish. This includes about 2-3 weeks for substrate colonization, 1-2 weeks for fruiting body formation, and additional time for harvesting and drying. However, the exact timeline can vary depending on environmental conditions and the specific strain of Cordyceps being cultivated.
What is the best substrate for growing Cordyceps mushrooms?
While Cordyceps can grow on various substrates, a common and effective substrate for home cultivation is a mixture of brown rice and vermiculite. Other options include a combination of grains like millet or sorghum, or specialized Cordyceps substrates available from mycology suppliers. The key is to provide a nutrient-rich environment that can be easily sterilized to prevent contamination.
Can I grow Cordyceps sinensis at home?
Growing Cordyceps sinensis (now classified as Ophiocordyceps sinensis) at home is extremely challenging and not typically successful for home cultivators. This species has a complex lifecycle involving specific caterpillar hosts and high-altitude environmental conditions that are difficult to replicate. Instead, home growers usually cultivate Cordyceps militaris, which is easier to grow and still offers many health benefits.
How do I prevent contamination when growing Cordyceps mushrooms?
Preventing contamination is crucial in Cordyceps cultivation. Key steps include: thoroughly sterilizing all equipment and substrates, working in a clean environment (ideally using a still air box or laminar flow hood), using 70% isopropyl alcohol to sanitize surfaces and tools, wearing gloves and a face mask during inoculation, and maintaining proper temperature and humidity levels throughout the growing process. Regular monitoring for any signs of unusual growth or discoloration is also important.
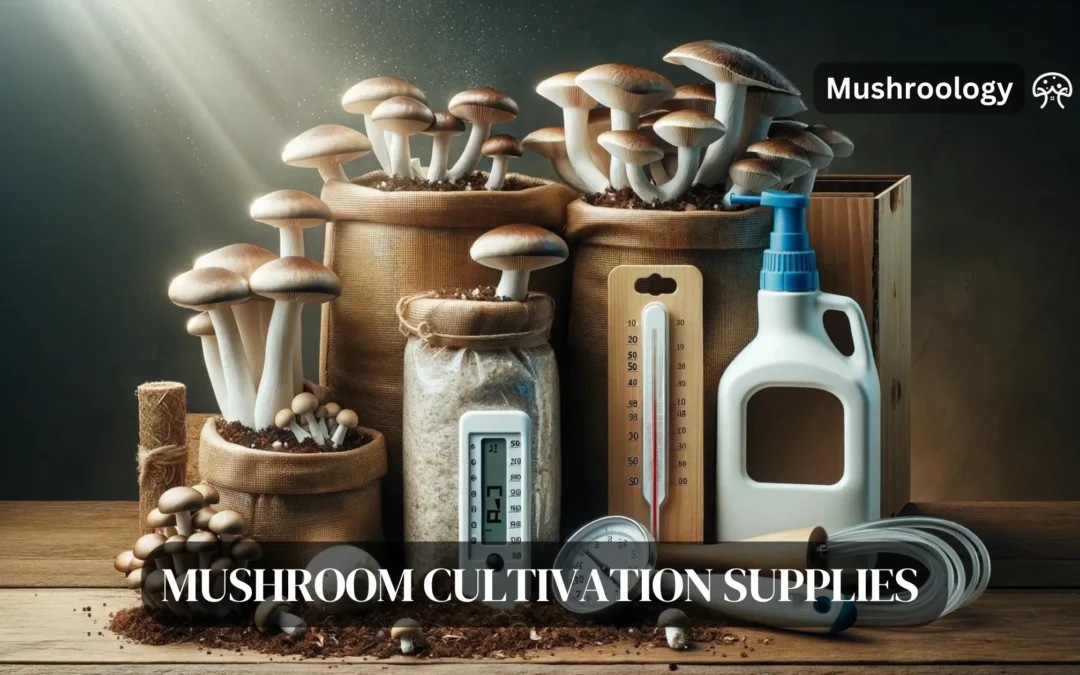
Hey there, mushroom enthusiasts! Are you ready to dive into the fascinating world of fungi cultivation? Whether you’re a curious beginner or a seasoned mycologist, having the right mushroom growing supplies can make all the difference in your fungi-growing journey. So, let’s roll up our sleeves and explore the essential equipment you’ll need to get started on this exciting adventure!
Getting Started: Basic Mushroom Growing Supplies
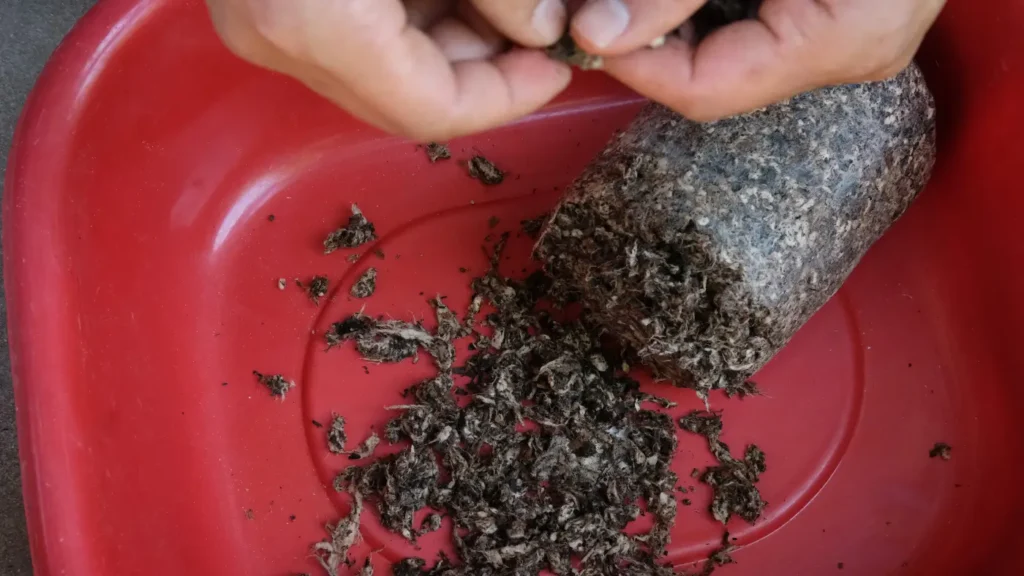
Substrate Materials: The Foundation of Mushroom Growth
1. Hardwood Sawdust
Hardwood sawdust is a fantastic choice for many gourmet mushroom species, particularly those that naturally grow on trees.
Pro Tip: Source your compost from reputable suppliers to ensure it’s free from harmful contaminants.
5. Coco Coir: A Versatile and Sustainable Substrate Option
Coco coir, derived from coconut husks, has gained popularity in the mushroom cultivation community as a versatile and eco-friendly substrate material. It’s a byproduct of the coconut industry, making it a sustainable choice for mushroom growers.
Mushroom Species That Thrive on Coco Coir:
Oyster Mushrooms (Pleurotus spp.)
Button Mushrooms (Agaricus bisporus)
Shiitake (Lentinula edodes) – when mixed with hardwood sawdust
Lion’s Mane (Hericium erinaceus) – as part of a substrate blend
King Oyster (Pleurotus eryngii)
Types of Coco Coir Products:
Coir Bricks: Compressed blocks that expand when soaked in water. Most common form for mushroom growers.
Coir Fiber: Loose, stringy fibers. Often mixed with other substrate materials.
Coir Pith: Fine, soil-like texture. Great for moisture retention but may need to be mixed with coarser materials for proper air exchange
Supplementary Substrate Materials
In addition to the main substrate materials, consider these supplementary options to enhance your mushroom growing:
Wood Chips: Great for outdoor cultivation of species like Wine Cap
Vermiculite: Helps retain moisture and improve substrate structure
Gypsum: Adds calcium and sulfur, improving substrate structure and pH balance
Custom Substrate Blends
Spawn and Spores: the seeds of your mushroom farm
Spawn holds vital importance. It’s not just “seeds”; it’s the living mycelium, the vegetative network of the mushroom, ready to colonize your substrate and eventually sprout those delicious fruiting bodies.
Types of Spawn:
Grain Spawn: The most common, using sterilized grains like rye or oats colonised with mycelium. Great for beginners and various mushrooms.
Dowel Plugs: Small wooden dowels pre-colonized with mycelium, ideal for inoculating logs or stumps. Suitable for oyster mushrooms and shiitake.
Liquid Culture: A suspension of actively growing mycelium in liquid nutrient broth. Often used for advanced techniques or large-scale production.
Choosing the Right Spawn:
Mushroom Type: Each mushroom variety has preferred spawn types. Oyster mushrooms thrive on dowel plugs, while button mushrooms might favor grain spawn.
Source: Opt for reputable suppliers with good reviews and proper sterilization techniques. Look for healthy, vigorous mycelium growth.
Quantity: Determine your growing area and desired yield to estimate the amount of spawn needed. Most suppliers offer different sizes.
Species Variety: Do you want specific strains with unique characteristics? Look for suppliers offering labeled, cultivated varieties.
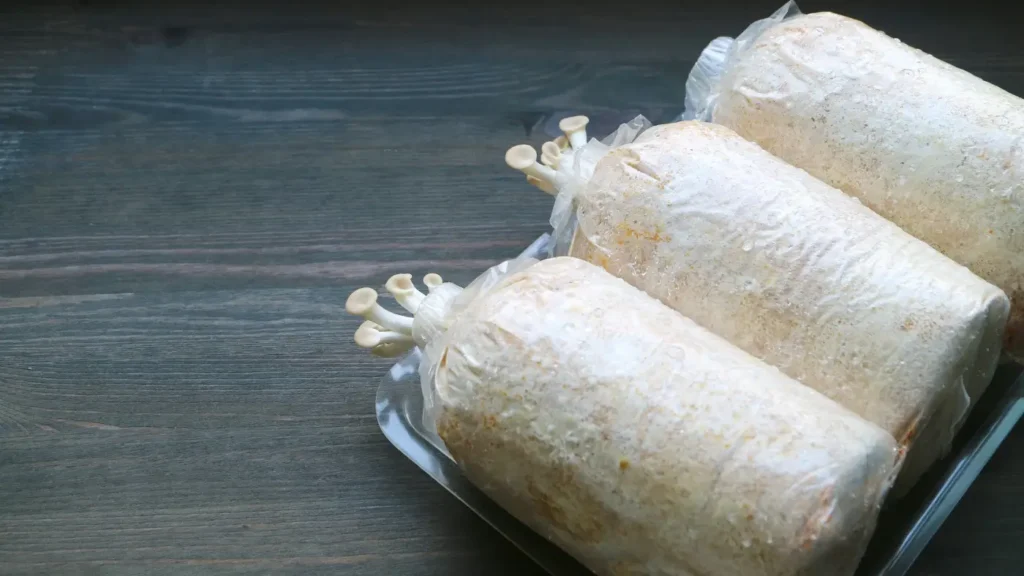
Containers
Now, let’s talk about where your mushrooms will live and grow. Here are some container options to consider:
Grow bags: These are specially designed plastic bags with filter patches for air exchange.
Plastic tubs: Great for larger-scale indoor cultivation.
Mason jars: Perfect for small-scale experiments or growing certain species like lion’s mane.
Logs: For outdoor cultivation of species like shiitake.
Grow bags offer a convenient and accessible way to cultivate mushrooms, especially for beginners. These pre-sterilized bags filled with substrate provide a controlled environment for your mycelium to colonize and fruit, eliminating the need for extensive setup and sterilization.
Types of Grow Bags:
All-in-one kits: Contain pre-mixed, sterilized substrate and inoculated spawn, perfect for beginners. Often include instructions and basic equipment.
Spawn bags: Empty bags filled with sterilized substrate, requiring you to add your chosen spawn. Offer more flexibility in spawn selection.
Fruiting bags: Designed specifically for the fruiting stage, providing ideal light and humidity conditions. May require additional ventilation or temperature control.
Temperature and Humidity Control
Mushrooms can be a bit picky about their environment, so controlling temperature and humidity is crucial. Here’s what you’ll need:
Thermometer and hygrometer: To monitor temperature and humidity levels.
Heating mats: For maintaining optimal temperatures during colder months.
Humidifiers: To keep the air moist enough for your fungi friends.
Fans: For proper air circulation and preventing contamination.
Creating the perfect environment is like giving your mushrooms a cozy, five-star hotel to grow in!
Lighting: Let There Be (Some) Light
While mushrooms don’t need as much light as plants, they still benefit from some illumination. Consider these lighting options:
LED grow lights: Energy-efficient and perfect for indoor cultivation.
Fluorescent lights: Another good option for providing indirect light.
Natural light: If you have a well-lit room, this might be all you need!
Remember, mushrooms don’t need intense light like plants do, but a little bit helps them know which direction to grow!
Sterilization and Sanitation: Keeping It Clean
One of the most critical aspects of successful mushroom cultivation is maintaining a clean environment. Here are some must-have mushroom growing supplies for sterilization:
Pressure cooker: Essential for sterilizing substrate and equipment.
Isopropyl alcohol: For sanitizing surfaces and tools.
Hydrogen peroxide: Another great sanitizing agent.
Gloves and face masks: To prevent contamination during handling.
Still air box or laminar flow hood: For creating a clean workspace during inoculation.
Water Sprayer
Humidity plays a vital role in mushroom cultivation, influencing everything from proper colonization to healthy fruiting bodies.
Types of Water Sprayers:
Trigger sprayers: Handheld sprayers with a trigger mechanism, offer precise control over misting intensity and direction. Great for targeted misting of fruiting bodies.
Pump sprayers: Larger, pressurized sprayers with pump handles, ideal for covering larger areas efficiently. Can be tiring for extended use.
Ultrasonic humidifiers: Electrically powered devices create a fine mist, ideal for maintaining consistent humidity levels in larger grow spaces. May require refilling frequently.
Automated misting systems: Programmable systems with nozzles and timers for hands-off humidity control. Expensive but offers the most convenience.
Advanced Mushroom Growing Supplies for Scaling Up
As you scale up your mushroom growing operation, automation becomes crucial for maintaining consistency and reducing labor. Let’s dive deep into the world of automated systems and how they can revolutionize your mushroom cultivation process:
Automated Systems
1. Environmental Controllers: The Brain of Your Mushroom Growing Operation
Environmental controllers are the central nervous system of an advanced mushroom growing setup. These sophisticated devices integrate various sensors and controls to maintain optimal growing conditions automatically.
Key Features:
Multi-parameter control: Manage temperature, humidity, CO2 levels, and lighting from a single interface.
Customizable schedules: Set different environmental parameters for various stages of mushroom growth.
Data logging: Keep detailed records of environmental conditions for analysis and optimization.
Remote monitoring and control: Access your system via smartphone apps or web interfaces.
Alerts and notifications: Receive instant alerts if conditions deviate from your set parameters.
Top Models to Consider:
Growlink Controller: Offers comprehensive control and integrates with various sensors and equipment.
Trolmaster Hydro-X: A modular system that can be expanded as your operation grows.
Autopilot Digital Environmental Controller: A user-friendly option with a wide range of features.
Pro Tip: Look for controllers with battery backup and fail-safe mechanisms to protect your crop during power outages.
2. Foggers: Creating the Perfect Misty Environment
Foggers are essential for maintaining high humidity levels, especially in larger grow rooms. They create a fine mist that evaporates quickly, increasing humidity without causing excessive wetness.
Types of Foggers:
Ultrasonic foggers: Use high-frequency vibrations to create a fine mist. They’re energy-efficient and quiet.
High-pressure foggers: Create mist by forcing water through tiny nozzles. They’re great for larger spaces.
Centrifugal humidifiers: Use a spinning disc to create fine water droplets. They’re durable and low-maintenance.
Key Considerations:
Droplet size: Smaller droplets (1-5 microns) are ideal for mushroom cultivation.
Coverage area: Ensure your fogger can adequately cover your growing space.
Water quality: Use distilled or reverse osmosis water to prevent mineral buildup.
Automation compatibility: Choose models that can be easily integrated with your environmental controller.
Recommended Models:
Tri-Jet Fogger: A popular choice for mushroom growers, offering adjustable output.
Hydrofogger: Known for its reliability and fine mist production.
MistKing Starter Misting System: A versatile option that can be expanded as needed.
3. CO2 Meters and Controllers: Optimizing the Atmospheric Mix
CO2 levels play a crucial role in mushroom growth and development. Automated CO2 monitoring and control can significantly boost your yields.
Components of a CO2 Control System:
CO2 sensor: Accurately measures CO2 levels in parts per million (ppm).
CO2 controller: Interprets sensor data and manages CO2 injection.
CO2 source: Usually a compressed CO2 tank or CO2 generator.
Solenoid valve: Controls the flow of CO2 into your growing area.
Key Features to Look For:
Accuracy: Look for sensors with ±50 ppm accuracy or better.
Calibration: Self-calibrating models or easy manual calibration options.
Integration: Ability to connect with your main environmental controller.
Safety features: Automatic shutoff if CO2 levels get too high.
Top CO2 Control Systems:
Titan Controls Atlas 3: A comprehensive CO2 monitor and controller.
CO2Meter DAC-8: Offers high accuracy and data logging capabilities.
AutoPilot APCE CO2 Controller: User-friendly with a clear digital display.
Optimal CO2 Levels:
Most mushrooms prefer CO2 levels between 800-1500 ppm.
Some species, like shiitake, can benefit from even higher levels during certain growth stages.
Harvesting and Processing Equipment
Once your mushrooms are ready for harvest, having the right equipment can make all the difference in efficiency, quality, and preservation. Let’s explore the essential harvesting and processing equipment you’ll need to take your mushroom growing operation to the next level:
Mushroom Knives
Mushroom knives are specialized tools designed for clean, efficient harvesting that minimizes damage to both the harvested mushrooms and the remaining mycelium.
Key Features to Look For:
Curved blade: Allows for precise cuts close to the substrate.
Stainless steel construction: Resists rust and is easy to clean.
Ergonomic handle: Reduces hand fatigue during long harvesting sessions.
Folding option: For easy storage and portability.
Types of Mushroom Knives:
Hori-Hori knife: A versatile Japanese tool great for outdoor mushroom harvesting.
Mushroom foraging knife: Often includes a brush on one end for cleaning.
Electric trimmer: For large-scale operations, these can speed up the harvesting process.
Top Recommendations:
Opinel No. 8 Mushroom Knife: A classic choice with a curved blade and brush.
Victorinox Swiss Army Mushroom Knife: Combines a knife, saw, and brush in one tool.
Gyokucho Razorsaw Hori-Hori Digging Tool: Excellent for harvesting outdoor-grown mushrooms.
Pro Tip: Keep your mushroom knives sharp and clean. A dull or dirty knife can damage mushrooms and spread contaminants.
Dehydrators: Preserving Your Mushroom Harvest
Dehydrators are essential for preserving excess mushrooms, creating value-added products, or preparing mushrooms for long-term storage.
Key Features to Consider:
Temperature control: Precise control allows for optimal drying of different mushroom species.
Fan speed settings: Adjustable airflow helps maintain quality during drying.
Capacity: Choose based on your expected harvest volume.
Tray material: Stainless steel or BPA-free plastic trays are ideal.
Types of Dehydrators:
Stackable tray dehydrators: Versatile and expandable.
Box and shelf dehydrators: Often have larger capacity and more even drying.
Commercial-grade dehydrators: For large-scale operations.
Top Picks:
Excalibur 3926TB: A reliable 9-tray dehydrator with temperature control.
COSORI Premium Food Dehydrator: Features a glass door for easy monitoring.
STX International Commercial Grade Digital Food Dehydrator: Ideal for larger operations.
If you’re planning to sell your mushrooms, proper packaging is crucial for maintaining freshness, attracting customers, and complying with regulations.
Essential Packaging Supplies:
Breathable bags: Allow for air circulation to keep mushrooms fresh.
Clamshell containers: Great for retail display of whole mushrooms.
Cardboard boxes: For bulk packaging or shipping.
Labels: For branding and providing required information.
Vacuum sealers: For packaging dried mushrooms or value-added products.
Laboratory Equipment: The Science Behind Successful Mushroom Cultivation
As you delve deeper into the world of mushroom cultivation, having the right laboratory equipment becomes crucial for advanced techniques, quality control, and developing your own strains. Let’s explore the essential lab equipment that can take your mushroom growing to a professional level:
Microscopes: Your Window into the Fungal World
Microscopes are indispensable tools for examining spores, identifying contaminants, and studying mycelial growth patterns.
Types of Microscopes:
Compound microscopes: For high-magnification viewing of spores and cellular structures.
Stereo microscopes: For lower magnification examination of mycelial growth and fruiting bodies.
Digital microscopes: Offer the ability to capture and share images easily.
Key Features to Consider:
Magnification range: Look for 40x to 1000x for compound microscopes, 10x to 80x for stereo microscopes.
Illumination: LED lighting is energy-efficient and provides clear illumination.
Camera attachment: Useful for documenting observations and sharing with others.
Top Recommendations:
AmScope B120C-E1: An excellent compound microscope for beginners and intermediate users.
OMAX 20X-40X Binocular Stereo Microscope: Great for examining larger specimens.
Celestron 5MP Digital Microscope Pro: Combines ease of use with digital capabilities.
Microscopy Tips:
Learn proper slide preparation techniques for clear viewing.
Regularly clean and maintain your microscope for optimal performance.
Consider joining online mycology forums to share and discuss your observations.
Agar Plates: The Foundation of Mushroom Culture Work
Agar plates are essential for isolating and propagating clean mushroom cultures, as well as for testing for contaminants.
Types of Agar Media:
Malt Extract Agar (MEA): A common all-purpose medium.
Potato Dextrose Agar (PDA): Excellent for promoting mycelial growth.
Sabouraud Dextrose Agar (SDA): Used for cultivating fungi and yeasts.
Essential Supplies for Agar Work:
Petri dishes: Pre-sterilized plastic dishes are convenient and cost-effective.
Parafilm: For sealing plates to prevent contamination.
Inoculation loops and needles: For transferring cultures.
Alcohol lamp or bunsen burner: For sterilizing tools.
Preparing Agar Plates:
Pressure cooker: For sterilizing agar media.
Magnetic stirrer: Helps in evenly mixing agar media.
pH meter: For adjusting the acidity of your agar media.
Pro Tip: Learn to make your own agar media to save costs and customize nutrient content for different mushroom species.
Flow Hood: Your Sterile Workspace
A flow hood (or laminar flow hood) creates a sterile work environment essential for advanced cultivation techniques like agar work and grain spawning.
Key Components of a Flow Hood:
HEPA filter: Removes 99.97% of particles 0.3 microns or larger.
Pre-filter: Catches larger particles to extend the life of the HEPA filter.
Blower: Pushes air through the filters to create laminar flow.
Work surface: Usually stainless steel for easy cleaning and durability.
Choosing a Flow Hood:
Size: Consider the space you have available and the size of projects you’ll be working on.
Air speed: Aim for a face velocity of 90-110 feet per minute for optimal performance.
Noise level: Look for quieter models if you’ll be working for extended periods.
Options:
Commercial flow hoods: Ready-to-use but can be expensive.
DIY flow hoods: Can be more cost-effective but require careful construction.
Top Commercial Models:
Cleatech Horizontal Laminar Flow Hood: Available in various sizes.
Terra Universal Pureflo Horizontal HEPA Filtered Laminar Flow Hood: Known for durability and performance.
Flow Hood Usage Tips:
Always clean the work surface with 70% isopropyl alcohol before use.
Learn proper technique to maintain sterility while working.
Regularly test your flow hood’s effectiveness using settle plates.
Additional Laboratory Equipment
As you advance in your mushroom cultivation journey, consider these additional lab supplies:
Autoclave: For sterilizing equipment and substrate materials.
Incubator: For maintaining optimal temperature for mycelial growth.
PCR machine: For advanced genetic work and strain identification.
Centrifuge: Useful for spore printing and liquid culture work.
Spectrophotometer: For measuring mycelial density in liquid cultures.
Safety Equipment
Don’t forget these essential items for maintaining a safe laboratory environment:
Lab coat: To protect your clothing and skin.
Safety goggles: To protect your eyes during lab work.
Nitrile gloves: For handling cultures and chemicals safely.
Fire extinguisher: Safety first!
Eyewash station: In case of accidental splashes.
Record-Keeping and Organization
Implement these systems to ensure accurate documentation of your lab work:
Lab notebook: For recording all experiments, observations, and results.
Label maker: For clearly marking all your cultures and experiments.
Digital camera: For documenting visual observations.
Inventory management system: To keep track of cultures, supplies, and equipment.
Pro Tips for Setting Up Your Mushroom Laboratory:
Start small: Begin with essential equipment and expand as you gain experience.
Prioritize cleanliness: A clean lab is crucial for successful mushroom cultivation.
Learn proper technique: Attend workshops or courses to learn advanced lab techniques.
Network with other growers: Join mycology societies or online forums to share knowledge.
Stay current: Keep up with the latest research and techniques in mushroom cultivation.
By investing in quality laboratory equipment, you’re opening up a world of possibilities in mushroom cultivation. From developing your own strains to ensuring the highest quality in your grows, a well-equipped lab is the cornerstone of advanced mushroom cultivation. Remember, while the equipment is important, it’s your skills and knowledge that will truly make the difference. Happy experimenting!
Can Anyone Cultivate Mushrooms at Home?
Yes, absolutely! Growing mushrooms at home is becoming increasingly popular and accessible, even for beginners. While experience definitely helps, even those with no prior gardening knowledge can get started with a little research and the right tools. Here’s why:
Accessibility:
Grow kits: Pre-made kits containing substrate, spawn, and instructions eliminate much of the setup and complexity, making it a breeze to start small.
Beginner-friendly varieties: Certain mushrooms, like oyster mushrooms and lion’s mane, are known for their ease of cultivation and tolerance for less-than-perfect conditions.
Minimal space requirements: You can start with small-scale setups like grow bags or jars, even in apartments or on balconies.
Factors to consider:
Research your chosen mushroom: Different types have specific needs regarding temperature, humidity, and substrate.
Start small and learn as you go: Begin with one or two kits or bags to gain experience before scaling up.
Be patient: Success doesn’t happen overnight. Mushroom cultivation takes time, observation, and adjustments.
Additional resources:
Online communities: Forums and groups dedicated to mushroom growing offer guidance, support, and troubleshooting tips.
Books and blogs: Many resources provide detailed information and beginner-friendly tutorials.
Local mycological societies: Connect with enthusiasts in your area for hands-on learning and community support.
Remember, the key is to start small, choose beginner-friendly varieties, and embrace the learning process. With a little effort and the right information, you can enjoy the satisfaction and delicious rewards of growing your own mushrooms at home!
Does Growing Different Types of Mushrooms Require Different Supplies?
Yes, growing different types of mushrooms can require different supplies for a few key reasons:
1. Substrate Preferences: Different mushrooms thrive on different substrates. Oyster mushrooms might prefer straw, while shiitake mushrooms might need hardwood logs or sawdust. You’ll need to choose the appropriate substrate based on the specific mushroom you’re growing.
2. Temperature and Humidity Needs: Each mushroom species has its ideal temperature and humidity range for optimal growth and fruiting. You might need to adjust your setup, like using a heating mat or humidifier, depending on the chosen mushroom.
3. Light Requirements: While most mushrooms don’t need direct sunlight, some species might benefit from specific lighting conditions. For instance, some gourmet varieties might require fluorescent bulbs for proper fruiting.
4. Spawn Type: While some mushrooms can be grown from grain spawn, others might need specialized spawn like dowel plugs for logs or liquid cultures for specific strains.
5. Advanced Techniques: Certain mushrooms might require additional equipment or techniques beyond basic supplies. For example, some gourmet varieties benefit from fruiting chambers with controlled airflow or sterile environments.
However, some supplies are universal:
Water sprayer: Maintaining humidity is crucial for most mushrooms, regardless of the species.
Thermometer: Monitoring temperature is essential for optimal growth and avoiding contamination.
Basic hygiene practices: Sterilization and cleanliness are important to prevent contamination, applicable to all mushroom varieties.
Here’s a quick tip: When researching a particular mushroom you want to grow, start by reading about its specific needs regarding substrate, temperature, humidity, light, and spawn type. This will help you determine the exact supplies you’ll need for successful cultivation.
Remember, even with some variations in supplies, mushroom growing can be an enjoyable and rewarding experience regardless of your chosen species. Start small, research thoroughly, and embrace the learning process!
The mushroom substrate provides a medium for the mushrooms to grow on and affects their growth rate, yield, and quality. Here, we’ll explore several types of substrates used for different mushroom species and their pros and cons.
1. Straw
Straw is a popular substrate for cultivating mushrooms, especially oyster mushrooms (Pleurotus spp.) and Paddy straw mushrooms (Volvariella volvacea), due to its accessibility, affordability, and ease of use. Here’s a more detailed exploration of straw as a substrate, including its preparation, advantages, and challenges.
Composition and Preparation
Instagram @symbiopgardenshop
Straw is the dried stalks of cereal plants after the grain and chaff have been removed. Wheat, rice, barley, and rye straw are commonly used for mushroom cultivation. The choice of straw type can influence mushroom growth, as different straws have varying nutrient contents and physical structures.
The preparation of straw for mushroom cultivation involves several steps:
1. Chopping: Straw is typically chopped into shorter lengths (2-5 inches) to increase surface area for mycelium colonization and to make handling easier.
2. Cleaning: The straw must be cleaned to remove any dirt, seeds, or contaminants that may interfere with mushroom growth.
3. Pasteurization: This is crucial for killing off unwanted bacteria, fungi, and pests that could compete with or harm the mushroom mycelium. Pasteurization can be done through hot water immersion (60-80°C for 1-2 hours) or through chemical methods (using lime or hydrogen peroxide).
4. Draining and Cooling: After pasteurization, the straw must be drained and cooled to a suitable temperature for inoculation with mushroom spawn.
Advantages of using straw as a substrate for mushroom
Accessibility: Straw is widely available in many regions, especially in agricultural areas, often as a by-product of cereal grain production.
Cost-Effectiveness: It is relatively inexpensive compared to other substrates, making it a cost-effective option for small-scale and commercial growers.
Ease of Preparation: While pasteurization requires some effort, the overall process of preparing straw is straightforward.
Rapid Colonization: Straw’s physical structure allows for fast mycelial growth and colonization, leading to quicker production cycles.
Challenges and Considerations of using straw as a substrate for mushroom:
Nutritional Content: Straw is primarily composed of cellulose and lignin, with limited nutrients. This can result in lower yields unless the straw is supplemented with additional nutrients, such as nitrogen sources.
Contamination Risk: If not properly pasteurized, straw can be prone to contamination by competing molds and bacteria.
Decomposition: As an organic material, straw will decompose over time, which can affect the duration of the production cycle and may require more frequent substrate changes compared to other materials.
Environmental Impact: Depending on the source, the use of straw could have environmental implications, including the sustainability of its production and transportation.
Tips for Success
Experiment with different types of straw to find the one that works best for the specific mushroom species being cultivated.
Consider supplementing straw with additional nutrients to enhance yields; common supplements include bran, gypsum, or commercial mushroom supplements.
Maintain optimal moisture content (around 65-75%) throughout the growing cycle, as straw can dry out or become overly wet, both of which can negatively impact mushroom growth.
In summary, straw is a versatile and widely used substrate in mushroom cultivation, offering many benefits but also presenting some challenges. Proper preparation and management of straw can lead to successful and productive mushroom crops.
2. Wood Logs or Sawdust
Wood logs and sawdust are foundational substrates in mushroom cultivation, particularly favored for species that naturally grow on wood, such as Shiitake (Lentinula edodes), Maitake (Grifola frondosa), Reishi (Ganoderma lucidum), and various types of Oyster mushrooms (Pleurotus spp.). This preference stems from these substrates’ ability to mimic the natural growing conditions of these fungi.
Types and Selection
1. Wood Logs: Hardwood logs are commonly used for species like Shiitake and Maitake. The type of wood is crucial; oak, beech, maple, and alder are among the preferred choices due to their density and nutrient content. The logs should be fresh (cut within the past few weeks) and free from mold and decay.
2. Sawdust: Fine wood particles are often used either alone or combined with other materials (like bran or gypsum) to enhance nutritional content. Sawdust from hardwoods is preferred, and it’s often compressed into pellets or blocks for easier handling and inoculation.
Preparation
Wood Logs: Preparation involves selecting the right diameter (usually 4-8 inches) and length (typically 3-4 feet) for the logs. The logs are then sterilized naturally by letting them rest for a few weeks before inoculation to reduce native microbial competition.
Sawdust: Sawdust substrates often need to be sterilized or pasteurized to eliminate competing microorganisms. This is typically done through steam sterilization. Supplements like wheat bran can be mixed in before sterilization to increase the nutrient profile. The moisture content must be carefully controlled to ensure optimal growth conditions.
Advantages
Natural Environment: Both substrates closely replicate the mushrooms’ natural growing conditions, promoting healthier and potentially more nutritious fungi.
Long-term Use: Wood logs can produce mushrooms for several years after being inoculated, offering a prolonged yield compared to other substrates.
Versatility: Sawdust can be easily mixed with supplements and used in various container types, providing flexibility in cultivation methods.
Challenges
Preparation and Maintenance: The preparation of logs and sawdust, especially the sterilization process, can be labor-intensive and require specific equipment.
Slow Colonization: Wood logs have a longer colonization period, often several months to a year, delaying the initial harvest.
Space Requirements: Logs, in particular, require significant space for storage during colonization and fruiting, which might be a limitation for small-scale growers.
Moisture Management: Maintaining the right moisture level in sawdust substrates is crucial and can be challenging; too dry or too wet conditions can adversely affect mycelium growth.
Tips for Success
Species Selection: Match the wood type with the mushroom species for optimal growth. Some species have specific preferences that can significantly impact yield and health.
Monitoring: Regularly monitor the moisture content and signs of contamination throughout the cultivation process. Adjust environmental conditions as needed to support healthy mycelium development.
Inoculation Technique: For logs, consider using plug spawn for easier handling and more uniform colonization. For sawdust, grain spawn often provides rapid and even colonization.
Wood logs and sawdust offer a sustainable and effective way to cultivate a variety of mushrooms, mirroring their natural habitats and supporting robust growth. Despite the challenges, with proper preparation and maintenance, these substrates can yield substantial and repeated harvests, making them a popular choice among both amateur and commercial mushroom growers.
3. Compost
Compost is an excellent substrate for cultivating certain types of mushrooms, most notably button mushrooms (Agaricus bisporus), including its variants such as Portobello and Cremini mushrooms. Compost is highly nutritious, providing a rich environment that supports vigorous mushroom growth.
Composition and Preparation
Compost for mushroom cultivation is typically made from a mixture of agricultural wastes, such as straw, hay, poultry manure, horse manure, and sometimes gypsum. The composition may vary based on availability, cost, and specific mushroom requirements. The preparation process involves several stages:
Initial Mixing and Wetting: Ingredients are mixed and moistened to initiate microbial activity, which starts the composting process.
Thermophilic Composting: The compost pile heats up due to microbial activity, reaching temperatures high enough (55-70°C) to kill weed seeds and harmful pathogens. This phase lasts for several weeks and may require turning the pile to ensure even composting.
Conditioning: After the active composting phase, the material is conditioned to lower ammonia levels and achieve the right balance of nutrients. This can involve additional turning and sometimes the addition of water or other materials to adjust the compost’s properties.
Pasteurization: The final step before the compost is used for mushroom cultivation involves pasteurizing it to kill any remaining pests, pathogens, and weed seeds. This can be done through thermal treatment (heating at 58-60°C for several hours).
Advantages of Using Compost
Nutrient-Rich: Compost provides a dense nutrient environment, which supports robust mushroom growth and potentially higher yields.
Utilization of Waste Products: The use of agricultural by-products in composting contributes to a more sustainable and environmentally friendly mushroom cultivation process.
Adaptability: Compost can be tailored to meet the specific nutritional needs of different mushroom species, though it’s most commonly associated with Agaricus spp.
Challenges
Complex Preparation: The composting process is labor-intensive and requires careful management to achieve the desired outcome. Incorrect compost preparation can lead to poor mushroom growth or failure.
Disease and Pest Management: While pasteurization helps, compost can still be susceptible to pests and diseases, requiring vigilant monitoring and management.
Environmental Control: Maintaining the correct environmental conditions (temperature, humidity, and CO2 levels) is crucial during the mushroom growing phase. Compost’s rich nutrient content can sometimes lead to excessive heat production, which must be managed.
Tips for Success
Quality Control: Regularly monitor the composting process, including temperature and moisture levels, to ensure the development of high-quality compost.
Environmental Management: Implement precise control over the growing environment to maximize mushroom yield and quality.
Hygiene Practices: Maintain high standards of cleanliness and hygiene throughout the cultivation process to minimize the risk of contamination and disease.
Compost provides a dynamic and nutrient-rich medium for mushroom cultivation, particularly suited to species that thrive in rich, organic environments. Despite the challenges associated with its preparation and management, the benefits of using compost, including the potential for higher yields and sustainable use of agricultural by-products, make it a valuable substrate for mushroom growers.
4. Manure
Manure, particularly horse and chicken manure, is a traditional and widely used substrate in mushroom cultivation, especially for growing button mushrooms (Agaricus bisporus) and some speciality mushrooms.
Manure provides a rich nutrient base that supports the vigorous growth of mushrooms, but it requires careful handling and preparation to be effective and safe.
Characteristics and Selection
Horse Manure: Horse manure is often preferred for mushroom cultivation due to its fibrous nature and good water-holding capacity. It is usually mixed with straw and other organic materials to create a balanced substrate. The fibrous content helps in maintaining the structure and aeration of the substrate, which is crucial for mycelial growth.
Chicken Manure: Chicken manure is richer in nitrogen compared to horse manure, making it a potent addition to mushroom substrates. However, due to its high nutrient content, it is usually used in smaller proportions to avoid “burning” the mycelium or creating excessively rich conditions that could favor the growth of competitors or pathogens.
Preparation
The preparation of manure for mushroom cultivation involves several steps to ensure that it is safe and conducive for mushroom growth:
1. Composting: Raw manure is composted to initiate microbial breakdown of organic matter, reduce harmful pathogens, and stabilize nutrient levels. This process typically involves piling the manure, possibly mixing it with straw or other carbon sources, and allowing it to compost over a period of weeks. The pile may need to be turned periodically to ensure even composting.
2. Pasteurization: After composting, the manure-based substrate is pasteurized to kill off any remaining harmful microorganisms and pests. Pasteurization involves heating the substrate to a specific temperature (usually around 60-70°C) for several hours.
3. Conditioning: Following pasteurization, the substrate is allowed to cool and may undergo further conditioning to adjust moisture content and ensure it is in the optimal state for inoculation with mushroom spawn.
Advantages
Rich Nutrient Content: Manure provides a high level of nutrients, which can support dense mushroom growth and potentially high yields.
Waste Recycling: Utilizing manure as a substrate contributes to recycling agricultural waste products, turning them into valuable food products.
Challenges
Pathogen Risk: Manure can harbor pathogens and pests; thus, thorough composting and pasteurization are critical to render it safe for mushroom cultivation.
Odor and Handling: The preparation and handling of manure can be unpleasant due to the odor and potential health risks associated with raw manure. Proper equipment and facilities are necessary to manage these issues.
Balancing Nutrient Levels: The high nutrient content, especially in chicken manure, must be carefully balanced to avoid harming the mushroom mycelium.
Tips for Success
Proper Preparation: Invest time in properly composting and pasteurizing the manure to reduce risks and improve substrate quality.
Environmental Control: Maintain optimal growing conditions (temperature, humidity, CO2 levels) to maximize the benefits of the nutrient-rich substrate.
Mixing Substrates: Consider mixing manure with other substrates like straw or coco coir to balance nutrient levels and improve the physical structure of the substrate.
Manure, as a substrate, offers significant advantages for mushroom cultivation, especially when it comes to nutrient availability. However, its effective use requires careful management of the preparation process and ongoing conditions to mitigate risks and optimize mushroom growth. With the right approach, manure can be a key component of a successful mushroom cultivation operation.
5. Coffee Grounds
Coffee grounds have gained popularity as a substrate for mushroom cultivation, especially for oyster mushrooms (Pleurotus spp.), due to their nutrient content, availability, and sustainability.
Used coffee grounds are a waste product of coffee consumption that can be repurposed into a valuable resource for growing mushrooms. This detailed examination covers the aspects of using coffee grounds as a substrate, including its characteristics, preparation, advantages, and challenges.
Characteristics
Nutrient Composition: Coffee grounds are rich in nitrogen, making them an excellent food source for mushrooms. They also contain other essential nutrients and minerals that can support mushroom growth.
Physical Properties: They have a fine, granular texture that can compact easily. This requires careful management to ensure proper aeration and moisture levels within the substrate.
Preparation
Collection and Storage: Used coffee grounds should be collected in a clean manner and stored properly to prevent mold growth. They can spoil or grow mold if left wet and not used promptly.
Sterilization: While coffee grounds are somewhat pasteurized during the brewing process, they can still benefit from additional sterilization or pasteurization to reduce the risk of contamination from competing molds and bacteria when used for mushroom cultivation.
Supplementation: To improve yields and balance the nutrient profile, coffee grounds can be mixed with other substrates like straw or supplemented with materials such as wheat bran.
Moisture Adjustment: The moisture content of the coffee grounds needs to be adjusted to the optimal level for mushroom growth, typically around 60-70%.
Advantages
Sustainability: Utilizing waste coffee grounds for mushroom cultivation is an excellent example of recycling and reducing waste.
Cost-Effective: For individuals and businesses that produce or have access to large amounts of used coffee grounds, this substrate can be very cost-effective.
Availability: Coffee grounds are readily available from coffee shops, restaurants, and even home brewing, making them accessible for small-scale and hobbyist growers.
Challenges
Contamination Risk: Coffee grounds are susceptible to contamination if not properly handled and sterilized, as their nutrient-rich nature can support a wide range of microbial life.
Physical Structure: The tendency of coffee grounds to compact can limit air exchange, which is critical for mycelial growth. This can be mitigated by mixing with other substrates or using them in layers.
Nutrient Imbalance: While rich in nitrogen, coffee grounds may lack other nutrients necessary for optimal mushroom development. Supplementation or blending with other substrates can address this issue.
Tips for Success
Blend with Other Substrates: Mixing coffee grounds with straw or sawdust can improve the physical structure and nutrient balance of the substrate.
Monitor Moisture Levels: Due to their fine texture, coffee grounds can either dry out quickly or retain too much moisture. It’s essential to maintain optimal moisture levels throughout the cultivation process.
Use Freshly Spent Grounds: To minimize contamination risk, use coffee grounds soon after they’re generated, or ensure they are properly stored and possibly pasteurized before use.
Coffee grounds offer a unique and sustainable option for mushroom cultivation, particularly appealing for urban growers and those looking to recycle waste products effectively.
6. Coconut Coir
Coconut coir, a natural fiber extracted from the husk of coconuts, is increasingly used as a substrate in mushroom cultivation, especially for varieties like oyster mushrooms (Pleurotus spp.) and button mushrooms (Agaricus bisporus).
Its sustainability, water retention capabilities, and resistance to pests and pathogens make it an attractive option for growers.
Characteristics
Physical Properties: Coconut coir is lightweight, has excellent water retention capabilities, and provides good aeration. Its fibrous texture helps prevent compaction, allowing for better air exchange crucial for mycelium growth.
Nutritional Content: While coconut coir is not particularly nutrient-rich compared to other substrates like manure or compost, it provides a clean and stable environment for mushroom cultivation. Its primary role is structural, supporting mycelial growth through physical properties rather than nutritional content.
Preparation
1. Hydration: Coconut coir is often sold in a dehydrated, compressed form and needs to be rehydrated before use. This is typically done by soaking the coir in water until it expands and becomes moist and fluffy.
2. Sterilization: Although coconut coir is less prone to bacterial and fungal contamination than other substrates, sterilization or pasteurization may still be necessary, especially when mixed with more nutrient-rich supplements.
3. Supplementation: To enhance yields, coconut coir can be supplemented with nutrient-rich materials such as spent coffee grounds, straw, or commercial mushroom supplements. This compensates for its low natural nutrient content.
4. pH Adjustment: The natural pH of coconut coir is slightly acidic to neutral, which is suitable for most mushrooms. However, some growers adjust the pH to match the specific requirements of their cultivated mushroom species.
How to pasteurize coco coir?
Pasteurizing coco coir is an essential step to ensure it is free from harmful pathogens, bacteria, and fungi before using it as a growing medium. Here are several methods to pasteurize coco coir:
Chemical Sterilization
1. Bleach Method:
Mix a teaspoon of bleach for every liter of water.
Soak the coco coir in the bleach solution for at least half an hour, ensuring all parts are exposed by stirring.
Drain and rinse the coco coir thoroughly with water to remove any residual bleach.
2. Potassium Permanganate Method:
Soak the coco coir in water for 10 minutes.
Mix 1 tablespoon of potassium permanganate per 4 liters of water.
Boil the mixture for 5 minutes.
Drain, rinse, and reuse the coco coir.
3. Hydrogen Peroxide Method:
Fill a bucket with water and mix in hydrogen peroxide until it is completely dissolved.
Soak the coco coir in the solution for 24 hours to ensure sterilization.
Heat Sterilization
Oven Heating:
Preheat the oven to 80°C (176°F).
Place the coco coir in an oven-safe container and heat it for 30 minutes to kill pathogens and harmful fungi.
Sun Bathing:
On a clear, hot day, place a clear tarp over moistened coco coir.
Ensure the temperature under the tarp reaches 65°C (149°F) for at least half an hour.
Pasteurization Techniques
Bucket Tek:
Boil water to 160-180°F (71-82°C).
Place a brick of coco coir in a bucket and pour the boiling water over it.
Cover the bucket with a lid and let it sit for 1-2 hours.
Ensure the coco coir reaches field capacity by squeezing out excess water.
Water Bath:
Place coco coir in a large glass jar.
Set the jar inside a larger pot of water heated to 160-180°F (71-82°C).
Maintain this temperature for at least an hour, monitoring for consistent temperature and evaporation.
Microwave Method:
Moisten the coco coir before placing it in the microwave.
Heat it in the microwave, ensuring it stays at a consistent temperature, though this method is less preferred due to difficulty in maintaining consistent heat.
Advantages
Sustainability: Coconut coir is a renewable, biodegradable by-product of the coconut industry, making it an environmentally friendly choice.
Disease Resistance: It has natural resistance to certain pathogens and pests, reducing the risk of contamination and disease.
Water Retention: Its excellent water retention capabilities help maintain consistent moisture levels, crucial for mushroom growth, without becoming waterlogged.
Ease of Use: Lightweight and easy to handle, especially once rehydrated, coconut coir is user-friendly for both amateur and commercial growers.
Challenges
Nutrient Deficiency: Its low nutrient content means that supplementation may be necessary to achieve optimal mushroom growth and yields.
Cost: Depending on location and availability, coconut coir can be more expensive than local substrates like straw or wood chips.
Quality Variation: The quality of coconut coir can vary depending on the source and processing method, potentially affecting its performance as a mushroom substrate.
Tips for Success
Proper Hydration: Ensure the coir is fully rehydrated and at the correct moisture content before use to maximize its benefits.
Balanced Supplementation: If supplementing, aim for a balance that enhances the nutrient profile without compromising the physical benefits of the coir.
Environmental Control: Maintain optimal growing conditions for your specific mushroom species, as the substrate alone cannot compensate for inadequate temperature, humidity, or ventilation.
Coconut coir’s sustainability, disease resistance, and excellent water retention make it a compelling substrate for mushroom cultivation, particularly when its limitations are properly addressed. By combining coconut coir with suitable supplements and maintaining optimal growing conditions, growers can leverage this versatile substrate to produce healthy and abundant mushroom crops.
7. Grain (Rye, Wheat, Millet)
Grain substrates, such as rye, wheat, millet, and others, are extensively used in mushroom cultivation, primarily for producing spawn.
Grain offers a nutritious and easily colonizable medium for the initial growth of mycelium, which can then be used to inoculate bulk substrates like straw, sawdust, or compost for larger-scale mushroom production.
Characteristics
Nutritional Content: Grains are rich in carbohydrates and contain a moderate amount of protein and other nutrients, making them an excellent food source for developing mycelium.
Physical Properties: The size and texture of grains provide an ideal surface area for mycelial attachment and colonization. The spaces between grains also facilitate aeration and moisture retention.
Preparation
Selection and Cleaning: It’s crucial to start with high-quality grains that are free from mold and pests. The grains should be thoroughly cleaned to remove dust and debris.
Soaking and Boiling: Grains are usually soaked in water for a period (often overnight) to hydrate them. This is followed by boiling or simmering to soften the grains further and to start the sterilization process.
Draining and Drying: After cooking, the grains need to be drained well to remove excess water. They should be spread out to dry slightly, ensuring that they are not too wet, which could lead to bacterial growth or too dry, which could inhibit mycelium growth.
Sterilization: The prepared grains are then loaded into jars or bags and sterilized in a pressure cooker or autoclave at 15 psi for 90-120 minutes. This step is critical to eliminate any competing microorganisms.
Inoculation: Once cooled, the sterilized grains are inoculated with mushroom spores or mycelium under sterile conditions to avoid contamination.
Advantages
Rapid Colonization: The rich nutrient content and physical structure of grains support fast and vigorous mycelium growth.
Versatility: Grain spawn can be used to inoculate a wide variety of bulk substrates, making it a versatile choice for different types of mushroom cultivation.
Scalability: Starting with grain spawn allows for scaling up production efficiently, as a small amount of spawn can inoculate a large volume of bulk substrate.
Challenges
Contamination Risk: Grains are highly susceptible to contamination due to their rich nutrient content. Sterile technique and proper sterilization are imperative.
Moisture Content Management: Achieving and maintaining the correct moisture level in grains is challenging but crucial. Too much moisture can lead to bacterial growth, while too little can prevent mycelium from colonizing the substrate.
Cost and Labor: While grains may not be expensive, preparing and sterilizing grains is labour-intensive and requires specialized equipment, such as a pressure cooker or autoclave.
Tips for Success
Quality Control: Use high-quality grains and follow strict sterilization protocols to minimize contamination risk.
Moisture Management: Perfect the process of preparing grains to achieve the optimal moisture content, enhancing mycelium growth and reducing the risk of contamination.
Environmental Conditions: After inoculation, store grain spawn in conditions that favour mycelium growth—typically in a dark place at a temperature suitable for the specific mushroom species being cultivated.
Grain substrates play a crucial role in mushroom cultivation, especially in the early stages of spawn production. While the process requires careful attention to detail and strict adherence to sterilization protocols, the use of grains can lead to highly efficient and productive mushroom cultivation when done correctly.
Each substrate has its specific applications and requires different preparation methods, such as pasteurization or sterilization, to minimize contamination. The choice of substrate often depends on the mushroom species, available resources, and the grower’s experience level. Experimentation and adaptation to local conditions are key to successful mushroom cultivation.