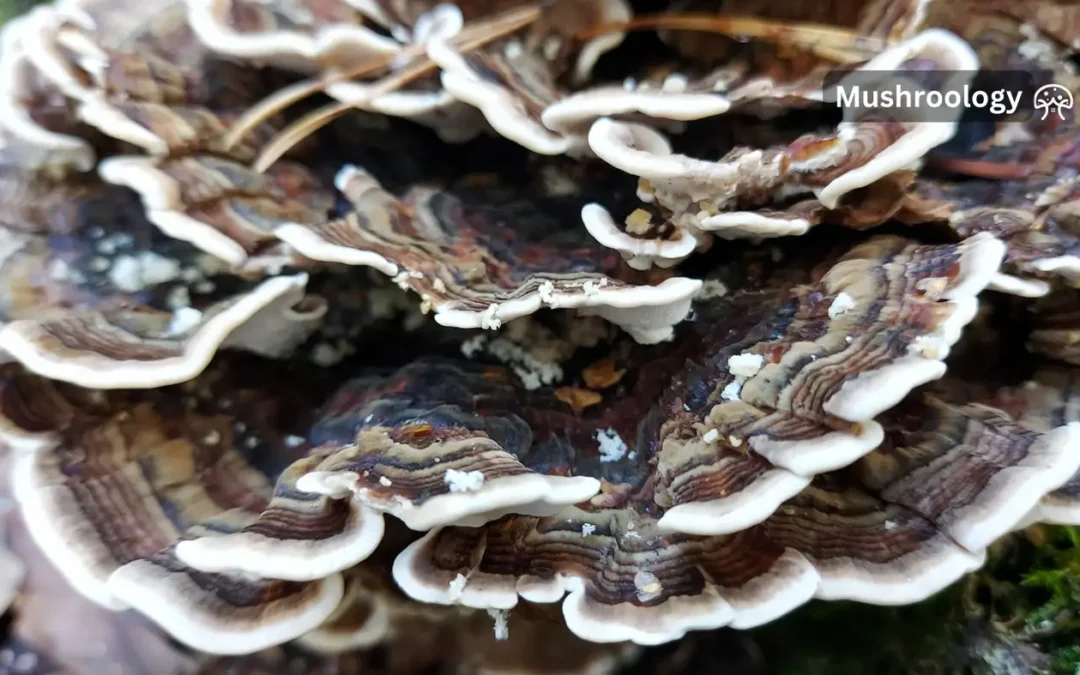
Turkey tail mushrooms (Trametes versicolor) are indeed edible, but they are not typically consumed in the same manner as more common culinary mushrooms due to their tough and leathery texture. Instead, they are often used for their medicinal properties and can be prepared in various forms to make them more palatable and beneficial.
Common Preparations:
Tea: One of the most popular ways to consume turkey tail mushrooms is by making tea. The mushrooms are typically boiled for an extended period to extract their beneficial compounds.
Powder: Turkey tail mushrooms can be dried and ground into a powder, which can then be added to smoothies, soups, or other dishes.
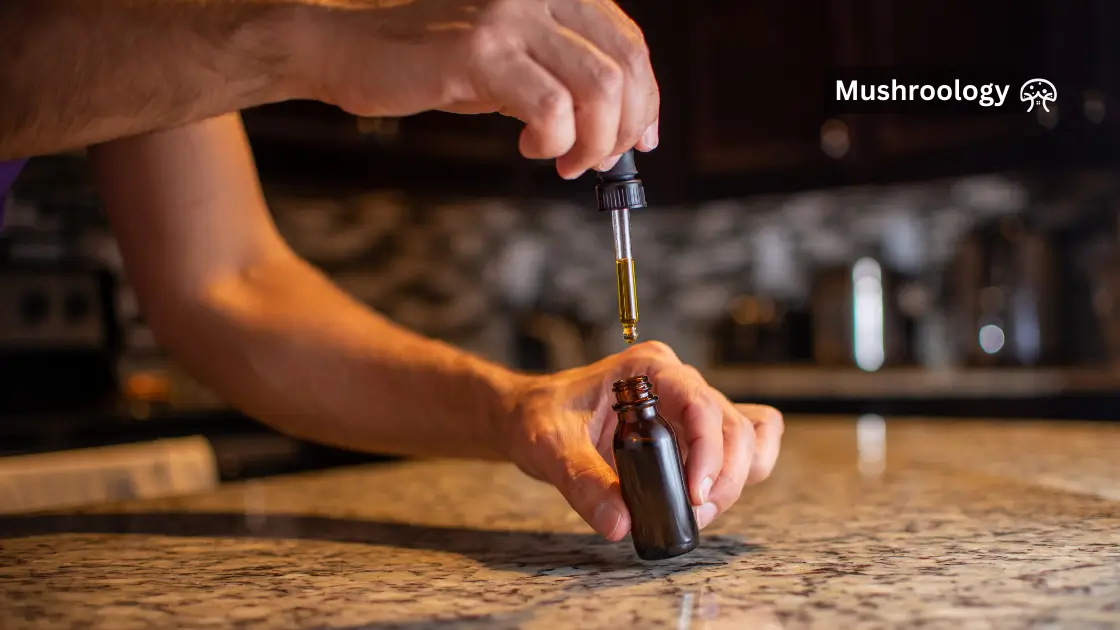
Tinctures: Another common method is making tinctures, where the mushrooms are soaked in alcohol for several weeks to extract their medicinal properties.
Supplements: Turkey tail mushrooms are also available in capsule or tablet form, making it easy to incorporate their benefits into a daily routine.
Turkey Tail mushrooms texture and taste
Turkey tail mushrooms (Trametes versicolor) have a distinctive texture and taste profile that sets them apart from culinary mushrooms like portobello or shiitake.
Texture
Turkey tail mushrooms are characterized by their:
Tough, leathery consistency similar to thin leather or cardboard
Fibrous structure with noticeable layers
Woody, cork-like quality that makes them difficult to chew
Resilient nature that doesn’t soften much, even with prolonged cooking
This tough texture is why turkey tail mushrooms aren’t typically eaten directly. Even after extended cooking, they remain chewy and fibrous, unlike culinary mushrooms that become tender. Their physical properties are more similar to tree bark than to typical edible mushrooms.
Taste
The flavor profile of turkey tail mushrooms includes:
Mild earthiness reminiscent of forest floor
Subtle mushroom flavor that’s not particularly strong
Slight bitterness, especially in tea form
Woody undertones similar to mild tree bark
Neutral base flavor that doesn’t compete with other ingredients
When dried, the flavor becomes slightly more concentrated but remains subtle. The taste isn’t unpleasant, but it’s not particularly sought after for culinary purposes.
.
How to prepare turkey tail mushroom
Turkey tail mushroom tea
Turkey tail tea is one of the most popular and straightforward ways to enjoy the benefits of these medicinal mushrooms.
Ingredients:
3-5 dried turkey tail mushrooms (or about 1/4 cup chopped)
4 cups water
Optional: honey, lemon, ginger, or other herbs for flavor
Instructions:
1. Clean the turkey tail mushrooms
Use a damp cloth or a soft brush to gently remove any dirt or debris from the mushrooms. Avoid soaking them in water as this can make them waterlogged and affect their texture and potency.
If you are foraging your mushrooms, make sure to trim off the part that was attached to the log using kitchen shears or a knife to remove any tough or dirty sections.
2. Chop the mushrooms
Cut the mushrooms into small pieces. This increases the surface area, allowing for better extraction of the beneficial compounds during the boiling process.
If using dried mushrooms, you can break them into smaller pieces by hand or use a knife.
3. Boil and simmer:
Place the mushrooms in water, bring to a boil, then reduce heat and simmer for at least 1 hour. For a more concentrated tea, you can simmer for up to 3 hours.
4. Strain and Serve
After simmering, strain the mushrooms out of the liquid using a fine mesh strainer or cheesecloth. Press the mushrooms gently to extract as much liquid as possible. Feel free to add honey, lemon, or other flavorings to improve the taste.
French press Method to brew turkey tail mushrooms tea
Ingredients:
¼ cup chopped turkey tail mushrooms
2 cups boiling water
2 tsp loose leaf tea of your choice
Optional: honey, maple syrup, lemon
Instructions:
Chop the mushrooms into small pieces.
Add the mushrooms and loose leaf tea to your French press.
Pour in the boiling water and let it steep for 45-60 minutes.
Press and pour into cups. Add honey, maple syrup, or lemon to taste.
Quick Simmer Method
Ingredients:
2-3 tablespoons dried turkey tail mushrooms
2-3 cups water
Instructions:
Bring the water to a boil.
Add the dried mushrooms.
Reduce heat and simmer for 15-20 minutes.
Strain and serve. Add honey or maple syrup if desired.
Turkey Tail mushroom broth
Turkey tail mushroom broth is a nutritious and flavorful base for soups, stews, and other recipes. Here’s a detailed guide on how to prepare it:
Ingredients:
Fresh or dried turkey tail mushrooms
Aromatics (e.g., garlic, onion, bay leaves)
Water
Optional: carrots, celery, black peppercorns, ginger, thyme, soy sauce
1. Prepare the Mushrooms
Clean the Mushrooms: Use a damp cloth or a soft brush to gently remove any dirt or debris from the mushrooms. If necessary, give them a quick rinse under running water, but avoid soaking them.
Chop the Mushrooms: Cut the mushrooms into small pieces to increase the surface area for extraction.
2. Simmer with Aromatics
In a large pot, add the chopped turkey tail mushrooms and your choice of aromatics. Common choices include:
Garlic: Halved or crushed cloves
Onion: Chopped or halved
Bay Leaves: 1-2 leaves
Carrots: Chopped
Celery: Chopped
Black Peppercorns: A few whole peppercorns
Ginger: Sliced
Thyme: Fresh sprigs or dried
Soy Sauce: For added umami flavor
Pour in enough water to cover the ingredients, typically about 8 cups for a rich broth. Heat the pot over medium-high heat until the water reaches a boil.
Reduce the heat to low and let the mixture simmer for several hours. A minimum of 1-2 hours is recommended, but simmering for up to 4-6 hours can yield a more concentrated and flavorful broth. Keep an eye on the water level and add more if necessary to keep the ingredients submerged.
3. Strain and Use
Strain the Broth: After simmering, strain the solids from the liquid using a fine mesh strainer or cheesecloth. Press the solids gently to extract as much liquid as possible.
Season: Taste the broth and season with salt or additional soy sauce if needed.
Store: The broth can be used immediately or stored in the refrigerator for up to a week. For longer storage, freeze the broth in airtight containers or ice cube trays for up to 3 months.
Uses for Turkey Tail Mushroom Broth
Soup Base: Use the broth as a base for soups, such as vegetable, chicken, or noodle soups.
Stews and Casseroles: Incorporate the broth into stews and casseroles for added depth of flavor.
Cooking Grains: Use the broth instead of water to cook grains like rice, quinoa, or barley for an extra boost of nutrition and flavor.
Sauces and Gravies: Use the broth as a base for making savory sauces and gravies.
Feel free to experiment with additional herbs and spices to tailor the broth to your taste preferences.
Turkey tail mushroom powder
Turkey tail mushroom powder is a versatile way to incorporate the health benefits of Trametes versicolor into your diet. Here’s a detailed guide on how to prepare and use turkey tail mushroom powder:
Instructions:
1. Dry the Mushrooms
Cleaning:
Method: Use a damp cloth or a soft brush to gently remove any dirt or debris from the mushrooms. Avoid soaking them in water as they can become waterlogged.
Tip: Trim off the part of the mushroom that was attached to the log using kitchen shears or a knife to remove any tough or dirty sections.
Drying:
Using a Dehydrator:
Setup: Lay the cleaned mushrooms on dehydrator trays in a single layer, ensuring they do not overlap.
Temperature: Set the dehydrator to 95-100°F (35-38°C).
Duration: Let the mushrooms dry for about 24-36 hours. Rotate the trays every 6-8 hours if you have multiple trays to ensure even drying.
Using an Oven:
Setup: Lay the mushrooms on baking trays in a single layer, making sure they do not overlap.
Temperature: Set the oven to the lowest possible temperature, usually around 200°F (93°C).
Process: Place the trays in the oven and keep the oven door slightly open (about 3-4 inches) to allow moisture to escape.
Duration: Let the mushrooms dry for about 24 hours, rotating the trays periodically to ensure even drying.
Air Drying:
Setup: Spread the mushrooms out on a screen or paper towels in a cool, dry area with good airflow.
Process: Turn the mushrooms over once a day to ensure even drying.
Duration: Air drying can take several days, depending on the humidity and temperature of your environment.
2. Grind into Powder
Once the mushrooms are completely dry and brittle, grind them into a fine powder using a coffee grinder, spice grinder, or food processor.
3. Use the Powder
Smoothies: Add a teaspoon of mushroom powder to your daily smoothie for an immune-boosting kick.
Soups and Sauces: Stir the powder into soups, stews, or sauces to enhance their nutritional profile.
Teas: Mix the powder into hot water or your favorite tea blend to make a nutritious mushroom tea.
Baking: Incorporate the powder into baked goods like bread, muffins, or cookies for added health benefits.
Capsules: If you prefer, you can encapsulate the powder using a capsule maker for easy consumption.
Store the turkey tail mushroom powder in an airtight container to protect it from moisture and humidity. Keep the container in a cool, dark place to avoid exposure to light, which can degrade the quality over time.
Label the container with the name and date of the powder to keep track of its freshness. Properly stored mushroom powder can last for up to a year, but it’s best to use it within six months for optimal potency.
Making a turkey tail mushroom tincture is a great way to extract and preserve the medicinal compounds of Trametes versicolor. Here’s how to prepare it:
Ingredients:
Dried turkey tail mushrooms
Alcohol (e.g., vodka, ideally 80-95 proof)
1. Prepare the Mushrooms
Clean the Mushrooms: Use a damp cloth or a soft brush to gently remove any dirt or debris from the mushrooms. Avoid soaking them in water to prevent them from becoming waterlogged.
Dry the Mushrooms: If the mushrooms are not already dried, dry them using a dehydrator set to 95-100°F for 24-36 hours, or in an oven set to the lowest temperature with the door slightly open for about 24 hours.
2. Steep in Alcohol
Chop or Grind the Mushrooms: Cut the dried mushrooms into small pieces or grind them into a coarse powder using a coffee grinder or food processor. This increases the surface area for extraction.
Combine with Alcohol: Place the chopped or ground mushrooms in a clean glass jar. Pour enough alcohol over the mushrooms to completely cover them. A common ratio is 1 part mushrooms to 5 parts alcohol by volume.
Seal and Store: Seal the jar tightly and store it in a cool, dark place. Let the mixture steep for at least 2-4 weeks, shaking the jar gently every few days to ensure even extraction.
3. Strain and Bottle
Strain the Mixture: After the steeping period, strain the mushrooms out of the liquid using a fine mesh strainer, cheesecloth, or a coffee filter. Press the mushrooms gently to extract as much liquid as possible.
Bottle the Tincture: Pour the strained liquid into dark glass dropper bottles to protect it from light. Label the bottles with the date and contents.
Use the Tincture
Dosage: Use a few drops to a full dropper (about 1-2 ml) of the tincture in water, tea, or directly under the tongue. Start with a small dose and adjust as needed.
Storage: Store the tincture in a cool, dark place. Properly stored, the tincture can last for several years.
For a more potent tincture, you can perform a double extraction, which involves both alcohol and water extraction to capture a broader range of medicinal compounds.
First Extraction (Alcohol): Follow the steps above for the alcohol extraction.
Second Extraction (Water): After straining the alcohol, take the leftover mushroom material and simmer it in water for 2-4 hours. Strain the water extract.
Combine Extracts: Combine the alcohol and water extracts in equal parts. This method ensures that both water-soluble and alcohol-soluble compounds are extracted.
DIY vs. store-bought options
While making your own turkey tail preparations can be rewarding, you might prefer the convenience of commercial products. Here’s a comparison to help you decide:
DIY advantages:
Full control over ingredients and quality
Cost-effective in the long run
Connection to the preparation process
Customizable to your taste preferences
Store-bought advantages:
Convenience
Standardized potency
Professional-grade extraction methods
Time-saving
If you decide to purchase commercial products, look for those that:
Use organic mushrooms
Specify the extraction method
List the amount of beneficial compounds (like beta-glucans)
Have third-party testing
Come from reputable companies with good reviews
Sourcing turkey tail mushrooms
Foraging
If you’re interested in foraging your own turkey tail mushrooms, it’s crucial to:
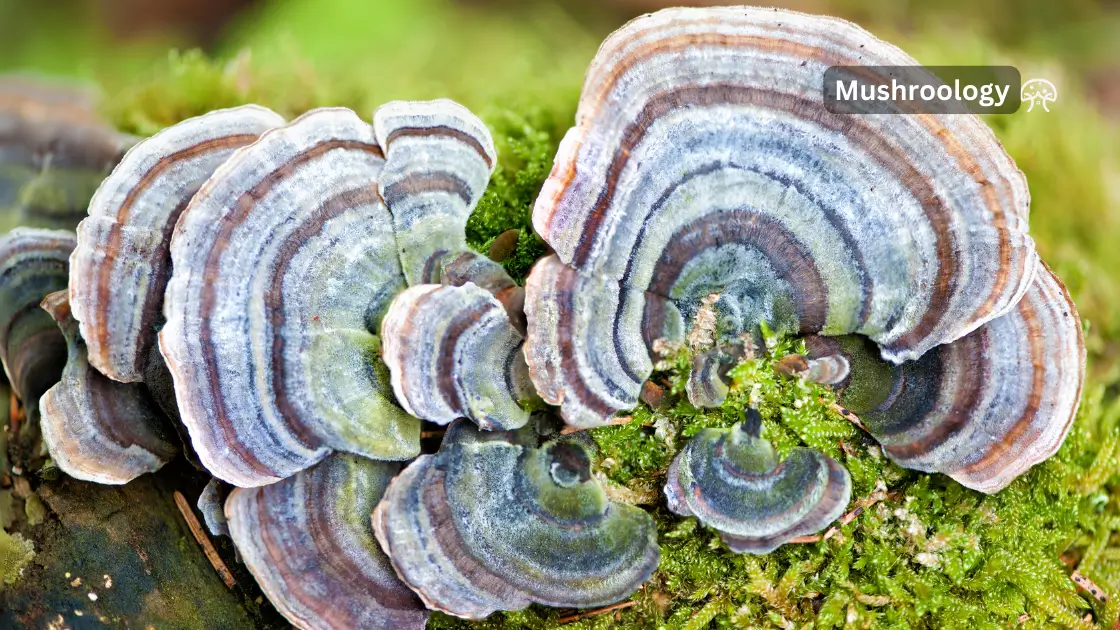
Learn proper identification (true turkey tails have tiny pores on the underside, not gills)
Forage in clean areas away from pollution
Only collect mushrooms that look fresh and healthy
Always consult with an experienced mushroom expert if you’re uncertain
Purchasing
If foraging isn’t your thing, you can buy dried turkey tail mushrooms from:
Health food stores
Online specialty shops
Some Asian markets
Herbalists and mycologists
Always ensure you’re buying from a reputable source that practices sustainable harvesting methods.
Safety considerations and potential side effects
Turkey tail mushrooms are generally considered safe for most people. However, there are some important considerations:
Possible side effects:
Digestive discomfort (especially when first starting)
Darkened stools
Rare allergic reactions
Precautions:
Start with small amounts and gradually increase to assess tolerance
Consult your healthcare provider before using if you:
Are pregnant or breastfeeding
Have a mushroom allergy
Take medications that might interact
Have an autoimmune condition
Remember that while turkey tail mushrooms have shown promising health benefits, they should complement, not replace, conventional medical treatments.
Turkey tail mushroom FAQ
How long does it take to experience benefits?
Most people report needing to take turkey tail mushrooms consistently for 2-8 weeks before noticing benefits. Like many natural supplements, consistency is key.
Can I take turkey tail mushrooms daily?
Yes, turkey tail mushrooms are generally considered safe for daily consumption. Follow the recommended dosage for your specific preparation method.
Will turkey tail mushrooms interact with medications?
While interactions are rare, always consult with your healthcare provider if you take medications, especially immunosuppressants or blood thinners.
Can children take turkey tail mushrooms?
It’s best to consult with a pediatrician before giving any medicinal mushrooms to children, as there’s limited research on their effects in young people.
How do I know if my turkey tail mushrooms are high quality?
Look for mushrooms with vibrant colors and no signs of mold or unusual odors. If purchasing supplements, check for third-party testing and clear labeling of active compounds.
Conclusion
Turkey tail mushrooms offer a fascinating array of potential health benefits, from immune support to gut health improvement. While they may not be the tastiest fungi in the forest, their medicinal properties make them well worth incorporating into your wellness routine.
Whether you choose to make a simple tea, create a versatile powder, or try a concentrated tincture, these remarkable mushrooms demonstrate how nature’s pharmacy continues to provide us with powerful tools for supporting our health.
Have you tried turkey tail mushrooms before? Which preparation method appeals to you most? Share your experiences or questions in the comments below!
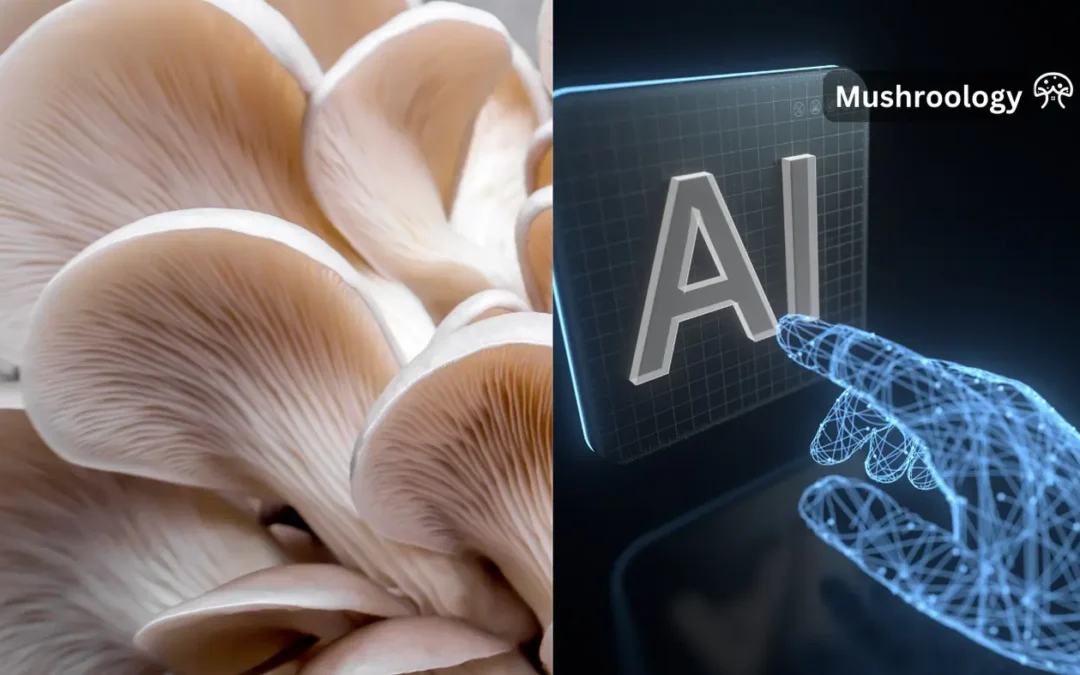
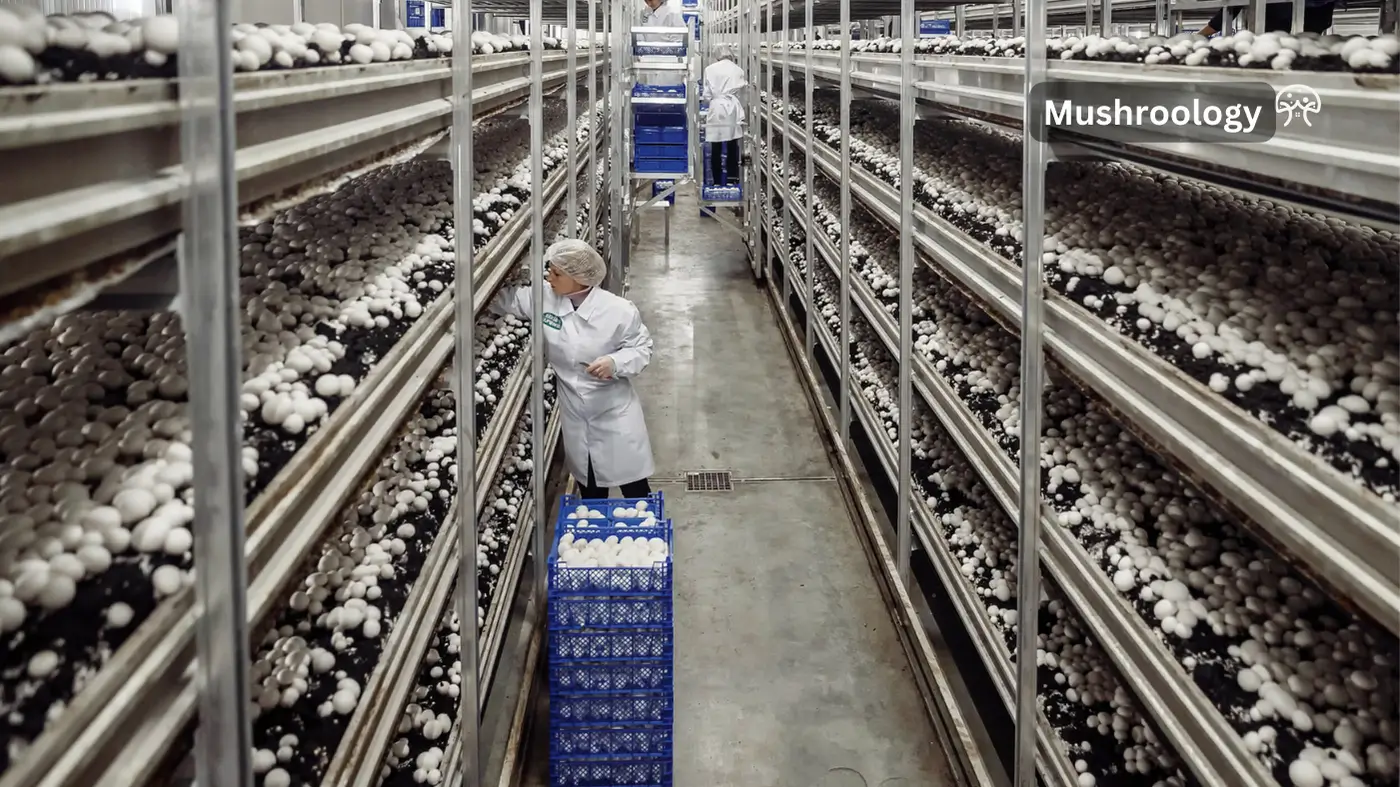
Artificial intelligence (AI) is making significant strides in various industries, and agriculture is no exception. One of the most exciting applications of AI is in mushroom cultivation. By leveraging advanced technologies like machine learning, computer vision, and the Internet of Things (IoT), farmers can optimize growing conditions, improve yields, and reduce labor costs.
The role of AI in mushroom cultivation
Artificial Intelligence (AI) is revolutionizing mushroom cultivation by automating and optimizing various aspects of the farming process. This integration of AI technologies helps in improving yield, reducing labor costs, and enhancing disease detection and prevention. Let’s see how AI is being utilized in mushroom farming:
Machine Learning
Predictive Analytics and Yield Optimization:
Machine learning algorithms are employed to analyze data from sensors and other sources to predict the best conditions for mushroom growth. These algorithms learn from historical data and continuously improve their accuracy over time.
For instance, the MUSHNOMICS project uses AI-driven algorithms to predict mushroom yields by analyzing data collected from IoT devices, and optimizing environmental conditions such as temperature, humidity, and CO2 levels.
Computer Vision
Growth Monitoring and Disease Detection:
Computer vision systems use cameras and image processing algorithms to monitor mushroom growth and detect diseases early. These systems analyze the size, shape, and color of mushrooms to identify any abnormalities that may indicate disease or suboptimal growth conditions.
For example, MycoSense has developed the MycoSense Spotlight, which uses AI and computer vision to assist in mushroom picking and early disease detection.
Quality Classification:
Computer vision is also used for quality classification of mushrooms. This involves identifying and grading mushrooms based on their visual characteristics, ensuring that only high-quality produce reaches the market.
Internet of Things (IoT)
IoT devices are deployed within mushroom farms to continuously monitor environmental conditions such as temperature, humidity, and CO2 levels. These devices collect real-time data, which is then fed into AI systems for analysis. The AI systems use this data to make real-time adjustments to optimize growing conditions.
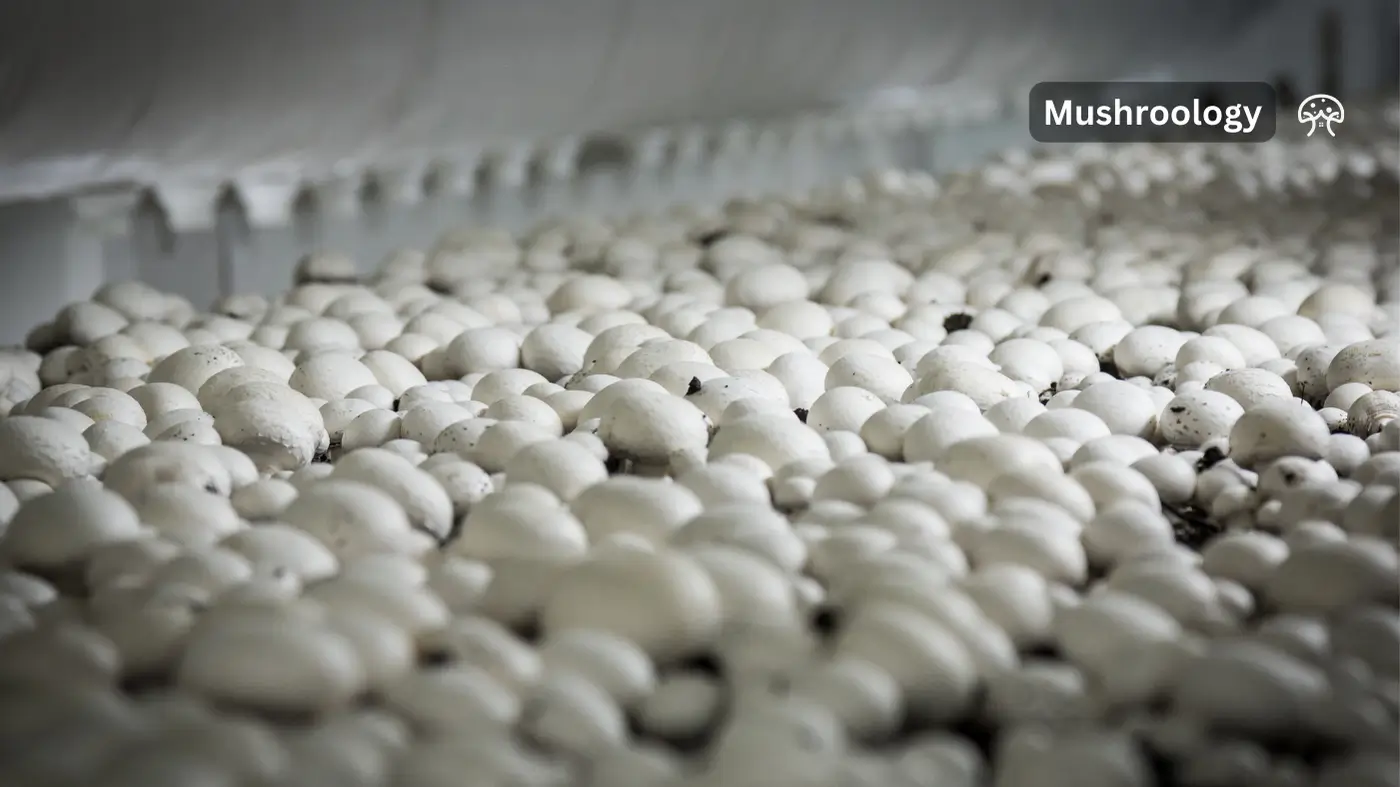
For example, the AI-based automatic climate control system for white button mushrooms uses IoT devices to manage climate conditions in the growing hall, ensuring optimal growth at different stages of mushroom development.
Automated Growing Systems
Automated systems control variables like temperature, humidity, and CO2 levels, ensuring optimal growing conditions. These systems reduce labor costs by minimizing the need for human intervention and improve yield and quality by maintaining consistent environmental conditions.
Mycro Harvest, for instance, has developed a shipping container-sized unit that uses affordable automation combined with AI monitoring to grow mushrooms at scale.
Robotics
Robotics combined with AI is used to automate the harvesting process. Tupu has introduced the industry’s first harvesting robot for gourmet mushrooms, which uses advanced camera vision AI to automate the harvesting process, improving efficiency and reducing labor costs.
Data Analytics and Big Data
AI systems utilize dynamic data-driven analytics to process and analyze the data collected by IoT devices. This involves using big data analytics to handle large volumes of data and extract meaningful insights that can inform yield predictions and optimize growing conditions. The MUSHNOMICS project, for example, employs big data analytics to manage production in real-time and optimize environmental conditions.
Smart Sensors
Smart sensors are used to monitor environmental conditions and collect data about the mushroom growing area. These sensors provide real-time data that is analyzed by AI systems to make precise adjustments to the growing conditions.
Benefits of AI in Mushroom Farming
Improved Yield and Quality
AI systems can analyze vast amounts of data to identify the optimal conditions for mushroom growth, leading to higher yields and better quality mushrooms. For example, Tupu’s AI-driven technology allows for the cultivation of organic gourmet mushrooms in urban environments, ensuring fresh and high-quality produce.
Reduced Labor Costs
Automation through AI reduces the reliance on manual labor. Automated systems can monitor and adjust growing conditions without human intervention, significantly cutting down labor costs. Mycro Harvest’s container-sized units exemplify this by using affordable automation combined with AI monitoring.
Enhanced Disease Detection and Prevention
AI-powered systems can detect diseases and pests early, preventing major crop losses. MycoSense, for instance, uses advanced neural networks for early disease detection, helping farmers maintain healthy crops and improve yields.
The most innovative AI technologies currently used in mushroom cultivation include a variety of advanced systems and methodologies that leverage artificial intelligence, machine learning, computer vision, and IoT. Here are some of the key technologies and their applications:
1. AI-Driven Yield Prediction and Environmental Control
MUSHNOMICS Project:
AI Algorithms for Yield Prediction: The Mushnomics project focuses on developing AI-driven algorithms to predict mushroom yields accurately. These algorithms analyze data from IoT devices to manage production in real-time, optimizing environmental conditions such as temperature, humidity, and CO2 levels.
ICT Platform for Data Exchange: Mushnomics also aims to create an ICT platform that facilitates data exchange across the entire mushroom value chain, from production to points of sale, enhancing decision-making and operational efficiency.
2. Automated Growing Systems
General Industry Innovations:
Automated Environmental Control: Automated systems control variables like temperature, humidity, and CO2 levels, ensuring optimal growing conditions. These systems reduce labor costs by minimizing the need for human intervention and improve yield and quality by maintaining consistent environmental conditions.
3. Computer Vision and Disease Detection
MycoSense Spotlight:
AI-Assisted Harvesting: MycoSense has developed the MycoSense Spotlight, which uses AI and computer vision to assist in mushroom picking. The system marks mushrooms that are ready for harvest, increasing efficiency and ensuring uniformity in size and quality.
Early Disease Detection: MycoSense is also working on intelligent software for early disease detection, which is crucial for preventing crop loss and maintaining healthy mushroom crops.
4. Robotics and AI Integration
Tupu:
Harvesting Robots: Tupu has introduced the industry’s first harvesting robot for gourmet mushrooms. This robot, combined with advanced camera vision AI, automates the harvesting process, improving efficiency and reducing labor costs.
Decentralized Farming System: Tupu’s system integrates robotics and AI to grow organic gourmet mushrooms in urban environments, making fresh produce more accessible and reducing supply chain disruptions.
5. Smart Sensors and Data Analytics
Clever Mushroom:
Portable AI and IoT System: Clever Mushroom utilizes smart sensors, data analytics, robotics, and AI to enhance mushroom cultivation. Their system improves resource efficiency, increases harvest yields, and reduces waste by continuously monitoring and adjusting growing conditions.
6. AI-Driven Smart Farms
Mycro Harvest:
AI Monitoring and Automation: Mycro Harvest has developed a shipping container-sized unit that uses AI to monitor and adjust environmental conditions automatically. This system is designed to be cost-effective and scalable, making it accessible for farmers to achieve higher production efficiency.
Challenges and Future Prospects
Challenges
Despite the benefits, there are challenges in adopting AI technology in mushroom farming. High initial costs and the need for technical knowledge can be barriers for small-scale farmers. Additionally, ensuring data accuracy and managing the complexity of AI systems require ongoing effort and expertise.
Future Prospects
The future of AI in mushroom cultivation looks promising. As technology advances, we can expect more sophisticated AI systems that offer even greater precision and efficiency. Innovations like AI-driven yield prediction and automated harvesting robots are set to revolutionize the industry further.
For instance, future AI systems could integrate more advanced machine learning models that predict not only the best growing conditions but also market demand, helping farmers optimize their production schedules.
Stay tuned to see how these technologies continue to transform the mushroom farming industry. By staying updated with the latest AI technologies, farmers can leverage these advancements to achieve greater efficiency and sustainability in their operations.
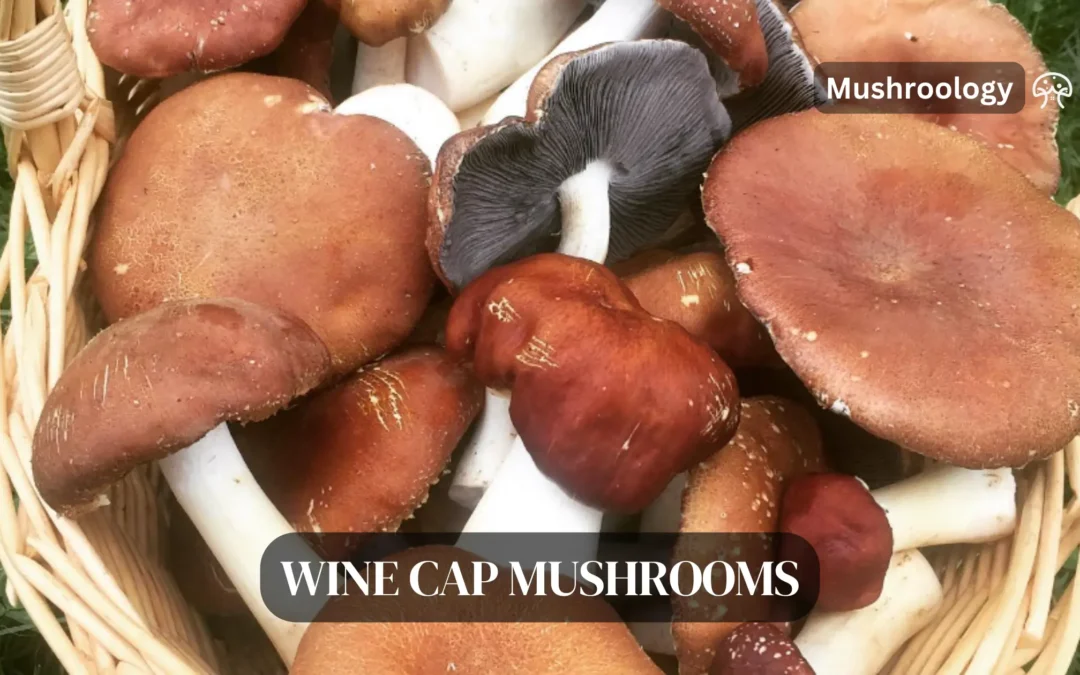
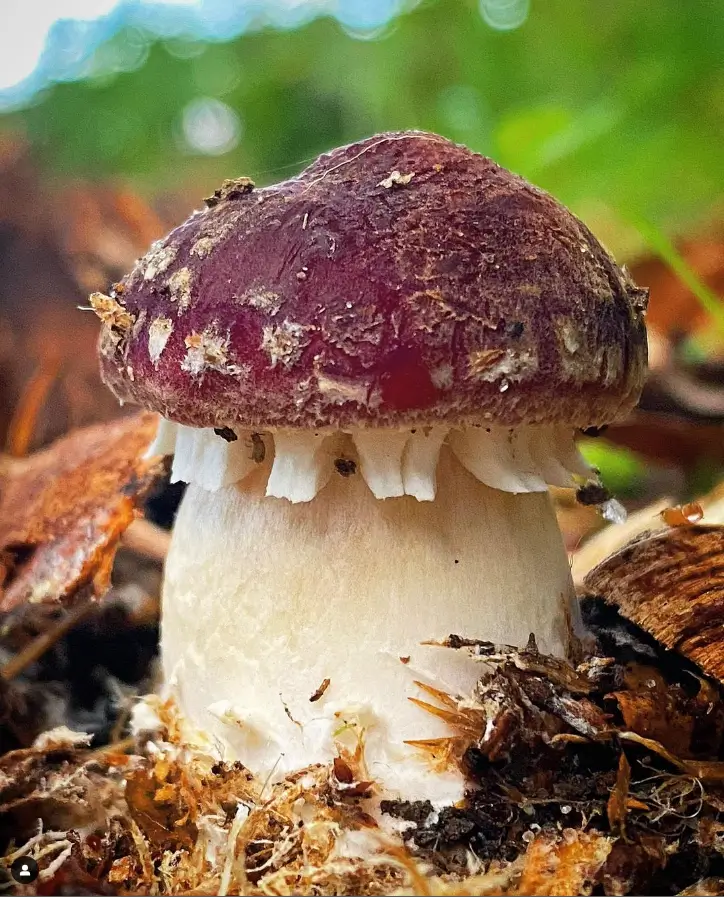
Wine cap mushrooms (Stropharia rugoso-annulata) are among the easiest and most rewarding mushrooms to cultivate in your home garden. These distinctive mushrooms, with their burgundy-colored caps and robust growth habit, are perfect for beginner mushroom growers and experienced gardeners alike.
Unlike many other mushroom varieties that require controlled indoor environments, wine cap mushrooms thrive outdoors in garden beds, making them an accessible choice for home cultivation. Their ability to grow in symbiosis with your garden plants while improving soil health has made them increasingly popular among sustainable gardeners and permaculture enthusiasts.
Instagram @milkwood
Where to grow Wine Cap Mushrooms
Wine cap mushrooms adapt to various garden environments, making them suitable for multiple growing locations. Understanding their environmental preferences helps you choose the optimal spot for cultivation:
Garden Beds and Borders
Established garden beds provide ideal conditions for wine cap mushrooms. Their extensive mycelial networks thrive in the nutrient-rich environment while benefiting neighboring plants through improved soil structure and nutrient cycling.
To incorporate wine caps into existing garden beds:
Apply a 2-4 inch layer of fresh wood chips or straw between plants
Inoculate this material with wine cap spawn
Maintain consistent moisture
Expect mushrooms to fruit seasonally for 2-3 years from a single inoculation
Under trees and shrubs
The partially shaded, naturally mulched areas beneath trees and shrubs create perfect microclimates for wine cap mushrooms. These locations typically maintain higher humidity and more consistent soil moisture, supporting robust mycelial growth.
Wine caps form beneficial relationships with many trees and shrubs, accelerating the decomposition of fallen leaves and small branches. This natural cleanup service reduces garden maintenance while improving soil health in these often-neglected areas.
Woodland edges
The transition zones between wooded areas and open spaces provide ideal conditions for wine cap cultivation. These naturally rich ecological boundaries offer the perfect balance of light, moisture, and organic matter.
Establishing wine cap colonies along woodland edges creates productive buffer zones that can yield substantial mushroom harvests while enhancing biodiversity in these transition areas.
Pathways and walkways
Garden pathways regularly refreshed with wood chips offer excellent opportunities for wine cap cultivation. Inoculating these areas serves multiple purposes:
Creates productive use of otherwise unused space
Accelerates decomposition of pathway materials
Provides easy access for monitoring and harvesting
Demonstrates the ornamental value of these attractive mushrooms
Raised Beds
Dedicated raised beds filled with layers of cardboard, straw, and wood chips create controlled environments for maximizing wine cap production. This approach allows precise management of moisture and substrate composition while providing physical separation from other garden components.
Raised bed cultivation is particularly valuable for growers primarily interested in mushroom production rather than soil improvement benefits.
There are several compelling reasons to consider growing wine cap mushrooms in your own garden.
Instagram @spore.stories
Step-by-Step Wine Cap Mushroom Growing Guide
Growing wine cap mushrooms successfully involves following a systematic approach. This detailed guide walks you through each critical stage of the cultivation process:
1. Select and Prepare Quality Substrate
Wine cap mushrooms thrive on woody materials rich in lignin and cellulose. The ideal substrate combines:
Hardwood chips (oak, maple, or mixed deciduous woods)
Straw (wheat or oat straw works best)
Small amounts of composted manure or finished compost (optional)
Substrate preparation:
If using fresh wood chips, allow them to age for 2-4 weeks to begin the decomposition process
For straw, soak in water for 12-24 hours to thoroughly hydrate
Drain excess water until substrate is damp but not dripping wet
For optimal results, pasteurize substrate by soaking in hot water (160-170°F) for 1-2 hours
Allow substrate to cool to room temperature before inoculation
2. Inoculate with Quality Spawn
Successful cultivation starts with high-quality spawn from reputable suppliers. Wine cap spawn comes in several forms:
Grain spawn (fastest colonization)
Sawdust spawn (economical for larger areas)
Plug spawn (convenient for smaller projects)
Inoculation process:
Spread a 2-4 inch layer of prepared substrate in your chosen location
Break apart spawn into small pieces, distributing it evenly throughout the substrate
Aim for approximately 1 part spawn to 5-10 parts substrate by volume
Mix thoroughly to ensure even distribution of spawn
Cover with a thin layer of straw or wood chips to retain moisture
Water gently to ensure consistent moisture throughout
3. Maintain Proper Growing Conditions
Wine cap mushrooms require specific environmental conditions during their colonization phase:
Temperature: 60-75°F (15-24°C) is ideal for mycelial growth
Moisture: Keep substrate consistently moist but not waterlogged
Light: Indirect light is beneficial for colonization
Protection: Cover with breathable material during extreme weather
Maintenance schedule:
Check moisture levels every 2-3 days, especially during dry periods
Mist with clean water when the surface appears dry
Protect from heavy rain and direct sunlight during the first 2-4 weeks
After 4-6 weeks, look for white mycelial growth spreading through the substrate
4. Support Fruiting Conditions
Once the mycelium has fully colonized the substrate (typically 1-3 months), it’s time to encourage fruiting:
Increase moisture through regular misting or light watering
Maintain good air circulation around the growing area
Look for pinhead formation (small button-like structures) indicating imminent fruiting
Expect mushrooms to appear 7-14 days after pinheads form
Triggering fruiting:
A temperature drop of 10-15°F can trigger fruiting
Natural rainfall often initiates fruiting cycles
Thorough watering after a dry period can stimulate mushroom production
5. Harvest and Maintain Production
Wine cap mushrooms typically produce multiple flushes (harvests) over a growing season:
First harvest usually occurs 2-4 months after inoculation
Subsequent flushes may appear every 2-4 weeks during favorable conditions
A single bed can produce for 1-3 years, depending on substrate volume and conditions
Maintenance for continued production:
After harvesting, gently water the bed to rehydrate the substrate
Add fresh layers of wood chips or straw annually to maintain productivity
During extreme weather, cover with breathable fabric to protect mycelium
How to harvest Wine Cap mushrooms
Proper harvesting techniques ensure maximum flavor and extended production from your wine cap mushroom beds. Follow these guidelines for optimal results:
Optimal Harvest Timing
Timing is crucial when harvesting wine cap mushrooms:
Harvest when caps are fully opened but before the margins begin to curl upward
Young specimens (2-4 inches in diameter) offer firmer texture and milder flavor
Mature specimens (4-6 inches) provide more pronounced earthy flavors
Avoid overmature mushrooms where caps have begun to flatten completely
Morning harvesting preserves freshness and flavor
Proper Harvesting Techniques
The correct harvesting method preserves both the mushroom quality and future production:
Grasp the mushroom stem firmly near the base
Twist gently while pulling upward in one smooth motion
Alternatively, use a sharp knife to cut just above soil level
Avoid disturbing the surrounding mycelium
Collect mushrooms in open baskets or breathable containers
Immediately remove any damaged portions
Post-Harvest Bed Maintenance
Proper care after harvesting ensures continued productivity:
Gently water the bed after heavy harvests to rehydrate the mycelium
Remove any damaged or rotting mushrooms
Avoid disturbing the mycelial network when cleaning the area
Apply a thin fresh layer of substrate material if needed
Check for signs of pests or contamination
Yield Expectations
Understand typical production patterns for realistic planning:
Initial flush typically yields 0.5-1 pound per 10 square feet
Subsequent flushes may produce slightly smaller harvests
Seasonal variation affects yield, with spring and fall often being most productive
A well-maintained bed can produce 2-5 pounds per 10 square feet annually
Production typically peaks in the second year after inoculation
Where to Buy Wine Cap Mushroom Spawn?
If you’re looking to cultivate your own wine cap mushrooms, you’ll need to source high-quality wine cap mushroom spawn. Luckily, there are reputable suppliers that offer a range of options to suit your needs. One such supplier is Field and Forest Products, a trusted name in the mushroom cultivation industry. They provide both peg spawn and sawdust spawn, allowing you to choose the type that best fits your growing method.
While Field and Forest Products is highly recommended, there are other suppliers available online or at local mushroom cultivation stores. It’s always a good idea to do your research and read reviews to ensure you’re purchasing from a reliable source. By buying wine cap mushroom spawn from reputable suppliers, you can set yourself up for success in growing this delicious and versatile mushroom variety.
Here is a table listing a few vendors of wine cap mushroom spawn:
Preserving wine cap mushrooms is a great way to enjoy their delicious flavor and extend their shelf life. Whether you have harvested an abundant crop or want to store some for future use, there are a few methods you can use to preserve wine cap mushrooms.
Storing Wine Cap Mushrooms
If you plan to use the wine cap mushrooms within a few days, storing them in a paper bag in the refrigerator is a simple and effective method. Remember not to wash the mushrooms before storage, as excessive moisture can cause them to spoil quickly. Place the mushrooms in a single layer in the paper bag, close it loosely to allow for airflow, and store it in the refrigerator.
Drying Wine Cap Mushrooms
Drying wine cap mushrooms is an excellent option for long-term storage. The drying process removes moisture from the mushrooms, preventing mold and extending their shelf life. To dry wine cap mushrooms, follow these steps:
Clean the mushrooms by gently brushing off any dirt or debris.
Cut the mushrooms into thin, even slices to promote even drying.
Spread the mushroom slices on a food dehydrator tray in a single layer. Ensure there is enough space between the slices for proper airflow.
Set the dehydrator to a temperature of around 135°F (57°C) and allow the mushrooms to dry for several hours or until they become dry and crisp.
Once the mushrooms are completely dry, transfer them to an airtight container or a sealed bag for storage.
Dried wine cap mushrooms can be rehydrated by soaking them in warm water for about 20 minutes before use. They can be added to stocks, soups, sauces, and other delicious dishes.
Preservation Method
Pros
Cons
Refrigeration
– Keeps mushrooms fresh for a few days – Easy to store
– Limited shelf life – Risk of spoilage if not used quickly
Drying
– Long shelf life – Retains flavor and nutritional value – Easy to rehydrate
– Requires a food dehydrator or drying equipment – Longer preparation time
Table: Pros and cons of different wine cap mushroom preservation methods.
By preserving your wine cap mushrooms, you can enjoy their unique flavor and culinary versatility throughout the year. Whether you choose to store them in the refrigerator or dry them for long-term storage, these preservation methods will ensure that you have a supply of wine cap mushrooms whenever you need them.
Troubleshooting Common Wine Cap Mushroom Problems
Even this beginner-friendly mushroom can encounter challenges. Identifying and addressing common issues ensures successful cultivation.
Slow or No Mycelium Growth
Possible Causes:
Substrate too dry or too wet
Temperature extremes (below 50°F or above 85°F)
Poor quality or expired spawn
Contamination from competing organisms
Insufficient spawn rate for substrate volume
Solutions:
Adjust moisture levels – substrate should feel damp but not waterlogged
Provide temperature protection during extremes
Purchase fresh spawn from reputable suppliers
Increase spawn rate to 15-20% of substrate volume
Ensure proper pasteurization of substrate before inoculation
Contamination Issues
Common Contaminants:
Green or black mold (Trichoderma or Aspergillus species)
Bacterial blotch (wet, slimy areas with unpleasant odor)
Competitor fungi (other mushroom species)
Slime molds (bright yellow or orange growths)
Prevention and Treatment:
Use properly pasteurized substrate
Maintain clean working conditions during inoculation
Remove visibly contaminated areas immediately
Apply hydrogen peroxide solution (3%) to affected areas
Isolate contaminated beds from healthy ones
In severe cases, remove and replace contaminated substrate
Pest Management
Common Pests:
Slugs and snails
Fungus gnats
Springtails
Mushroom flies
Rodents
Organic Control Methods:
Create physical barriers with copper tape or diatomaceous earth
Set up beer traps for slugs and snails
Use yellow sticky traps for flying insects
Apply beneficial nematodes to control soil pests
Create hardware cloth barriers to prevent rodent access
Time harvests to avoid peak pest activity periods
Environmental Challenges
Weather-Related Issues:
Drought stress (dry, cracking substrate)
Excessive rain (waterlogged substrate)
Temperature extremes (freezing or excessive heat)
High winds (drying effects)
Protective Measures:
Adjust watering schedule based on weather conditions
Apply additional mulch during dry periods
Create drainage channels during rainy seasons
Use row covers during extreme temperatures
Install windbreaks for exposed beds
Integrating Wine Cap Mushrooms into Sustainable Systems
Wine cap mushrooms offer numerous benefits when integrated into sustainable gardening systems, particularly in permaculture practices. These mushrooms serve as valuable allies in recycling organic waste, improving soil health, and providing a nutritious food source. By incorporating wine cap mushroom cultivation techniques into your sustainable gardening endeavors, you can create a self-sufficient and regenerative system that benefits both the environment and your own food production.
In permaculture, wine cap mushrooms play a crucial role in the decomposition process. They thrive on woody mulch and can easily break it down into nutrient-rich compost, contributing to soil fertility. Moreover, these mushrooms help in creating a favorable soil microbiome by fostering beneficial bacteria and fungi, leading to enhanced soil structure and nutrient availability.
By cultivating wine cap mushrooms in your sustainable garden, you can establish a mutually beneficial relationship between the mushrooms and other plants. The mushrooms, with their mycelium network, improve nutrient flow and aeration, while the surrounding plants contribute to creating the ideal microclimate for mushroom growth. This synergistic interaction promotes overall ecosystem health and supports sustainable gardening practices.
To incorporate wine cap mushrooms effectively, consider preparing dedicated mushroom beds or incorporating them into existing garden beds or permaculture systems. Choose suitable areas with naturally moist soil, and provide shade or canopy cover for optimal mushroom growth. With careful cultivation and attention to sustainable techniques, wine cap mushrooms can be a valuable asset in your sustainable gardening efforts.
FAQ
Why should I consider growing wine cap mushrooms?
Wine cap mushrooms are easy to grow, improve soil health, and have a unique flavor for culinary use.
How do mushrooms improve the soil?
Mushrooms break down organic matter, create channels in the soil for better nutrient flow, and contribute to a diverse soil microbiome.
Where can I grow wine cap mushrooms?
Wine cap mushrooms can be grown in garden beds, raised beds, and even in shady areas with moist soil.
How do I grow wine cap mushrooms?
Spread a suitable substrate on the soil, mix in wine cap mushroom spawn, keep the substrate moist, and wait for the mushrooms to fruit.
Where can I buy wine cap mushroom spawn?
Wine cap mushroom spawn can be purchased from suppliers such as Field and Forest Products or online mushroom cultivation stores.
How can I identify wine cap mushrooms?
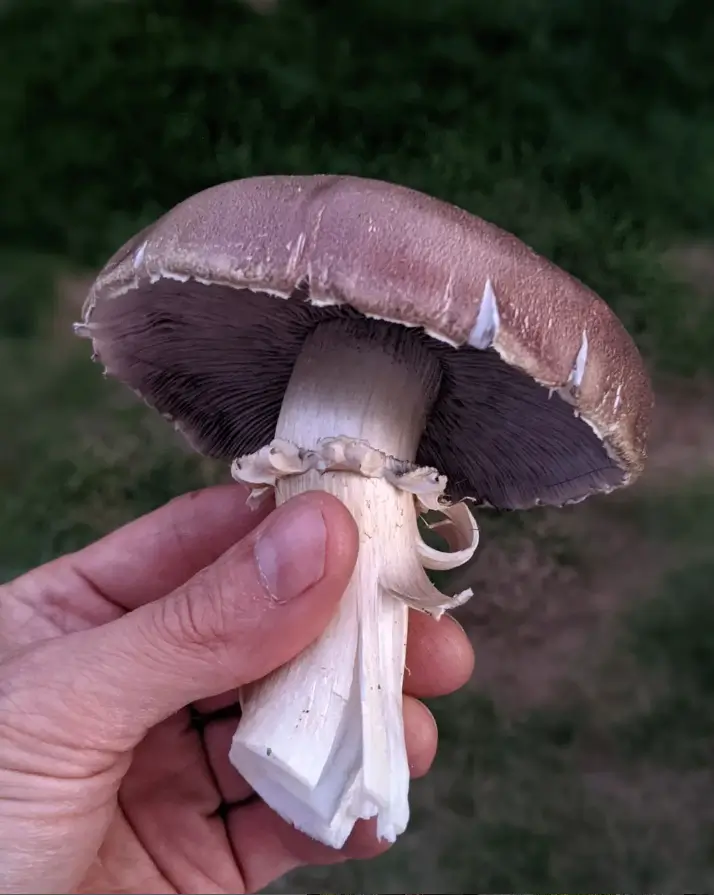
Wine cap mushrooms have red-wine colored caps, grey-violet gills, and a creamy-white stalk with an annulus or ring.
How do I harvest wine cap mushrooms?
Harvest the mushrooms when the caps are fully opened, trim off the base, and inspect for any inhabitants before cooking.
How can I cook wine cap mushrooms?
Wine cap mushrooms can be sautéed, added to soups and stews, or stuffed and baked. They have a nutty and earthy flavor.
How can I preserve wine cap mushrooms?
Store them in a paper bag in the refrigerator for a few days or dry them using a food dehydrator for long-term storage.
What are the benefits of growing wine caps in the garden?
Wine cap mushrooms enhance soil fertility, build organic matter, contribute to permaculture systems, and add diversity to the garden ecosystem.
What are some tips for growing wine cap mushrooms?
Choose the right substrate, maintain proper moisture levels, select suitable growing locations, and manage pests and diseases.
What are common wine cap mushroom growing problems and how can I troubleshoot them?
Common problems include inadequate fruiting, contamination, pests, and diseases. These can be addressed by proper substrate preparation, optimal growing conditions, and pest management strategies.
How can wine cap mushrooms be integrated into sustainable systems?
Wine cap mushrooms can help recycle organic waste, improve soil health, and provide a valuable food source in sustainable gardening and permaculture systems.
Ever tossed your used coffee grounds into the trash and thought, “There must be something better I could do with these”? Well, get ready for a surprising answer – those humble coffee grounds can become the perfect growing medium for delicious gourmet mushrooms!
Quick-start guide: growing mushrooms on coffee grounds in 5 steps
If you’re eager to get started, here’s the quick version:
Collect fresh coffee grounds (within 24 hours of brewing)
Mix with mushroom spawn (oyster mushrooms work best for beginners)
Place in a clear container with air holes
Keep in a warm, dark place until white mycelium fully colonizes (2-3 weeks)
Introduce light and fresh air to trigger mushroom growth (harvest in 5-7 days)
The entire process takes about 3-4 weeks from start to finish, with minimal daily maintenance. Now let’s dive into the details so you can get growing!
What you’ll need: Materials checklist
Essential supplies
Fresh coffee grounds (5-6 cups) – collect from your home or local coffee shop
Clear plastic bag or container – food-grade plastic works best
Spray bottle – for maintaining humidity
Rubber bands or tape – for sealing your container
Clean scissors or knife – for creating air holes and harvesting
Optional equipment for better results
Thermometer/hygrometer – to monitor temperature and humidity
Supplementary materials – straw or hardwood sawdust to mix with coffee grounds (70% coffee grounds, 20% supplement, 10% spawn works well)
Isopropyl alcohol (70%) – for sanitizing tools and workspace
Clean gloves – to prevent contamination during handling
Don’t worry about getting everything perfect – mushroom cultivation is forgiving, especially with oyster mushrooms. I started with just coffee grounds, spawn, and a plastic bag, and still got a decent first harvest!
Choosing the right Mushroom spawn for beginners
Oyster mushrooms: The ideal starter species
When I first started growing on coffee grounds, I tried several species and quickly discovered why everyone recommends oyster mushrooms for beginners. They’re practically the superheroes of the mushroom world:
Fast colonizers – they’ll take over your coffee grounds in just 2-3 weeks
Contamination resistant – they can often outcompete molds and bacteria
Forgiving – they tolerate varying conditions better than most species
Prolific fruiters – even a small container can produce impressive harvests
For your first grow, I’d specifically recommend Pearl Oysters (Pleurotus ostreatus) or Blue Oysters (Pleurotus columbinus). The Pearl variety does well at room temperature (65-75°F), while Blue Oysters prefer slightly cooler conditions.
Other Beginner-Friendly Options
Once you’ve mastered oysters, you might want to try:
Pink Oysters (Pleurotus djamor) – great for warmer environments (75-85°F)
Wine Cap (Stropharia rugosoannulata) – works well in outdoor coffee ground beds
Shiitake – more challenging but possible when mixed with hardwood sawdust
I’d recommend sticking with oysters for your first few grows. They’re not just easier – they’re also delicious and versatile in the kitchen!
Step-by-Step growing process
Step 1: Collect and prepare coffee grounds
Your success starts with good coffee grounds. Here’s what you need to know:
Where to get your grounds:
Your home coffee maker (easiest source)
Local coffee shops (many are happy to give away grounds)
Office break rooms (check with whoever makes the coffee)
What to look for:
Freshness – use grounds within 24 hours of brewing
Moisture – grounds should be damp but not soggy
No mold – avoid grounds that smell musty or show discoloration
I’ve had great success asking my neighborhood café for grounds. I just drop off a clean bucket in the morning and pick it up at the end of the day – free substrate!
Preparation tips:
Break up any clumps in your coffee grounds
If the grounds seem too wet, spread them out to dry slightly
If using supplementary materials like straw, pasteurize them first by soaking in hot water (160-170°F) for 1-2 hours
Remember, coffee grounds come pre-pasteurized from the brewing process – that’s one of their big advantages as a substrate!
Step 2: Add Mushroom Spawn
Now for the exciting part – adding the spawn that will grow into your mushrooms:
Put your coffee grounds in a clean container
Break up the mushroom spawn into small pieces
Mix thoroughly with the coffee grounds (aim for 1 part spawn to 5 parts coffee grounds)
Ensure the spawn is distributed evenly throughout
My first time, I didn’t break up the spawn enough, and it took longer to colonize. Learn from my mistake – really break it up for faster, more even growth!
Step 3: Create the perfect growing environment
Your coffee grounds and spawn need the right home to thrive:
Transfer the mixture to a clear plastic bag or container
Create small air holes (about 1/4 inch) every few inches around the container
Seal the top with rubber bands or tape
Place in a warm, dark location (65-75°F is ideal)
I use the top shelf of my kitchen cabinet – it’s warm, dark, and out of the way. Just remember where you put it so you don’t forget to check on it!
Your container doesn’t need to be fancy. I’ve used everything from ziplock bags to old takeout containers with great results.
Step 4: Monitoring the Colonization Phase
This is the waiting game, but it’s fascinating to watch:
Within 3-5 days, you should see white, thread-like growth (mycelium) spreading through the grounds
By 2 weeks, most of your container should appear white with mycelium
The mycelium should smell fresh and earthy – any sour or unpleasant smell indicates contamination
I recommend checking your container daily, but don’t open it during this phase! Just observe through the clear plastic to avoid introducing contaminants.
What to watch for:
White, cotton-like growth = good! This is healthy mycelium.
Green, black, or blue spots = bad! This is mold contamination.
Yellow liquid = stress. The mycelium may be too wet or fighting contamination.
If you see contamination, don’t panic! Small spots can sometimes be removed, or you can let the mycelium fight it out (oysters often win!).
Step 5: Triggering and Supporting Fruiting
When your container is fully colonized (mostly white), it’s time to trigger fruiting:
Move your container to a location with indirect light (a north-facing window works well)
Cut larger holes (1-2 inches) in the plastic to allow mushrooms to grow out
Increase humidity by misting with water 2-3 times daily
Maintain room temperature between 60-75°F
This change in environment signals to the mycelium that it’s time to produce mushrooms. Within 3-7 days, you should see tiny mushroom “pins” forming.
A little tip from my experience: After cutting the holes, I drape a lightly damp paper towel over parts of my container to create a humid microclimate that mushrooms love.
Step 6: Harvesting Your Mushrooms
The most rewarding part! Here’s how to know when and how to harvest:
When to harvest:
Oyster mushrooms are ready when the caps are still slightly curved downward
Don’t wait until the caps flatten completely or curl upward
Most mushrooms will reach optimal size within 4-7 days of appearing
How to harvest:
Grasp the cluster at the base
Twist gently while pulling away from the substrate
Alternatively, cut the mushrooms at the base with a clean knife
I remember my first harvest – I waited too long and the caps started dropping spores everywhere. For the best flavor and texture, harvest when the caps are still somewhat curled under.
After harvesting, refrigerate mushrooms immediately and use within a week. Or sauté them right away for the freshest meal you’ve ever had!
Troubleshooting: Common Problems and Solutions
Even experienced growers run into issues sometimes. Here are the problems I’ve encountered and how I solved them:
No Growth or Slow Growth
Problem: After 2 weeks, you see little or no white mycelium.
Possible causes:
Temperature too low
Contamination inhibiting growth
Old or inactive spawn
Solutions:
Move to a warmer location (65-75°F is ideal)
Mix in more spawn if available
Be patient – sometimes growth starts slowly but accelerates
When my first batch was growing slowly, I moved it from my basement to my kitchen cabinet, and the warmer temperature kickstarted the mycelium growth.
Mold and Contamination Issues
Problem: Green, black, or blue spots appearing in your container.
Possible causes:
Unclean materials or workspace
Old coffee grounds
Too much moisture
Solutions:
For small contamination: Remove affected areas with a clean spoon
For widespread contamination: Unfortunately, it’s best to start over
For future grows: Use fresher grounds and sanitize all equipment
My second grow developed a small green patch. I scooped it out with a clean spoon that I’d wiped with alcohol, and the mycelium took over the space successfully.
Fruiting Problems
Problem: Fully colonized substrate, but no mushrooms appear.
Possible causes:
Insufficient fresh air exchange
Too little light
Low humidity
Not enough temperature difference to trigger fruiting
Solutions:
Create more/larger holes in your container
Move to a location with indirect light
Increase misting to 3-4 times daily
Try a cooler location (a drop of 5-10°F can trigger fruiting)
I once had a stubborn batch that wouldn’t fruit until I moved it to my bathroom and gave it a light misting after every shower. The extra humidity did the trick!
Advanced Tips for Better Yields
Ready to take your mushroom growing to the next level? Here are some techniques that have helped me increase my harvests:
Supplementing Your Coffee Grounds
Coffee grounds alone work fine, but adding these supplements can boost your yields:
Straw (pasteurized): Improves aeration and provides additional nutrients
Hardwood sawdust: Great structural support for the mycelium
Gypsum (1-2%): Helps regulate pH and provides calcium and sulfur
I’ve had great results with a mix of 70% coffee grounds, 25% pasteurized straw, and 5% gypsum – my yields nearly doubled compared to coffee grounds alone!
Getting Multiple Flushes
Don’t throw out your substrate after the first harvest! Try this to get additional flushes:
After harvesting all mushrooms, submerge the entire block in clean, cold water for 12-24 hours
Drain thoroughly and return to your fruiting container
Resume regular misting and fresh air exposure
Most blocks will produce 2-3 flushes, with each subsequent flush yielding about 60-70% of the previous one. I’ve gotten up to 4 flushes from a single coffee ground block!
Scaling Up Your Growing Operation
Once you’ve mastered the basics, here are ways to expand:
Multiple containers: Stagger your starts for continuous harvests
Larger containers: Five-gallon buckets with holes work great for bigger grows
Collect more grounds: Partner with local cafés for regular pickups
I started with one small container and now run five larger ones in rotation – providing enough mushrooms for my family and friends year-round!
Frequently asked questions
How long does it take to grow mushrooms on coffee grounds? From start to harvest, expect 3-4 weeks. The colonization phase takes 2-3 weeks, and fruiting takes another 5-7 days. The actual timeline can vary based on temperature, humidity, and mushroom species.
Can I use coffee grounds from any coffee maker? Yes! Grounds from drip makers, French press, espresso machines, or even instant coffee all work fine. Just ensure they’re free from mold and used within 24 hours of brewing.
What types of mushrooms grow best on coffee grounds? Oyster mushrooms (particularly Blue and Pearl varieties) grow best on coffee grounds. With some additional supplements, you can also grow Pink Oysters, Wine Caps, and even Shiitake mushrooms.
Is it safe to eat mushrooms grown on coffee grounds? Absolutely! The mushrooms don’t taste like coffee at all. They break down the compounds in the grounds and convert them into mushroom tissue. Just make sure your growing conditions are clean to avoid contamination.
Do I need special equipment to grow mushrooms? No special equipment is required for small-scale growing. Basic household items like plastic bags, spray bottles, and rubber bands are sufficient. The only specialty item you’ll need is mushroom spawn, which you can order online.
Can I reuse coffee grounds for multiple batches? After your mushroom block stops producing (usually after 2-4 flushes), the spent substrate makes excellent garden compost but shouldn’t be reused for new mushroom grows.
Your mushroom growing journey begins!
Growing mushrooms on coffee grounds is one of the most rewarding sustainable hobbies I’ve ever taken up. There’s something genuinely magical about transforming daily waste into delicious food – and once you’ve tasted freshly harvested mushrooms, store-bought will never compare!
Remember, mushroom cultivation is part science, part art, and part patience. Don’t be discouraged if your first attempt isn’t perfect. Each grow teaches you something new, and soon you’ll develop an intuition for what your mushrooms need.
So gather those coffee grounds, order some spawn, and start growing! I’d love to hear about your experiences and answer any questions that come up along the way. Happy growing!
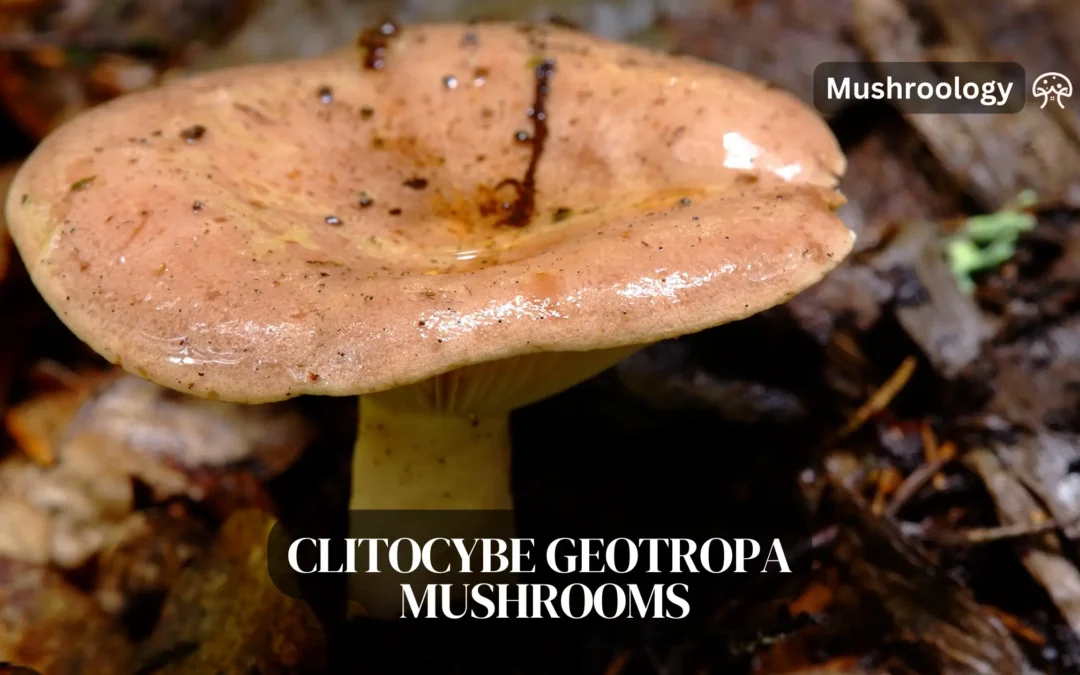
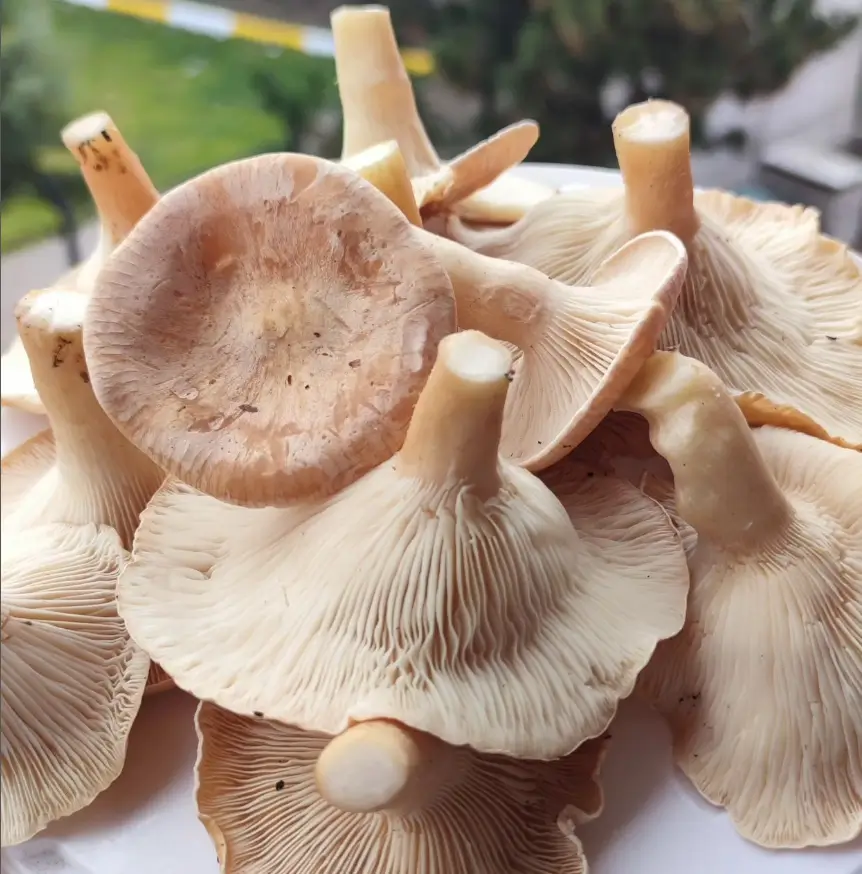
Clitocybe geotropa, is a fascinating species within the fungal kingdom. Here are ten scientific facts about this mushroom:
Clitocybe geotropa belongs to the genus Clitocybe, known for its funnel-shaped mushrooms. This species is part of the Basidiomycota division, which includes fungi that reproduce sexually through the formation of specialized cells called basidia.
It is commonly referred to as the Trooping Funnel due to its habit of appearing in large, dense groups with cap shapes resembling funnels. It’s also known as the Monk’s Head and the Rickstone Funnel.
The cap of Clitocybe geotropa can reach up to 20 cm in diameter, starting convex but becoming more funnel-shaped as it matures. The cap color varies from creamy white to pale brown.
Its gills are decurrent, meaning they extend down the stem, and are closely packed. The gills are white to cream in color, which contrasts with the slightly darker cap.
The stem of Clitocybe geotropa is tall, thick, and white, often bulging towards the base. It lacks a ring, which is a common feature in many other mushroom species.
This mushroom is commonly found in deciduous and coniferous forests, particularly under beech and spruce trees. It prefers well-drained soils and is often found in large rings or arcs, a phenomenon known as fairy rings.
Clitocybe geotropa is widely distributed across Europe and North America. Depending on local climate conditions, it appears from late summer to late autumn.
It is an edible species, appreciated for its mild, nutty flavor. However, caution is advised as it can be confused with other toxic Clitocybe species, and some people may experience gastrointestinal upset after consuming it.
While specific nutritional studies on Clitocybe geotropa are limited, mushrooms in general are known to be a good source of vitamins, minerals, and dietary fiber, with low fat and calorie content.
As a saprotrophic fungus, Clitocybe geotropa plays a crucial role in forest ecosystems by decomposing leaf litter and other organic matter, recycling nutrients back into the soil.
How to cultivate Clitocybe geotropa mushroom
The cultivation of Clitocybe geotropa, like that of Clitocybe maxima, would likely involve similar stages: substrate preparation, inoculation, colonization, fruiting, and harvesting. However, since Clitocybe geotropa naturally grows in woodland settings, mimicking its natural habitat would be key to successful cultivation.
Substrate Preparation
Clitocybe geotropa would thrive on a substrate that closely resembles its natural forest floor environment. A mix of hardwood sawdust, enriched with beech wood components if possible, and supplemented with straw and other organic matter, could provide a suitable base.
The substrate’s moisture content, pH, and nutrient levels would need to be carefully controlled to match the requirements of Clitocybe geotropa.
Inoculation and Colonization
Spores or mycelium of Clitocybe geotropa would be introduced to the prepared substrate in a sterile environment to prevent contamination.
The inoculated substrate would then be kept under controlled conditions to allow the mycelium to colonize the substrate fully. This process might take several weeks and requires monitoring for temperature, humidity, and possible contamination.
Fruiting Conditions
Once colonization is complete, conditions would be adjusted to trigger fruiting. This might involve changes in temperature, light exposure, and humidity, mimicking the transition to autumn, when Clitocybe geotropa naturally fruits.
Maintaining adequate humidity and providing a slight drop in temperature could be crucial for initiating the fruiting phase.
Harvesting
Instagram @hayat_dogadaguzel
Mushrooms can be harvested once they’ve reached the desired size. Like Clitocybe maxima, the fruit bodies of Clitocybe geotropa should be cut at the base, avoiding damage to the mycelium to allow for subsequent fruitings.
Challenges and Considerations
Given that Clitocybe geotropa is less commonly cultivated than other mushrooms, obtaining spawn might be more challenging. Enthusiasts might need to isolate their own mycelium from wild specimens, a process that requires sterility and patience.
Because Clitocybe geotropa grows in symbiosis with trees, simulating this environment might require innovative approaches, such as incorporating tree root extracts into the substrate or growing mushrooms in proximity to living trees in controlled environments.
Research into the specific needs of Clitocybe geotropa, along with experimentation to optimize growth conditions, would be necessary steps for anyone looking to cultivate this species commercially or as a hobby. As with any mushroom cultivation, cleanliness, patience, and attention to environmental conditions are key factors for success.
FAQs for Clitocybe geotropa
1. What is Clitocybe geotropa? Clitocybe geotropa, also known as the Trooping Funnel or Monk’s Head, is a large, sturdy cream- or buff-colored funnel-shaped mushroom. It is widely found in Europe and, to a lesser extent, in North America.
2. Is Clitocybe geotropa edible? Yes, Clitocybe geotropa is considered an edible mushroom. It has a faint smell of bitter almonds and a non-distinctive taste. However, caution is advised as it can be confused with poisonous species.
3. What does Clitocybe geotropa look like? The mushroom has a cream or buff-colored cap that can reach up to 20 cm in diameter, with a prominent boss in young specimens. As it matures, the cap becomes more funnel-shaped. The decurrent gills are the same color as the cap, and the stipe is bulbous, larger at the base.
4. Where can I find Clitocybe geotropa? It grows in mixed woodlands, often in troops or fairy rings. It is very common throughout Britain and Ireland and is also found across mainland Europe and in North America.
5. When is Clitocybe geotropa in season? In Britain and Ireland, it appears from August to early December, but in southern Europe, it can be found a month or more later, occasionally right through to the start of the New Year.
6. How can I distinguish Clitocybe geotropa from poisonous mushrooms? Clitocybe geotropa can be confused with poisonous species like Clitocybe dealbata and Clitocybe rivulosa. However, these poisonous species do not grow as large as the Trooping Funnel. Always check for a white spore print and the characteristic almond smell to help with identification.
7. What are some common uses for Clitocybe geotropa? When young and fresh, it can be fried with onions or used in risottos, soups, and many other mushroom dishes. The stems are rather tough, so many people discard them and eat just the caps.
8. What is the taxonomic status of Clitocybe geotropa? Some authorities now accept this species as a member of a new genus proposed in 2003 by Finnish mycologist Harri Harmaja, recording it as Infundibulicybe geotropa.9. Are there any health benefits associated with Clitocybe geotropa? Research has indicated that Clitocybe geotropa has neuroprotective, antioxidative, antimicrobial, and moderate cytotoxic activity, highlighting its potential health benefits.
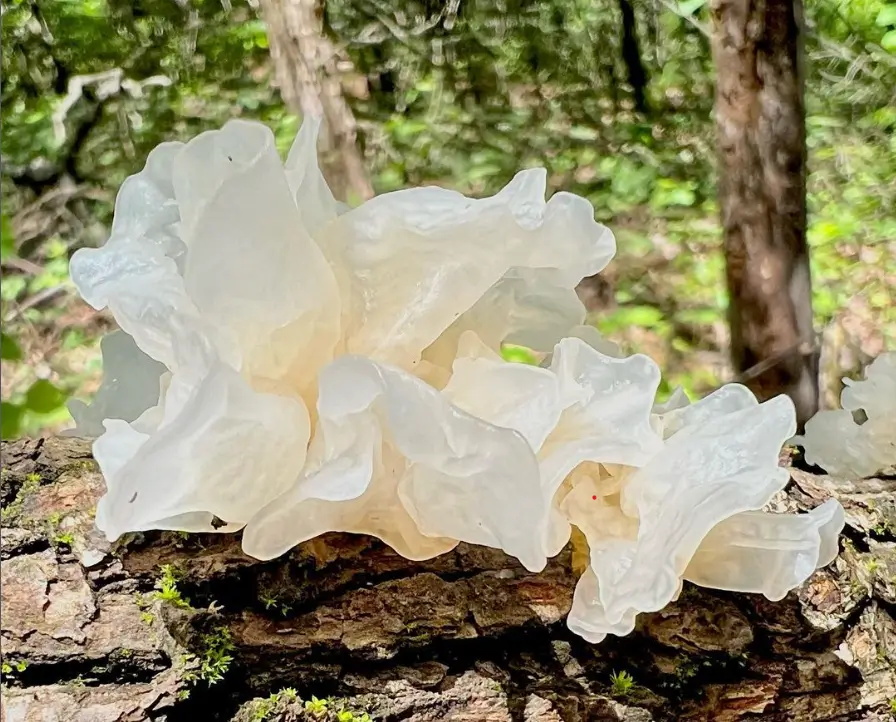
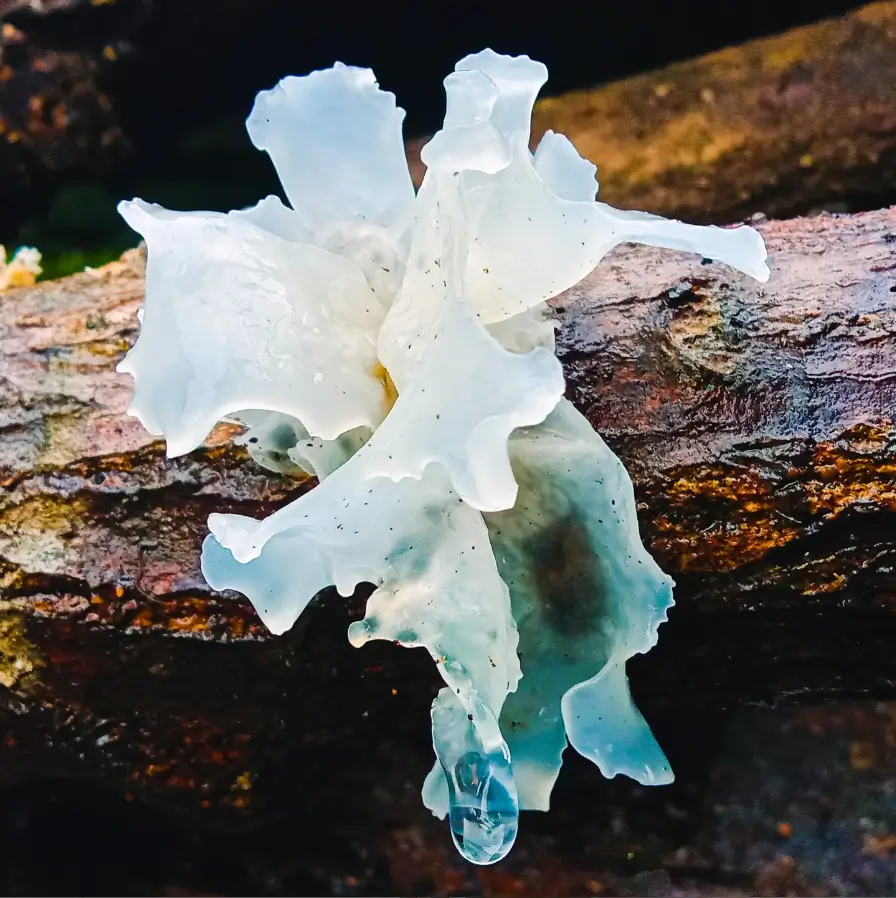
Tremella fuciformis, commonly known as snow fungus, silver ear mushroom, white jelly mushroom, snow ear, and white wood ear, is a unique edible fungus celebrated for its gelatinous texture and health benefits. In Chinese, it’s referred to as 银耳 (yín ěr), meaning “silver ear,” and in Japanese, it’s called シロキクラゲ (shiro kikurage), translating to “white tree jellyfish.”
Tremella mushroom, often hailed as nature’s hyaluronic acid, are a treasure trove of benefits for health and beauty. These frilly, translucent fungi have been a cornerstone in Traditional Chinese Medicine for millennia, revered for their disease prevention, immunity-boosting, and skin-improving properties.
Why learn how to grow Tremella mushroom?
Before we dive into the nitty-gritty of tremella cultivation, let’s talk about why you might want to learn how to grow tremella mushroom in the first place. Trust me, once you discover the benefits of this remarkable fungus, you’ll be itching to get your hands dirty.
Instagram @amazing_fungi_girl
The Many Wonders of Tremella Fuciformis
Tremella fuciformis isn’t just a pretty face in the fungal world (though it is quite stunning with its translucent, snow-white frills). This mushroom is packed with potential health benefits that have made it a staple in Eastern medicine and cuisine for generations. Here are just a few reasons why learning how to grow tremella mushroom might be worth your while:
Skin Health: Tremella is often called the “beauty mushroom” due to its potential skin-hydrating properties. It’s like nature’s own moisturizer!
Antioxidant Powerhouse: These little fungi are loaded with antioxidants, which can help protect your cells from damage.
Immune Support: Some studies suggest that tremella may give your immune system a helpful boost.
Culinary Delight: In the kitchen, tremella adds a unique texture and subtle flavor to soups, desserts, and teas.
Sustainable Hobby: Learning how to grow tremella mushroom can be an eco-friendly and rewarding hobby.
Now that you’re excited about tremella let’s roll up our sleeves and get into the fun part – learning how to grow tremella mushroom from scratch!
Essential equipment for Tremella cultivation
Before we dive into the step-by-step process of how to grow tremella mushroom, let’s make sure you have all the necessary tools and equipment. Don’t worry; you don’t need a professional lab setup to get started. Here’s a list of items you’ll need:
Got everything? Great! Now let’s move on to the exciting part – the step-by-step guide on how to grow tremella mushroom.
Instagram @micomedicina
How to grow Tremella mushroom – step-by-step guide
Step 1: Prepare your substrate
The first step in learning how to grow tremella mushroom is creating the perfect home for your fungi to thrive. Tremella loves hardwood, so we’ll be using a sawdust-based substrate. Here’s a simple recipe to get you started:
5 parts hardwood sawdust
1 part wheat bran
1% gypsum (by weight of dry ingredients)
Enough water to reach 60-65% moisture content
Mix these ingredients thoroughly in a large, clean container. The mixture should feel damp but not soaking wet – like a wrung-out sponge. This is crucial for successful tremella cultivation, so take your time to get it right!
Step 2: Substrate sterilization – a key step in Tremella mushroom cultivation
Now that you’ve prepared your substrate, it’s time to sterilize it. This step is crucial in preventing contamination and giving your tremella the best chance to thrive. Here’s how to do it:
Fill your substrate containers (jars or bags) about 2/3 full with the mixture.
If using jars, cover the lids with foil. For bags, fold the top and secure with a paperclip.
Place the containers in your pressure cooker or large pot.
For a pressure cooker, sterilize at 15 PSI for 2 hours. In a pot, boil for 4-5 hours, ensuring the water doesn’t evaporate.
Allow the containers to cool completely before handling.
Congratulations! You’ve just completed one of the most critical steps in how to grow tremella mushroom. Proper sterilization sets the stage for successful cultivation.
Step 3: Inoculation of tremella spawn
Tremella mushrooms are unique in their cultivation requirements. They are parasitic yeasts that require a host fungus, typically Hypoxylon archeri, to grow. This symbiotic relationship is essential for the successful cultivation of Tremella mushrooms.
To grow Tremella, cultivators typically need to first inoculate a substrate with Hypoxylon archeri. Once the Hypoxylon has colonized the substrate, Tremella spores or spawn can be introduced.
Mixed culture technique: A mixed-culture cultivation technique is used, involving both Hypoxylon archeri and Tremella fuciformis. The ratio of Tremella to Hypoxylon is crucial in this approach.
Now comes the exciting part – introducing the tremella culture to your sterilized substrate. This process, known as inoculation, is where the magic begins. Here’s how to do it:
Clean your workspace thoroughly with isopropyl alcohol.
Put on your gloves and face mask.
If using liquid culture, shake the bottle well before use.
Open your substrate container slightly and add about 5-10 ml of liquid culture (or a tablespoon of grain spawn).
Seal the container immediately after inoculation.
Remember, cleanliness is key when learning how to grow tremella mushroom. Any contaminants introduced during this stage can ruin your entire batch, so take your time and be meticulous.
Step 4: Incubation – patience is a virtue
After inoculation, it’s time to let your tremella mycelium colonize the substrate. This process is called incubation, and it’s where your patience will be tested. Here’s what you need to know:
Place your inoculated containers in a warm, dark place.
Maintain a temperature between 70-75°F (21-24°C).
Check your containers regularly for signs of growth or contamination.
Incubation typically takes 2-4 weeks, depending on conditions.
During this time, you’ll see white, fluffy mycelium spreading through the substrate. This is a good sign and means you’re on the right track in your journey of how to grow tremella mushroom!
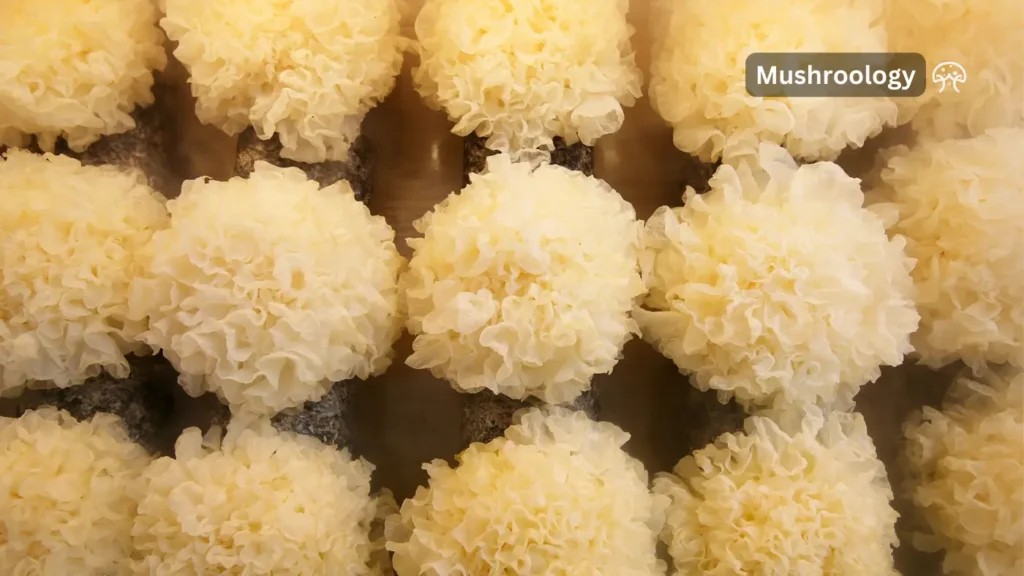
Step 5: Fruiting – watch your Tremella bloom
Once your substrate is fully colonized, it’s time to induce fruiting. This is where you’ll see the familiar snow-white frills of tremella start to form. Here’s how to create the perfect fruiting conditions:
Move your colonized containers to a fruiting chamber or area with indirect light.
Maintain high humidity (80-90%) using a humidifier or regular misting.
Keep the temperature between 68-72°F (20-22°C).
Ensure good air circulation without direct drafts on the mushrooms.
Mist the fruiting bodies lightly 2-3 times a day.
Within a week or two, you should start seeing small tremella fruiting bodies forming. Congratulations – you’re well on your way to mastering how to grow tremella mushroom!
Step 6: Harvest your Tremella mushroom
As your silver ear mushrooms mature, they’ll grow into beautiful, frilly clusters. But when is the right time to harvest? Here are some tips:
Harvest when the fruiting bodies are fully developed but before they start to dry out.
Use clean, sharp scissors to cut the mushrooms at the base.
Handle the mushrooms gently to avoid damaging them.
After harvesting, you can often get a second flush by maintaining fruiting conditions.
Remember, learning how to grow tremella mushroom is an art as much as a science. With each harvest, you’ll gain experience and refine your technique.
Tips for Tremella cultivation
Now that you’ve got the basics of how to grow tremella mushroom down, let’s explore some advanced techniques to take your cultivation to the next level:
Prepare your own liquid culture
Creating your own liquid culture can significantly speed up colonization times. Here’s a simple recipe:
Mix 4% honey or light malt extract with distilled water.
Sterilize the mixture in a pressure cooker.
Once cooled, add a small piece of clean tremella tissue.
Incubate at room temperature, shaking occasionally.
In a few weeks, you’ll have a ready-to-use liquid culture for your next round of inoculation!
Experimenting with substrates
While the sawdust-based substrate we discussed earlier works well, tremella can grow on various materials. Try experimenting with:
Different hardwoods (maple, birch, etc.)
Soybean hulls
Corn cobs
Remember to adjust moisture content and sterilization times accordingly.
Optimizeg fruiting conditions
Fine-tuning your fruiting conditions can lead to larger and more abundant harvests. Consider:
Using LED lights to provide indirect illumination
Implementing a fog system for consistent humidity
Creating a laminar flow hood for ultra-clean inoculations
These advanced techniques can help you become a true expert in how to grow tremella mushroom.
Troubleshooting common issues in tremella cultivation
Even with the best practices, you might encounter some challenges in your tremella cultivation journey. Here are some common issues and how to address them:
Contamination
If you see any green, black, or odd-colored growths, it’s likely contamination. Unfortunately, the best course of action is to dispose of the contaminated container to prevent spread.
Slow growth
If your mycelium seems to be growing slowly, check your temperature and humidity levels. Tremella prefers slightly warmer temperatures during colonization.
Poor fruiting
If you’re not seeing fruiting bodies, ensure you’re providing enough fresh air exchange and maintaining high humidity. Sometimes, a cold shock (dropping the temperature by a few degrees) can trigger fruiting.
Remember, every challenge is an opportunity to learn more about how to grow tremella mushroom. Don’t get discouraged – even experienced growers face setbacks sometimes!
How to store and use your Tremella harvest
Congratulations on your successful tremella harvest! But the journey doesn’t end here. Proper storage and use of your mushrooms are just as important as knowing how to grow tremella mushroom. Here are some tips:
Store fresh silver ear mushroom
Fresh tremella can be stored in the refrigerator for up to a week.
Place them in a paper bag or container lined with paper towels to absorb excess moisture.
Avoid plastic bags, which can cause the mushrooms to become slimy.
Drying Tremella
Clean the mushrooms gently with a soft brush.
Use a food dehydrator or oven on the lowest setting to dry the mushrooms.
Store dried tremella in an airtight container in a cool, dark place.
Using Your Tremella
Now that you know how to grow tremella mushroom, it’s time to enjoy the fruits of your labor! Here are some ideas:
Rehydrate dried tremella and add to soups or stews.
Blend fresh or rehydrated tremella into smoothies for a nutritional boost.
Make a tremella-infused face mask for a natural skincare treatment.
Steep dried tremella in hot water to make a nourishing tea.
The possibilities are endless, so get creative and enjoy your home-grown tremella!
So, are you ready to start your tremella growing adventure? Grab your supplies, roll up your sleeves, and dive into the wonderful world of mushroom cultivation. Who knows – this might be the beginning of a lifelong passion!
Happy growing, and may your tremella harvests be bountiful!
FAQs
1. What are Tremella mushrooms? Tremella mushrooms, also known as Snow fungi, are a species of jelly-like fungi that have been used in traditional Chinese medicine and cuisine for centuries. They are known for their hydrating properties and ability to hold up to 500 times their weight in water.
2. What are the health benefits of Tremella mushrooms? Tremella mushrooms are rich in antioxidants and contain compounds that boost the immune system. They are also beneficial for skin and hair health, promoting hydration and healing. Additionally, Tremella mushrooms support brain health, healthy bones, and a healthy metabolism.
3. How do Tremella mushrooms support skin health? Tremella mushrooms exceed even hyaluronic acid in hydrating properties, making them a popular ingredient in skincare products. They help keep the skin soft and supple, support the production of enzymes that maintain a healthy appearance, and are used to support healthy respiration and lung tissue.
4. Can Tremella mushrooms be used in cooking? Yes, Tremella mushrooms are popular in Chinese cuisine, especially in sweet dishes like dessert soups with traditional fruits like jujubes. They have a velvety texture and absorb flavors well, making them a versatile ingredient in both savory and sweet preparations.
5. How are Tremella mushrooms cultivated? Tremella mushrooms require a host fungus, typically Hypoxylon archeri, to grow. They can be cultivated on natural logs or synthetic substrates using a mixed culture inoculum technique. The cultivation process involves preparing the substrate, inoculation with the host fungus and Tremella spores, and maintaining specific environmental conditions for fruiting.
6. What substrate is used for Tremella mushroom cultivation? A lignocellulosic material such as sawdust, supplemented with nutrients like wheat bran or rice bran, is commonly used as the substrate for Tremella mushroom cultivation. The substrate is then pasteurized or sterilized to eliminate competing microorganisms.
7. How long does it take for Tremella mushrooms to grow? The time from inoculation to harvest can vary, but typically, Tremella mushrooms take several weeks to colonize the substrate and an additional few weeks to fruit. The entire process from start to harvest can take approximately 2 to 3 months.
8. Where can I find Tremella mushroom spawn or spores? Tremella mushroom spawn or spores can be sourced from specialized mushroom cultivation suppliers, online marketplaces, and mycology forums and communities.
9. Are there any special considerations for growing Tremella mushrooms at home? Since Tremella mushrooms are parasitic on other fungi, cultivating them at home requires inoculating the substrate with both the host fungus and Tremella spores. Maintaining the right temperature, humidity, and lighting conditions is crucial for successful cultivation.
10. How are Tremella mushrooms harvested? Tremella mushrooms are harvested by gently twisting and pulling them from the substrate. They can be harvested in waves, as new mushrooms will continue to grow after the initial harvest. The harvested mushrooms can be used fresh or dried for later use.