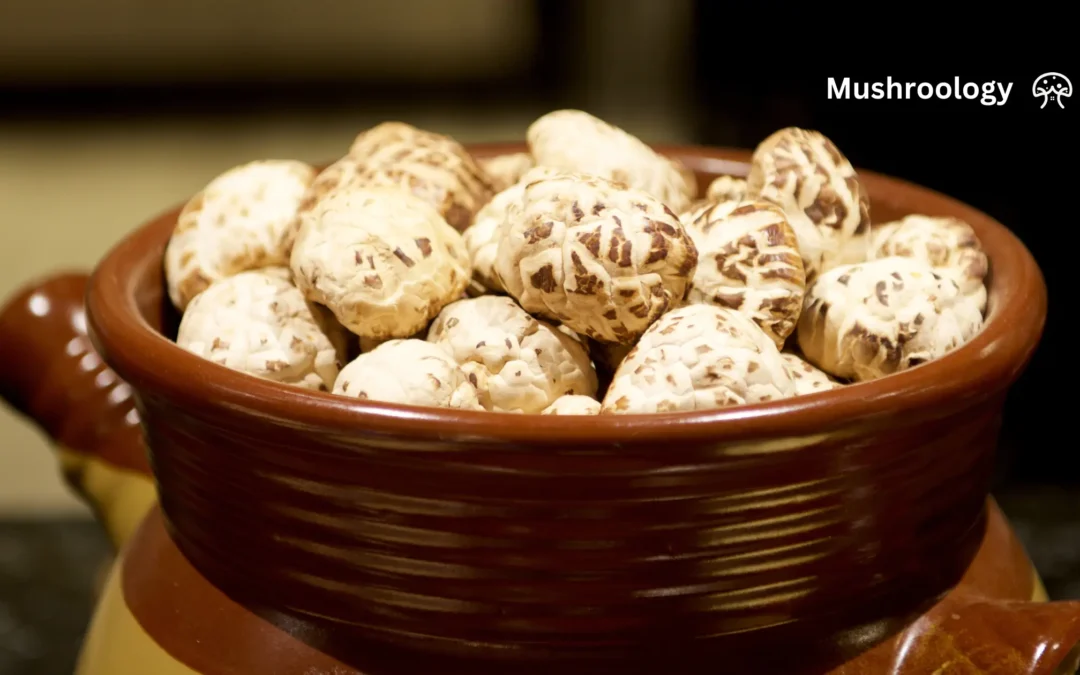
Have you ever wondered why some foods cost hundreds of dollars? Japan’s “White Flower” shiitake mushrooms, also called Hana-Donko, are among the world’s most expensive mushrooms. Some have sold for as much as $2,200 at special auctions!
These aren’t your everyday mushrooms. The white cracks on their caps look like flower patterns (hence the name), and their rich flavor makes them a treasure in fine dining. But what makes them truly special is how they’re grown – using methods that are over 1,000 years old.
The ancient art of growing shiitake mushrooms
Unlike regular mushrooms that grow in just weeks, Hana-Donko shiitake take years to produce. Japanese farmers use a special method called Genboku that requires:
Special Oak Logs: Farmers carefully select sweet oak logs with the right thickness
Hand Inoculation: They drill holes and insert mushroom spores by hand
Natural Aging: The logs rest in forest shade for 18-24 months
Perfect Conditions: The mushrooms only grow when temperature and humidity are just right
This slow process is why each log produces only a small amount of mushrooms twice a year. A single log can keep producing for 3-7 years before it completely breaks down.
Why They Cost So Much: The 60% Rule
Not every shiitake mushroom makes the cut as a premium “White Flower” variety. To earn this title, mushrooms must pass six strict tests:
Must be the perfect size (33-42mm cap)
Need at least 80% white cracking on the surface
Have tightly curled edges
Contain thick, meaty flesh
Have very low moisture content after drying
Show zero blemishes or damage
Only about 5-10% of all harvested shiitake qualify as the premium Hana-Donko grade. This rarity helps explain why they cost up to 40 times more than regular shiitake mushrooms!
A Market in Transition
The global shiitake market is growing fast and should reach $1.2 billion by 2032. But in Japan, there’s a problem: most mushroom farmers are over 60 years old, and fewer young people want to continue this labor-intensive tradition.
Growing Markets
Asia: Especially Hong Kong and Taiwan, where demand rises 15% yearly
North America: Health-conscious consumers love shiitake’s high vitamin D content
Online Sales: Luxury food platforms are selling more premium mushrooms each year
Challenges
Climate Change: Warmer temperatures are delaying harvests by several weeks
Labor Shortages: Growing these mushrooms takes 300+ hours per year per hectare
Log Shortages: The special oak trees needed are becoming harder to find
From Forest to Table: How Premium Shiitake Are Used
Premium dried shiitake are prized in high-end cooking for their:
Rich Umami Flavor: They add depth to soups, stews, and sauces
Meaty Texture: When rehydrated, they have a satisfying bite
Health Benefits: They’re packed with vitamins D and B, plus minerals and antioxidants
In Japan, these mushrooms are also popular as luxury gifts, especially during holidays. Beautiful gift boxes of premium shiitake can cost hundreds of dollars but are seen as prestigious presents.
Balancing tradition with technology
How can this ancient tradition survive in the modern world? Forward-thinking farmers are finding solutions:
Smart Sensors: Some use AI-powered devices to monitor growing conditions
Blockchain Tracking: QR codes let buyers verify where and how the mushrooms were grown
Automated Sorting: Special cameras help grade mushrooms faster than human eyes
Sustainability Programs: “Adopt-a-Log” initiatives help urban consumers support rural farmers
Experience the luxury of Hana-Donko Shiitake mushroom
While the finest Hana-Donko mushrooms may be beyond most budgets, you can still try good-quality dried shiitake in your cooking:
Rehydrate Properly: Soak in warm water for 20-30 minutes until soft
Save the Liquid: The soaking water makes an excellent broth base
Slice Before Cooking: Cut into strips to release more flavor
Add to Stir-fries and Soups: They pair wonderfully with Asian flavors
For those lucky enough to try premium Hana-Donko shiitake, savor them slowly. These mushrooms represent centuries of tradition, countless hours of expert care, and the perfect balance of nature and human craft.
The future of premium Shiitake mushrooms
As one Japanese chef says, “We serve Ishikawa’s mushrooms not just for taste—but to sustain communities.” By supporting sustainable shiitake farming, consumers help preserve both cultural traditions and forest ecosystems.
Whether they’re selling for thousands at auction or being savored in a special meal, Japan’s White Flower shiitake mushrooms remain one of the food world’s most fascinating luxury crops.
This beginner-friendly guide provides clear instructions from basic to advanced methods, including agar preparation, cloning techniques, and troubleshooting. With structured guidance and clear visuals, it’s perfect for successfully cultivating mushrooms at home.
A visual resource that covers substrates, species-specific methods, and troubleshooting. The clear explanations make it an excellent choice for beginners wanting to grow mushrooms at home.
Offering clear, beginner-focused instructions for both indoor and outdoor cultivation, this book provides an accessible entry point for those new to mushroom growing.
This book features accessible, low-tech home cultivation methods with an emphasis on sustainability. It’s perfect for those who prefer simple yet effective DIY approaches that work even in limited spaces.
The definitive guide covering cultivation methods for 31 mushroom species, this comprehensive resource includes troubleshooting advice, gardening tips, updated production techniques, and detailed growth parameters. Authored by renowned mycologist Paul Stamets, it’s ideal for serious cultivators seeking deep knowledge.
Known as “The Grower’s Bible,” this book covers detailed cultivation techniques for edible and psychoactive mushrooms, substrate preparation, contamination control, and mushroom genetics. It’s an ideal reference for serious growers seeking comprehensive scientific knowledge and practical methods.
This practical guide ranges from basic to advanced organic cultivation techniques, including experimental methods and mycoremediation approaches. It’s perfect for growers who value organic practices, sustainability, and innovative mycological applications.
Offering step-by-step instructions on various innovative indoor and outdoor growing methods, this book is great for hobbyists looking for creative, practical solutions using accessible materials.
With contemporary indoor and outdoor growing techniques plus preservation tips, this modern approach is suitable for urban gardeners looking for practical techniques.
Species-Specific Cultivation Guides
11. The Shiitake Growers Handbook by John Donoghue & Paul Przybylowicz
This specialized manual details shiitake cultivation from substrates to pest management, making it a must-have resource for those specifically interested in shiitake production either commercially or as a hobbyist.
12. Mushroom Growing at Home with Agaricus Bisporus (Button Mushrooms) by Benjamin Hirst
A focused guide specifically on button mushroom cultivation at home with clear practical advice, perfect for those wanting specialized knowledge on successfully cultivating button mushrooms.
Psilocybin Mushroom Cultivation
13. The Psilocybin Mushroom Bible by Dr. K Mandrake & Virginia Haze
The definitive guide on safe psilocybin mushroom cultivation with updated research, ideal for those interested in the safe home cultivation of psilocybin mushrooms with scientifically grounded methods.
14. Psilocybin Mushrooms of the World by Paul Stamets
This comprehensive global identification guide covers psilocybin species with cultivation insights and includes historical context and cultural significance. It’s an essential reference for identifying or cultivating psilocybin mushrooms safely.
15. Magic Mushroom Grower’s Guide: Simple Steps to Bulk Cultivation by Principium Quaesitor
With step-by-step beginner-friendly instructions on bulk psilocybin mushroom cultivation, this book is an ideal starting point for cultivating magic mushrooms efficiently at a larger scale.
16. Magic Mushroom Grower’s Guide (Classic Manual) by Principium Quaesitor
This classic manual combines philosophical insights with practical home-growing methods and includes whimsical illustrations. It’s a valuable resource that merges cultural insights with practical bulk-cultivation techniques.
Foraging and Identification Guides
17. Mushrooms Demystified by David Arora
With extensive identification keys and detailed descriptions of over 2000 species, this is an indispensable reference for serious mushroom hunters needing accurate identification.
18. The Complete Mushroom Hunter by Gary Lincoff
This illustrated guide to identifying edible mushrooms, poisonous look-alikes, and recipes is an ideal companion for those who enjoy wild mushroom foraging safely with culinary insights.
19. Edible Mushrooms by Geoff Dann
A comprehensive guide to edible wild fungi in Britain and Europe with extensive identification information, this is an essential resource for European-based growers or wild mushroom enthusiasts seeking reliable identification guidance.
Medicinal Mushrooms and Environmental Applications
20. Mycelium Running by Paul Stamets
Exploring fungi’s ecological roles, bioremediation applications, sustainable cultivation methods, and environmental restoration, this book is essential for those interested in sustainable living and environmental solutions through mushroom cultivation.
21. Medicinal Mushrooms: A Clinical Guide by Martin Powell
Offering clinical insights into medicinal mushrooms’ health benefits along with practical dosage recommendations, this professional-grade resource is useful for healthcare providers integrating medicinal mushrooms into practice and vital for anyone interested in medicinal applications backed by clinical evidence.
Commercial and Sustainable Cultivation
22. Farming the Woods by Ken Mudge & Steve Gabriel
This book integrates mushroom cultivation into forest farming practices with permaculture principles, making it essential for permaculture enthusiasts seeking sustainable agroforestry approaches including mushroom cultivation.
23. Mycelial Mayhem by David & Kristin Sewak
Offering practical advice on cultivating mushrooms commercially or recreationally with companion planting strategies, this is ideal for those considering small-scale commercial mushroom farming or permaculture integration.
Conclusion
Whether you’re a hobbyist, professional grower, medicinal mushroom enthusiast, or environmentalist, these resources provide valuable knowledge for your mushroom cultivation journey. Start with the beginner guides if you’re new to cultivation, and progress to the more specialized texts as your experience and interests develop.
By investing in these educational resources, you’ll build a solid foundation of knowledge that will help you avoid common pitfalls, improve your yields, and discover the fascinating world of fungiculture.
Time to Harvest: 4-8 weeks (indoor method) | 2-6 months (outdoor method) Difficulty Level: Beginner to Intermediate Average Yield: 1-3 pounds per 5lb block (indoor) | 2-5 pounds per 3’×3′ bed (outdoor)
Quick Answer: To grow king oyster mushrooms indoors, inoculate sterilized hardwood sawdust with spawn, maintain humidity at 80-90%, and harvest when caps are fully formed but before edges turn upward. For outdoor growing, layer spawn with straw or wood chips in a shaded area and keep the bed consistently moist.
Table of Contents
Growing your own king oyster mushrooms can be an incredibly rewarding adventure. Whether you have a spare closet or a shaded garden corner, you can cultivate these gourmet delights at home. This comprehensive guide walks you through step-by-step instructions for both indoor and outdoor cultivation methods, ensuring success regardless of your space constraints or experience level.
Meet the King Oyster Mushroom
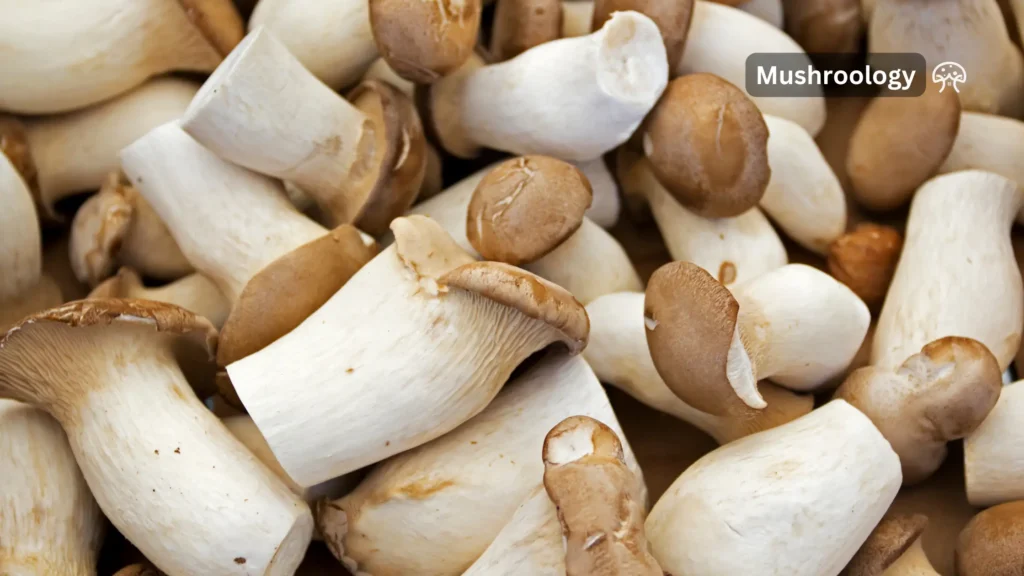
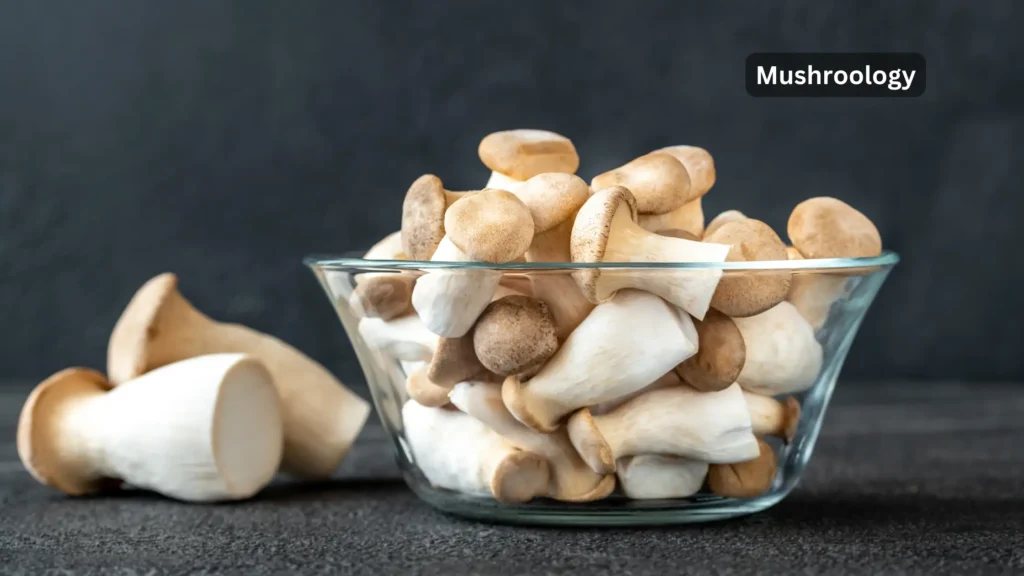
King oyster mushrooms (Pleurotus eryngii), also called king trumpet mushrooms, are prized for their meaty texture and rich umami flavor. Unlike their cousins, the regular oyster mushrooms, king oysters develop thick, substantial stems that are the culinary highlight of the species.
King oyster mushrooms can look dramatically different depending on how you grow them:
Indoor-grown kings typically develop thick, cylindrical stems with small pale caps due to lower fresh air levels and controlled lighting.
Outdoor-grown kings often form shorter stems with larger, darker brown caps that have a more rustic appearance.
Scientific Classification
Kingdom: Fungi
Division: Basidiomycota
Class: Agaricomycetes
Order: Agaricales
Family: Pleurotaceae
Genus: Pleurotus
Species: P. eryngii
Benefits of Growing Your Own
Cultivating your own king oyster mushrooms offers numerous advantages:
Freshness guarantee — harvest moments before cooking
Cost-effective — a single spawn purchase can yield multiple harvests
Chemical-free growing — control exactly what goes into your mushrooms
Year-round cultivation (indoor method)
Educational experience — watch the fascinating lifecycle of fungi
Unique culinary ingredient — restaurant-quality mushrooms at home
Many growers report savings of $15-20 per pound compared to store prices, with indoor setups paying for themselves within 2-3 harvests.
Essential Supplies & Equipment
Complete Shopping List
Required Item
Recommended Products
Purpose
Approx. Cost
Mushroom Spawn
King oyster grain spawn (North Spore, Field & Forest)
The “seed” material
$15-30
Growing Substrate
Hardwood sawdust pellets + wheat bran OR pre-made substrate block
Food for the mushrooms
$15-25
Growing Container
Filter patch grow bags OR plastic tote with modified lid
Holds substrate during colonization
$8-15
Spray Bottle
Any fine-mist bottle
Maintaining humidity
$3-8
Thermometer/Hygrometer
Digital display with probe
Monitoring conditions
$10-15
Pressure Cooker (optional for DIY)
Presto 23-Qt
Sterilizing substrate
$80-120
Humidity Tent (optional)
Mini greenhouse or clear plastic tote
Creating humid environment
$15-40
For Outdoor Cultivation
Hardwood chips or straw bales
Sawdust spawn (preferable over grain spawn)
Garden soil or peat moss for casing
Watering can with gentle shower head
Beginner’s Pro Tip
First-timers should consider starting with a pre-made grow kit ($25-35) which includes colonized substrate ready to fruit. This eliminates the need for sterilization equipment and provides a foolproof introduction to mushroom growing.
Grow King Oyster Mushroom Indoor
Step 1: Acquire Quality Spawn (Week 1)
Mushroom spawn is the living “seed” material that contains the mushroom mycelium. For king oysters, you have several options:
Grain spawn (rye, millet, wheat) — Best for indoor cultivation
Sawdust spawn — Works for both indoor and outdoor methods
Liquid culture — For advanced growers making their own grain spawn
Where to Buy Spawn:
North Spore (northspore.com)
Field & Forest Products (fieldforest.net)
Local mushroom farms (often sell spawn to home growers)
Storage Tip: Refrigerate spawn until use to maintain viability, but allow it to warm to room temperature for 12-24 hours before inoculation.
Step 2: Prepare the Growing Substrate (Week 1)
King oyster mushrooms grow best on hardwood-based substrates with nutritional supplements. Choose one of these methods:
Option A: Pre-Made Substrate (Easiest)
Purchase sterilized, supplemented sawdust bags ready for inoculation.
Option B: DIY Straw Substrate (Intermediate)
Cut straw into 1-3 inch pieces
Pasteurize by soaking in hot water (160-170°F/71-77°C) for 1-2 hours
Drain thoroughly until moist but not dripping
Option C: DIY Sawdust Substrate (Advanced)
Recipe:
5 parts hardwood pellets (oak, maple, etc.)
1 part wheat bran (20% supplement ratio)
Water to approximately 60-65% moisture content
Sterilization Process:
Mix pellets with bran, then add water until pellets break down
Fill filter patch bags or jars, leaving 1/3 space for expansion
Sterilize at 15 PSI in pressure cooker for 2-2.5 hours
Allow to cool completely before handling
Step 3: Inoculate the Substrate (Week 1)
Cleanliness is crucial at this stage to prevent contamination.
Clean your workspace with 70% isopropyl alcohol
Wash hands thoroughly and wear gloves if available
Break up spawn into small pieces
Mix spawn thoroughly with substrate (10-20% spawn rate by weight)
Seal the bag or container while allowing for gas exchange
Proper Spawn Distribution: Ensure spawn pieces are evenly distributed throughout the substrate for faster colonization and lower contamination risk.
Step 4: Incubation Period (Weeks 2-3)
During incubation, the mycelium colonizes the substrate. This phase requires:
Do not open the container during this period to avoid contamination.
Step 5: Initiating Fruiting (Week 4)
Once fully colonized (substrate appears completely white), the block is ready for fruiting:
Move to a fruiting area with indirect light and slightly cooler temperatures (55-65°F/13-18°C ideal)
Create an X-shaped cut (3-4 inches) in the plastic or remove the top portion
Optional but recommended: Add a 1/2-inch casing layer of moistened peat moss/vermiculite mix
Place in a humidity chamber or mist several times daily
Fruiting Environment Requirements:
Humidity: 80-90% relative humidity
Light: Indirect light for 8-12 hours daily
Fresh Air: Regular exchange to prevent CO₂ buildup
Temperature: Slightly cooler than incubation temperature
Humidity Chamber Ideas:
Modified plastic tote with holes covered by polyfill
Mini greenhouse with intermittent misting
Tent created from clear plastic sheeting
Step 6: Pinning Stage (Week 5)
Pinning refers to the formation of baby mushrooms:
Usually appears 7-14 days after initiating fruiting conditions
Looks like small white to brownish bumps on the substrate surface
Requires consistent humidity (mist 2-4 times daily)
Benefits from cooler nighttime temperatures if possible
Pin Development Monitoring: Monitor pin development closely – if pins appear dry or yellowish, increase humidity immediately. If they grow very long and thin, increase fresh air exchange.
Step 7: Supporting Mushroom Growth (Weeks 5-6)
As mushrooms develop from pins:
Maintain constant high humidity (mist around, not directly on developing mushrooms)
Ensure adequate fresh air (fan or ventilate 2-3 times daily)
Watch for elongating stems and cap development
Adjust conditions based on mushroom appearance:
Long stems, tiny caps = increase fresh air
Cracked caps = increase humidity
Growth Rate: Under ideal conditions, kings will double in size approximately every 24-48 hours during active growth.
Step 8: Harvesting Indoor King Oysters (Weeks 6-7)
Harvest timing is crucial for optimal flavor and texture:
Harvest when caps are fully formed but before edges begin to curl upward
Twist and pull gently at the base, or cut with a sharp knife
Clean any substrate from the stem base
Refrigerate immediately for longest shelf life
Yield Expectations: A 5lb substrate block typically produces 1-3 pounds of fresh mushrooms across multiple flushes.
Step 9: Encouraging Additional Flushes (Weeks 8+)
After the first harvest:
Rest the block for 7-14 days while maintaining humidity
For stubborn blocks, soak in cold water for 12-24 hours to rehydrate
Return to fruiting conditions
Expect 2-3 flushes total, with each subsequent flush yielding about 50-70% of the previous one
Block Retirement: When the block no longer produces or shows signs of contamination, it can be “retired” to an outdoor bed for potential bonus harvests.
GRow King Oyster Mushroom Outdoor
Step 1: Site Selection (Spring/Fall)
Finding the ideal location is critical for outdoor cultivation success:
Light: Choose an area with dappled shade or north-facing exposure
Moisture: Select a spot that naturally retains moisture
Protection: Areas shielded from harsh winds and direct sunlight
Size: Minimum 2’×2′ area, ideally 3’×3′ or larger
Seasonal Timing: Spring and fall provide ideal temperature ranges and moisture for starting outdoor beds.
Step 2: Bed Preparation (Day 1)
Clear vegetation, rocks, and debris from the area
Optional: Create a shallow depression (2-4″ deep) or build a simple frame
Lay down cardboard as a biodegradable weed barrier if desired
Ensure access to water source for regular moistening
Sawdust spawn is strongly recommended for outdoor beds (5-10 lbs per 3’×3′ bed)
Higher spawn rates (20-30% by volume) increase success rates
Pre-treatment:
Soak substrate materials thoroughly before use
Allow excess water to drain until material is damp but not dripping
Step 4: Bed Layering (Day 1)
Create a lasagna-like structure:
Base layer: 2″ of moistened substrate material
First spawn layer: Crumble spawn evenly across the surface
Middle substrate layer: Add 2-3″ more substrate
Second spawn layer: Add another even layer of spawn
Final substrate layer: Cover with 2″ more substrate
Casing layer: Top with 1-2″ of garden soil or peat/vermiculite mix
Total bed depth should be approximately 6-8 inches.
Step 5: Bed Maintenance (Weeks 1-12)
Proper maintenance greatly influences success:
Moisture management:
Water gently whenever the top inch feels dry
During dry periods, water daily with fine spray
Apply deeper watering weekly to reach lower layers
Protection options:
Cover with breathable fabric during extreme weather
Use straw mulch to help retain moisture
Install temporary shade cloth during unexpected sunny periods
Monitoring:
Check weekly for white mycelial growth at edges
Look for contaminants (green/black molds)
Observe seasonal weather patterns and adjust watering
Colonization Duration: Outdoor beds typically take 1-3 months to fully colonize depending on spawn amount, temperature, and substrate type.
Step 6: Encouraging Fruiting (After Colonization)
Once the bed is colonized (visible white mycelium throughout):
Natural triggering: Temperature fluctuations, especially cooling periods, often trigger fruiting
Cold shock technique: Water with cold water during a cooler period
Physical disruption: Gently rake the top 1/2″ of the bed to simulate soil disturbance
Seasonal Fruiting Patterns:
Spring-planted beds often fruit in late summer/early fall
Fall-planted beds may fruit the following spring/summer
Established beds frequently fruit after temperature drops of 10°F or more
Step 7: Outdoor Harvesting (As Mushrooms Appear)
Harvesting outdoor kings:
Harvest in the morning for best flavor and texture
Cut at the base with a sharp knife rather than pulling
Check for insect damage before bringing indoors
Clean thoroughly by brushing or light rinsing
Outdoor Yield Variations: Outdoor beds typically produce in sporadic flushes dependent on weather conditions rather than on a predictable schedule. Harvests may be larger but less predictable than indoor grows.
Step 8: Bed Longevity and Maintenance (Ongoing)
Extend the life of your outdoor bed:
Annual refreshing: Top off with fresh substrate and a small amount of spawn
Winter protection: Add extra mulch layer in cold climates
Record keeping: Note when and where mushrooms emerge to identify patterns
Expected lifespan: With proper maintenance, king oyster beds can remain productive for 1-3 years, with the first year typically being most productive.
Harvesting & Storage
When to Harvest
For maximum flavor and texture, harvest king oyster mushrooms when:
Cap size: Fully formed but still relatively flat
Cap edges: Before they begin to curl upward or develop wavy margins
Texture: Firm and dense, not soft or spongy
Color: Light tan to medium brown caps with white to cream stems
Proper Harvesting Techniques
Indoor method: Twist and pull gently at the base, or cut flush with the substrate
Outdoor method: Cut with a clean knife at soil level
Cluster harvesting: Cut the main stem below where individual mushrooms branch out
Cleaning Your Harvest
Use a soft brush to remove substrate particles
For stubborn debris, wipe with damp paper towel
Avoid soaking or heavy washing which can affect flavor and texture
Trim discolored portions if necessary
Storage Methods
Storage Method
Temperature
Container
Shelf Life
Notes
Refrigeration
33-38°F (1-3°C)
Paper bag or breathable container
7-14 days
Best method for maintaining texture
Drying
N/A
Dehydrator or air drying
6-12 months
Rehydrate before use
Freezing (cooked)
0°F (-18°C)
Airtight container
3-6 months
Blanch briefly before freezing
Pickling
Refrigerated
Sealed jar
2-3 months
Great for stem pieces
Pro tip: For longest shelf life, store unwashed mushrooms in a paper bag with a paper towel to absorb excess moisture.
Keep in darkness during incubation; stabilize temperature
Pest Issues (Outdoor Growing)
Pest
Signs
Prevention
Treatment
Slugs/Snails
Mushrooms with ragged holes; slime trails
Copper tape barriers; diatomaceous earth
Beer traps; manual removal at night
Fungus Gnats
Small flies; tiny larvae in mushrooms
Sticky traps; mosquito bits in soil
Cover with insect netting during fruiting
Mites
Tiny moving dots; webbing
Good air circulation; cleanliness
Introduce predatory mites; isolate affected areas
Cooking & Using Your Mushrooms
Preparation Methods
Cleaning: Brush or wipe clean; avoid soaking
Trimming: Remove only the very base of stems
Slicing options:
Vertical slices for “scallop” medallions
Cross-sections for meaty rounds
Shredded lengthwise for “pulled” texture
Cooking Techniques
Method
Instructions
Best For
Searing
High heat, minimal oil, don’t crowd pan
“Scallop” medallions; meat replacement
Roasting
400°F, 20-25 mins, with olive oil
Whole small mushrooms; caramelized flavor
Grilling
Medium-high heat, brush with oil
Thick stem slices; smoky flavor
Stir-frying
Quick cook with aromatics
Thin slices; Asian dishes
Soups
Add late in cooking process
Broth-based soups; ramen
Flavor Pairings
Herbs: Thyme, rosemary, sage
Aromatics: Garlic, shallots, ginger
Cooking fats: Butter, sesame oil, olive oil
Acids: Balsamic vinegar, rice vinegar, lemon
Complementary ingredients: Soy sauce, miso, cream
Preservation Recipes
King Oyster Jerky
Slice stems lengthwise into strips
Marinate in soy sauce, maple syrup, liquid smoke
Dehydrate until chewy
Pickled King Oysters
Slice stems into rounds
Create brine with vinegar, salt, sugar, spices
Process in water bath canner or refrigerate
Frequently Asked Questions
Growing Questions
Q: How long does it take to grow king oyster mushrooms from start to harvest? A: Indoor cultivation typically takes 4-8 weeks from inoculation to first harvest. Outdoor beds may take 2-6 months before the first flush appears.
Q: Can I grow king oyster mushrooms without a pressure cooker? A: Yes! You can use pre-sterilized substrate bags, grow kits, or the straw pasteurization method which requires only a large pot of hot water.
Q: What’s the difference between king oyster and regular oyster mushrooms? A: King oysters (Pleurotus eryngii) have thick, meaty stems and small caps, while regular oysters (Pleurotus ostreatus) have larger caps with thinner stems. Kings typically grow individually rather than in clusters.
Q: Can I grow king oyster mushrooms from store-bought mushrooms? A: This is extremely difficult as commercial mushrooms are often treated to inhibit growth. Starting with proper spawn gives exponentially better results.
Q: What temperature is best for fruiting king oyster mushrooms? A: 55-65°F (13-18°C) is ideal for fruiting, though they can fruit at room temperature with proper humidity and fresh air.
Cultivation Specifics
Q: Why aren’t my king oyster mushrooms forming caps? A: This usually indicates excessive CO₂ levels. Increase fresh air exchange by fanning or ventilation.
Q: How many flushes can I expect from one substrate block? A: Typically 2-3 flushes, with each flush being smaller than the previous. The first flush usually provides about 60% of the total yield.
Q: Is casing layer necessary for king oyster mushrooms? A: While not absolutely required, a casing layer significantly improves yield and mushroom quality for king oysters, unlike some other oyster varieties.
Q: Can I mix king oyster spawn with other mushroom species? A: It’s not recommended, as different species have different growth rates and environmental requirements, leading to competition and reduced yields.
Q: How do I know if my substrate is at the right moisture content? A: The “squeeze test” is reliable: when squeezed firmly, a few drops of water should come out, but not a stream. The substrate should feel like a damp sponge.
Harvesting & Storage
Q: How do I know exactly when to harvest king oyster mushrooms? A: Harvest when caps are fully developed but before the edges start to curl upward or develop waves. The cap underside should still have a firm, fresh appearance.
Q: Why are my outdoor-grown king oysters darker than store-bought ones? A: Outdoor cultivation with natural light produces darker cap colors, while commercial indoor-grown kings have lighter coloration due to controlled conditions.
Q: Can king oyster mushrooms be frozen raw? A: While possible, freezing raw changes their texture significantly. It’s better to cook them first (sauté lightly) before freezing.
Q: How long will king oyster mushrooms last in the refrigerator? A: When stored properly in a paper bag, they can last 7-14 days due to their dense structure, significantly longer than most mushroom varieties.
Growing Your Mushroom Knowledge
Now that you have comprehensive instructions for cultivating king oyster mushrooms both indoors and outdoors, you’re ready to embark on your fungi-growing journey. With proper care and attention to environmental conditions, you’ll soon be harvesting your own gourmet mushrooms.
Remember that mushroom cultivation is both a science and an art – don’t be discouraged by initial setbacks. Each grow teaches valuable lessons that will improve your future harvests. Document your process, experiment with different techniques, and most importantly, enjoy the delicious results of your cultivation efforts!
Ready to start growing? Check out our recommended spawn suppliers [insert affiliate links] and essential equipment [affiliate links] to begin your king oyster mushroom adventure today!
Last Updated: May 2025
This guide is continuously updated with latest cultivation techniques and reader feedback. Have a question or tip? Leave a comment below!
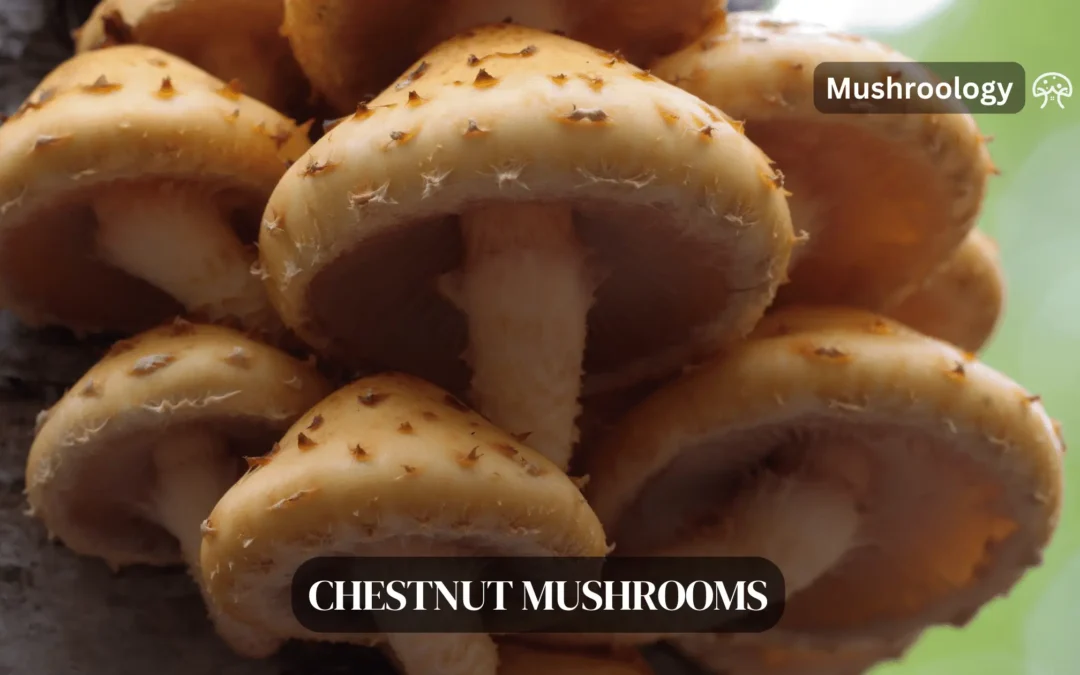
Chestnut mushrooms, also known as cinnamon caps mushrooms, are a fascinating species of fungi prized for their culinary versatility, nutritional benefits, and ecological role. These small to medium-sized mushrooms are characterized by their rich, earthy flavor with a slightly nutty undertone, making them a favorite in gourmet cooking.
The scientific name of the chestnut mushroom is Pholiota adiposa. This species is also commonly known as the cinnamon cap or fat Pholiota. The name “Pholiota” comes from the Latin word for “scaly,” referring to the mushroom’s textured cap, while “adiposa” derives from the Latin word for “fat” or “greasy,” describing its shiny or slimy appearance when wet.
Pholiota adiposa has several popular names across different regions and languages:
Chestnut Mushroom
Fat Pholiota
Fatty Pholiota
Kuritake
Brick Top
Cinnamon Cap
Shimeji (Japanese)
Chestnut Bolete
Chestnut Agaric
Chestnut Pholiota
Numerisugitake (Japanese)
Slijmsteelbundelzwan (Dutch)
Yellow-cap fungus
Fat mushroom
Slimy scalycap
Where can you find the chestnut mushrooms in nature?
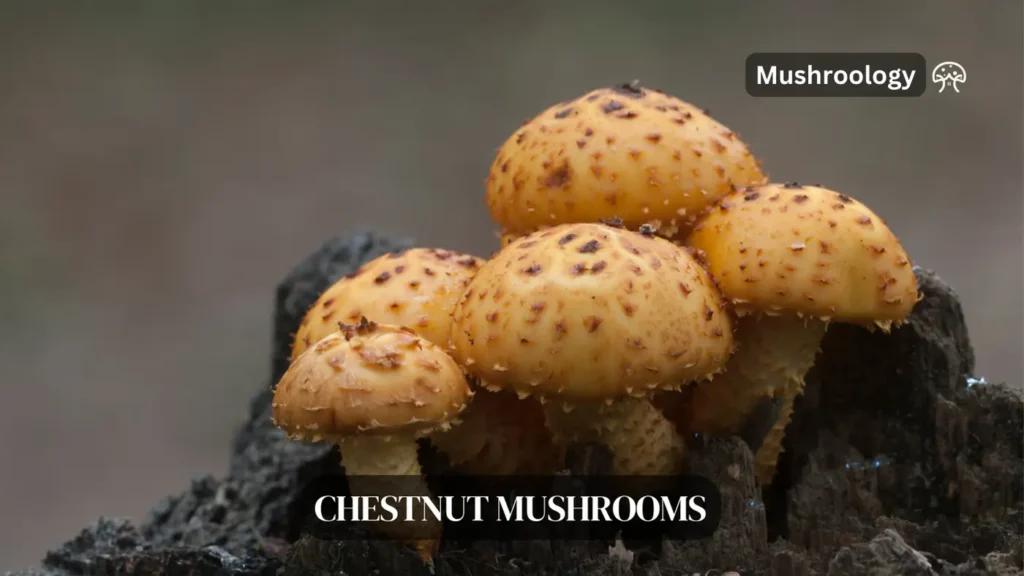
Chestnut mushrooms are saprophytic fungi that thrive on decaying hardwoods like beech, oak, maple, and elm. They play a critical role as decomposers in temperate forests across North America, Europe, and parts of Asia. Occasionally parasitic on weakened trees, they can be found growing on stumps, fallen logs, or at the base of living trees during late summer to fall. Their ability to adapt to various environments makes them resilient and relatively easy to cultivate.
Description and identification
Pholiota adiposa belongs to the genus Pholiota within the family Strophariaceae in the phylum Basidiomycota. This genus comprises wood-rotting saprotrophic mushrooms with distinctive morphological features that aid in their identification.
Chestnut mushrooms can be identified by the following key characteristics:
Cap: 2-10 cm in diameter, convex becoming flat, yellow to chestnut brown in color with darker scales that are denser in the center. The cap surface is slimy when wet.
Gills: Crowded, adnate, pale yellow when young turning rusty brown with age.
Stem: 2-8 cm long, 0.5-1.5 cm thick, cylindrical, yellow with brown scales below a faint ring zone. Stems often join together at the base.
Flesh: Yellowish in color.
Spore Print: Rusty brown
Habit: Grows in dense clusters on hardwood stumps and logs
Chestnut mushrooms have a mild, nutty flavor and slightly crunchy texture that holds up well when cooked. However, proper identification is crucial as there are some poisonous look-alikes such as the deadly Galerina marginata.
Supplies list for growing Chestnut Mushrooms
Before you begin your chestnut mushroom growing journey, it’s important to gather all the necessary supplies. Here’s what you’ll need:
The first and most important supply is the chestnut mushroom spawn or liquid culture. Spawn is basically mushroom mycelium that has been grown on a substrate like grain or sawdust. Liquid culture is a liquid solution containing mushroom mycelium. You can purchase chestnut mushroom spawn or liquid culture from reputable suppliers online or at specialty mushroom shops.
Chestnut mushrooms prefer to grow on hardwood. A common substrate recipe is 78% hardwood sawdust, 20% wheat bran, 1% sugar, and 1% gypsum. The hardwood sawdust provides the main food source, while the bran, sugar and gypsum provide extra nutrients and help with moisture retention. You can source these ingredients individually or purchase pre-mixed mushroom substrate.
Mushroom grow bags
Mushroom grow bags are specially designed plastic bags with filter patches that allow for gas exchange while preventing contaminants from entering. They come in various sizes, but 5-10 pound bags work well for home growing. Look for bags that are thick and durable, with a 0.2-0.5 micron filter patch.
Pressure Cooker or Large Pot
To pasteurize your substrate and prevent contamination, you’ll need a pressure cooker or a large pot. A pressure cooker allows you to reach higher temperatures and sterilize the substrate more thoroughly. However, a large pot can also work for pasteurization if you don’t have access to a pressure cooker.
Clean Growing Environment
Chestnut mushrooms require a clean, temperature-controlled environment to fruit properly. A spare room, basement, or garage can work well as long as you can control the temperature, humidity, and light. You’ll want to be able to maintain a temperature between 60-70°F (15-21°C), humidity between 85-95%, and indirect light exposure.
Rubbing alcohol for sterilizing surfaces and equipment
Spray bottles for misting and maintaining humidity
Thermometer and hygrometer for monitoring temperature and humidity
Gloves and face mask for sterile inoculation
Sharp knife or scalpel for cutting bags
Shelving or racks for incubating and fruiting blocks
By gathering all these supplies before you start, you’ll be well-prepared to begin your chestnut mushroom growing adventure. In the next section, we’ll go over the step-by-step process of inoculation, incubation, and fruiting.
How to grow chestnut mushrooms on logs?
Chestnut mushrooms are wood-loving fungi that thrive on hardwoods like oak, beech, or maple. These dense woods decompose slowly, giving your mushrooms a long-term food source. Plus, once you set up your logs, they’ll keep producing mushrooms season after season with minimal effort. It’s a sustainable and cost-effective way to grow!
Step 1: Choose the right logs
First things first—select freshly cut hardwood logs. Ideally, they should be:
3–4 feet long and 4–6 inches in diameter.
Free of rot, mold, or insect damage.
Cut during late winter or early spring when the sap content is low (this reduces contamination risks).
Let the logs rest for 2–4 weeks after cutting to allow natural antifungal compounds to break down. But don’t wait too long—logs should still be fresh when you inoculate them!
Step 2: Inoculate the logs
Here’s where the magic begins! You’ll need either plug spawn or sawdust spawn to introduce the mushroom mycelium into the logs.
Drill Holes: Use a 5/16-inch bit to drill holes about 1 inch deep in a diamond pattern along the log. Space them 4–6 inches apart.
Add Spawn: Insert plug spawn into each hole and tap it in with a hammer. For sawdust spawn, pack it tightly using an inoculation tool.
Seal It Up: Cover each hole with melted beeswax or cheese wax to protect the spawn from drying out and keep contaminants away.
Stack Your Logs: Place your logs in a shaded area with good airflow. You can stack them like a crib or lean them in an A-frame shape.
Step 3: Caring for Your Logs
Patience is key here—colonization takes about 6–12 months before you’ll see your first flush of mushrooms. During this time:
Keep Them Moist: Water the logs during dry spells to maintain humidity but avoid soaking them.
Provide Shade: Direct sunlight can dry out the logs, so keep them in a cool, shaded spot.
Winter Protection: Logs can overwinter outdoors, but avoid exposing them to extreme frost.
Once the mycelium fully colonizes the log, you’ll start seeing small bumps (primordia) form on the surface—this means mushrooms are on their way!
To create an ideal growing medium for your chestnut mushrooms, you’ll need to prepare a hardwood-based substrate. A common recipe is:
78% hardwood sawdust (preferably beech, oak or maple)
20% wheat bran
1% sugar
1% gypsum
Mix these ingredients thoroughly until evenly distributed. Slowly add water while mixing until the substrate reaches approximately 60-65% moisture content. You can test this by squeezing a handful of the mix – it should hold together without dripping water.
Next, fill your mushroom grow bags about 2/3 to 3/4 full with the moistened substrate mix. Pack it down gently to remove air pockets but don’t compact it too tightly. Leave some space at the top for the spawn.
Seal the bags with a filter patch or micropore tape to allow for gas exchange while preventing contaminants from entering. If using an autoclavable grow bag, fold the top over and secure it with a metal clamp or zip tie.
Sterilize the bagged substrate in a pressure cooker at 15 PSI for 2.5 hours. Allow to cool completely to room temperature before inoculating. If you don’t have a pressure cooker, you can pasteurize the substrate in boiling water or steam for 2-4 hours instead.
Step 2: Inoculate the Substrate
Once your substrate bags have cooled, it’s time to introduce the chestnut mushroom mycelium. If using liquid culture, shake it vigorously first to distribute the mycelium evenly.
Working in a still-air environment like in front of a flow hood or inside a glovebox, carefully open each bag. Inoculate the bags by injecting 3-5ml of liquid culture syringe or adding a layer of grain spawn across the top surface of the substrate. Use about 1 cup of grain spawn for every 5-7lbs of substrate.
After inoculation, reseal the bags, label them with the date and species, and gently mix or shake to distribute the spawn if desired. Be careful not to rip or puncture the bags.
Step 3: Incubation
Place your inoculated substrate bags in a clean area with stable temperature between 68-75°F (20-24°C) to incubate. Indirect light or darkness is fine at this stage. Avoid areas with drafts, high humidity or direct sunlight.
Over the next 2-4 weeks, the white mycelium will start to visibly spread throughout the substrate, eventually colonizing it completely. Avoid disturbing the bags during this time to allow the mycelium to grow undisturbed. The bags may puff up with built up CO2 – this is normal.
Step 4: Chestnut mushroom fruiting conditions
Once the substrate is fully colonized with no visible patches of uncolonized sawdust, it’s time to initiate fruiting. This is triggered by exposing the bags to cooler temperatures, light, humidity and fresh air.
The ideal fruiting temperature for chestnut mushrooms is generally between 18-22°C (64-72°F), though they can tolerate slightly lower or higher temperatures depending on the stage of development and environmental conditions.
Fruiting Temperature Ranges
Primordia Formation (Pinning Stage): 15-18°C (59-64°F) is optimal for initiating pins, with high humidity levels around 95% to encourage the formation of baby mushrooms.
Fruit Body Formation: Once pins develop into mushrooms, the ideal temperature increases slightly to 17-21°C (63-70°F), with the sweet spot being around 18-19°C (64-66°F). Maintaining this range ensures robust growth and prevents stress on the developing mushrooms.
Why Temperature Matters
Consistent temperatures are critical for chestnut mushroom cultivation:
Low Temperatures: Below the recommended range, growth slows significantly, delaying fruiting and reducing yield.
High Temperatures: Excessive heat can dry out the fruiting bodies, lead to poor quality mushrooms, and increase susceptibility to pests or diseases.
To create an opening for the mushrooms, cut a 4-inch slit or “X” on the side of each bag using a clean, sharp blade. Some growers completely remove the top of the bag. Arrange the bags on a shelf with the cut side facing outwards.
Mist the exposed substrate 2-4 times per day to maintain high humidity. Within 1-2 weeks, you should see tiny chestnut mushroom pins starting to form.
Step 5: Fruiting and Harvest
When to Harvest Chestnut Mushrooms
Timing: Chestnut mushrooms typically take 10–14 days to mature after pinning begins, depending on environmental conditions like temperature and humidity.
Cap Appearance: The ideal time to harvest is when the mushroom caps are fully opened but still slightly curved downward. The edges of the caps should not yet have started to curl or flatten completely, as this indicates they are overripe and may begin dropping spores.
Gills Exposure: The gills underneath the caps should be visible but not overly darkened or releasing spores. Harvesting before spore release improves their storage quality and prevents them from becoming too soft.
Growth Pattern: Mushrooms often grow in dense clusters, so look for uniform maturity across the cluster. It’s generally best to harvest the entire cluster at once rather than picking individual mushrooms.
How to Harvest Chestnut Mushrooms
Twist and Pull: Gently twist the mushroom at its base and pull it out of the substrate. This method minimizes damage to the surrounding mycelium and ensures a clean harvest.
Cutting Option: Alternatively, use a clean knife to cut the stems close to the substrate or growing block, especially if twisting risks disturbing nearby pins or immature mushrooms.
Avoid Leaving Roots: Ensure you remove the entire fruit body, including any remnants at the base, to prevent contamination or rot in subsequent flushes.
Why Proper Timing Matters
Harvesting too early can result in smaller mushrooms with less developed flavor.
Waiting too long can lead to spore release, which not only reduces freshness but can also make the mushrooms softer and less visually appealing for storage or cooking.
Each bag can produce 2-3 flushes of mushrooms, spaced about 2 weeks apart. After harvesting a flush, keep the bag in fruiting conditions and a second flush may form from the same opening. Once a bag stops producing, remove it and start again with a new substrate bag.
With practice and patience, you’ll be able to grow bountiful harvests of homegrown chestnut mushrooms! While not the easiest mushroom for beginners, they are a rewarding challenge for the adventurous home cultivator.
FAQ
What is the scientific name of chestnut mushrooms?
The scientific name of chestnut mushrooms is Pholiota adiposa. They are also known by common names like cinnamon cap mushrooms, brick tops, and kuritake.
What do chestnut mushrooms look like?
Chestnut mushrooms have distinctive yellow to orange-brown convex caps measuring 2-10 cm across, covered in darker scales. The gills are pale yellow when young, turning rusty brown with age. The stems are 3-12 cm long, slender, and scaly below a faint ring zone. They grow in dense clusters on hardwood.
What is the flavor and texture of chestnut mushrooms?
Chestnut mushrooms have a mild, nutty flavor sometimes compared to shiitake but less intense. They have a firm, meaty texture that remains pleasantly crunchy and chewy after cooking.
How do you grow chestnut mushrooms?
Chestnut mushrooms can be grown at home using hardwood logs, stumps, or enriched sawdust substrate inoculated with spawn. Optimal conditions are 55-70°F (13-21°C) and moderate humidity. Outdoor log cultivation or indoor growing in bags can both yield good results.
When do chestnut mushrooms fruit?
In the wild, chestnut mushrooms fruit in the fall from August to October. When cultivated indoors, they can fruit year-round. Primordia formation takes 1-2 weeks after full colonization, followed by another 1-2 weeks until mature mushrooms are ready to harvest.
Are there any poisonous look-alikes to chestnut mushrooms?
While chestnut mushrooms are considered edible, some Pholiota species may cause reactions, especially if consumed with alcohol. Deadly Galerina marginata mushrooms are potential look-alikes. Proper identification by an expert is crucial for wild foraging.
What are the health benefits of chestnut mushrooms?
Chestnut mushrooms are nutritious, containing protein, fiber, vitamins, minerals and beneficial compounds like polysaccharides. Studies suggest they have anti-inflammatory, immune-boosting and antimicrobial properties. However, more research is needed on the medicinal potential of this species.
Have you ever heard of chestnut mushrooms? These tasty fungi, also called Pholiota adiposa or fat Pholiota, are gaining attention for good reason. They’re not just delicious but also packed with health benefits.
Chestnut mushrooms have been used in Asian cooking for centuries. Now, they’re becoming popular worldwide as more people discover their unique taste and health advantages.
What are chestnut mushrooms?
Chestnut mushrooms are small to medium-sized fungi with brown, slightly sticky caps. They grow in clusters on wood and have a nutty, slightly sweet flavor.
These mushrooms belong to the Pholiota genus and are different from the more common button or cremini mushrooms. Their scientific name “adiposa” means oily or fatty, which refers to their slightly sticky caps.
People love chestnut mushrooms for their firm texture and rich taste. They keep their crunch even after cooking, making them perfect for many dishes.
Nutritional content of chestnut mushrooms
Nutrient
Amount per 100g
Benefits
Calories
15-22 calories
Ideal for weight management
Protein
3g
Supports muscle maintenance
Carbohydrates
3g
Provides energy
Dietary Fiber
2g
Promotes digestive health and satiety
Fat
<0.5g
Supports heart health
Vitamin D
Varies (increases with sunlight exposure)
Supports bone health and immune function
B Vitamins
Includes riboflavin (B2), niacin (B3), pantothenic acid (B5)
Aids energy production and nervous system health
Selenium
5.7mcg
Provides antioxidant protection
Potassium
420mg
Regulates blood pressure and muscle function
Copper
0.2g
Supports red blood cell formation and iron absorption
Chestnut mushrooms are nutrition superstars in a tiny package. They’re about 90% water and very low in calories.
A 100-gram serving (about a cup) of chestnut mushrooms contains only about 15 calories. This makes them perfect for anyone watching their weight or trying to eat healthier.
Low in calories, high in nutrients
Despite being low in calories, these mushrooms are packed with good stuff. They’re virtually fat-free and contain no cholesterol.
They provide a decent amount of protein and fiber for a vegetable. This combination helps you feel full longer after eating.
Rich in vitamins
Chestnut mushrooms are loaded with B vitamins. They contain riboflavin (B2), niacin (B3), and pantothenic acid (B5).
Chestnut mushrooms contain more vitamin B2 than most common vegetables. B vitamins help your body turn food into energy and keep your brain working well.
Important minerals
These mushrooms are also good sources of important minerals. They contain potassium, which helps control blood pressure.
Chestnut mushrooms provide copper, which is needed for making red blood cells and keeping nerves healthy, as noted by Xotic Mushrooms. They also contain selenium, which acts as an antioxidant.
Health benefits of chestnut mushrooms
Now let’s explore the many ways chestnut mushrooms can improve your health. These benefits come from their unique nutrients and special compounds.
1. Boosts immune system
One of the biggest benefits of chestnut mushrooms is how they support your immune system. They contain special carbohydrates called beta-glucans.
These beta-glucans stimulate immune cells and strengthen your body’s defenses. According to PMC research, beta-glucans activate important immune cells like macrophages and natural killer cells.
These activated cells are better at fighting infections and targeting harmful cells. By eating chestnut mushrooms, you’re giving your immune system natural support.
Studies show that Pholiota adiposa can also balance immune responses. It reduces harmful inflammation while supporting normal immune function.
2. Provides powerful antioxidants
Chestnut mushrooms are packed with antioxidants. These are compounds that protect your cells from damage caused by harmful molecules called free radicals.
Researchers have found several antioxidant compounds in chestnut mushrooms. One important one is methyl gallate, which showed strong antioxidant effects in lab tests.
According to a PubMed study, methyl gallate from Pholiota adiposa could neutralize over 80% of certain free radicals in test solutions. This suggests these mushrooms can help fight oxidative stress in your body.
Other antioxidants in chestnut mushrooms include phenolic compounds, flavonoids, and ergothioneine. Together, they help protect your cells from damage that can lead to aging and disease.
3. Supports brain health
Your brain may benefit from chestnut mushrooms too. They contain B vitamins that are crucial for brain function and mental clarity.
These mushrooms may have more direct brain benefits as well. A recent study examined how compounds from Pholiota adiposa might help with Alzheimer’s disease.
Researchers found that certain molecules in chestnut mushrooms might affect pathways related to brain degeneration. According to this study, compounds in these mushrooms showed potential for addressing neurodegenerative disorders.
While more research is needed, these findings suggest chestnut mushrooms could be brain-friendly food. The combination of B vitamins and unique compounds may help keep your mind sharp.
4. Helps Digestion
If you want better digestion, chestnut mushrooms can help. They contain dietary fiber that adds bulk to stool and feeds good gut bacteria.
Chestnut mushrooms may actively improve your gut microbiome. A study on mice showed that those given chestnut mushroom extract had more balanced gut bacteria.
According to PMC research, the mushroom extract increased beneficial bacteria like certain Lactobacillus species. It also reduced potentially harmful bacteria in the gut.
A healthy gut is connected to better immunity and even improved mood. By adding chestnut mushrooms to your meals, you’re supporting your digestive system naturally.
5. Has Anti-Inflammatory Effects
Chronic inflammation in the body is linked to many diseases. Chestnut mushrooms contain compounds that can help reduce inflammation.
Studies show that substances in Pholiota adiposa can lower pro-inflammatory signals while increasing anti-inflammatory ones. This helps bring your body’s inflammatory response back into balance.
One study found that an adenosine-rich extract from chestnut mushrooms had notable anti-inflammatory effects. It instructed immune cells to produce fewer inflammatory molecules and more inflammation-resolving ones.
These anti-inflammatory properties might help with conditions involving excess inflammation. They may contribute to overall comfort and wellbeing in the body.
6. Shows Potential Anti-Cancer Properties
Some of the most exciting research on chestnut mushrooms involves their potential anti-cancer effects. While eating mushrooms isn’t a cancer cure, studies show promising results.
In one mouse study, an extract of Pholiota adiposa slowed the growth of liver cancer tumors. It even triggered cancer cell death according to PMC research.
Scientists have identified specific compounds behind these effects. A polysaccharide called PAP80-2a from chestnut mushrooms showed notable anti-cancer activity in lab tests.
This polysaccharide seems to work by activating immune cells that attack tumor cells. It also directly suppresses cancer cell growth, as reported in PMC studies.
While these findings are mostly from lab and animal studies, they suggest chestnut mushrooms contain natural compounds with cancer-fighting potential.
7. Supports heart health
Your heart may benefit from chestnut mushrooms too. Their nutrient profile supports cardiovascular health in several ways.
They are low in sodium and contain potassium, which helps maintain healthy blood pressure. Getting enough potassium can reduce strain on your heart.
Chestnut mushrooms also contain the compound adenosine, which helps widen blood vessels and improve blood flow. A study on Pholiota adiposa extracts found that its adenosine has heart-protective effects.
The antioxidants and anti-inflammatory compounds in these mushrooms also help protect blood vessels. Less inflammation in blood vessels means lower risk of plaque formation.
How to add chestnut mushrooms to your diet
Now that you know the benefits, how can you enjoy chestnut mushrooms? Here are some easy ways to add them to your meals.
Cooking methods
Sautéing is one of the easiest ways to prepare chestnut mushrooms. Heat some oil in a pan, add sliced mushrooms, and cook until golden-brown.
They taste great with garlic, herbs, or onions. Sautéed chestnut mushrooms make a perfect topping for toast or addition to egg dishes.
Roasting brings out their nutty flavor. Toss them with olive oil, salt, and pepper, then roast until they caramelize slightly.
You can also add them to soups and stews. Their firm texture holds up well in liquid, and they add rich flavor to broths.
Meal Iideas
Use chestnut mushrooms as a meat substitute in some recipes. Their chewy texture and savory taste make them a good stand-in for meat.
Add them to pasta dishes for extra flavor and nutrition. They pair particularly well with creamy sauces.
Include them in stir-fries with other vegetables. Their crunchy texture adds interest to the dish.
Make a mushroom toast by sautéing chestnut mushrooms with garlic and thyme, then serving on crusty bread. This makes a simple but delicious lunch or appetizer.
Scientific research on Chestnut Mushrooms
The health benefits of chestnut mushrooms are backed by growing scientific evidence. Here’s what researchers have discovered.
Immune System Studies
Scientists have studied how compounds in Pholiota adiposa affect immunity. They found that polysaccharides from these mushrooms can activate immune cells.
One study showed that a specific polysaccharide significantly stimulated the immune system in lab mice. It enhanced the activity of cells that fight infections and abnormal cells.
Research also shows these mushrooms can modulate immune signaling. They help reduce excessive inflammation while supporting normal immune function.
Cancer Research
Multiple studies have examined the anti-cancer potential of chestnut mushrooms. In 2022, researchers found that an ethanol extract of Pholiota adiposa slowed tumor growth in mice with liver cancer.
Scientists identified a high-purity polysaccharide (PAP80-2a) as a potent anti-cancer agent. According to PMC research, it activated immune cells to attack tumor cells and stopped cancer cells from multiplying.
These findings support the idea that chestnut mushrooms contain compounds that might help fight cancer. While more human studies are needed, the results are promising.
Antioxidant Research
In 2014, researchers made headlines by isolating methyl gallate from Pholiota adiposa. This was the first time this powerful antioxidant had been found in a mushroom.
The compound showed strong ability to prevent oxidative damage in red blood cells. It effectively neutralized free radicals in laboratory tests.
Scientists have also identified other antioxidant components in these mushrooms. These include ergosterol peroxide and various phenolic acids that contribute to their overall antioxidant capacity.
Brain Health Research
A recent computational study from 2024 investigated how chestnut mushroom compounds might affect Alzheimer’s disease. The analysis showed that mushroom-derived compounds could interact with human proteins involved in neurodegeneration.
Researchers identified several pathways through which chestnut mushroom compounds could have neuroprotective effects. These include the STAT3 and NF-κB pathways.
Computer simulations suggested these compounds might bind to proteins involved in Alzheimer’s. This could potentially slow disease progression, though clinical trials are still needed.
What are the side effects of Chestnut mushrooms?
Chestnut mushrooms are generally safe to eat for most people. They’re a food, not a medicine, and have been eaten safely for centuries.
However, as with any mushroom, some people might have allergies. If you’ve never tried chestnut mushrooms before, start with a small amount.
Always make sure you’re getting cultivated chestnut mushrooms from reliable sources. Never pick wild mushrooms unless you’re an expert at identifying them.
If you have existing health conditions or take medications, talk to your doctor before using mushroom supplements. Whole mushrooms in food are generally safe, but concentrated extracts might interact with medications.
Conclusion
Chestnut mushrooms (Pholiota adiposa) offer impressive health benefits in a small package. From boosting immunity to supporting brain health, these fungi are truly functional foods.
They provide essential nutrients while being low in calories. Their unique compounds like beta-glucans, adenosine, and methyl gallate contribute to their medicinal properties.
Adding chestnut mushrooms to your diet is an easy way to increase your nutrient intake. Their nutty flavor and crunchy texture make them enjoyable to eat in many dishes.
While more human studies will provide further clarity, current research supports many traditional claims about chestnut mushroom benefits. They represent a perfect blend of delicious taste and health-promoting potential.
Next time you’re grocery shopping, consider picking up some chestnut mushrooms. Your taste buds — and your body — will thank you for it.