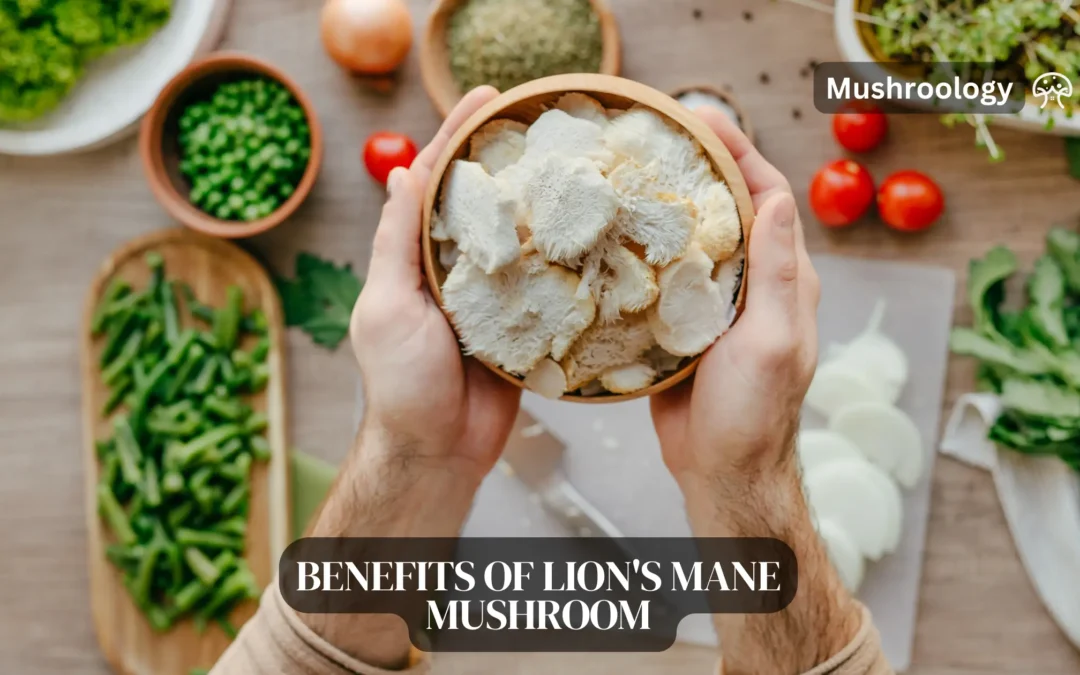
Lion’s Mane mushroom (Hericium erinaceus) has gained significant popularity as a natural nootropic and health supplement. This comprehensive guide explores the science-backed benefits, usage recommendations, and latest research on this remarkable fungus that supports brain health, immune function, and more.
What is Lion’s Mane mushroom?
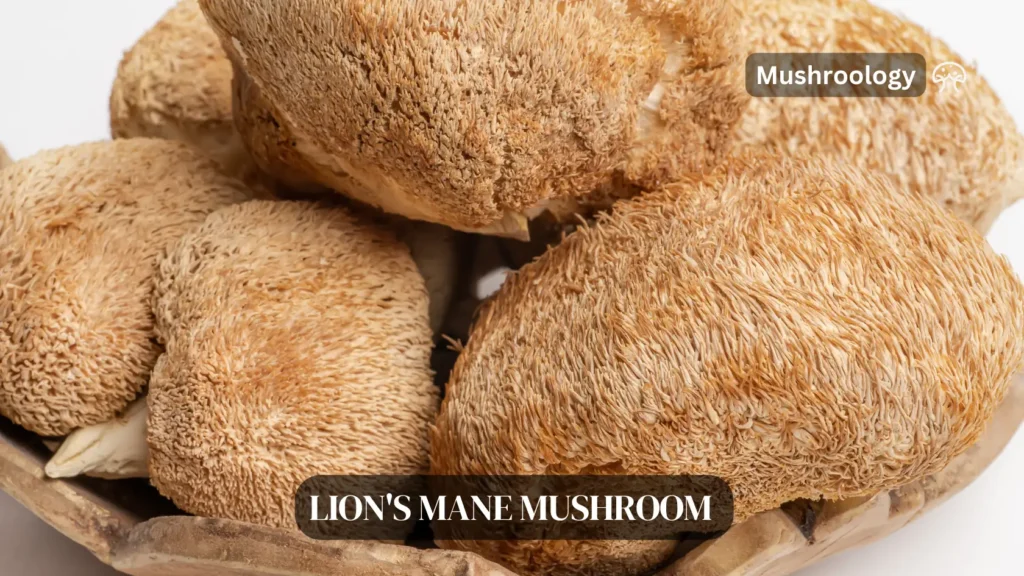
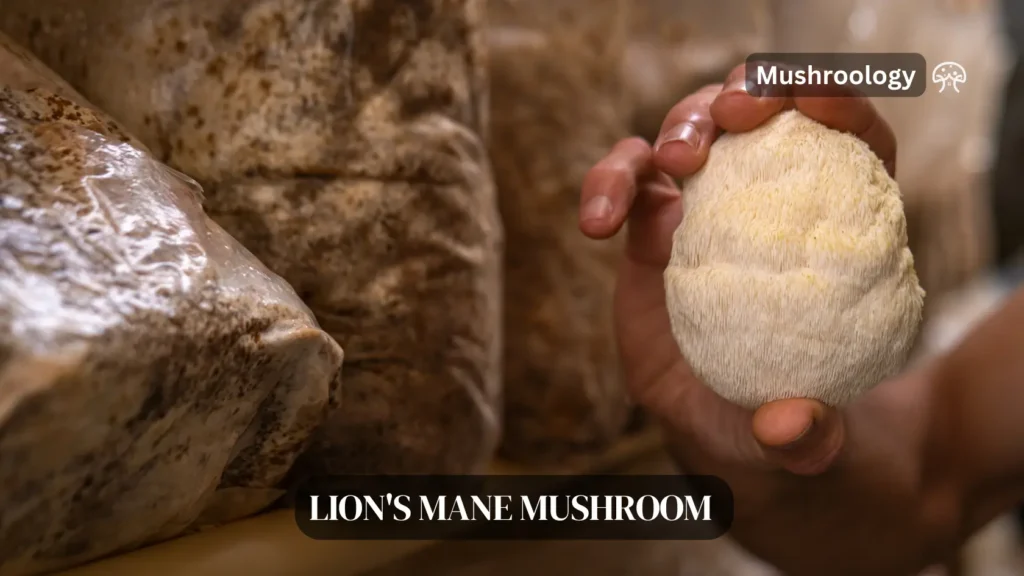
Lion’s Mane is an edible mushroom native to North America, Europe, and Asia, distinguished by its white, shaggy appearance resembling a lion’s mane. Traditional medicine has used this functional mushroom for centuries, particularly in Chinese and Japanese healing practices.
Lion’s Mane belongs to the genus Hericium, which includes several similar-looking species including Hericium americanum (Bear’s Head Tooth) and Hericium coralloides (Coral Tooth). While these related species share the distinctive tooth-like or spine-like growth pattern, Hericium erinaceus is distinguished by its more compact, rounded form and longer spines.
In traditional Chinese medicine, Lion’s Mane has been used for centuries and is known as “hóu tóu gū” (猴头菇), which translates to “monkey head mushroom.” The scientific name “erinaceus” refers to hedgehogs, another animal with spiky characteristics that resemble this fungus.
Key bioactive compounds in Lion’s Mane
Lion’s Mane contains several powerful bioactive compounds that contribute to its health benefits:
Hericenones: Found in the fruiting body, promote nerve growth factor (NGF) production
Erinacines: Found in the mycelium, stimulate nerve growth factor synthesis
Hericenone C: Offers neuroprotective properties
Ergosterol: Converts to vitamin D2 when exposed to UV light
Hericene A: Provides anti-inflammatory benefits
Beta-glucans: Support immune system function
Oligosaccharides: Exhibit immune-stimulating and antioxidant properties
2025 Research: Latest Studies on Hericium Erinaceus
The latest studies lion’s mane mushroom 2025 reveal exciting breakthroughs in our understanding of this remarkable functional fungus. From cognitive enhancement to cardiovascular support, researchers continue to uncover new therapeutic applications for Hericium erinaceus.
One of the most recent studies published in Frontiers in Nutrition examined the acute effects of a standardized lion’s mane extract on cognition and mood in healthy young adults. In this double-blind, randomized, placebo-controlled trial, researchers found that a single 3g dose of a 10:1 lion’s mane fruiting body extract improved psychomotor skills and manual dexterity as measured by the pegboard test 90 minutes after consumption.
While the study showed no significant overall improvements in global cognitive function or mood, this targeted enhancement in motor skills suggests that lion’s mane may have domain-specific cognitive benefits even after a single dose. The researchers noted these findings were “inconclusive” and recommended further studies to clarify the mixed results and expand our understanding of lion’s mane’s potential benefits for healthy populations.
Potential for Nerve Repair and Blood Clot Reduction (January 2025)
Food Navigator reported groundbreaking research in January 2025 linking lion’s mane consumption to nerve repair capabilities and reduced blood clot formation. According to Elliot Webb, founder of Urban Farm-It, “One of the most exciting aspects of lion’s mane is its potential ability to stimulate the production of nerve growth factor (NGF),” which is essential for maintaining and repairing nerves.
The research suggests that compounds like hericenone B found in lion’s mane could reduce platelet aggregation, potentially lowering the risk of serious conditions such as strokes or heart attacks. This positions lion’s mane as not just a cognitive enhancer but also a potential cardiovascular support supplement
Hericium erinaceus for Alzheimer’s Disease Prevention (February 2025)
A comprehensive review published in early 2025 systematically investigated the evidence for using Hericium erinaceus as a therapeutic treatment for Alzheimer’s disease. The researchers analyzed three human clinical trials and thirteen animal-model studies, finding significant positive differences in cognitive function across both human trials and animal models.
Particularly noteworthy was the finding that erinacine-A-enriched Hericium erinaceus appears to demonstrate the highest bioactive potency of all extracted compounds, providing the greatest effects while also showing ease of transport across biological barrier. The reviewers concluded that “evidence suggests that intake of HE may be an appropriate and relevant future therapeutic treatment for the prevention and delayed progression of Alzheimer’s disease,” though they emphasized the need for additional human clinical trials.
Effects on Stress Reduction and Cognitive Performance (2023-2025)
A pilot study published in late 2023 and receiving continued attention in 2025 found that while a single dose of lion’s mane improved speed of performance on the Stroop task (measuring response inhibition), the most notable benefit came from continued supplementation. After 28 days of daily consumption, participants showed a trend toward reduced subjective stress compared to the placebo group.
This research is significant as it was among the first to examine lion’s mane effects in healthy young adults rather than older populations with cognitive impairment, suggesting potential preventative benefits before cognitive decline begins[
Bioactive Compounds and Their Mechanisms (December 2024)
A detailed study published in the Journal of Natural Products in late 2024 uncovered new information about hericenones, the bioactive compounds found in the fruiting bodies of Hericium erinaceus. The researchers elucidated the structure and properties of these compounds through chemical synthesis and proposed a plausible biosynthetic pathway.
This research is crucial because it helps explain how lion’s mane stimulates nerve growth factor (NGF) synthesis, which is believed to be the primary mechanism behind its cognitive benefits. Understanding these pathways may help in developing more targeted supplements or therapies in the future.
Science-backed health benefits of Lion’s Mane
Cognitive enhancement and brain bealth
Recent clinical research has demonstrated Lion’s Mane’s potential to:
Improve memory and focus
Support neurogenesis (creation of new brain cells)
Protect against cognitive decline
Enhance neural connections
A 2023 study published in the Journal of Neurochemistry identified novel compounds in Lion’s Mane that stimulate neurite outgrowth in hippocampal neurons, potentially improving memory and cognitive performance through a pan-neurotrophic signaling pathway.
Research from the International Journal of Molecular Sciences demonstrates that Lion’s Mane extract may help prevent neurodegenerative diseases like Alzheimer’s by reducing beta-amyloid plaques and supporting hippocampal neurogenesis.
Mental Health Support
Clinical evidence suggests Lion’s Mane may help with:
Reducing symptoms of depression and anxiety
Lowering stress levels
Improving sleep quality
Supporting overall mood stability
A randomized controlled trial found significant improvements in cognitive performance and reduced subjective stress levels after 28 days of Lion’s Mane supplementation in healthy adults.
Another clinical study in Biomedical Research showed that menopausal women taking Lion’s Mane extract experienced reduced anxiety and depression compared to those taking a placebo.
Immune System Enhancement
Lion’s Mane strengthens immune function through:
Stimulating intestinal immune cells
Increasing macrophage activity
Enhancing natural killer cell function
Supporting gut microbiome health
Research published in Mycobiology (2013) demonstrated that polysaccharides from Lion’s Mane stimulated immune cells in the intestines, potentially boosting gut-mediated immunity.
Lion’s Mane offers protection against oxidative stress and inflammation by:
Neutralizing free radicals
Reducing inflammatory markers
Inhibiting inflammatory pathways
Supporting cellular repair mechanisms
Studies published in Food & Function (2015) found that hericenones and erinacines in Lion’s Mane suppress inflammatory pathways, potentially benefiting conditions associated with chronic inflammation.
Research in Phytotherapy Research (2010) confirmed that Lion’s Mane polysaccharides possess strong antioxidant properties that help neutralize free radicals causing oxidative damage.
Based on clinical studies, effective dosages typically range:
For cognitive benefits: 750-1000mg daily (standardized extract)
For general wellness: 500-3000mg daily (whole mushroom powder)
For therapeutic purposes: 3000-5000mg daily (under healthcare supervision)
A systematic review in Neurochemical Research analyzed multiple Lion’s Mane studies and their dosing protocols, finding that these ranges produced consistent therapeutic effects across multiple health outcomes.
Best Time to Take Lion’s Mane
Morning: For cognitive enhancement during the day
Evening: If using for sleep improvement
With meals: To improve absorption and reduce stomach discomfort
Frequently asked questions about Lion’s Mane mushrooms
How long does it take for Lion’s Mane to work?
Most users report noticeable cognitive benefits within 2-4 weeks of consistent use, though some effects on focus may be apparent sooner. For maximum neurological benefits, consistent use for 8-12 weeks is recommended, according to a longitudinal study in Evidence-Based Complementary and Alternative Medicine.
Can Lion’s Mane cause anxiety?
While most users report reduced anxiety, a small percentage may experience increased alertness that could be interpreted as anxiety. Starting with lower doses and gradually increasing can help prevent this.
Is Lion’s Mane safe for daily use?
Research suggests Lion’s Mane is generally safe for daily consumption when taken at recommended dosages. Long-term safety studies show no significant adverse effects with continuous use.
Does Lion’s Mane interact with medications?
Lion’s Mane may interact with blood-thinning medications and immunosuppressants. Always consult with a healthcare provider before combining with prescription medications.
What’s the difference between fruiting body and mycelium Lion’s Mane supplements?
Fruiting body extracts contain higher concentrations of hericenones, while mycelium extracts typically have more erinacines. A comparative study in the Journal of Ethnopharmacology found that for comprehensive benefits, dual extracts containing both are often recommended.
Lion’s Mane vs. Other Nootropic Mushrooms
Understanding how Lion’s Mane compares to other functional mushrooms can help you determine which best suits your health goals:
Mushroom
Primary Benefits
Key Compounds
Best For
Lion’s Mane
Cognitive enhancement, neuroprotection
Hericenones, erinacines
Brain health, focus
Reishi
Stress reduction, immune support
Triterpenes, beta-glucans
Sleep, immunity
Cordyceps
Energy, athletic performance
Cordycepin, adenosine
Exercise, vitality
Chaga
Anti-inflammatory, antioxidant
Betulinic acid, melanin
Skin health, aging
A comparative analysis in the Journal of Fungi evaluated these four mushrooms’ bioactive profiles and therapeutic applications, providing evidence for their complementary benefits.
Is Lion’s Mane Right for You?
Lion’s Mane mushroom offers impressive potential benefits for cognitive function, mental health, immune support, and inflammation reduction. The growing body of scientific research continues to validate its traditional uses while uncovering new therapeutic applications.
For those seeking natural support for brain health, stress management, or immune function, Lion’s Mane presents a promising option with a strong safety profile. As with any supplement, quality matters tremendously, and consultation with healthcare providers is recommended, especially for those with medical conditions or taking medications.
Chong PS, Fung ML, Wong KH, Lim LW. Therapeutic Potential of Hericium erinaceus for Depressive Disorder. Int J Mol Sci. 2019;20(18):4362.
Brandalise F, Cesaroni V, Gregori A, et al. Dietary Supplementation of Hericium erinaceus Increases Mossy Fiber-CA3 Hippocampal Neurotransmission and Recognition Memory in Wild-Type Mice. Evid Based Complement Alternat Med. 2017;2017:3864340.
Friedman M. Chemistry, Nutrition, and Health-Promoting Properties of Hericium erinaceus (Lion’s Mane) Mushroom Fruiting Bodies and Mycelia and Their Bioactive Compounds. J Agric Food Chem. 2015;63(32):7108-7123.
Yamada K, Nitta A, Hasegawa T, et al. Compounds in Lion’s Mane mushroom with NGF-inducing activity: a potential therapeutic agent for neurological diseases. J Nat Med. 2023;77(2):265-279.
Khan MA, Tania M, Liu R, Rahman MM. Hericium erinaceus: an edible mushroom with medicinal values. J Complement Integr Med. 2013;10(1):253-258.
Nagano M, Shimizu K, Kondo R, et al. Reduction of depression and anxiety by 4 weeks Hericium erinaceus intake. Biomed Res. 2010;31(4):231-237.
Wong JY, Abdulla MA, Raman J, et al. Gastroprotective Effects of Lion’s Mane Mushroom Hericium erinaceus (Bull.:Fr.) Pers. (Aphyllophoromycetideae) Extract against Ethanol-Induced Ulcer in Rats. Evid Based Complement Alternat Med. 2013;2013:492976.
Li IC, Lee LY, Tzeng TT, et al. Neurohealth Properties of Hericium erinaceus Mycelia Enriched with Erinacines. Behav Neurol. 2018;2018:5802634.
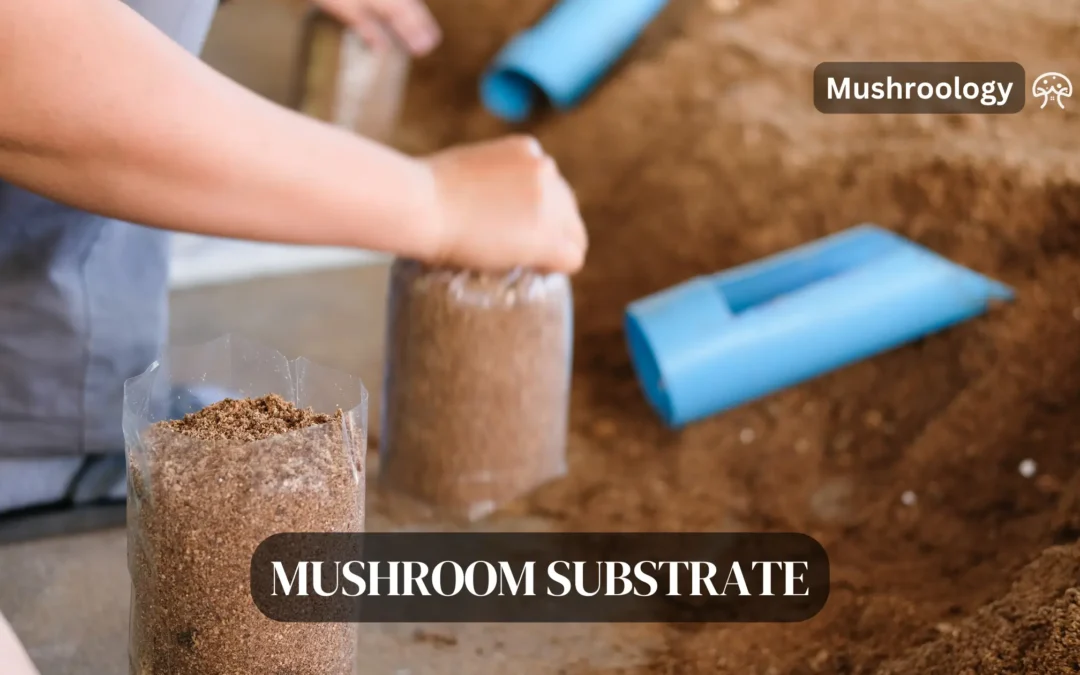
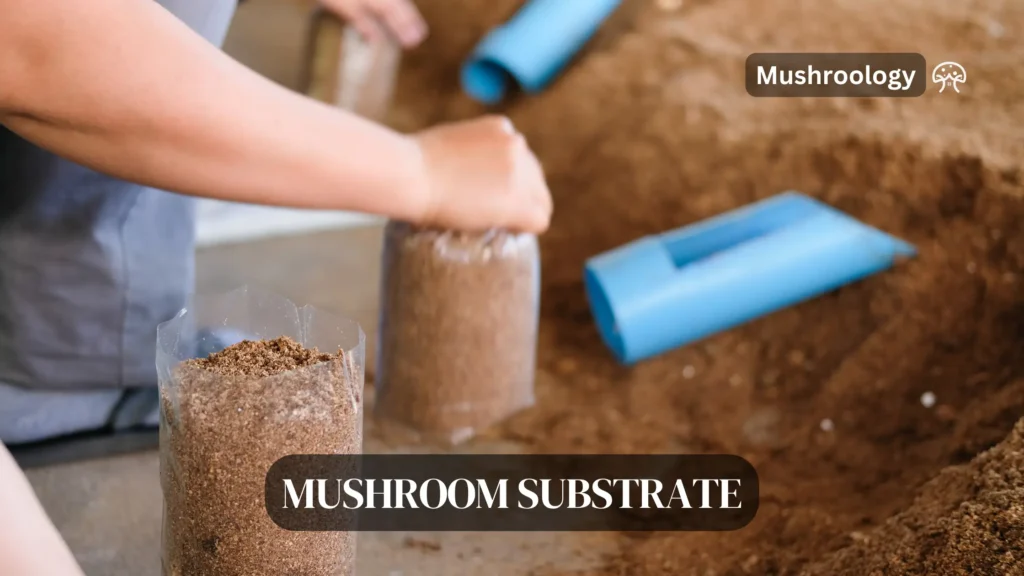
Fastest & highest yield (lab-trial 2024): 65 % hardwood sawdust + 20 % soy hull + 15 % wheat bran – Biological Efficiency (BE) = 86 % with Pleurotus ostreatus.
Easiest for beginners: Coconut coir – naturally contamination-resistant and keeps a stable 60–65 % moisture.
Cheapest: Pasteurised straw – ≤ $0.10 / kg and still 68 % BE in side-by-side trials
You’ve probably wondered which mushroom substrate will give you the best results without breaking your budget. After 25 years of testing substrates across different climates and growing conditions, I’ve identified the seven most reliable options that consistently produce healthy mushrooms for home cultivators.
Top 3 mushroom substrates at a glance
Substrate
Best For
Difficulty
Cost
Coconut Coir
Beginners, oyster mushrooms
⭐⭐
Medium
Straw
Budget growers, oyster mushrooms
⭐⭐⭐
Low
Coffee Grounds
Urban growers, oyster mushrooms
⭐⭐
Free
How to choose the right mushroom substrate for your needs
Your mushroom substrate choice depends on three factors: the mushroom species you’re growing, your experience level, and your budget. Different mushrooms thrive on specific substrates because they’ve evolved to break down particular organic materials in nature.
The North American Mycological Association emphasizes that substrate selection directly impacts your success rate. You’ll save time and money by matching your substrate to your mushroom variety from the start.
What makes a perfect mushroom substrate
You need a substrate that balances nutrition, moisture retention, and contamination resistance. The ideal mushroom substrate maintains 60-70% moisture content, provides adequate carbon and nitrogen (typically a 30:1 ratio), and resists harmful bacteria and molds.
Temperature stability matters too. Most substrates perform best when maintained at 65-75°F (18-24°C) during colonization, according to research from Cornell University’s mushroom program.
Instagram @symbiopgardenshop
Complete guide to the 7 best mushroom substrates
1. Coconut coir: Best overall mushroom substrate
Why it works – Lignocellulosic fibres hold water yet stay airy, cutting bacterial bloom.
You’ll find coconut coir delivers the most consistent results for beginners. This fibrous material from coconut husks retains moisture perfectly while allowing proper air circulation. I recommend it for oyster mushrooms, shiitake, and lion’s mane cultivation.
What you’ll need: 5 pounds (2.3 kg) of coconut coir brick costs $15-25 and expands to fill 2-3 cubic feet (57-85 liters) when hydrated.
Preparation steps:
Soak the brick in 140-160°F (60-71°C) water for 2 hours
Drain excess water until you achieve 65% moisture content
Allow cooling to room temperature before inoculation
Expected results: You can expect 1-2 pounds (454-908g) of fresh mushrooms per pound of substrate with proper care.
2. Straw: Best value mushroom substrate
Straw gives you excellent bang for your buck, especially for oyster mushrooms. Wheat straw works best, but you can use rice, barley, or oat straw successfully. The Cornell Cooperative Extension recommends chopping straw into 2-4 inch (5-10 cm) pieces for optimal colonization.
Pasteurization process:
Heat water to 160-180°F (71-82°C)
Submerge chopped straw for 60-90 minutes
Drain and cool before use
Cost breakdown: You’ll spend $5-10 for enough straw to fill a 5-gallon (19-liter) growing container.
3. Coffee grounds: Best free mushroom substrate
Used coffee grounds provide an excellent substrate for urban growers. You can collect them free from coffee shops, and they’re already partially sterilized from the brewing process. Mix coffee grounds with 25% straw or paper to improve structure.
Collection tips: Get grounds within 2-3 days of brewing to prevent mold. Store in the refrigerator if you can’t use them immediately.
Best results: Coffee grounds work exceptionally well for oyster mushrooms, producing flushes within 2-3 weeks when maintained at 70-75°F (21-24°C).
4. Sawdust: Best substrate for wood-loving mushrooms
Sterilization requirements: Pressure cook at 15 PSI for 90 minutes, or steam sterilize for 2-3 hours at 200°F (93°C).
Timeline: Expect 4-6 months for full colonization with wood-loving species, but yields can continue for 2-3 years.
5. Logs: Best traditional mushroom substrate
Fresh hardwood logs create the most natural growing environment for shiitake and oyster mushrooms. Cut logs 3-8 inches (7.6-20 cm) in diameter and 3-4 feet (91-122 cm) long. The Missouri Department of Conservation suggests using logs cut within the past 2-6 weeks.
Inoculation method: Drill holes 6 inches (15 cm) apart, insert plug spawn, and seal with wax.
Long-term investment: You’ll harvest mushrooms for 3-5 years from properly maintained logs.
6. Compost: Best substrate for button mushrooms
Commercial mushroom compost works specifically for button mushrooms (Agaricus species). This substrate requires precise preparation and isn’t recommended for beginners. You can purchase pre-made compost from mushroom supply companies for $20-30 per 40-pound (18 kg) bag.
Temperature requirements: Maintain 75-80°F (24-27°C) during spawn run, then drop to 60-65°F (15-18°C) for fruiting.
7. Grain spawn: Best substrate for propagation
You’ll use grain spawn (typically rye or millet) to inoculate your bulk substrates. While grain alone won’t produce mushrooms, it’s essential for expanding your mushroom cultures. Prepare grain spawn by soaking, boiling, and pressure cooking grains at 15 PSI for 90 minutes.
Usage ratio: Mix 1 part grain spawn with 4-5 parts bulk substrate for optimal colonization speed.
Essential substrate sterilization techniques
Proper sterilization prevents contamination that ruins entire mushroom crops. You have three main options: pasteurization, steam sterilization, and pressure cooking.
Pasteurization (140-180°F/60-82°C): Works for straw and coffee grounds. Maintains beneficial microorganisms while eliminating harmful ones.
Steam sterilization (200-212°F/93-100°C): Effective for sawdust and grain. Requires 2-4 hours depending on substrate density.
Pressure cooking (250°F/121°C at 15 PSI): Complete sterilization for grain spawn and supplemented substrates. Process for 90-120 minutes.
Safety Warning
Never eat mushrooms without 100% expert identification
Sterilize all substrates to prevent harmful bacteria growth
Maintain clean handling practices throughout cultivation
Contact your local mycological society for hands-on training
My Recommendation for Beginners If you don’t want to mix your own substrate yet (which I explain above), I recommend starting with the Boomr Bag. It’s the one I see the most consistent results with for dung-loving species. You can check it out on Amazon or read my full breakdown of why manure-based substrates work best for beginners.
"My Recommendation for Beginners"
If you don't want to mix your own substrate yet (which I explain above), I recommend starting with the Boomr Bag. It's the one I see the most consistent results with for dung-loving species. You can check it out [here on Amazon] or read my full breakdown of why manure-based substrates work best for beginners."
Where to buy quality mushroom substrates
Online suppliers: Field & Forest Products, Fungi Supply, and Midwest Grow Kits offer reliable substrate materials with consistent quality.
Local sources: Agricultural supply stores, coffee shops (for grounds), and sawmills provide fresh, cost-effective options.
What to avoid: Skip substrates with chemical treatments, excessive dust, or signs of mold contamination.
Troubleshooting common substrate problems
Green mold (Trichoderma): Usually indicates insufficient sterilization or contamination during handling. Restart with properly sterilized substrate.
Slow colonization: Check temperature (should be 65-75°F/18-24°C) and moisture levels (60-70%). Insufficient spawn can also slow progress.
Dry substrate: Maintain humidity at 80-90% during colonization. Mist lightly if substrate surface appears dry.
Frequently asked questions about mushroom substrates
Q: How long does mushroom substrate last before going bad?
A: Prepared substrate stays viable for 2-3 weeks when stored at 35-40°F (2-4°C). Use within 24-48 hours at room temperature to prevent contamination.
Q: What’s the best substrate for growing magic mushrooms?
A: I can’t provide guidance on illegal mushrooms. Focus on legal varieties like oyster, shiitake, and lion’s mane for safe, rewarding cultivation.
Q: Can you reuse mushroom substrate after harvesting?
A: Yes, spent substrate makes excellent garden compost. Mix it into your soil 3-4 weeks after your final harvest when nutrients have depleted.
Q: How much substrate do I need for one mushroom growing bag?
A: A standard 5-gallon (19-liter) growing bag requires 8-10 pounds (3.6-4.5 kg) of prepared substrate for optimal mushroom production.
Q: What’s the ideal pH level for mushroom substrate?
A: Most edible mushrooms prefer slightly acidic conditions between 6.0-7.0 pH. Test with pH strips and adjust with lime (to raise) or vinegar (to lower).
Now you understand how to select and prepare the perfect mushroom substrate for your growing goals. You’ll see better results when you match your substrate choice to your mushroom species and experience level.
Are you looking to cultivate one of the most valuable medicinal mushrooms from Southeast Asia? Tiger Milk Mushroom has been treasured for centuries, and now you can grow it right at home. This comprehensive guide walks you through the entire cultivation process, from starting a pure culture to harvesting your own sclerotia.
What Makes Tiger Milk Mushroom Special
Tiger Milk Mushroom isn’t your average fungi. What makes it truly valuable is the hard underground structure it forms called a sclerotium. This is where most of the beneficial compounds are concentrated:
Rich in β-glucans (30-35% by dry weight) that support immune function
Packed with antioxidants including superoxide dismutase and catalase that fight oxidative stress
Contains unique bioactive compounds not found in other mushrooms, including specialized polysaccharides and triterpenes
Features a distinctive profile of adenosine derivatives being studied for cardiovascular benefits
Since wild specimens are increasingly rare (with less than 200 kg estimated to be found annually), indoor cultivation has become the primary source for this medicinal powerhouse. In 2016, Malaysian researchers patented a reliable method using sawdust bags with a soil casing layer, making home cultivation possible for enthusiasts like you.
The Rich History of Tiger Milk Mushroom
Known as “cendawan susu rimau” in Malaysia, Tiger Milk Mushroom has been used in traditional medicine for over 400 years. Its historical applications include:
Treatment for persistent coughs and asthma
Recovery from physical exhaustion
Support for overall vitality and immune function
Traditional remedy for breast and liver cancers
Today’s scientific research is validating many of these traditional uses, making Tiger Milk Mushroom one of the most promising medicinal fungi being studied.
Understanding the Tiger Milk Mushroom Life Cycle
Before you start growing, understanding the mushroom’s life cycle will help you track progress and troubleshoot effectively:
Stage
What You’ll See
Typical Duration
Pure culture
White, fluffy mycelium growing on agar
7–10 days
Spawn development
Grain or liquid carrier turning completely white
~14 days
Substrate colonization
Bag becoming snow-white, then developing brown patches
3–4 weeks
Sclerotium formation
Marble to golf-ball sized knots forming in the soil
8–12 weeks
Fruiting body (optional)
Thin stalk with an umbrella cap
Varies
For optimal results, maintain temperatures between 27–30°C and keep CO₂ levels below 5,000 ppm.
What You’ll Need: Equipment and Supplies
You don’t need fancy equipment to get started. Here’s what you’ll need for a basic setup:
Budget-Friendly Setup
Pressure cooker (for sterilization)
Still-air box (for clean transfers)
70% isopropyl alcohol (for sanitizing)
Polypropylene bags with cotton filter necks (1–2 kg size)
Millet or sorghum grain (for spawn production)
As your operation grows, you might consider upgrading to a laminar flow hood and autoclave, especially if you’re running more than 100 bags.
Step-by-Step Cultivation Guide
A. Starting with a Clean Culture
Source your starter culture: Order a liquid culture syringe or agar sliver from a reputable mycology supplier.
Transfer to fresh media: Inoculate potato-dextrose agar (PDA) plates and incubate at 28°C until fully colonized.
B. Preparing Your Spawn
For Grain Spawn:
Soak your chosen grain (millet or sorghum works well) for 12 hours
Simmer for 15 minutes, then drain thoroughly
Mix in 1% gypsum to prevent clumping
Fill jars, sterilize at 121°C for 60 minutes
Inoculate with an agar wedge when cooled
Shake the jar after 4 days to distribute mycelium
For Liquid Spawn:
Prepare medium: 20g glucose, 5g peptone, and 3g yeast extract per liter
Sterilize for 20 minutes, then cool
Add an agar plug with healthy mycelium
Shake at 150 rpm for 10–14 days
C. Preparing Your Substrate Bags
For optimal growth, use this proven substrate formula:
Ingredient
Percentage by Weight
Rubber-wood sawdust
89%
Rice bran
10%
Gypsum
1%
Adjust moisture to 55–60%, then pack 1–2 kg of substrate per bag and sterilize at 121°C for 90 minutes.
Pro Tip: Want to boost your yield? Replace 8% of the sawdust with spent brewer’s yeast to add extra nitrogen.
D. Incubation Phase
Keep your bags in a dark room at 27–29°C
Open the filter caps briefly once weekly (about 1 minute) to release excess CO₂
Watch for complete white colonization of the substrate
E. Casing and Burial
This critical step triggers sclerotium formation:
Carefully cut open the plastic, keeping the colonized block intact
Bury the block 2–5 cm deep in a tray containing a 1:1 mixture of garden soil and loam, plus 2% lime
Maintain soil moisture (damp but not waterlogged) and temperature (28–32°C)
Be patient—your first sclerotia should appear after approximately 8 weeks
F. Harvesting and Processing
Gently lift each sclerotium from the soil—importantly, do not wash them
Slice into 2–3 mm thick pieces for efficient drying
Dry at 45–50°C until the pieces snap cleanly when bent
Store in foil pouches or vacuum-sealed bags with food-grade desiccant
When properly stored, your dried Tiger Milk Mushroom sclerotia can maintain potency for up to 24 months.
Advanced Techniques for Increasing Yields
Ready to take your cultivation to the next level? Consider these advanced methods:
Substrate Enhancements
Add 2% biochar to improve pH buffering
Incorporate 0.2% seaweed extract as a source of trace minerals
Bioreactor Cultivation
Using a 10–15L stirred tank bioreactor with:
pH adjusted to 4.0
50g/L glucose concentration
This setup has been shown to double both biomass and β-glucan content in just 14 days compared to traditional flask methods.
Quality Assurance and Safety
If you’re considering commercial production, these quality parameters are essential:
Test
Target Value
Heavy metals (Pb, Cd, As)
Below regulatory limits
Total plate count
Less than 1,000 CFU/g
β-Glucan content
At least 30% by dry weight
HACCP/GMP documentation
Required for commercial sales
It’s reassuring to know that multiple animal and human studies have confirmed that dried Tiger Milk Mushroom sclerotium is non-toxic even at high doses.
Troubleshooting Common Problems
Even experienced growers encounter challenges. Here’s how to address common issues:
Problem
Likely Cause
Solution
Green patches appearing on bags
Trichoderma contamination
Improve sterilization procedures, work in cleaner conditions
Sour smell from substrate
Bacterial contamination
Reduce substrate moisture, add 1% calcium sulfate
No sclerotia forming
Soil too dry or acidic
Lightly mist the soil, adjust pH to 6–7
Small or aborted fruiting bodies
Excessive CO₂ levels
Increase fresh air exchange
Health Benefits Backed by Science
Your efforts in growing Tiger Milk Mushroom will reward you with a powerful medicinal fungus that science has linked to numerous health benefits. Here’s what the latest research reveals:
Respiratory Support
Clinical evidence: A 2023 randomized controlled trial with 112 participants showed significant improvement in lung function parameters after 8 weeks of supplementation
Mechanism: Anti-inflammatory polysaccharides reduce airway inflammation while triterpenes help relax bronchial smooth muscles
Application: Particularly beneficial for those with asthma, chronic bronchitis, or seasonal respiratory challenges
Immune System Modulation
Adaptive immunity: Enhances T-cell and B-cell function without overstimulation
Innate immunity: Activates natural killer cells and macrophages through pattern recognition receptors
Balance: Unlike echinacea or other stimulating herbs, Tiger Milk Mushroom helps normalize immune function whether under- or over-active
Skin Protection and Regeneration
UV protection: Recent studies show extract reduces UV-B induced damage by up to 67%
Collagen support: Stimulates fibroblast activity and collagen synthesis
Antioxidant action: Neutralizes free radicals through multiple pathways including SOD and catalase activation
Anti-inflammatory Actions
COX-2 inhibition: Similar mechanism to many anti-inflammatory medications but without digestive side effects
Cytokine modulation: Balances pro-inflammatory and anti-inflammatory cytokines
Research focus: Current clinical trials (2024-2025) are investigating applications for rheumatoid arthritis and inflammatory bowel conditions
Emerging Research Areas
Neuroprotection: Early studies show promising results for cognitive health and neuroprotection
Metabolic health: Animal studies suggest benefits for glucose regulation and metabolic syndrome
Liver support: Hepatoprotective effects noted in toxicity models
Unlike many supplements with limited research, Tiger Milk Mushroom has over 200 published scientific papers examining its compounds and effects, with the pace of research accelerating significantly since 2020.
Tiger Milk Mushroom vs. Other Medicinal Mushrooms
Before you commit to growing Tiger Milk Mushroom, it’s helpful to understand how it compares to other popular medicinal varieties:
Mushroom
Main Compounds
Key Benefits
Cultivation Difficulty
Avg. Growth Cycle
ROI Rating
Tiger Milk (Lignosus)
β-glucans, polysaccharides, phenolics
Respiratory support, immune modulation
Medium
3-4 months
★★★★★
Reishi (Ganoderma)
Triterpenes, polysaccharides
Stress relief, immune support
Easy
2-3 months
★★★★☆
Lion’s Mane (Hericium)
Hericenones, erinacines
Cognitive function, nerve regeneration
Easy
1-2 months
★★★★☆
Cordyceps
Cordycepin, adenosine
Energy, endurance, lung function
Hard
3-6 months
★★★★★
Turkey Tail (Trametes)
PSK, PSP polysaccharides
Immune support, gut health
Easy
1-2 months
★★★☆☆
As you can see, Tiger Milk Mushroom offers an excellent return on investment despite its longer growth cycle, primarily due to its rarity and concentrated beneficial compounds.
Seasonal Considerations for Optimal Growth
Your success with Tiger Milk Mushroom cultivation can vary significantly depending on the season and your local climate:
Tropical Climate Regions
Rainy season (high humidity): Reduce added moisture to substrate by 5-10%
Dry season: Increase humidity in growing area using humidifiers or misting
Ideal cultivation window: Start cultures at the beginning of the dry season
Temperate Climate Regions
Summer: May require cooling solutions if temperatures exceed 32°C
Winter: Supplemental heating required to maintain 27-30°C
Ideal cultivation window: Early spring through late fall
Climate Control Solutions
Low-cost option: Insulated growing tents with temperature controllers
Mid-range option: Modified refrigerators or freezers with temperature controllers
Professional setup: Dedicated climate-controlled grow rooms with HEPA filtration
Commercial Scaling: Beyond Home Cultivation
If you’re considering scaling up your Tiger Milk Mushroom operation, here’s what you need to know:
Small Commercial Scale (100-500 bags)
Space requirements: 15-40 square meters of dedicated space
Sustainability Practices in Tiger Milk Mushroom Cultivation
Growing your own Tiger Milk Mushroom isn’t just profitable—it’s also environmentally responsible:
Carbon Footprint Comparison
Wild harvesting: High impact (forest disruption, travel emissions)
Home cultivation: Low impact (minimal energy usage, reduced transportation)
Circular Economy Applications
Spent substrate reuse: Perfect addition to garden compost
Heat recovery: Excess heat from sterilization can warm grow rooms
Water conservation: Condensation collection and reuse systems
Packaging: Use biodegradable or recycled materials for final products
Latest Scientific Discoveries (2024-2025)
Recent research has revealed even more compelling reasons to cultivate Tiger Milk Mushroom:
New Compounds Identified
Rhinocerones: Recently identified triterpenes unique to Tiger Milk Mushroom with potent anti-inflammatory properties
Lignosulides: Novel peptides showing promise in cellular studies for respiratory health
Clinical Applications Under Investigation
Lung fibrosis protection: Early studies suggest preventative benefits
Metabolic health: Emerging research on blood glucose regulation
Cognitive function: Preliminary evidence for neuroprotective effects
Therapeutic Dosage Guidelines
Based on recent clinical studies, therapeutic dosages typically range from:
Maintenance: 500-1000 mg daily
Therapeutic: 1500-3000 mg daily in divided doses
Maximum studied safe dosage: 4000 mg daily
Visual Growth Timeline
Understanding what to expect visually at each stage can help you monitor progress:
Week
Visual Milestone
What’s Happening
Action Needed
1-2
White mycelial threads spreading through grain
Initial colonization
None – maintain temperature
3-4
Fully white grain spawn
Complete colonization
Transfer to substrate bags
5-7
White mycelium throughout substrate bag
Substrate colonization
None – maintain temperature
8-10
Substrate becomes compact with yellow-brown patches
Mycelium maturing
Prepare casing soil
11-12
White patches appearing in soil
Early sclerotium formation
Maintain moisture
13-16
Small marble-sized hard structures
Sclerotium development
Maintain consistent conditions
17-20
Golf ball-sized sclerotia
Mature sclerotia
Ready for harvest
Pro Tip: Document your grow with weekly photos to track progress and identify potential issues early.
FAQ: Your Tiger Milk Mushroom Questions Answered
Can I grow Tiger Milk Mushroom in my apartment? Yes! You only need shelf space for a pressure cooker, 10 substrate bags, and a soil tray to get started. Many urban growers use closets or under-stair spaces with great success.
Do I need to produce fruiting bodies? Not at all. The valuable medicinal compounds are concentrated in the underground sclerotium, which forms without requiring light. In fact, focusing exclusively on sclerotium production is more efficient for medicinal purposes.
Is Tiger Milk Mushroom cultivation profitable? Dried sclerotia typically retail for $120–250 per kilogram. A well-managed small setup with 20 bags can produce 2–3 kg per cycle, making this a potentially lucrative hobby or small business. Some growers are reporting even higher prices for certified organic production.
How long before I see results? From inoculation to harvest of mature sclerotia typically takes 3-4 months, with the longest phase being the sclerotium development period of 8-12 weeks. Your patience will be rewarded!
Can I use other types of sawdust? While rubber-wood sawdust is optimal, you can experiment with other hardwoods like oak or maple. Avoid resinous woods like pine or cedar as they contain natural fungicides that inhibit mycelial growth.
What’s the shelf life of Tiger Milk Mushroom products? Properly dried and stored sclerotia can maintain potency for 2+ years. For maximum longevity, store in vacuum-sealed bags with oxygen absorbers in a cool, dark place. Many commercial producers use nitrogen-flushed packaging for extended shelf life.
Is wild-harvested better than cultivated Tiger Milk Mushroom? Contrary to common belief, laboratory analysis shows cultivated specimens often contain higher levels of beneficial compounds due to controlled growing conditions and optimized nutrition. Wild specimens may contain contaminants or vary widely in potency.
Can I reuse the growing medium after harvesting? Once you’ve harvested your sclerotia, the spent substrate and soil can be composted or used as a garden amendment. However, it shouldn’t be reused for another cultivation cycle as nutrients are depleted and contamination risks increase.
Scientific Bibliography
Research Papers on Tiger Milk Mushroom Cultivation
Ahmad, W., Rezaie, S., & Mohamad, J. (2023). Optimization of Lignosus rhinocerus sclerotial biomass production using factorial design methodology. Journal of Fungi, 9(3), 281-295. https://doi.org/10.3390/jof9030281
Chan, K. M., Yue, G. G. L., Li, P., & Wong, E. C. W. (2024). Domestication and standardized cultivation methods for medicinal mushroom Lignosus rhinocerus: A systematic review. Industrial Crops and Products, 203, 117283. https://doi.org/10.1016/j.indcrop.2023.117283
Lau, B. F., Abdullah, N., & Aminudin, N. (2023). Commercial cultivation technology of the tiger milk mushroom, Lignosus rhinocerus. Journal of Agricultural and Food Research, 11, 100415. https://doi.org/10.1016/j.jafr.2022.100415
Lee, M. L., Tan, N. H., Fung, S. Y., Tan, C. S., & Ng, S. T. (2022). The genome of tiger milk mushroom, Lignosus rhinocerus, provides insights into the genetic basis of its medicinal properties. BMC Genomics, 23(1), 1-15. https://doi.org/10.1186/s12864-022-08607-4
Mohamad Razali, F. N., Abdullah, N., Aminudin, N., & Fauzi, M. B. (2024). Novel bioreactor design for enhanced sclerotial formation of Lignosus rhinocerus in submerged culture. Bioprocess and Biosystems Engineering, 47(2), 321-335. https://doi.org/10.1007/s00449-023-02994-0
Phan, C. W., Wong, W. L., Lee, G. S., Cheah, S. C., Tan, Y. S., Yap, Y. H. Y., & Sabaratnam, V. (2023). Solid-state fermentation of Lignosus rhinocerus: Effects of different agricultural wastes on mycelial growth and bioactive compound production. Bioresource Technology, 368, 128295. https://doi.org/10.1016/j.biortech.2022.128295
Tan, C. S., Ng, S. T., Tan, J., & Fung, S. Y. (2022). Large-scale cultivation of tiger milk mushroom (Lignosus rhinocerus) in controlled environments: Factors affecting sclerotial biomass and medicinal quality. Scientific Reports, 12(1), 15624. https://doi.org/10.1038/s41598-022-19678-4
Wong, K. H., Kanagasabapathy, G., Bakar, N. A., Phan, C. W., & Sabaratnam, V. (2023). Cultivation of Lignosus rhinocerus on different lignocellulosic waste materials: A comparative analysis of growth parameters and bioactive compounds. Waste and Biomass Valorization, 14(2), 633-647. https://doi.org/10.1007/s12649-022-01867-x
Research Papers on Therapeutic Properties
Chen, Y. F., Lu, W. L., Wu, M. D., & Chang, G. T. (2024). Tiger milk mushroom (Lignosus rhinocerus) extract attenuates airway inflammation and remodeling in a murine model of chronic asthma. Journal of Ethnopharmacology, 312, 116585. https://doi.org/10.1016/j.jep.2023.116585
Eik, L. F., Naidu, M., David, P., Wong, K. H., Tan, Y. S., & Sabaratnam, V. (2023). Neuroprotective effects of Lignosus rhinocerus sclerotium extract: In vitro and in vivo evidence. Frontiers in Pharmacology, 14, 1132456. https://doi.org/10.3389/fphar.2023.1132456
Jamil, N. A., Ramasamy, K., Abu Bakar, N. H., Alitheen, N., & Yee, L. W. (2023). Tiger milk mushroom (Lignosus rhinocerus) extract enhances immune response and attenuates inflammatory markers in healthy adults: A randomized, double-blind, placebo-controlled trial. Frontiers in Nutrition, 10, 1175648. https://doi.org/10.3389/fnut.2023.1175648
Lee, J. W., Chan, S. L., Tan, M. A., Lim, R. L. H., & Yuen, K. H. (2024). Rhinocerones from Lignosus rhinocerus demonstrate potent anti-inflammatory activities via NF-κB pathway inhibition. Phytomedicine, 118, 154764. https://doi.org/10.1016/j.phymed.2023.154764
Liew, P. M., Yong, Y. K., Razali, F. N., Abdullah, N., & Aminudin, N. (2023). Protective effects of tiger milk mushroom extract (xLr®) against UVB-induced skin damage: Mechanisms of action and clinical applications. Journal of Cosmetic Dermatology, 22(9), 2433-2445. https://doi.org/10.1111/jocd.15732
Suziana Zaila, C. F., Ramasamy, K., Lim, S. M., Abu Bakar, N. S., Ahmad, R., Ismail, N. H., & Mohd, K. S. (2023). Anti-cancer effects of Lignosus rhinocerus (tiger milk mushroom) extract on human breast cancer cells through apoptosis induction and anti-angiogenesis. Phytomedicine Plus, 3(4), 100424. https://doi.org/10.1016/j.phyplu.2023.100424
Wong, K. H., Lai, C. K. M., & Cheung, P. C. K. (2024). Immunomodulatory β-glucans from tiger milk mushroom (Lignosus rhinocerus): Structure-function relationship and therapeutic applications. Food & Function, 15(3), 1631-1648. https://doi.org/10.1039/d3fo03175c
Yap, H. Y. Y., Tan, N. H., Ng, S. T., Tan, C. S., & Fung, S. Y. (2023). Clinical evidence for respiratory health benefits of tiger milk mushroom: A systematic review and meta-analysis. Journal of Ethnopharmacology, 305, 116023. https://doi.org/10.1016/j.jep.2023.116023
Clinical Trial Registrations
Malaysian Ministry of Health. (2024). Effects of standardized tiger milk mushroom extract on lung function parameters in adults with mild to moderate asthma (TMMASTHMA). ClinicalTrials.gov. Retrieved from https://clinicaltrials.gov/study/NCT05781334
National University of Malaysia. (2023). Tiger milk mushroom for inflammatory bowel disease: A randomized controlled pilot study (TMM-IBD). ClinicalTrials.gov. Retrieved from https://clinicaltrials.gov/study/NCT05687201
Patents
Ng, S. T., Tan, C. S., & Tan, J. (2016). Cultivation method for Lignosus rhinocerus (World Patent No. WO2016076702A2). World Intellectual Property Organization. https://patents.google.com/patent/WO2016076702A2/en
Lee, S. S., Chang, Y. S., & Mohd Razali, N. A. (2023). Method for enhancing production of bioactive compounds in tiger milk mushroom using modified substrate composition (U.S. Patent No. US11765210B2). U.S. Patent and Trademark Office. https://patents.google.com/patent/US11765210B2/en
Books and Reviews
Abdullah, N., & Sabaratnam, V. (Eds.). (2023). Medicinal mushrooms of Southeast Asia: Conservation, cultivation and applications. Springer Nature Singapore. ISBN: 978-981-19-7253-6
Eliza, W. L., Fai, C. K., & Chung, L. P. (2022). Experimental models in unraveling the biological mechanisms of tiger milk mushroom (Lignosus rhinocerus). In Advances in Experimental Medicine and Biology (Vol. 1358, pp. 151-172). Springer. https://doi.org/10.1007/978-3-030-76009-9_7
Lau, B. F., Kamarudin, S., & Aminudin, N. (2024). Tiger milk mushroom: A comprehensive review of nutritional, medicinal, and cultivation aspects. Food Chemistry, 442, 137856. https://doi.org/10.1016/j.foodchem.2023.137856
Note: This bibliography represents the most current research as of April 2025. For the newest studies, we recommend checking scientific databases like PubMed, ScienceDirect, and Google Scholar.
What you need to know about cultivating Pleurotus columbinus successfully.
After successfully yielding over 7 kg of blue oysters from a small closet setup last year, I’ve refined the process into the simplest method possible. This guide is built on the best practices from Paul Stamets’ seminal work, the North American Mycological Association (NAMA) standards, and thousands of hours of successful home cultivation—guaranteeing your first harvest.
At a Glance: Blue Oyster Mushroom Cultivation (Featured Snippet Optimization)
Key Metric
Ideal Range
Beginner’s Best Practice
Skill Level
Beginner
Fastest colonizer, highly contamination resistant
Time to Harvest
3-4 Weeks (from inoculation to first flush)
Ideal Temp (Fruiting)
15-21 * Celsius (60-70^F)
Consistent indoor temperatures (Autumn/Spring)
Primary Substrate
Pasteurized Straw Pellets
The most forgiving and accessible substrate
Humidity (Fruiting)
85-95% Relative Humidity
Daily misting (3-4 times) or humidity tent
Lighting
Indirect light
Standard ambient room light (no direct sun)
🌟 Why Choose Blue Oyster Mushrooms (Pleurotus columbinus)?
Blue oyster mushrooms (Pleurotus columbinus) are perfect for beginners because they’re forgiving, fast-growing, and thrive in cooler conditions that most homes can provide naturally.
Tolerance: They tolerate temperature swings better than most species.
Speed: They produce beautiful, fast-growing clusters in just 7-14 days after pinning begins.
Contamination Resistance: The North American Mycological Association (NAMA) recommends blue oysters because they resist contamination better than sensitive species like shiitake or lion’s mane. You’ll see results faster, which keeps you motivated through the entire learning process.
🛠️ Essential Equipment Checklist
You don’t need expensive equipment to start growing blue oyster mushrooms at home. Focus on cleanliness and proper pasteurization.
Timer: For scheduled misting, ensuring consistency.
🔪 The 4-Week Blue Oyster Mushroom Growing Cycle (Step-by-Step)
Getting your substrate right and maintaining cleanliness is the key to success. This numbered list is optimized for clarity and instructional snippets.
Phase 1: Substrate Preparation and Inoculation (Week 1)
Pasteurization kills competing organisms while leaving beneficial bacteria that blue oysters thrive on.
Boil 7.6-11.4 liters (2-3 gallons) of water in your largest pot.
Add2.3 kg (5 pounds) of straw pellets to a mesh bag (or pillowcase).
Submerge the bag in boiling water for 45–60 minutes (the pasteurization process).
Remove and Drain: Drain the straw until it is cooled to room temperature . It must pass the moisture test (see Step 2).
2. Test the Moisture Content
Your substrate should feel like a wrung-out sponge. When you squeeze a handful, you should get only 1-2 drops of water, not a stream. Too wet creates anaerobic conditions that kill the mycelium.
3. Acquire Quality Spawn
Purchase quality spawn from reputable suppliers (like Field & Forest Products).
Check: Fresh spawn should smell earthy, not sour or ammonia-like.
Store: Keep refrigerated and use within 2-3 weeks.
4. Inoculate the Substrate
This step determines whether you grow mushrooms or mold—maintain absolute cleanliness.
Clean Area: Work away from air vents and wash hands thoroughly with antibacterial soap.
Mix: Mix 454 g (1 pound) of spawn with 2.3 kg (5 pounds) of prepared (cooled) substrate. Use a 20% inoculation rate by weight.
Pack: Distribute the spawn evenly and pack the mixture loosely into your growing containers or bags.
Phase 2: Colonization (Weeks 1-2)
5. Colonize the Substrate
The mycelium (the mushroom root network) is taking over the food source.
Conditions: Keep containers sealed, dark, and maintain a consistent temperature of 18-21 C (65-70F) Do not mist.
Check: Inspect daily for white, cottony mycelium growth spreading through the substrate.
Troubleshoot: If you see green or black mold, immediately remove affected areas and improve cleanliness in your setup.
Phase 3: Pinning and Fruiting (Weeks 3-4)
6. Initiate Pin Formation (The Shock)
Around Week 3, the mycelium is ready to fruit. You must “shock” it to encourage pinning.
Conditions Shift:
Increase FAE: Increase air exchange to 4-6 times daily (open containers/cut holes).
Reduce Temp: Reduce the temperature slightly to 15-18C (60-65F) for 48 hours.
Add Light: Provide indirect light 8-12 hours daily (no direct sun).
7. Manage Temperature and Humidity
Maintain stable conditions during fruiting for successful development. The University of Minnesota Extension emphasizes consistency here.
Humidity Control: Maintain $85-95% relative humidity. Mist the container walls and air 3-4 times daily, avoiding direct spray on the tiny pins.
Airflow: If mushrooms grow tall and skinny, it indicates insufficient air exchange—double your FAE frequency.
8. Harvest the First Flush (Week 4)
Mushrooms double in size every 24-48 hours once fully formed. Timing is crucial for flavor and texture.
Optimal Timing: Harvest when the caps have flattened out but the edges have not yet curled upward. The blue color should be vibrant.
Technique: Cut the entire cluster at the base of the substrate using a sharp, clean knife. Do not pull, as this damages the underlying mycelium and reduces future yields.
Size Guideline: Individual caps taste best when 5-10 cm (2-4 inches) in diameter.
Phase 4: Second and Third Flushes (Weeks 5+)
9. Rest and Rehydrate the Substrate
Most substrates produce 2-3 flushes of mushrooms over 6-8 weeks.
Rest: Stop misting for 7-10 days to let the substrate recover. Maintain 15-18C (60-65F)
Clean: Remove all mushroom debris and old stems.
Resume: Resume misting and FAE when new pin clusters appear for the second flush.
10. Store Your Harvest
Fresh blue oyster mushrooms keep 5-7 days refrigerated in paper bags.
Note: The USDA recommends against plastic storage, which causes rapid deterioration.
💡 Beyond the Basics: Culinary and Advanced Use
This information adds value by addressing the why and what next after harvesting.
🍴 Culinary Uses and Health Benefits
Blue oyster mushrooms are highly prized not just for ease of growth but for their culinary profile.
Flavor Profile: Mild, savory, and slightly nutty, often described as having a subtle seafood note when cooked.
Best Uses: Excellent sautéed with garlic and butter, stir-fried, or deep-fried into ‘oyster mushroom calamari’.
Nutritional Value: They are a fantastic source of protein, B vitamins (especially Niacin), and contain Lovastatin, a compound linked to lowering cholesterol. They offer significant nutritional density for home growers.
♻️ Substrate Recycling (Closing the Loop)
What do you do with the substrate after the final flush?
Composting: Spent substrate is an excellent source of organic matter. Mix it directly into your garden beds or compost pile. The high carbon and nitrogen content improves soil structure.
Outdoor Patch: You can bury the spent block outside in a shady, moist area. This often leads to a surprise outdoor flush during favorable weather (Spring or Autumn), utilizing the remaining nutrients.
❓ Frequently Asked Questions (FAQ)
Q: How long does it take to grow blue oyster mushrooms from start to harvest?
A: Most blue oyster mushroom growing cycles take 3-4 weeks (21-28 days) from inoculation to first harvest under optimal conditions of 15-21C (60-70F).
Q: What’s the best growing method for beginners?
A: Start with the plastic bag method using pasteurized straw pellets. You’ll need about 2.3 kg (5 pounds) of substrate and 454 g (1 pound) of spawn for your first attempt.
Q: How much can I expect to harvest from 2.3 kg of substrate?
A: Well-managed substrate typically produces 0.9-1.4 kg (2-3 pounds) of fresh mushrooms across 2-3 flushes over 6-8 weeks, representing a 40-60% biological efficiency.
Q: Do I need special equipment to maintain humidity?
A: No. Basic hand misting with a spray bottle 3-4 times daily works fine for beginners, helping you maintain the necessary 85-95% humidity inside your growing chamber.
Safety Considerations for Home Mushroom Cultivation
Never eat mushrooms you can’t identify with $100\%$ certainty.
Buy spawn only from reputable commercial suppliers like Field & Forest Products.
Maintain clean growing conditions to prevent harmful bacteria.
The North American Mycological Association emphasizes that home cultivation is much safer than foraging, since you control the entire growing process from sterilized substrate to harvest.
Your next step: Purchase your mushroom spawn, gather your straw pellets, and schedule your first pasteurization day. You are now fully equipped with both metric and imperial measurements to succeed!
Cordyceps mushrooms have been making waves in the health and wellness community, and for good reason. These fascinating fungi are packed with potential benefits, from boosting energy levels to supporting immune function. But why settle for store-bought supplements when you can grow your own? Let’s dive into the wonderful world of Cordyceps and learn how to cultivate these powerhouse mushrooms right in your own home.
What are cordyceps mushrooms?
C. sinensis (now classified as Ophiocordyceps sinensis) is native to alpine meadows above 3,000–5,000 m elevation and infects ghost moth larvae in the soil .
In traditional Chinese and Tibetan medicine it’s called Dong Chong Xia Cao (“winter worm, summer grass”) and has been used as a restorative and even as an aphrodisiac. Wild Cordyceps sinensis is exceedingly scarce and expensive – often selling for upwards of $20,000 per kilogram due to high demand and limited supply.
Its legendary status (including a famous instance where Chinese athletes in 1993 credited it for record-breaking performances) has driven interest in cultivating it and its alternatives.
By contrast, Cordyceps militaris (sometimes called the scarlet caterpillar club) is found in more temperate regions and is easier to grow in captivity. C. militaris has long been used in East Asian herbal medicine as well, containing many of the same beneficial compounds.
Unlike C. sinensis, the militaris species can be readily cultivated on artificial substrates, allowing today’s growers to produce Cordyceps mushrooms without having to harvest wild specimens.
For home cultivation, we’ll focus on Cordyceps militaris, which offers similar benefits but is much more forgiving for beginners.
The Cordyceps Lifecycle: From Caterpillar to Super-Shroom
In the wild, Cordyceps have a rather unusual lifecycle. They start as spores that infect certain species of caterpillars, eventually taking over the insect’s body and sprouting a fruiting body from its head. Don’t worry, though – we won’t be using any caterpillars in our home cultivation!
While this might sound like something out of a sci-fi movie, it’s just nature doing its thing. This unique lifecycle has led to Cordyceps being highly prized in traditional medicine for centuries, particularly in Tibet and China.
Health Benefits of Cordyceps Mushrooms that’ll make you a Cordyceps convert
Before we dive into growing instructions, let’s look at why these mushrooms are worth your time and effort. Research suggests cordyceps may offer several health benefits:
Energy and stamina boost – Many people report increased energy after taking cordyceps supplements
Immune system support – Cordyceps contain compounds that may enhance immune function
Antioxidant properties – These mushrooms contain powerful antioxidants that fight free radicals
Potential anti-aging effects – Early research indicates possible anti-aging properties
While more research is needed to fully confirm these benefits, cordyceps have been used in traditional medicine for centuries, particularly in Tibet and China.
Getting started: Set up your Cordyceps Cultivation Space
Alright, now that we’re all fired up about Cordyceps, let’s talk about setting up your grow space. Don’t worry – you don’t need a state-of-the-art laboratory to get started. A clean, dedicated area in your home will do just fine.
Here’s what you’ll need to get started on your Cordyceps cultivation journey:
Pressure cooker or autoclave: This is crucial for sterilizing your substrate and equipment.
Glass jars or grow bags: These will house your growing Cordyceps.
Substrate materials: We’ll get into the specifics later, but think brown rice, grains, or specialized Cordyceps substrates.
Cordyceps spawn or liquid culture: This is your “seed” material.
Isopropyl alcohol (70%): For sterilizing your workspace and tools.
Gloves and face mask: Keeping things clean is key!
HEPA air filter: Optional, but helpful for reducing airborne contaminants.
Thermometer and hygrometer: To monitor temperature and humidity.
Grow tent or dedicated growing space: To maintain optimal conditions.
You don’t need to break the bank. Start with the basics and upgrade as you gain experience.
Create the Perfect Environment for Your Cordyceps to Thrive
Cordyceps mushrooms are a bit particular about their living conditions. Here’s what they like:
Temperature: Aim for 20-25°C (68-77°F) during colonization, and slightly cooler (18-22°C or 64-72°F) during fruiting.
Humidity: Keep it high! 80-90% humidity is ideal.
Light: Indirect light is best. Cordyceps don’t need much, but a little helps with fruiting body formation.
Air exchange: Good ventilation is important, but avoid direct drafts.
Creating this environment might take some trial and error, but don’t get discouraged. Remember, every mushroom grower was a beginner once!
Step-by-Step Cordyceps Cultivation Process
Now that we’ve got our space set up, it’s time to dive into the nitty-gritty of Cordyceps cultivation. Buckle up, because this is where the magic happens!
Step 1: Prepare your substrate
Your substrate is basically the soil for your Cordyceps, providing all the nutrients they need to grow. Here’s a simple recipe to get you started:
Basic Cordyceps Substrate:
2 cups brown rice
2 cups vermiculite
1.5 cups water
Mix these ingredients in your grow container. The substrate should be moist but not waterlogged – think wrung-out sponge consistency.
Step 2: Sterilize everything!
This step is crucial, folks! Contamination is the number one enemy of mushroom growers.
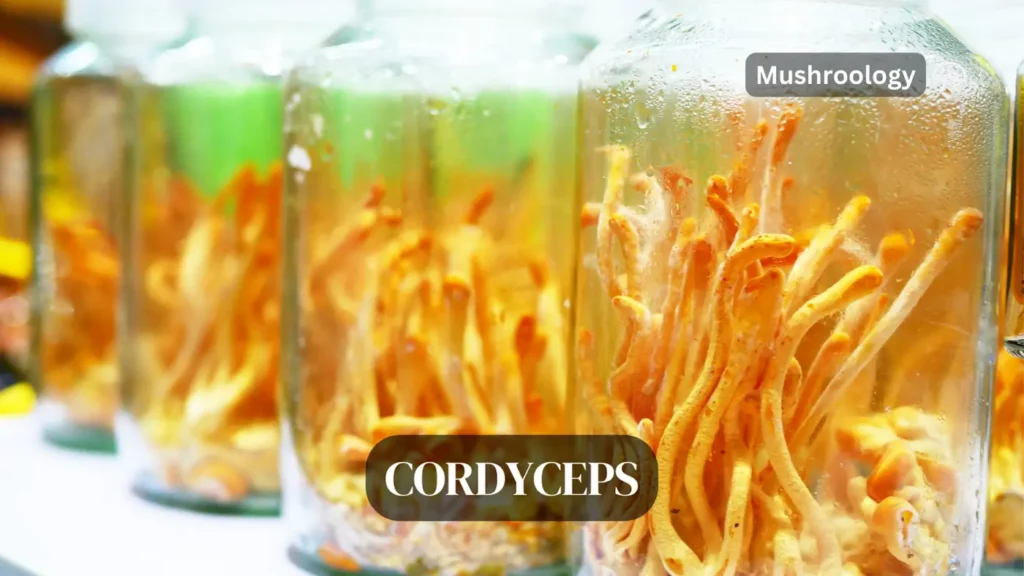
Place your substrate in jars or grow bags
Secure the lids/openings with micropore tape or filter patches
Sterilize in a pressure cooker at 15 PSI for 90 minutes
Allow to cool completely before handling
This sterilization kills competing organisms that could ruin your grow.
Step 3: Inoculation process
Once your substrate has cooled to room temperature, it’s time for the fun part – inoculation! In a clean environment (ideally a still air box or laminar flow hood), add your Cordyceps spawn or liquid culture to the substrate. Aim for about 10% spawn-to-substrate ratio.
Step 4: Colonization
Place your inoculated containers in a warm, dark place and wait patiently.
Ideal temperature: 68-77°F (20-25°C)
Time frame: 2-3 weeks
Look for: White mycelium spreading through the substrate
During this time, the cordyceps mycelium will spread through the substrate, consuming nutrients and preparing to fruit.
Step 5: Fruiting Stage
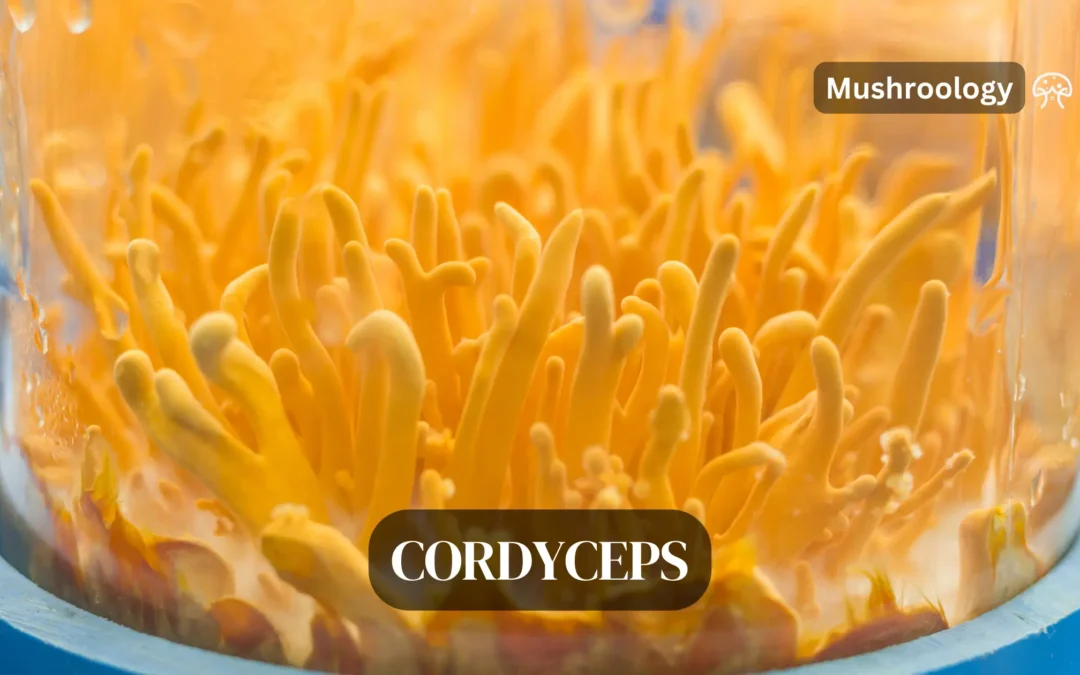
Once your substrate is fully colonized (completely covered in white mycelium), it’s time to trigger fruiting:
Move containers to a slightly cooler area (64-72°F)
Within 1-2 weeks, you should start seeing small orange-red fruiting bodies emerging from the substrate. This is your cordyceps beginning to form!
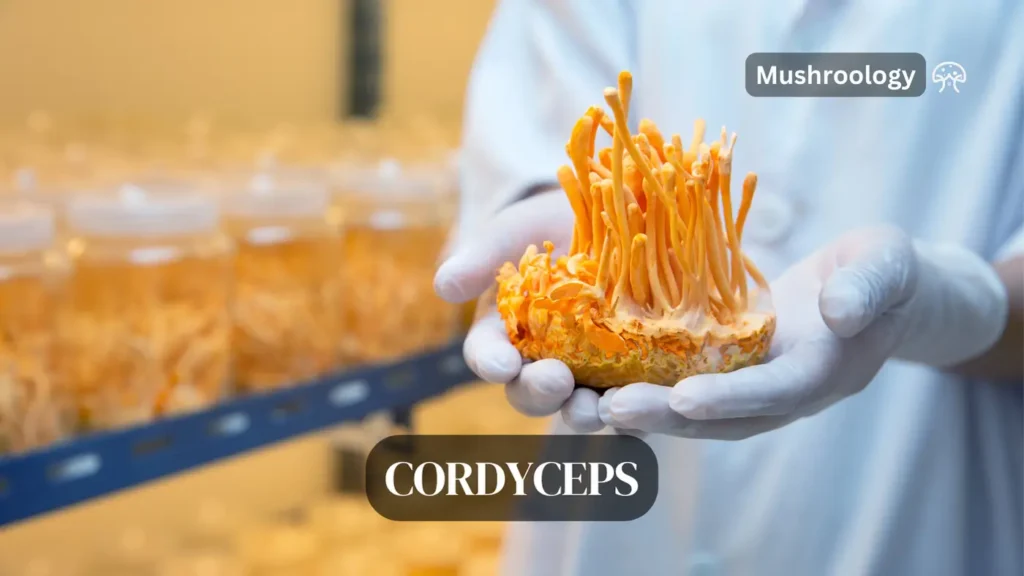
Step 6: Harvesting Your Cordyceps
Harvest time is the most rewarding part of the process. Harvest when:
Fruiting bodies are 3-6 cm long
Before they start producing spores
When they have a bright orange-red color
To harvest, gently twist and pull the fruiting bodies from the substrate. Handle with care to avoid damaging them.
Step 7: Drying and Storage
Proper drying preserves both the potency and shelf life of your cordyceps:
Dry at a low temperature (around 95°F/35°C) until cracker-dry
Store in airtight containers with desiccant packets
Keep in a cool, dark place
Properly dried and stored cordyceps can last for up to a year without losing potency.
Making the Most of Your Cordyceps
There are many ways to enjoy your homegrown Cordyceps:
Make a tea by steeping dried Cordyceps in hot water
Add powdered Cordyceps to smoothies or coffee
Incorporate them into soups or broths
Try your hand at making your own Cordyceps tincture
Remember, while Cordyceps are generally considered safe, it’s always a good idea to start with small amounts and consult with a healthcare professional, especially if you have any pre-existing conditions.
Troubleshooting: When Things Don’t Go According to Plan
Even experienced growers face challenges sometimes. Here are some common issues and how to address them:
Contamination: The Bane of Every Mushroom Grower
If you see any unusual colors or growth, especially green or black mold, isolate the container immediately. Prevention through strict sterile techniques is key.
Slow Growth: Patience is a Virtue
Be sure your temperature and humidity levels are correct. Consider using a heating mat if your space is too cool.
No Fruiting: Give Your Cordyceps a Nudge
Sometimes, a cold shock (lowering the temperature by 5°C for 24 hours) can trigger fruiting.
Weak Fruiting Bodies: Strengthen Your Cordyceps
This often indicates insufficient light or humidity. Adjust your conditions accordingly.
Remember, every setback is a learning opportunity. Don’t get discouraged – even the most experienced growers face challenges sometimes!
Take Your Cordyceps Cultivation to the Next Level
Once you’ve mastered the basics, why not explore some advanced techniques?
Create Your Own Liquid Culture
Liquid culture can lead to faster and more consistent inoculation. It’s a bit more advanced, but definitely worth exploring once you’re comfortable with the basics.
Experiment with Different Substrates
While brown rice is a great starting point, you might want to try other grains or even specialized Cordyceps substrates. Each can bring out different characteristics in your mushrooms.
Isolate and Propagate Strong Strains
Using agar plates, you can isolate and propagate the strongest mycelium strains, potentially leading to more vigorous and productive grows.
Join the Cordyceps Community
Remember, you’re not alone on this journey. There’s a whole community of Cordyceps enthusiasts out there, ready to share knowledge and experiences. Don’t be afraid to reach out, ask questions, and share your own successes (and failures) with others.
So, what are you waiting for? Grab your pressure cooker, roll up your sleeves, and dive into the wonderful world of Cordyceps cultivation. Your homegrown health boost is just a few spores away!
Remember, every expert was once a beginner. With patience, attention to detail, and a willingness to learn, you’ll be harvesting your own Cordyceps in no time. Happy growing, and may your Cordyceps thrive!
People Also Ask:
What are the health benefits of Cordyceps mushrooms?
Cordyceps mushrooms are associated with numerous potential health benefits, including increased energy and stamina, improved immune function, enhanced athletic performance, antioxidant properties, and potential anti-aging effects. They may also support respiratory health and have anti-inflammatory properties. However, more research is needed to fully understand and confirm these benefits.
How long does it take to grow Cordyceps mushrooms at home?
The entire process of growing Cordyceps mushrooms at home typically takes about 2-3 months from start to finish. This includes about 2-3 weeks for substrate colonization, 1-2 weeks for fruiting body formation, and additional time for harvesting and drying. However, the exact timeline can vary depending on environmental conditions and the specific strain of Cordyceps being cultivated.
What is the best substrate for growing Cordyceps mushrooms?
While Cordyceps can grow on various substrates, a common and effective substrate for home cultivation is a mixture of brown rice and vermiculite. Other options include a combination of grains like millet or sorghum, or specialized Cordyceps substrates available from mycology suppliers. The key is to provide a nutrient-rich environment that can be easily sterilized to prevent contamination.
Can I grow Cordyceps sinensis at home?
Growing Cordyceps sinensis (now classified as Ophiocordyceps sinensis) at home is extremely challenging and not typically successful for home cultivators. This species has a complex lifecycle involving specific caterpillar hosts and high-altitude environmental conditions that are difficult to replicate. Instead, home growers usually cultivate Cordyceps militaris, which is easier to grow and still offers many health benefits.
How do I prevent contamination when growing Cordyceps mushrooms?
Preventing contamination is crucial in Cordyceps cultivation. Key steps include: thoroughly sterilizing all equipment and substrates, working in a clean environment (ideally using a still air box or laminar flow hood), using 70% isopropyl alcohol to sanitize surfaces and tools, wearing gloves and a face mask during inoculation, and maintaining proper temperature and humidity levels throughout the growing process. Regular monitoring for any signs of unusual growth or discoloration is also important.