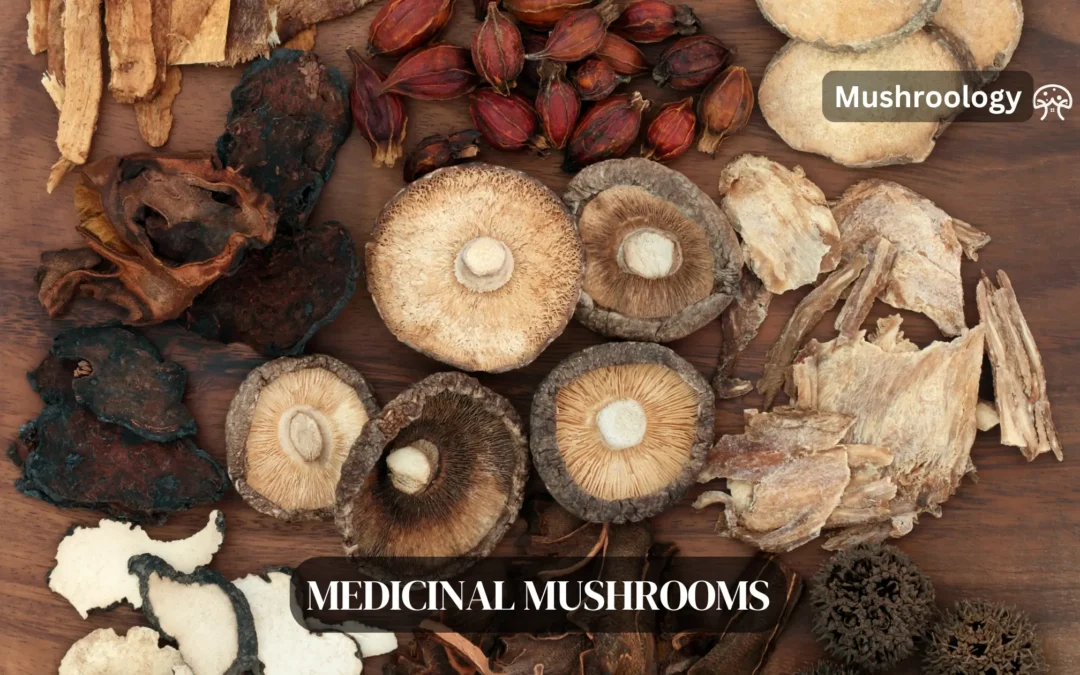
For centuries, medicinal mushrooms have been a natural way to support health, and now science is catching up to validate their powerful properties. Let’s take a closer look at 13 superstar mushrooms, their bioactive compounds, and how they can help boost your health. From immune support to better brain function, these fungi offer benefits you don’t want to miss.
1. Reishi mushroom ( Ganoderma lucidum ): benefits, dosage, and research
Reishi mushroom (Ganoderma lucidum), revered in Traditional Chinese Medicine as the “Mushroom of Immortality,” isn’t just ancient folklore. Modern science is now uncovering the potent health benefits of this remarkable fungus. Reishi might be worth considering if you’re looking for natural ways to manage stress, boost your immune system, or explore potential cancer support.
What makes Reishi so powerful?
Reishi’s power comes from its unique composition of bioactive compounds, including:
Triterpenes: These compounds are responsible for Reishi’s calming effects. They may influence neurotransmitters, promoting relaxation and potentially improving sleep quality. Think of them as nature’s stress relievers.
Beta-Glucans: These are potent immune modulators. They “train” your immune cells, like natural killer (NK) cells, to be more effective at fighting off invaders and potentially even cancer cells. This is why Reishi is often touted for its immune-boosting properties.
Polysaccharides: These complex carbohydrates also contribute to immune support and have shown antioxidant and anti-inflammatory effects in various studies.
Proven health benefits of Reishi: what the research says
Stress and Anxiety Reduction: Feeling overwhelmed? Reishi might help. Studies suggest it can reduce feelings of anxiety and promote relaxation. While more research is needed, the existing evidence is promising.
Immune System Support: This is where Reishi truly shines. Research, such as a study by Gao et al. (2002), demonstrated a significant increase (up to 300%) in NK cell activity after Reishi consumption. This means your body’s natural defenses become more efficient.
Potential Cancer-Fighting Properties: This is a hot area of research. Studies like the one by Wachtel-Galor et al. (2011) indicate Reishi’s potential to inhibit cancer cell growth and induce apoptosis (programmed cell death) in certain cancer types. However, it’s crucial to understand that Reishi is not a cure for cancer, but it may offer supportive benefits.
Heart and Brain Health: Emerging research suggests Reishi may play a role in cardiovascular health by helping regulate blood pressure and cholesterol. Its antioxidant properties may also protect against age-related cognitive decline.
How to use Reishi
Getting the right dosage is key. Here’s a general guideline:
Dried Mushroom: 1.5–9 grams daily. This can be used to make tea.
Extract: 1–1.5 grams daily. Extracts are more concentrated and often come in capsule or powder form.
Reishi is available in various forms:
Tea: A traditional way to consume Reishi.
Capsules: Convenient for precise dosing.
Tinctures: Liquid extracts that are absorbed quickly.
Powder: Can be added to smoothies, coffee, or other beverages.
⚠️Important Note: Always consult your healthcare provider before starting any new supplement, especially if you’re pregnant, nursing, taking medications, or have pre-existing health conditions.
2. Lion’s Mane: The ultimate natural brain-boosting mushroom
Want to sharpen your focus, boost your memory, and protect your brain as you age? Lion’s Mane (Hericium erinaceus) is making waves in the world of nootropics (cognitive enhancers). This unique-looking mushroom contains powerful compounds that support brain health in remarkable ways. Let’s explore the science-backed benefits and how you can use Lion’s Mane to unlock your brain’s potential.
The Brain-Boosting Power of Hericenones and Erinacines
Lion’s Mane contains two key compounds responsible for its cognitive benefits:
Hericenones: These stimulate the production of Nerve Growth Factor (NGF) in the brain. NGF is like fertilizer for your brain cells, promoting their growth, maintenance, and survival.
Erinacines: These compounds can cross the blood-brain barrier, directly impacting brain function and potentially promoting neurogenesis (the creation of new brain cells).
Science-Backed Benefits: What Lion’s Mane Can Do for Your Brain
Here’s what the research says about Lion’s Mane:
Enhanced Focus and Mental Clarity: By increasing NGF, Lion’s Mane can improve communication between brain cells, leading to sharper focus and clearer thinking.
Improved Memory and Recall: Studies suggest Lion’s Mane can boost memory and recall, especially in cases of mild cognitive impairment. A 2009 study by Mori et al. showed promising results in this area.
Neuroprotection and Cognitive Decline: Lion’s Mane’s ability to promote NGF and potentially neurogenesis suggests it could protect against age-related cognitive decline and neurodegenerative diseases like Alzheimer’s. Research by Kawagishi et al. (2008) supports this.
Potential Mood Support: Some preliminary research indicates Lion’s Mane may also have positive effects on mood and anxiety, although more studies are needed.
How to Use Lion’s Mane: Dosage and Consumption Methods
Here’s a quick guide to dosage:
Pure Powder: 1–3 grams daily.
Standardized Extract: 250–750 mg daily. Look for extracts standardized to contain a certain percentage of hericenones and erinacines.
Premium Supplements: Always follow the label instructions.
You can consume Lion’s Mane in several ways:
Coffee/Tea: Add powder to your morning beverage.
Capsules: A convenient and precise way to dose.
Smoothies: Blend powder into your favorite smoothie.
Important Note: As with any supplement, consult your healthcare provider before starting Lion’s Mane, especially if you have any underlying health conditions or are taking medications.
3. Chaga Mushroom (Inonotus obliquus): The Antioxidant Powerhouse from the North
Chaga (Inonotus obliquus) isn’t your typical mushroom. It’s a hard, charcoal-like growth that primarily thrives on birch trees in cold climates like Siberia, Canada, and Northern Europe. But don’t let its appearance fool you – Chaga is packed with powerful antioxidants and other beneficial compounds that have been used in traditional medicine for centuries. If you’re interested in boosting your antioxidant intake, supporting your immune system, or exploring potential anti-aging benefits, Chaga might be worth exploring.
What Makes Chaga So Special? The Antioxidant Advantage
Chaga’s unique composition is what gives it its potent properties:
Betulinic Acid: This compound, derived from birch bark, has shown promising anti-inflammatory, antiviral, and even anti-cancer effects in some studies.
Melanin: Chaga is incredibly rich in melanin, the pigment responsible for skin and hair color. Melanin is a powerful antioxidant that can protect cells from damage caused by free radicals.
Polysaccharides: These complex carbohydrates support immune function and have demonstrated antioxidant and anti-tumor properties.
Science-Backed Benefits: What Research Reveals About Chaga
Here’s a look at the key benefits supported by scientific research:
Superior Antioxidant Protection: Chaga is considered one of the most potent natural sources of antioxidants. These compounds neutralize harmful free radicals, which can contribute to aging, inflammation, and various diseases. A 2016 study by Zhao et al. highlighted Chaga’s exceptional free radical scavenging ability.
Powerful Anti-Inflammatory Effects: Chronic inflammation is linked to many health problems. Chaga’s betulinic acid and other compounds may help reduce inflammation throughout the body.
Immune System Support: Chaga’s polysaccharides can stimulate the immune system, helping the body defend itself against infections and illnesses.
Potential Anti-Aging Properties: Due to its high antioxidant content, Chaga may help protect against cellular damage that contributes to ageing. Research by Shashkina et al. (2006) confirmed its unique melanin-based protection.
How to Use Chaga: Dosage and Preparation
Chaga is typically consumed as a tea or extract. Here’s a general guideline:
Raw Powder: 1–3 grams daily. This can be brewed into a tea.
Concentrated Extract: 200–600 mg daily. Extracts are more potent and convenient.
Here are the most common ways to consume Chaga:
Traditional Immunity Tea: Simmering Chaga chunks or powder in hot water for an extended period extracts its beneficial compounds.
Pre-Workout Energy Boost (Some Users): While not a primary benefit, some people report a mild energy boost from Chaga tea.
As a Supplement: Chaga extracts are available in capsule and powder form for convenient consumption.
Important Note: While Chaga is generally considered safe, it’s important to consult with your healthcare provider before using it, especially if you are taking blood thinners, have diabetes, or have any other health conditions. Chaga contains compounds that may interact with certain medications.
4. Cordyceps (Cordyceps Sinensis) – The Elite Athlete’s Secret Weapon
This power-packed performance enhancer isn’t just another supplement. With its unique compounds cordycepin and adenosine, Cordyceps naturally supercharges your energy levels and maximizes oxygen utilization. Groundbreaking research by Chen et al. (2010) proved its ability to boost VO2 max in athletes, while Zhou et al. (2015) revealed impressive kidney-protective benefits.
Take 1-3g of powder or 400-800mg of extract daily to experience enhanced stamina and respiratory function. Whether you’re an endurance athlete looking for a natural edge or someone seeking sustained energy, Cordyceps delivers results that could transform your performance. For best results, take it 30 minutes before workouts and maintain consistent daily use.
⚠️ Safety Note: While Cordyceps is generally considered safe, always consult a qualified healthcare provider before starting any new supplement regimen, especially if you’re pregnant, nursing, taking medications, or have underlying health conditions. Some people may experience mild digestive upset or allergic reactions. Start with a lower dose to assess tolerance, and discontinue use if you experience any adverse effects. Choose high-quality supplements from reputable manufacturers, as supplement quality can vary significantly.
Pro tip: Combine with Lion’s Mane for enhanced mental focus during intense training sessions, but discuss any supplement combinations with your healthcare provider first.
Looking to supercharge your immune system naturally? Turkey Tail Mushroom is your answer, backed by decades of clinical research. This powerhouse contains two immune-boosting compounds – PSP and PSK – that have revolutionized complementary cancer care in Asia.
Game-changing research by Tsukagoshi et al. (1984) revealed increased survival rates in cancer patients using PSK, while Yang et al. (1992) demonstrated its impressive antiviral properties. Take 1-3g of powder or 500-1500mg of extract daily via tea, capsules, or powder for optimal immune support.
⚠️ Safety Note: While Turkey Tail has an excellent safety profile, always consult your healthcare provider before starting any new supplement, especially if you’re undergoing cancer treatment, taking medications, or have autoimmune conditions. Choose quality products from reputable manufacturers and start with a lower dose to assess tolerance.
Pro tip: For maximum benefits, combine with Reishi mushroom – but always discuss supplement combinations with your healthcare provider first.
6. Maitake (Grifola frondosa) – The Blood Sugar Balancing Champion
This powerful adaptogenic mushroom does double duty with its unique beta-glucans and D-fraction compounds. Landmark research by Kodama et al. (2002) showed that maitake enhances immune response and supports chemotherapy effectiveness, while Mori et al. (2005) demonstrated its impressive ability to help regulate blood sugar levels.
For optimal benefits, consume 2-7g of maitake dried mushroom or 500-1500mg of extract daily through tea, supplements, or delicious culinary preparations. Perfect for those managing blood sugar levels or seeking immune support. You can also add fresh Maitake to stir-fries and soups for a gourmet nutrition boost.
⚠️ Safety Note: While Maitake is generally safe, those taking diabetes or blood thinners should consult their healthcare provider before use, as it may enhance their effects. Monitor blood sugar levels closely if you’re diabetic. Start with a lower dose and adjust gradually.
Pro tip: Combine with Lion’s Mane for enhanced metabolic and cognitive benefits – but always check with your healthcare provider first, especially if you have diabetes or are taking medications.
7. Shiitake (Lentinula edodes) – The Heart-Health Superfood
The legendary Shiitake mushroom packs two powerful compounds – lentinan and eritadenine – that make it a cardiovascular powerhouse. Breakthrough research by Rathore et al. (2017) confirmed its cholesterol-lowering effects, while Hobbs et al. (2005) demonstrated how its lentinan compound activates immune cell response for enhanced disease resistance.
Enjoy 6-16g fresh/dried or 500-1000mg extract daily. Add these savory mushrooms to stir-fries, soups, and pasta dishes, or take supplements for concentrated benefits. Ideal for anyone looking to support heart health naturally while boosting their immune system.
⚠️ Safety Note: While Shiitake is safe for most people, some may experience skin rashes or digestive discomfort when consuming raw or undercooked mushrooms. Those with autoimmune conditions should consult their healthcare provider before starting supplements. Always source from reputable suppliers and properly cook fresh mushrooms.
Pro tip: For maximum heart benefits, pair with regular exercise and a balanced diet – but discuss any supplement regimen with your healthcare provider, especially if you’re taking cholesterol medications.
8. Agaricus Blazei (Agaricus subrufescens)
Key Compounds
Beta-glucans and ergosterol, known for their strong immune-modulating and anti-cancer properties.
Why It’s Amazing
This mushroom is celebrated for its potential in supporting immunity and combating cancer.
Study 1: Agaricus Blazei extracts showed significant anti-cancer properties in studies on colon cancer cells (Firenzuoli et al., 2008).
Study 2: Clinical trials reveal its use in reducing side effects of chemotherapy (Kimura et al., 2004).
How to Use
Commonly consumed as capsules, teas, or powdered forms mixed with beverages.
Daily Dosage
2-5 grams of dried Agaricus or 500-1500 mg of extract daily.
9. Phellinus linteus
Key Compounds
Polysaccharides and hispidin, offering potent antioxidant and anti-inflammatory effects.
Why It’s Amazing
Phellinus linteus is a powerful anti-inflammatory agent and antioxidant. It has been shown to reduce tumor growth and improve prostate health.
Study 1: Research highlights its ability to suppress inflammatory markers (Jang et al., 2004).
Study 2: Studies indicate its potential role in inhibiting angiogenesis in cancer cells (Hwang et al., 2008).
How to Use
Consumed as tea, capsule, or powdered extract.
Daily Dosage
1-3 grams of powdered Phellinus or 500-1000 mg of extract daily.
10. Tremella (Tremella fuciformis)
Key Compounds
Polysaccharides, known for their hydration and anti-aging benefits.
Why It’s Amazing
Tremella is known as the “beauty mushroom” for its ability to improve skin elasticity and hydration. It also boosts immunity.
Study 1: Research confirms Tremella’s hydration effects on the skin (Liu et al., 2020).
Study 2: Studies highlight its antioxidant properties, combating aging and oxidative stress (Yang et al., 2011).
How to Use
Common in soups, teas, and desserts, or as a powdered supplement.
Daily Dosage
1-3 grams of Tremella powder or 200-500 mg of extract daily.
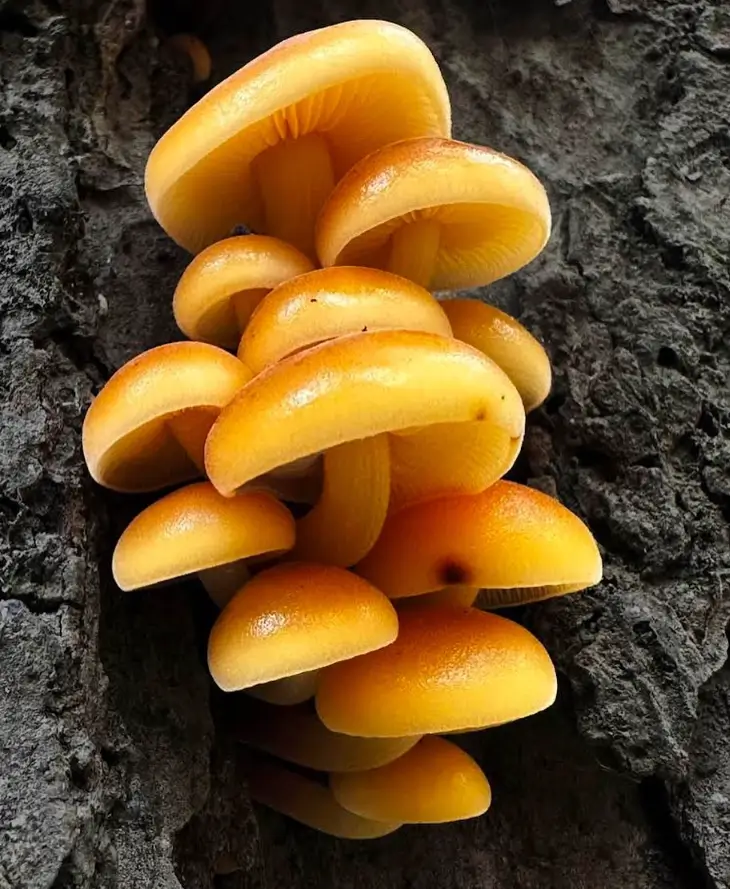
11. Enoki (Flammulina velutipes)
Key Compounds
Proflamin and polysaccharides, supporting immunity and cancer prevention.
Why It’s Amazing
Enoki mushrooms are rich in antioxidants and have shown promise in reducing cancer risk.
Study 1: Epidemiological studies link Enoki consumption with lower cancer rates (Gu et al., 2007).
Study 2: Its polysaccharides improve immune response and have anti-tumor effects (Zhang et al., 2012).
How to Use
Commonly used fresh in soups or stir-fries, or as a supplement.
Daily Dosage
100-200 grams fresh or 1-3 grams of dried powder daily.
12. Blazei Murill (Agaricus brasiliensis)
Key Compounds
Beta-glucans and ergosterol, known for regulating blood sugar and improving immune function.
Why It’s Amazing
Blazei Murill is particularly effective in supporting glucose regulation and reducing inflammation.
Study 1: Research confirms its blood sugar-lowering effects (Kimura et al., 2004).
Study 2: Its anti-inflammatory properties enhance overall immunity (Hetland et al., 2008).
How to Use
Typically consumed as tea, capsules, or powdered supplements.
Daily Dosage
1-3 grams of dried Blazei or 500-1500 mg of extract daily.
13. Polyporus (Polyporus umbellatus)
Key Compounds
Ergone and polysaccharides, promoting diuretic and immune-boosting effects.
Why It’s Amazing
Polyporus supports kidney health by aiding fluid balance while also enhancing immune responses.
Study 1: Its diuretic effects have been demonstrated in animal models (Zhao et al., 2019).
Study 2: Studies confirm its role in reducing inflammation and boosting immunity (Chen et al., 2015).
How to Use
Consumed as tea or in supplement form.
Daily Dosage
1-3 grams of dried Polyporus or 200-500 mg of extract daily.
References
Wachtel-Galor, S., et al. (2011). “Ganoderma lucidum (Reishi).” Herbal Medicine: Biomolecular and Clinical Aspects. (Link)
Gao, Y., et al. (2002). “Immunomodulating and antitumor activities of Ganoderma lucidum polysaccharides.” Medical Hypotheses. (Link)
Mori, K., et al. (2009). “Effects of Hericium erinaceus on mild cognitive impairment.” Journal of Nutrition Science and Vitaminology. (Link)
Kawagishi, H., et al. (2008). “Nerve growth factors in Lion’s Mane.” Journal of Ethnopharmacology. (Link)
Zhao, C., et al. (2016). “Antioxidant and anti-inflammatory activities of Chaga mushroom extract.” Biomedicine & Pharmacotherapy. (Link)
Shashkina, M., et al. (2006). “Chaga as an antioxidant source.” Pharmaceutical Chemistry Journal. (Link)
Chen, S., et al. (2010). “Cordyceps improves endurance performance.” New England Journal of Medicine. (Link)
Zhou, X., et al. (2015). “Renal protective effects of Cordyceps sinensis.” Journal of Ethnopharmacology. (Link)
Tsukagoshi, S., et al. (1984). “Polysaccharide K (PSK) in cancer therapy.” American Journal of Medicine. (Link)
Yang, Q., et al. (1992). “Antiviral effects of Turkey Tail polysaccharides.” Immunology. (Link)
Kodama, N., et al. (2002). “Maitake’s D-fraction in enhancing chemotherapy.” Biochemical and Biophysical Research Communications. (Link)
Mori, K., et al. (2005). “Blood glucose regulation by Maitake mushrooms.” Acta Diabetologica. (Link)
Rathore, H., et al. (2017). “Shiitake mushrooms and cardiovascular health.” Journal of Food Science and Technology. (Link)
Hobbs, C., et al. (2005). “Lentinan’s role in immune modulation.” Cancer Biotherapy & Radiopharmaceuticals. (Link)
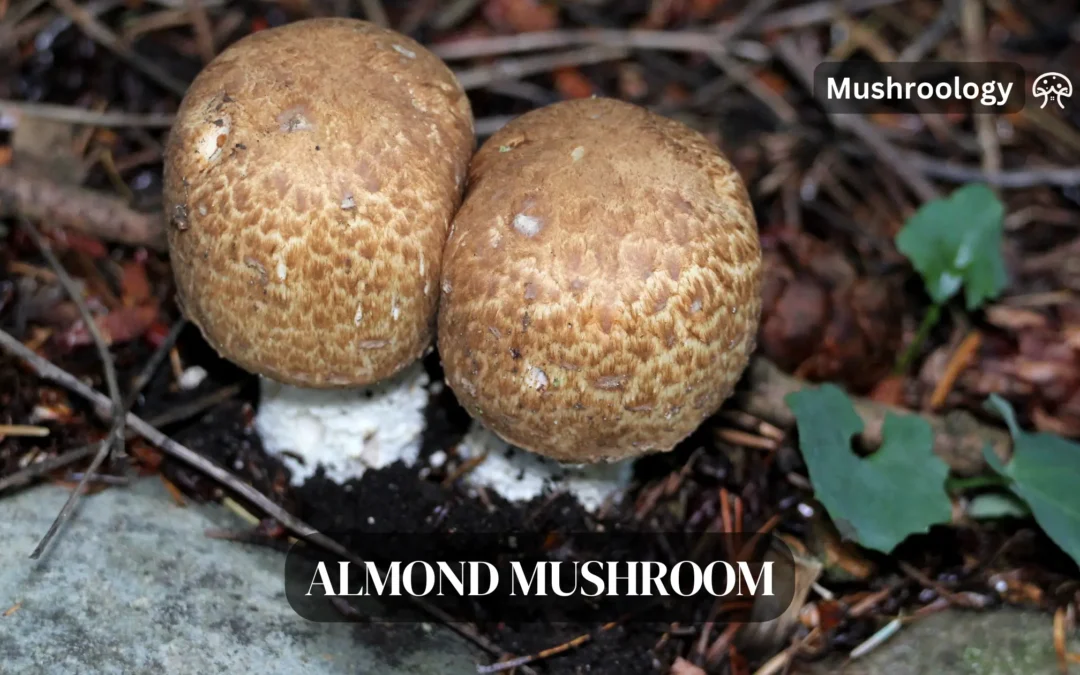
Growing Almond Agaricus (Agaricus subrufescens) mushrooms at home requires careful preparation and attention to detail to ensure successful and productive growth.
These mushrooms are known for their sweet, almond-like flavour and potential health benefits. Here’s a detailed guide on preparing the substrate for your Almond Agaricus mushrooms.
Best substrates for growing Almond Agaricus mushrooms
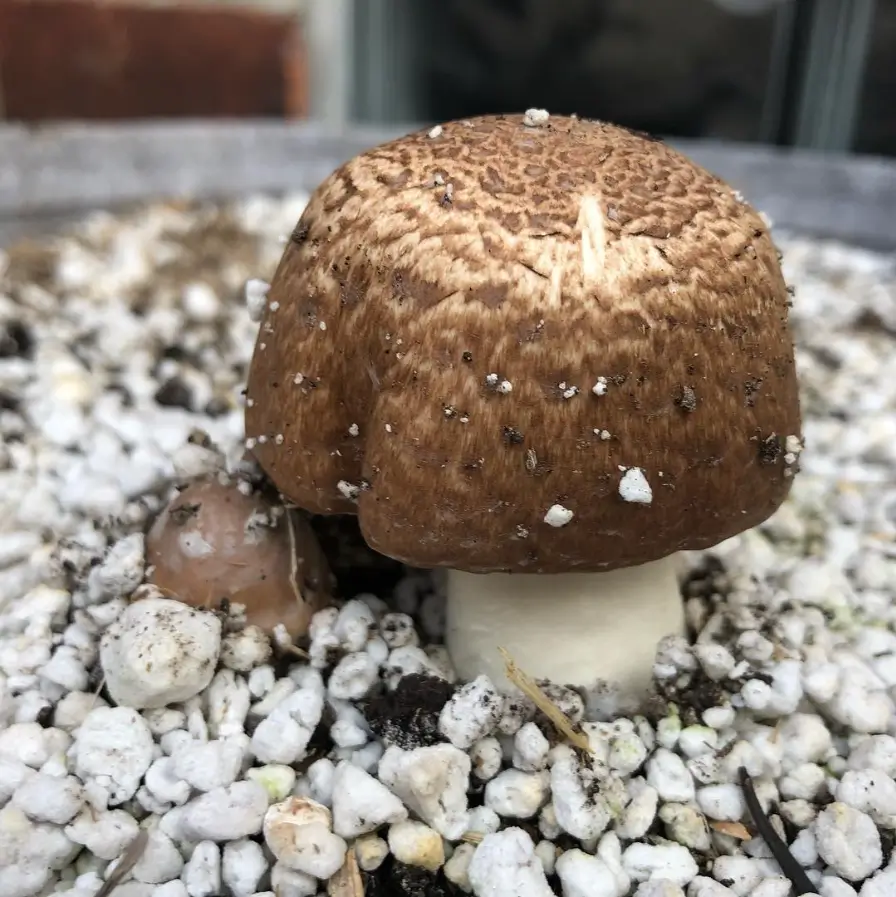
Instagram @terrestrialfungi
Almond Agaricus mushrooms thrive in a variety of compost-based substrates. The choice of substrate is crucial as it provides the necessary nutrients and environment for the mushrooms to grow. Below are some of the substrates that can be used:
1. Composted plant matter and manure
Almond Agaricus mushrooms prefer rich, decomposed plant matter. A mix of spent and composted substrates, such as Shiitake (sawdust) blocks and mycelial, composted oyster mushroom straw, can be used. This “dual waste” substrate approach allows for the efficient use of resources and supports sustainable cultivation practices.
2. Agro-Residues
Studies have shown that compost mixed with selected agro-residues like woodchips (25%) and corncob (25%) can produce better yields. This mix not only supports the growth of Almond Agaricus mushrooms but also utilizes agricultural by-products, making it an environmentally friendly optionAlmond Agaricus.
3. Straw-Bedded Horse Manure and Hay or Wheat Straw
Common bulk ingredients for the mushroom substrate include straw-bedded horse manure and hay or wheat straw. These materials are widely used in the mushroom industry for their availability and effectiveness in supporting mushroom growth.
4. Crop Straws
Crop straws, such as rice straw, wheat straw, corn straw, and cottonseed shell, along with compost and sawdust, have been identified as suitable substrates for Almond Agaricus cultivation. These substrates offer a balance of nutrients and physical properties conducive to mushroom growth.
5. Fully Finished Compost
Fully finished compost, where the starting material is no longer recognizable, is essential for Almond Agaricus cultivation. This type of compost provides a nutrient-rich environment for the mushrooms. It’s important that composts made with animal manure are fully composted prior to use to avoid any potential issues.
6. Peat Moss with Vermiculite (Casing Layer)
While not a primary substrate, a casing layer of peat moss with vermiculite can be applied to the surface of the compost bed. This layer helps maintain moisture and encourages the development of mushroom pins. It’s an optional step that can enhance yields.
Preparing the Substrate
Materials Needed
Fully finished compost (10 lbs per sq. ft. of bed space, 5 inches deep)Almond Agaricus
Almond Agaricus spawn (1/2 lb. per sq. ft.)Almond Agaricus
Choose the Right Compost: Almond Agaricus mushrooms prefer rich, decomposed plant matter. Use composted materials like woodchips, corncob, or a mix of spent and composted mushroom substrates. The compost should be fully finished, meaning you can’t tell what the starting materials were.
Moisture Content: The compost should have a moisture content of 60-70%. To test, grab a handful of compost and squeeze it. It should stick together in a clump and show water on your hand when released.
Prepare the Bed: Lay out your compost in the desired location for your mushroom bed. The bed should be approximately 5 inches deep. If using pots or planters, fill them 1/2 to 2/3 full with moistened potting soil before adding the compost.
Inoculation: Break the Almond Agaricus spawn into small, egg-sized pieces and mix it evenly with the substrate. Ensure that the spawn is well-distributed throughout the compost.
Maintain Moisture: After inoculation, maintain the moisture content of the substrate. This may require regular watering, especially in protective structures like greenhouses where natural rainfall is absent. A mulch layer can help retain moisture and reduce the need for frequent watering.
Monitor Mycelium Growth: Over the next few weeks, watch for the growth of white mycelium on the compost surface. This indicates that the spawn is colonizing the substrate.
Casing Layer (Optional): Consider adding a casing layer for increased yields. This is a thin layer of nutrient-poor, water-holding material that can help maintain bed moisture and reduce the need for constant watering.
Almond Agaricus Mushroom Care
Light
These mushrooms require indirect light to initiate the fruiting phase. Direct sunlight should be avoided to prevent drying out the substrate.
Soil
The “soil” for Almond Agaricus is essentially the composted substrate. Ensure it’s fully composted and has the right moisture content.
Water
Maintain the substrate’s moisture by watering lightly but regularly. Overwatering can drown the mycelium, while under-watering can halt its growth.
Temperature and humidity
Keep the growing area at temperatures between 70-90°F (21-32°C) during the incubation phase. For fruiting, a slight decrease in temperature and exposure to higher humidity levels is beneficial.
Fertilizer
Almond Agaricus mushrooms do not require traditional fertilizers. The nutrients in the composted substrate provide all the necessary food for growth.
During the incubation period, it’s crucial to monitor the temperature and moisture levels of the substrate. The substrate should remain moist but not waterlogged. If the substrate appears to be drying out, mist it lightly with water. However, be cautious not to overwater, as this can lead to the growth of unwanted bacteria and molds.
Transitioning to Fruiting
Once the substrate is fully colonized by the mycelium, it’s time to initiate the fruiting process. This involves changing the environmental conditions to signal the mycelium to produce mushrooms.
How to harvest almong agaricus mushroom
Harvest Almond Agaricus mushrooms when the veil between the mushroom cap and stem is mostly intact. This stage indicates maturity while preserving the mushroom’s quality and flavor.
Propagating
Propagation of Almond Agaricus mushrooms is primarily through the inoculation of new substrates with spawn. Unlike plants, mushrooms are propagated through spores or mycelial fragments rather than seeds.
Growing Almond Agaricus mushrooms at home is a rewarding endeavor that offers health benefits, culinary enjoyment, and potential commercial opportunities. By following these detailed steps and providing the right care, you can successfully cultivate these nutritious and flavorful mushrooms in your own space.
What are the health benefits of Almond Agaricus mushrooms
Anti-Cancer Properties
Anti-Cancer Effects: Studies have shown that Almond Agaricus mushrooms possess anti-cancer properties, which can help in the prevention and treatment of cancer.
Immune Support
Immune-Boosting Effects: The mushrooms contain beta-glucans, which are known to stimulate the immune system and enhance its ability to fight off infections and diseases.
Anti-Inflammatory Effects
Anti-Inflammatory Properties: Compounds like ergosterol in Almond Agaricus mushrooms have shown anti-inflammatory potential, which can help in reducing inflammation and related conditions
Antioxidant Properties
Antioxidant Effects: The mushrooms contain antioxidants such as ergothioneine and selenium, which help protect cells from oxidative damage and reduce the risk of chronic diseases.
Nutritional Value
High in Minerals: Almond Agaricus mushrooms are rich in valuable minerals like potassium, phosphorus, calcium, magnesium, and zinc, making them a nutritious addition to the diet.
Safety and Side Effects
Safety: While generally considered safe, there is limited scientific evidence to support all claimed uses. Side effects may include stomach discomfort, diarrhea, and nausea[4].
Medicinal Uses
Medicinal Applications: Almond Agaricus mushrooms have been used in traditional medicine for various conditions, including hay fever, cancer, heart disease, and diabetes, though more research is needed to confirm their effectiveness.
FAQs for Growing Almond Agaricus Mushrooms
1. What is the best time to plant Almond Agaricus mushrooms? Plant Almond Agaricus (Agaricus subrufescens) after the last frost date in your area to ensure at least 2-4 months of frost-free weather for optimal growth.
2. What type of substrate is ideal for Almond Agaricus mushrooms? A fully finished compost, which can include a mix of plant matter and manure, is ideal. The substrate should have a moisture content of 60-70%.
3. How do I inoculate the substrate with Almond Agaricus spawn? Break the spawn into golf ball-sized chunks and bury them at least an inch down into the compost bed, spaced about 4-6 inches apart.
4. What are the temperature requirements for growing Almond Agaricus mushrooms? During the incubation phase, maintain temperatures between 70-90°F (21-32°C). The mushrooms are cold-sensitive and will only produce as long as temperatures stay above 40°F (4°C).
5. How often should I water my Almond Agaricus mushroom bed? Watering frequency depends on the environment; outdoor beds may receive enough rainfall, but beds in grow structures may need watering every other day if conditions are hot and dry.
6. Is a casing layer necessary for Almond Agaricus mushrooms? While not necessary, a casing layer can provide added humidity protection and help increase yields. It should be wet enough to release about 10 drops of water when squeezed.
7. How do I know when to harvest Almond Agaricus mushrooms? Harvest when the veil between the mushroom cap and stem is mostly intact, which indicates maturity while preserving quality and flavor.
8. Can Almond Agaricus mushrooms be grown indoors? Yes, they can be grown “small scale” in window boxes or large potted plants, indoors or out, as long as the environmental conditions are met.
9. What are the benefits of growing Almond Agaricus mushrooms? Almond Agaricus mushrooms are known for their sweet, almond-like flavor and potential health benefits, including medicinal properties.
10. Can Almond Agaricus mushrooms tolerate cold temperatures? The mycelium can survive some freezing weather, but developing baby mushrooms will not. It’s best to pack in as much growing season as possible.
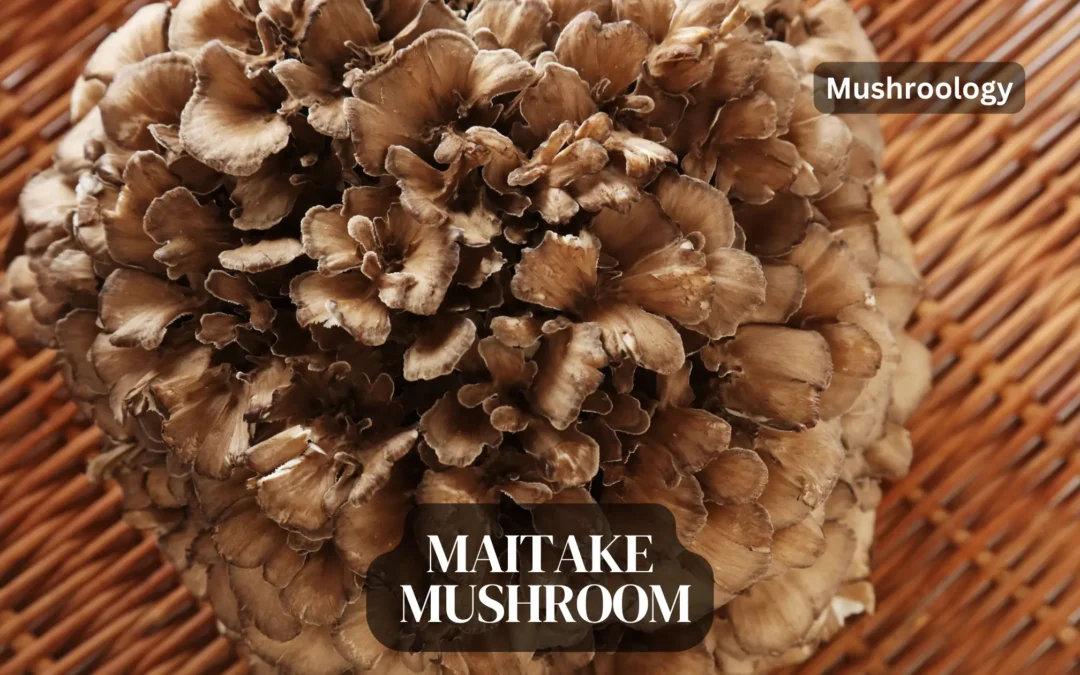
Did you know that a single cluster of Hen of the Woods mushrooms can weigh up to a staggering 50 pounds? This culinary delicacy, also known as Maitake, is not only a forager’s dream but can also become a prized addition to your own garden. I’ll share my personal journey into successful maitake cultivation, guiding you from spore to harvesting hen of the woods mushrooms right in your backyard.
Key Takeaways
Discover the unique growing conditions required for Hen of the Woods mushrooms.
Learn tips and tricks for a bountiful home harvest of maitake mushrooms.
Understand the importance of selecting the right environment for successful cultivation.
Gain insights into the optimal harvesting techniques specific to Hen of the Woods.
Acquire practical knowledge for storing and enjoying your homegrown mushrooms.
What is Hen of the Woods Mushroom
As I delve deeper into the fascinating world of maitake mushrooms, it strikes me that these fungi are not just any ordinary addition to a dish but a treasure trove of taste and tradition. Known scientifically as Grifola frondosa, these mushrooms are revered across continents for their unique flavor and potential health benefits.
While the Western world may recognize them as ‘hen of the woods’ or ‘sheep’s head,’ I find the Japanese name, maitake, meaning “dancing mushroom,” particularly compelling. It’s as if the mere mention of their name invites a culinary celebration.
These polypore bracket fungi thrive notably on oak trees, but you’ll also find them gracing the bases of maple and elm trees. Each cluster can become a substantial harvest, sometimes weighing as much as 50 pounds. Their presence is not merely a gift for the palate but perhaps also for our well-being, as ongoing research suggests potential benefits in combating certain cancers, diabetes, and hypertension.
How to grow maitake mushrooms?
Instagram @cakewalkcakewalk
Choose the right logs for cultivation of Maitake mushrooms
The selection of logs is crucial to ensure a successful harvest. Growing Maitake mushrooms demands specific conditions, so I always turn to the robust and reliable oak as the foundational medium for cultivation. When selecting oak logs for Maitake, look for wood that is fresh, recently cut, and most importantly, free of any signs of disease or decay. These logs will host your Hen of the Woods mushrooms, nurturing them to fruition.
Preparing Your Logs for Inoculation
Once the perfect logs have been selected, the next step is preparing logs for mushroom cultivation. This involves a sterilization process which may include pressure cooking, steaming, or boiling. By doing so, we create an environment that is inviting for the Maitake spawn. Remember, after treating, they must be allowed to cool, providing a clean slate for the inoculation process.
Inoculate the Logs with Maitake Spawn
With our logs selected, cut, and sterilized, now comes the pivotal step of inoculating logs. It’s here that we introduce the Maitake spawn to its new home. Using high-quality mushroom growing supplies, we ensure that the spawn makes contact with both ends of the log, promoting an even spread of the mycelium. This careful procedure is one of the most critical steps to grow Hen of the Woods mushrooms.
To summarize, here’s a handy table of the key tasks and considerations in each of these stages:
Stage
Key Task
Considerations
Log Selection
Finding suitable oak logs
Ensure freshness and no disease
Log Preparation
Sterilizing through pressure cooking, steaming, or boiling
Proper cooling post-treatment
Log Inoculation
Introducing Maitake spawn to logs
Clean environment, even mycelium spread
Remember, patience and precision are your allies in this endeavour. With care and attention to detail, you can transform mere oak logs into a flourishing forest of Hen of the Woods mushrooms.
Preparation Is Key: Sterilizing Your Logs
When venturing into the realm of indoor mushroom cultivation, particularly for maitake, one fact stands incontrovertible: sterilization is not a step to be underestimated. I’ve discovered that sterilizing logs for maitake growth is a crucial cornerstone for success, as the logs provide the very foundation for your harvest. By fostering a sterile environment, we deny any unwelcome fungi or bacteria the chance to usurp our maitake’s nutrients or real estate. Let’s dive into the process that sets the stage for bountiful growth.
To begin, we need to discuss the options available for sterilization, each with its own set of benefits. Whether it’s pressure cooking at 15 psi for precisely 120 minutes, steaming your logs for a solid 3-6 hours, or opting for boiling them for about an hour, the goal is unvarying: create a pristine substrate for your precious maitake spawn.
Sterilization Method
Duration
Temperature
Required Equipment
Pressure cooking
120 minutes
15 psi
Large pressure cooker
Steaming
3-6 hours
N/A
Steam source and enclosed area
Boiling
1 hour
100°C (212°F)
Large boiling pot or vat
Moreover, while each approach shares a common purpose, I prefer pressure cooking. This method has never failed to deliver a consistently sterile outcome.
To wrap up our sterilization saga, remember that this process is paramount in the grand scheme of growing maitake. Ensure you strictly adhere to the times and conditions to maintain the wood’s integrity and set the stage for eventual mushroom fruition. Good luck, and may your logs be forever free of contaminants!
Caring for your Maitake logs during incubation
Embarking on the journey of indoor mushroom cultivation is quite an adventure. Particularly with maitake mushrooms, or Hen of the Woods, dedicating ample care during the incubation stage is key. Let me walk you through the steps to ensure a flourishing environment for your maitake logs.
Monitoring Temperature and Moisture Levels
The perfect incubation space for maitake logs strikes a balance between warmth and humidity. Your logs crave a consistent temperature range of 55-70°F. Monitor this closely using a reliable thermometer and be mindful of any excessive fluctuations that could hinder mycelial growth.
Maintaining the moisture content of the logs is equally crucial. The goal is to keep your logs damp to the touch, replicating the moist woodland floors. However, avoid an overly wet environment as it could lead to mold issues and negatively impact your healthy mycelial growth. I suggest a routine check-up twice a week to optimize conditions and adjust as necessary.
Identifying Mycelial Growth and Contaminants
As your maitake logs begin to incubate, you’ll notice a telltale sign of progress: white mycelial growth spreading across your substrate. This network of filaments will show itself with a mix of white and orange patches. It’s a beautiful moment, witnessing the initial steps of what will eventually become delicious mushrooms.
However, in the world of fungi, unwanted guests are always a possibility. It’s pivotal to recognize mushroom cultivation contaminants early on. Should you find greenish hues or black spots, these might be indicators of mold or spores from other fungi. While not all are detrimental to maitake mushrooms, they’re certainly not what we’re looking for.
White and rust-colored patches suggest healthy growth.
Green or black spots could be contaminants — take note and manage accordingly.
By closely monitoring temperature and moisture, and by keeping an eye out for both healthy mycelial growth and potential contaminants, you’ll create an optimal environment for maitake mushrooms to thrive. It’s a process that requires patience and attention to detail, but the reward of home-grown maitake is undoubtedly worth it.
Outdoor Cultivation Techniques: Burying and Maintaining Logs
After the rigorous process of indoor incubation, it’s time I take my maitake cultivation outdoors. This crucial shift to outdoor mushroom cultivation paves the way for more efficient growth and simulates the natural habitat conditions these mushrooms so dearly love. Burying logs for maitake cultivation isn’t just about sticking them in the dirt; it’s an art that requires precision, patience, and a true understanding of the maitake lifecycle.
I begin by carefully removing the logs from their bags, taking care not to disturb the mycelium that’s started to form. Burying them vertically, I ensure that just the tip of the log remains visible above the soil level. This practice is not just for aesthetics; it protects the spawn and maintains the needed humidity and temperature for optimal growth.
The transition from indoor to outdoor is a delicate one. I’ve compiled a detailed table below to ensure that you have all the essential information for successfully burying and maintaining your maitake logs:
Activity
Date/Time
Details
Expected Outcome
Log Selection
Post-Inoculation
Choose healthy, colonized logs from indoor incubation.
Logs ready for outdoor setup.
Site Preparation
1-2 Days Before Burying
Select a shaded area with rich, moist soil.
An ideal environment for log placement.
Log Burying
Early Morning
Logs are buried vertically with the top exposed.
Logs simulate the natural growing conditions.
Monitoring
Daily
Check for proper soil moisture and log stability.
Healthy mycelium growth without contamination.
Maintenance
As Needed
Apply water during dry spells, prevent soil erosion.
Continuous, uninterrupted maitake development.
Finally, it’s time to play the waiting game. Nature takes its course, and my maitake should begin to fruit with the right conditions. What starts as a laborious venture indoors blossoms into a rewarding harvest outdoors. Patience and consistent care are the backbones of fruitful outdoor mushroom cultivation.
Adhering to this roadmap, I look forward to witnessing the lifecycle of maitake culminate in the fruits of my labor—right in my own backyard.
Harvesting Your Maitake
As a passionate forager and cultivator, I’ve learned that timing and proper technique are crucial when harvesting Hen of the Woods. Let me guide you through the essential steps to ensure your maitake mushrooms are collected at their peak for optimal flavor and freshness.
When to harvest your maitake mushrooms?
Take note of the best time to harvest maitake—typically late summer to fall, around one year after you’ve buried the logs. Look for the fronds to reach a length of 1-2 inches. This is when they are most succulent and ready for harvest. Gently twist and pull off the maitake mushrooms to avoid damaging the mycelium, encouraging future growth.
How to store maitake mushrooms?
After successfully harvesting your mushrooms, the next critical steps are cleaning and storing hen of the woods properly. Given their intricate fronds, they can trap a lot of debris, so thorough cleaning is a must. Use a soft brush or a damp cloth to gently wipe away any dirt.
For maitake storage tips, remember that these mushrooms have a delicate texture and should be consumed quickly. However, if you need to store them, keep these tips in mind:
Storage Method
Duration
Tips
Refrigeration
Up to 7 days
Place in a paper bag and store in your refrigerator’s crisper drawer.
Freezing
Several months
Blanch and freeze in an airtight container or zipper bag to preserve texture.
Drying
Several months to a year
Dehydrate the mushrooms and store them in a cool, dark place in an airtight container.
How to freeze hen of the woods mushrooms?
To freeze Hen of the Woods mushrooms, follow these steps:
Cleaning and Preparation:
Clean the mushrooms thoroughly, removing any dirt, leaves, or debris.
Separate the mushrooms into large leaves or clusters and inspect for twigs and debris.
Cut away dirty or discolored portions and ensure the flesh is pure white.
Cut the mushrooms into thick slices or clusters for easier freezing and cooking.
Freezing Methods:
Raw Freezing:
Place the cleaned and prepared mushrooms on a cookie sheet lined with parchment paper.
Freeze the mushrooms until they are solid, then transfer them to a ziplock or vacuum-seal bag.
Cook the mushrooms straight from frozen to maintain their texture and flavor.
Sauté and Freeze:
Sauté the mushrooms in butter or oil until they release their liquid and the butter or oil is absorbed.
Let the mushrooms cool, then freeze them in individual containers or ziplock bags.
Dry Sauté and Freeze:
Slice the mushrooms thinly and cook them in a hot, dry pan until all the liquid has evaporated.
Let the mushrooms cool, then freeze them in measured quantities.
Storage and Cooking:
Store the frozen mushrooms in airtight containers or bags to prevent freezer burn.
Cook the mushrooms straight from frozen to maintain their texture and flavor.
By following these steps, you can effectively freeze Hen of the Woods mushrooms and enjoy them throughout the year.
How to prepare Maitake Mushroom and Health Benefits
The culinary uses of maitake are as versatile as it gets. I often find myself reaching for these mushrooms when I want to add a rich, spicy kick to my dishes.
From the simple joy of sautéing them in a bit of olive oil to the more intricate preparation of roasting or even integrating them in risottos or soups, maitake mushrooms infuse a depth of flavor that is unmatched. They hold up beautifully in a variety of cooking methods, making them a staple in my kitchen not only for their taste but also for their acclaimed maitake mushroom health benefits.
Speaking of health, the interest I have in these delightful fungi is bolstered by their potential medicinal properties. Research points to maitake’s possible anti-cancer effects, a characteristic that has sparked a wave of interest in the health community. On a personal level, knowing that what I’m consuming could be beneficial for managing diabetes and hypertension makes incorporating maitake mushrooms into my diet a no-brainer. For anyone looking to marry taste with wellness, this mushroom certainly fits the bill.
As a culinary enthusiast always on the lookout for ingredients that bring both flavor and health benefits to the table, I find myself returning to maitake mushrooms. Whether I’m throwing together a quick stir-fry or crafting an elaborate meal for friends, these mushrooms are an integral part of the culinary experience. They’re a testament to the beauty of nature’s provisions and remind me that the best foods are those that are not only delicious but also possess the power to heal.
FAQ
What are Hen of the Woods Mushrooms?
Hen of the Woods, also known as Maitake or scientifically as Grifola frondosa, are large, edible bracket fungi known for their rich flavor and potential health benefits. They are typically found growing at the base of oak trees.
Why is the Hen of the Woods Mushroom called ‘Maitake’?
‘Maitake’ is a Japanese term that translates to “dancing mushroom”. This name may reflect the unique appearance of the mushroom or the joy it has historically brought to those who found or consumed it.
How do you select logs for Maitake mushroom cultivation?
For successful maitake cultivation, choose fresh, healthy oak logs free from disease. These logs will be the foundation for your mushroom growing and should be prepped accordingly before inoculation.
What are the steps to prepare logs for inoculation?
Preparing logs for mushroom cultivation involves sterilizing them through methods such as pressure cooking, steaming, or boiling. After sterilization, cool the logs to a safe temperature before inoculating them with maitake spawn.
How is inoculation done when growing Hen of the Woods mushrooms?
Logs are inoculated with maitake spawn by introducing the spawn into a sterilized environment, ensuring even coating around the cut ends of the log. This is typically done in clean, controlled conditions to prevent contamination.
How important is sterilization in the cultivation of Maitake mushrooms?
Sterilization is crucial in maitake mushroom cultivation. It eliminates potential competitors and contaminants, creating a sterile substrate that’s ideal for the maitake spawn. This typically involves pressure cooking the logs or treating them with steam or boiling water.
What conditions do Maitake logs need during incubation?
During incubation, which lasts for 2-3 months, ensure your maitake logs are kept in an area with temperatures ranging from 55-70°F. It’s important to balance moisture levels, light exposure, and temperature to mimic natural growing conditions.
How do you identify healthy mycelial growth?
Healthy mycelial growth for maitake mushrooms is indicated by a white coating with occasional orange rust-coloured patches. Any signs of green mold should be monitored closely, although they generally don’t affect maitake growth.
What are the outdoor cultivation techniques for Maitake?
Outdoor cultivation involves transplanting the inoculated logs by burying them vertically, with just the top exposed. This mimics the natural habitat of Hen of the Woods and encourages fruiting.
How do you harvest Hen of the Woods mushrooms?
Harvest Hen of the Woods mushrooms when the fronds have grown 1-2 inches long, typically from late summer to fall, about a year after burying the logs. They should be harvested by gentle pulling and twisting to avoid damage to the log and future yields.
How should Maitake mushrooms be cleaned and stored?
After harvesting, clean the mushrooms thoroughly to remove debris. They can be stored in a refrigerator and are best enjoyed when cooked, as cooking helps to enhance their natural flavors.
What are the health benefits of Maitake mushrooms?
Maitake mushrooms are attributed with several health benefits, including potential anti-cancer effects and aiding in the treatment of diabetes and hypertension. Their earthy and spicy flavors make them a favorite in many culinary dishes.
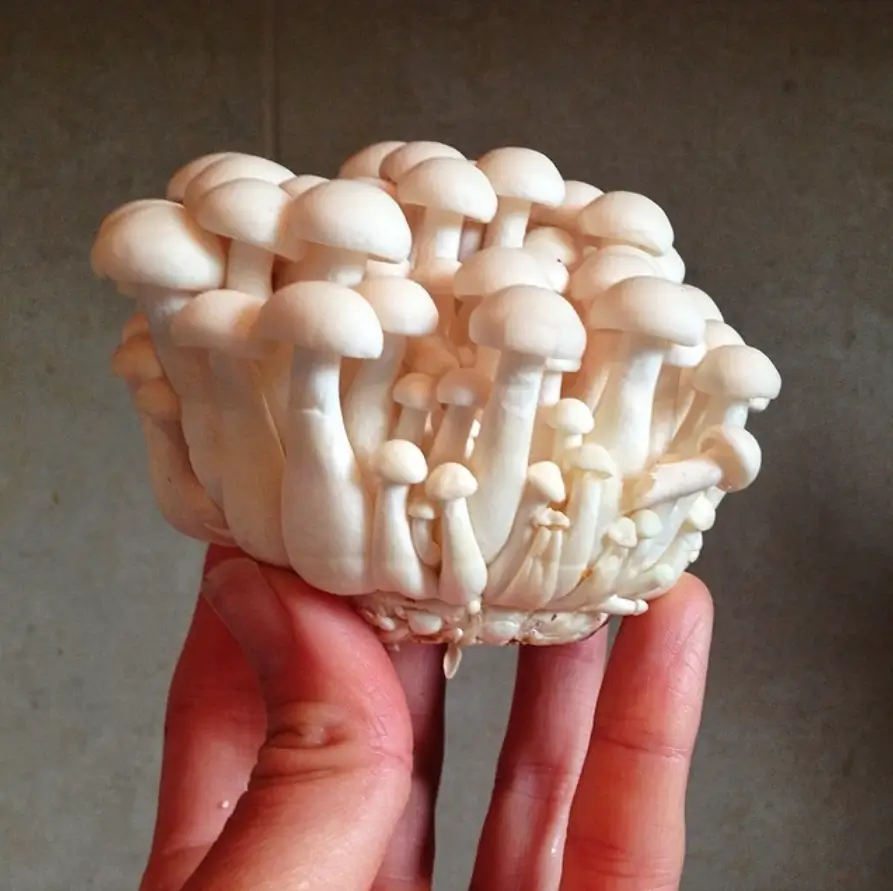
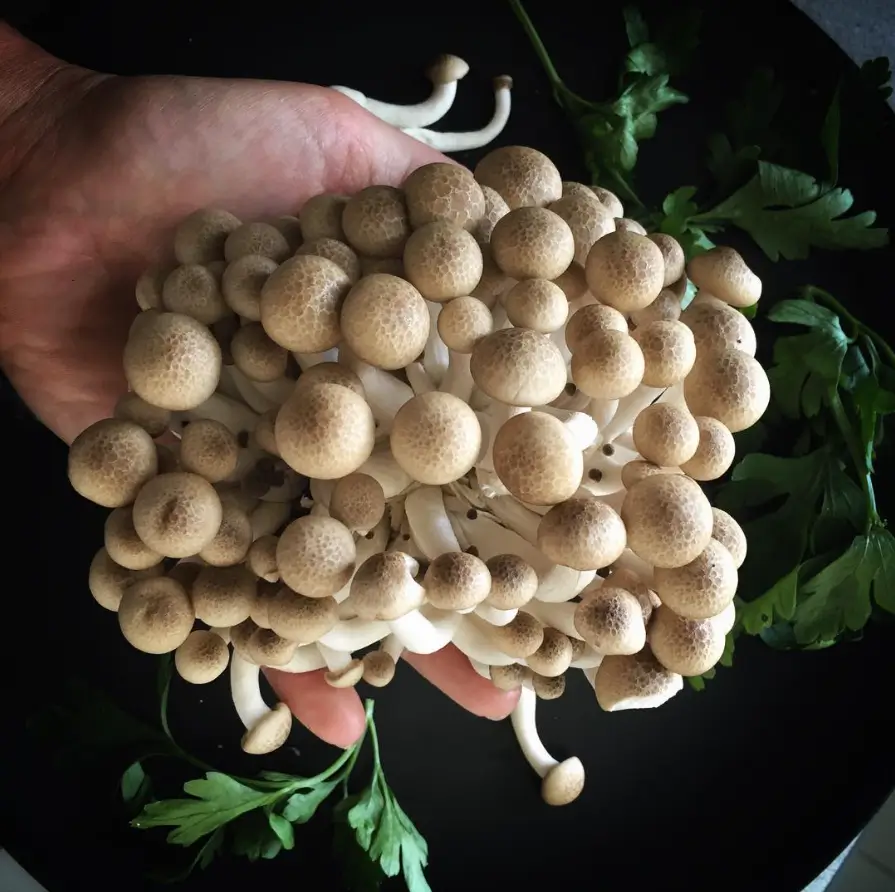
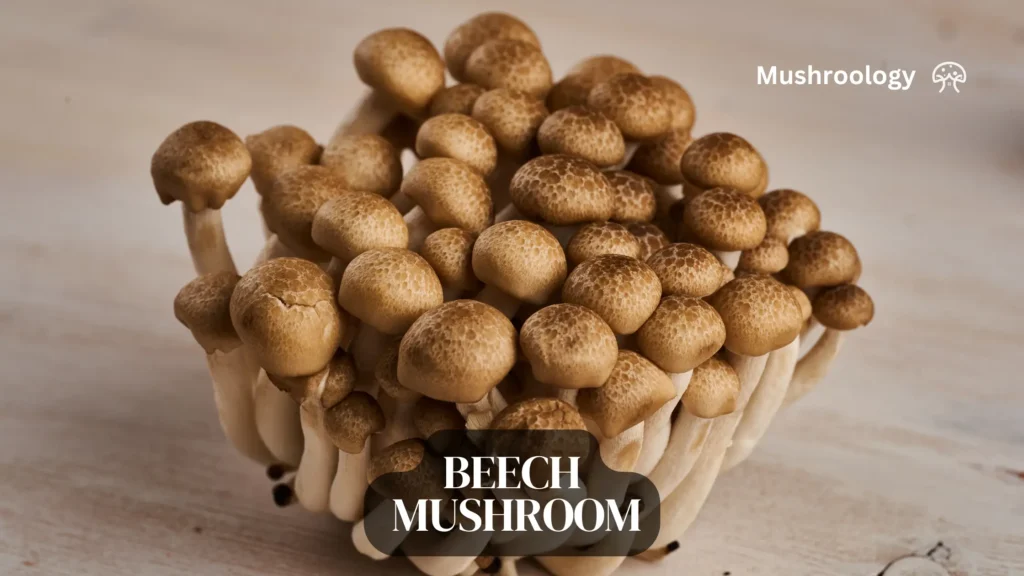
Brown beech mushrooms, scientifically known as Hypsizygus tessulatus, are a type of edible mushroom native to East Asia. They are also commonly referred to as Buna-shimeji or brown clamshell mushrooms. These mushrooms are known for their small, brown caps and creamy white stems, and they grow in clusters on hardwood trees, particularly beech trees, which is how they got their name.
Brown Beech Mushrooms (Buna-shimeji)
Brown beech mushrooms, also known as Buna-shimeji, are characterized by their brown caps and long, slender stems. They grow in clusters, often referred to as “bouquets.” These mushrooms have a slightly nutty flavor that intensifies when cooked, offering a tender texture that complements a variety of dishes.
White Beech Mushrooms (Bunapi-shimeji)
White beech mushrooms, or Bunapi-shimeji, are a mutation of the brown beech mushrooms and are not commonly found in the wild. They are cultivated for their uniform white color and delicate flavor. Like their brown counterparts, they grow in clusters and have a firm texture that holds up well in cooking.
Instagram @amyshertzer
Beech mushroom growth habitat
Beech mushrooms are commonly found growing on decaying beech trees, which is where they get their name. They thrive in cool, damp environments, making them suitable for cultivation in controlled settings.
Key takeaways
Identify the right substrate is critical for successful beech mushroom cultivation.
Create a breathable environment with a quarter-inch hole in jar lids can lead to an ideal cultivation set-up.
Sterilization of jars at specific temperatures and pressures is a non-negotiable step in the growing process.
Indoor beech mushroom cultivation offers a rewarding and flavorful harvest accessible from the comfort of your home.
Adequate preparation and a clear guide can simplify the beech mushroom growing at-home experience for enthusiasts.
“Mycelium is the dark matter of the soil: unseen and often ignored, yet vital to the cycle of life and growth.”
Let’s delve deeper and juxtapose the different approaches within beech mushroom farming techniques. Below is a compiled breakdown of various substrates and their corresponding benefits:
Substrate
Benefits
Notes
Hardwood Sawdust
Mimics natural habitat leads to robust mycelial networks
Widely available and cost-effective
Supplemented Substrates (e.g., soy hulls)
Enriches nutrition, increases yield
It may require additional preparation
Logs
Long-term cultivation, gradual mushroom growth
Suitable for outdoor setups
Beech Mushroom Growing Guide
Instagram @asia.wysoczynska
The mushroom grower’s toolkit
Here’s a list of items you’ll want to gather before you begin:
Substrate materials (we’ll discuss this in detail later)
Sterilization equipment (pressure cooker or large pot)
Grow bags or containers
Beech mushroom spawn
Thermometer and hygrometer
Spray bottle for misting
Clean workspace and gloves
Remember, cleanliness is key when it comes to mushroom cultivation. You’ll want to make sure all your equipment is properly sanitized to prevent contamination. Trust me, your future mushrooms will thank you!
Choose the right substrate for Beech Mushrooms
One of the most crucial aspects of growing beech mushrooms is selecting and preparing the right substrate. The substrate is essentially the food source for your mushrooms, providing them with the nutrients they need to grow and thrive.
Ideal substrate for beech mushrooms
For beech mushrooms, a hardwood-based substrate works best. Here’s a popular mix that many growers swear by:
• 50% hardwood sawdust (beech or oak works well)
• 30% wheat bran
• 20% wood chips
• Water (to achieve proper moisture content)
The key is to create a substrate that’s nutrient-rich but also allows for proper air exchange. It’s like creating the perfect mushroom buffet!
Preparing rour substrate for beech mushrooms
Now that you’ve got your ingredients, it’s time to prep your substrate. This process might seem a bit intimidating at first, but don’t worry – we’ll break it down into easy-to-follow steps.
Mix your dry ingredients thoroughly.
Gradually add water until the mixture holds its shape when squeezed (but isn’t dripping).
Fill your grow bags or containers with the substrate mixture.
Sterilize the filled bags in a pressure cooker or large pot for about 2-3 hours.
Allow the sterilized substrate to cool completely before inoculation.
Remember, patience is a virtue in mushroom cultivation. Taking the time to properly prepare and sterilize your substrate will pay off in healthier, more abundant mushrooms down the line.
Inoculation: Introduce Beech Mushroom Spawn
Excited? You should be! We’re about to bring your substrate to life with beech mushroom spawn. This is where the magic really begins.
Choose quality spawn
First things first – make sure you’re starting with high-quality beech mushroom spawn. Look for reputable suppliers who specialize in mushroom cultivation. Good spawn is the foundation of a successful grow, so it’s worth investing in quality.
The inoculation irocess
In a clean, still-air environment, open your sterilized substrate bag.
Carefully add your beech mushroom spawn to the substrate.
Mix thoroughly to distribute the spawn evenly.
Seal the bag, leaving a small opening for air exchange.
Think of this process as planting seeds in a garden. You’re setting the stage for your mushrooms to colonize and flourish!
Create the Perfect Growing Environment for Beech Mushrooms
Alright, green thumbs (or should I say, fungal fingers?), it’s time to create the ideal home for your beech mushrooms. These little guys can be a bit particular about their living conditions, but don’t worry – with a few simple tricks, you’ll have them feeling right at home in no time.
Temperature and Humidity
Beech mushrooms thrive in specific temperature and humidity ranges. Here’s what you need to aim for:
Maintaining these conditions is crucial for healthy mycelium growth and fruiting. Consider using a thermometer and hygrometer to monitor these factors closely. You might even want to create a mini greenhouse effect by covering your grow bags with a clear plastic tent – just be sure to allow for some air circulation!
Lighting Conditions
While beech mushrooms don’t need light for photosynthesis (they’re fungi, after all!), they do benefit from some indirect light during their fruiting stage. A few hours of soft, ambient light each day can help guide their growth and improve their color.
Monitoring mycelium growth
Now comes the part that tests every mushroom grower’s patience – waiting for the mycelium to colonize the substrate. But don’t worry, this is where things get really interesting!
Signs of Healthy Colonization
As your beech mushroom mycelium grows, you’ll start to see white, thread-like structures spreading through the substrate. This is a good sign! Here’s what to look out for:
• Even, white growth throughout the substrate
• A slightly sweet, mushroomy smell
• No signs of contamination (unusual colors or odors)
Remember, good things come to those who wait. Colonization can take anywhere from 2-4 weeks, depending on conditions. Use this time to learn more about mushroom cultivation – you’re on your way to becoming a fungi expert!
Fruiting: Help Your Beech Mushrooms to Grow
Congratulations! If you’ve made it this far, your patience is about to pay off. Once your substrate is fully colonized, it’s time to initiate fruiting. This is where you’ll start to see those clusters of beech mushrooms forming – exciting, right?
Initiate the Fruiting Process
To encourage your beech mushrooms to fruit:
Introduce fresh air by opening the grow bag or moving to a fruiting chamber.
Lower the temperature slightly (55-65°F or 13-18°C).
Increase humidity to 90-95% by misting regularly.
Provide indirect light for 6-8 hours a day.
Think of this as creating autumn-like conditions – it’s when beech mushrooms naturally fruit in the wild. You’re essentially tricking them into thinking it’s the perfect time to produce mushrooms!
Harvest Your Beech Mushrooms: Timing is Everything
The moment you’ve been waiting for is almost here – harvest time! But hold your horses, eager mushroom farmer. Knowing when and how to harvest is crucial for getting the best out of your beech mushrooms.
When to Harvest
Beech mushrooms are ready to harvest when:
• The caps are fully formed but not yet flattened
• The clusters are tight and compact
• They’re about 1-2 inches in height
Pro tip: It’s better to harvest a bit early than too late. Overripe mushrooms can become tough and lose flavor.
Harvesting Techniques
To harvest your beech mushrooms:
Gently grasp the base of the cluster.
Twist and pull the entire cluster from the substrate.
Avoid leaving stumps, as these can be sites for contamination.
Remember, a clean harvest sets the stage for future flushes. Your substrate can produce multiple harvests, so treat it with care!
Enjoy the Fruits of Your Labor!
You’ve done it! You’ve successfully grown your own beech mushrooms. Now comes the most rewarding part – enjoying your harvest. Beech mushrooms have a delightful texture and a mild, nutty flavor that shines in a variety of dishes.
Common mistakes and how to avoid them when growing beech mushrooms
Poor Sterilization Techniques
Mistake: Not properly sterilizing the substrate can lead to contamination. Solution: Always sterilize the substrate thoroughly using a pressure cooker or autoclave.
Inadequate Air Circulation
Mistake: Poor air circulation can lead to contamination and poor mycelium growth. Solution: Ensure adequate air circulation by using fans or placing the containers in a well-ventilated area.
Incorrect Temperature and Humidity
Mistake: Not maintaining the correct temperature and humidity levels can hinder mushroom growth. Solution: Use a thermometer and hygrometer to monitor and maintain the ideal conditions.
Impatience
Mistake: Rushing the process can lead to poor results. Solution: Be patient and allow the mycelium to fully colonize the substrate before inducing fruiting.
Pro Tips for Growing Beech Mushrooms
Use High-Quality Spawn: Purchase spawn from a reputable supplier to ensure high success rates.
Monitor Conditions Regularly: Regularly check and adjust the temperature, humidity, and air circulation.
Experiment with Substrates: Try different substrate combinations to see what works best for your setup.
Keep a Growing Journal: Document your growing process to track what works and what doesn’t.
Why Grow Beech Mushrooms?
Growing beech mushrooms at home offers a multitude of benefits that span freshness, cost-effectiveness, health advantages, and sustainability. Here’s a comprehensive look at why you should consider cultivating these nutritious fungi:
Freshness
One of the most compelling reasons to grow beech mushrooms at home is the unparalleled freshness you can achieve. When you cultivate your own mushrooms, you can harvest them at their peak, ensuring the best flavor and texture. Freshly harvested beech mushrooms have a nutty, slightly sweet taste and a firm, crunchy texture that can elevate any dish. This freshness is often lost in store-bought mushrooms, which may have been harvested days or even weeks before reaching your kitchen.
Cost-Effective
Growing beech mushrooms at home can be a cost-effective alternative to purchasing them from specialty stores or markets. While the initial investment in growing kits or supplies might seem significant, the long-term savings are substantial. A single grow kit can yield multiple harvests, providing a steady supply of mushrooms at a fraction of the cost of buying them regularly. Additionally, by growing your own, you avoid the markup prices often associated with gourmet mushrooms.
Health Benefits
Beech mushrooms are a nutritional powerhouse, offering a range of health benefits:
Rich in Vitamins and Minerals: Beech mushrooms are an excellent source of vitamins B and D, which are crucial for maintaining healthy bones, teeth, and immune function. They also contain significant amounts of copper, selenium, and potassium, which support various bodily functions, including red blood cell formation, thyroid health, and blood pressure regulation.
High in Antioxidants: These mushrooms are packed with antioxidants that help protect the body from oxidative stress, reducing the risk of chronic diseases such as cancer and heart disease. Antioxidants neutralize free radicals, preventing cell damage and inflammation.
Immune System Boost: Beech mushrooms have been used in traditional Chinese medicine for their immune-boosting properties. They can stimulate the production of white blood cells, enhancing the body’s natural defenses against infections and diseases.
Low in Calories and Fat: Beech mushrooms are low in calories and fat, making them an excellent addition to a healthy diet. They are also high in dietary fiber, which aids in digestion and helps maintain a healthy weight.
Sustainability
Growing your own beech mushrooms is an environmentally friendly practice that contributes to sustainability in several ways:
Reduced Carbon Footprint: By cultivating mushrooms at home, you eliminate the need for transportation and packaging, significantly reducing your carbon footprint. Commercially grown mushrooms often travel long distances before reaching consumers, contributing to greenhouse gas emissions.
Organic and Chemical-Free: Home cultivation allows you to control the growing conditions, ensuring that no harmful pesticides or synthetic fertilizers are used. This not only benefits your health but also protects the environment from chemical contamination.
Waste Reduction: Growing your own food encourages the use of imperfect produce that might otherwise be discarded. This practice reduces food waste and promotes a more sustainable food system.
Biodiversity and Soil Health: Home gardening practices such as composting and crop rotation enhance soil health and promote biodiversity. These practices create a balanced ecosystem that supports beneficial insects and wildlife, contributing to a healthier environment.
FAQ
What exactly are beech mushrooms?
Beech mushrooms, or Hypsizygus tessulatus, are edible fungi with a small brown cap and a creamy white stem. They’re known for their rich, buttery flavour and can be a delicious addition to many recipes. They’re also packed with nutrients and have been recognized for their potential medicinal benefits.
Can I grow beech mushrooms at home?
Absolutely! You can grow beech mushrooms indoors with the right setup. You’ll need a suitable substrate, which could be hardwood sawdust or a combination of sawdust and soy hulls, proper environmental conditions such as temperature, humidity, and ventilation, and, of course, beech mushroom spawn for inoculation.
What kind of substrate is best for growing beech mushrooms?
Beech mushrooms thrive on a substrate made from hardwood sawdust, but for an even better yield, you can add soy hulls, which provide additional nutrients. Ensure the substrate is finely ground for the best results in the cultivation process.
What are the optimal conditions for mycelium colonization?
The ideal temperature for mycelium growth is between 50-60 degrees Fahrenheit with a humidity level of 80-90%. Make sure your growing area is dark and provides ample room temperature for the best colonization.
What is the inoculation technique for beech mushrooms?
Inoculation involves adding grain spawn to your substrate. This should be done under sterile conditions to avoid contamination. After adding the spawn, it’s crucial to maintain the temperature and humidity levels to encourage the growth of the mycelium.
How do I create the ideal indoor farming environment?
To create the ideal environment for growing beech mushrooms, you need to control the temperature, usually between 14.5 to 16 degrees Celsius, and maintain high humidity levels around 96-98%. Additionally, you’ll want to ensure proper ventilation to manage carbon dioxide levels and provide low-level lighting to stimulate growth.
How do I know when it’s time to harvest my beech mushrooms?
Beech mushrooms are typically ready to harvest approximately 3-4 weeks after the initial fruiting begins. They should be plump, with caps fully developed but not fully unfolded. The exact timing can depend on your specific growing conditions, so keep an eye on them as they develop.
What maintenance is required during the beech mushroom growing process?
During the growth process, you’ll need to monitor temperature and humidity levels closely, adjust ventilation as necessary, and mist the mushrooms to maintain proper humidity if you’re in the fruiting phase. It’s essential to monitor for any signs of contamination and address them promptly.
Are there any common issues to watch out for when growing beech mushrooms?
Common issues include contamination by mold or bacteria, which can result from improper sterilization or environmental conditions. Fluctuating temperatures or incorrect humidity levels can also hinder the growth of your beech mushrooms. Maintaining a consistent environment is key to successful cultivation.
Can I grow beech mushrooms all year round?
Yes, you can grow beech mushrooms year-round if you provide them with the controlled environment they need. This makes indoor cultivation especially appealing since you’re not dependent on outdoor weather conditions.
Enoki mushrooms (Flammulina velutipes) naturally grow in various regions across the globe. They are predominantly found in:
Eastern Asia: Enoki mushrooms have been growing wild since ancient times, particularly in countries like Japan, Korea, and China
North America: They are also found in the wild across various parts of North America
Europe: Enoki mushrooms grow in certain regions of Europe, including Great Britain and Ireland.
Enoki mushrooms grow naturally in various woodland settings. They are typically found on rotting wood, especially dead hardwood trees such as elm, willow, Chinese hackberry, persimmon, ash, and mulberry trees.
These mushrooms prefer cool temperatures and high humidity, so they are commonly found during the cooler parts of the year, such as late fall, early spring, and even mid-winter in milder climates.
It is important to note that wild enoki mushrooms can closely resemble toxic species, so proper identification, such as performing a spore print, is crucial when foraging.
Enoki Mushrooms taste and texture
Enoki mushrooms have a mild, delicate flavor that is often described as slightly sweet, subtly earthy, and sometimes with a hint of fruitiness or nuttiness Their taste is not as strong or “mushroomy” as other varieties like shiitake or portobello, making them a versatile ingredient that blends well with other flavors in a dish.
The standout feature of enoki mushrooms is their texture: they are crisp and firm when fresh, offering a pleasant, crunchy bite that can be preserved if lightly cooked. The thin, noodle-like stems and tiny caps remain slightly chewy, adding a unique mouthfeel to soups, stir-fries, salads, and noodle dishes.
In summary, enoki mushrooms are prized for their:
Mild, sweet, and slightly earthy flavor
Delicate, crunchy, and slightly chewy texture
Ability to absorb surrounding flavors in cooked dishes
These qualities make enoki mushrooms a popular choice in East Asian cuisine, especially in soups, hot pots, stir-fries, and as a garnish.
How to Select the Right Enoki Mushroom Varieties
Different enoki mushroom varieties have distinct characteristics and specific growing requirements.
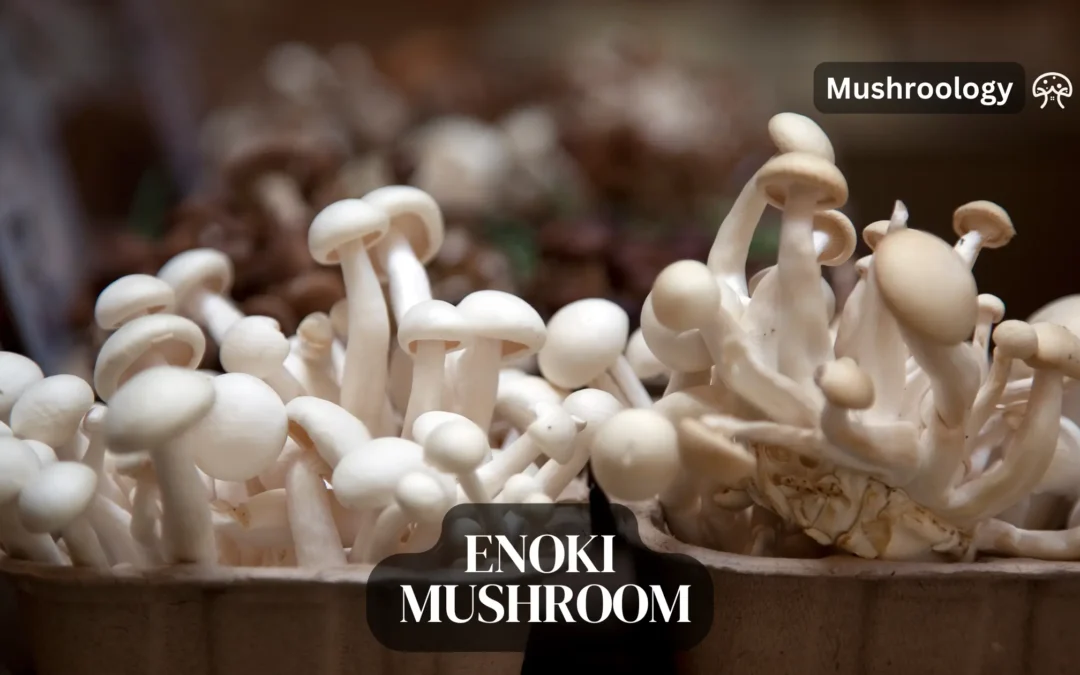
White Enoki Mushrooms
Scientific Name: Flammulina velutipes var. velutipes
The traditional white enoki mushrooms are the most commonly cultivated worldwide. These mushrooms have small, slender stems and tiny white caps, making them visually appealing. They are known for their delicate flavour and crisp texture, perfect for adding a unique touch to salads, stir-fries, and soups.
Golden Enoki Mushrooms
Scientific Name: Flammulina velutipes var. lutescens
Instagram @mushroomphotography
The golden enoki mushrooms, also known as lutescens or wild velvet shank, have a vibrant golden color. They have longer and thicker stems compared to the white variety but maintain the same small cap size. These mushrooms have a slightly earthier and nuttier flavor, making them a delicious addition to various dishes.
Other Enoki Mushroom Varieties
In addition to the white and golden enoki varieties, there are other less common varieties available. These include pink enoki mushrooms, which have a distinct pink hue, and brown enoki mushrooms, which have a darker cap color. While these varieties may have unique flavors and appearances, they generally require more specialized growing conditions and are less commonly cultivated at home.
When selecting the right enoki mushroom variety for your cultivation project, consider factors such as flavor preferences, visual appeal, and growing requirements.
How to grow enoki mushrooms at home?
Several crucial factors are to consider, including temperature, humidity, light, and ventilation. Let’s dive into each of these elements to understand how they contribute to the optimal conditions for growing enoki mushrooms.
Temperature
Temperature plays a vital role in the growth and development of enoki mushrooms. They thrive in cooler temperatures, ideally between 45 to 60°F (7 to 15°C). Maintaining a consistent temperature within this range is important to ensure proper fruiting and avoid stress on the mushrooms. A temperature-controlled environment, such as a dedicated mushroom growing room or a temperature-regulated greenhouse, can help you achieve optimal results.
Humidity
Enoki mushrooms require high humidity levels to encourage vigorous growth. Aim for relative humidity (RH) of around 85-95% during the cultivation process. This can be achieved using a humidifier or regularly misting the growing area. Be mindful of not creating excess moisture, which can lead to fungal contamination. Adequate airflow and ventilation play a crucial role in maintaining the ideal humidity levels while preventing the buildup of stagnant air.
Light
Unlike some other mushroom varieties, enoki mushrooms benefit from exposure to light during their growth. Natural light is the ideal source, but artificial lighting can be used if not available. Position grow lights at a distance and angle that mimics natural daylight to provide the mushrooms with the necessary light spectrum for proper development. Aim for 12-16 hours of light per day during the cultivation period to promote healthy and robust enoki mushrooms.
Ventilation
Proper ventilation is essential to prevent the buildup of carbon dioxide and promote air exchange within the growing environment. Good airflow helps to maintain a healthy microbial balance and prevents the growth of contaminants. Consider using fans or installing an exhaust system to ensure consistent air circulation. However, be cautious not to create excessively turbulent air that could harm the delicate enoki mushroom clusters.
Select the suitable substrate for your enoki mushrooms
Enoki mushrooms thrive in specific environments that provide the necessary nutrients and support. In this section, I will discuss the different options available for cultivating enoki mushrooms and help you select the most suitable growing medium for your cultivation setup.
The Pros and Cons of Different Growing Mediums
There are several growing mediums commonly used for enoki mushroom cultivation, including sawdust, straw, or a combination of both. Each medium has its own advantages and disadvantages that you should consider before making a decision.
Sawdust
Sawdust is a popular choice for growing enoki mushrooms. It provides a stable, easily controlled environment for mushroom growth. Sawdust is relatively free from contaminants and can be easily sterilized. However, it may require additional supplements to provide sufficient nutrients for optimal mushroom development.
Straw
Straw is another commonly used medium for enoki mushroom cultivation. It is rich in nutrients and provides a good substrate for mushroom growth. Straw is more readily available and less expensive compared to sawdust. However, it can be more prone to contamination and requires thorough pasteurization before use.
Combination
Some growers prefer to use a combination of sawdust and straw to create a balanced growing medium. This allows them to take advantage of the benefits of both mediums while minimizing their respective drawbacks. The combination provides a diverse and nutrient-rich substrate for robust mushroom growth.
Choose the most suitable substrate for your enoki mushrooms
When selecting the substrate for enoki mushrooms, consider your specific circumstances and resources. It can be an excellent choice if you have access to high-quality sawdust and the necessary equipment for sterilization. Alternatively, if you have access to clean, nutrient-rich straw and can effectively pasteurize it, straw might be the better option for you.
Remember, proper sterilization or pasteurization techniques are crucial to minimize the risk of contamination in any chosen growing medium. Following best practices and maintaining a clean, sterile environment will greatly increase your chances of successful enoki mushroom cultivation.
To help you visualize the pros and cons of each growing medium, here is a summary in the form of a table:
Utilizes the benefits of both mediums, diverse substrate
Requires resources for both sawdust sterilization and straw pasteurization
Preparing the Substrate
After selecting the appropriate substrate it is crucial to properly prepare it to create optimal conditions for enoki mushroom growth. By following these essential steps, you can minimize the risk of contamination and ensure the healthy colonization of your enoki mushrooms.
Sterilization Techniques
Sterilization is a critical step in preparing the growing medium for enoki mushrooms. It eliminates any potential harmful microorganisms that could compete with the mushroom mycelium. There are several sterilization techniques you can use:
Heat Sterilization: The most common method involves using heat to kill off any contaminants. It can be done by pressure cooking or using an autoclave. Make sure to follow the manufacturer’s instructions and sterilize the growing medium thoroughly.
Chemical Sterilization: Another option is to use chemicals such as hydrogen peroxide or bleach to sterilize the medium. However, this method requires caution and proper dilution to prevent damage to the growing medium and the mushrooms.
Substrate Preparation
Once the growing medium is sterilized, it’s time to prepare the substrate for the enoki mushrooms. Substrate refers to the material on which the mushroom mycelium will grow. Common substrates for enoki mushroom cultivation include sawdust, straw, or a combination of both. Here’s how to prepare the substrate:
Sawdust Substrate: If you’re using sawdust, start by soaking it in water for 24 hours. Drain the excess water and mix it with vermiculite or another nitrogen-rich supplement to enhance the nutrient content. Blend the mixture thoroughly and transfer it to a sterilized container or bag.
Straw Substrate: If you’re using straw, chop it into small pieces and soak it in hot water for 1-2 hours. Drain the water and pasteurize the straw either by steaming or placing it in an oven at a specific temperature. Once pasteurized, spread the straw out to cool before transferring it to a container or bag.
Combination Substrate: For a combination substrate, blend the soaked and pasteurized ingredients together, ensuring an even distribution of sawdust and straw. This combination allows for a balanced nutrient composition that promotes proper enoki mushroom growth.
Remember to maintain a clean and sterile environment throughout the preparation process to prevent contamination. Once your growing medium is prepared, you’re ready to proceed with the enoki mushroom cultivation process.
Inoculating the Growing Medium
Inoculation plays a crucial role in the cultivation process of enoki mushrooms. It involves introducing enoki mushroom spawn into the growing medium, kickstarting the colonization process. There are different methods of inoculation available, such as using grain spawn or sawdust spawn. Let’s explore these methods in detail.
1. Grain Spawn Inoculation
One method of inoculating the growing medium is by using grain spawn. Grain spawn consists of sterilized grains, such as millet or wheat, that have been inoculated with enoki mushroom mycelium. Here’s how you can use grain spawn for inoculation:
Prepare a clean working area and ensure proper sterilization of tools and equipment.
Take a clean container and fill it with the desired growing medium, such as sterilized sawdust or a sawdust-straw mixture.
Using clean hands or sterile gloves, evenly distribute the grain spawn throughout the growing medium.
Ensure that the grain spawn is evenly spread, allowing for optimal colonization.
By following these steps, you can successfully inoculate the growing medium with grain spawn, providing a favorable environment for enoki mushroom growth.
2. Sawdust Spawn Inoculation
Another method of inoculation involves using sawdust spawn. Sawdust spawn consists of enoki mushroom mycelium grown on sterilized sawdust particles. Here’s how you can use sawdust spawn for inoculation:
Prepare a sterile environment for working and ensure all tools and equipment are properly sterilized.
Take a clean container and fill it with the selected growing medium, such as sterilized sawdust or a sawdust-straw mixture.
Spread a layer of sawdust spawn evenly over the growing medium.
Gently mix the sawdust spawn into the growing medium, ensuring even distribution.
By following these steps, you can successfully inoculate the growing medium with sawdust spawn, creating favorable conditions for enoki mushroom colonization and growth.
During the inoculation process, it is crucial to maintain a sterile environment to prevent contamination. Proper sterilization of tools, containers, and working surfaces is essential to ensure successful inoculation. Additionally, following good hygiene practices, such as wearing clean gloves, can further minimize the risk of contamination.
Manage the Growing Conditions
Once the growing medium is inoculated with enoki mushroom spawn, it is crucial to carefully manage the growing conditions to ensure healthy mushroom growth and maximize your yield. By monitoring and adjusting key factors such as temperature, humidity, watering, and pest management, you can create an optimal environment for your enoki mushrooms to thrive.
Temperature and Humidity Control
Enoki mushrooms have specific temperature and humidity requirements to grow successfully. Optimal temperature for enoki mushroom cultivation is between 50°F and 60°F (10°C and 15°C), while humidity levels should be maintained at around 85% to 95%. These conditions can be achieved by using a dedicated growing chamber or by utilizing tools such as humidifiers and fans. It is essential to regularly monitor the temperature and humidity levels to ensure they remain within the desired range.
Watering
Proper watering is crucial for enoki mushroom growth. The growing medium should be kept consistently moist, but not overly wet, to prevent mold growth and ensure the mushrooms receive enough water for development.
Avoid using cold or chlorinated water, as it can inhibit mushroom growth. Instead, opt for filtered or dechlorinated water at room temperature. Regularly check the moisture content of the growing medium and adjust watering as needed.
Pest Management
Pests and diseases can threaten the health and productivity of your enoki mushroom crop. Common pests in enoki mushroom cultivation include mites, flies, and gnats. Regularly inspect the growing area and mushrooms for any signs of pests or diseases. Proper sanitation practices, such as keeping the growing environment clean and promptly removing contaminated or damaged mushrooms, can help prevent infestations. Consider using organic pest control methods, such as beneficial insects or natural pest repellents if necessary.
By managing the growing conditions diligently, you can provide your enoki mushrooms with the ideal environment for healthy growth and abundant yields. Stay vigilant with temperature and humidity control, adjust watering practices to maintain proper moisture levels, and take proactive measures to prevent and manage pests. With these techniques, you’ll be on your way to cultivating thriving enoki mushrooms in no time.
Harvesting and Storage Techniques
Knowing when and how to harvest enoki mushrooms is crucial to enjoy them at their peak freshness and flavor. In this section, I’ll guide you through the harvesting process, including proper techniques for cutting and handling the delicate mushroom clusters. Additionally, I’ll discuss the best practices for storing harvested enoki mushrooms to prolong their shelf life.
Harvesting Enoki Mushrooms
When it comes to harvesting enoki mushrooms, timing is everything. Harvesting the mushrooms when they reach a desirable size, typically around 2-4 inches in length is recommended. The caps should still be tightly closed, and the stems should be slender and firm.
To harvest enoki mushrooms, simply use a sharp knife or pair of scissors to cut the mushroom clusters at the base of the stems, where they meet the growing medium. Be gentle and avoid damaging nearby mushrooms or the growing medium.
When harvesting, it’s important to remove both the mushrooms and any remaining mycelium (the white, thread-like structure) from the growing medium. This helps prevent the accumulation of decaying matter, which can negatively impact future mushroom flushes.
Handling Enoki Mushrooms
Enoki mushrooms have delicate, slender stems that require careful handling to avoid damage. To preserve their quality, it’s recommended to gently brush off any excess dirt or substrate using a soft brush or a damp cloth. Avoid washing the mushrooms with water, as they can become waterlogged and lose their flavor.
After cleaning, separate the mushroom clusters into individual stems for easier cooking and presentation. Enoki mushrooms are often used in stir-fries, soups, and salads, and their unique texture and flavor can enhance a variety of dishes.
How to store Enoki Mushrooms
Proper storage is essential to prolong the shelf life of harvested enoki mushrooms. Here are some best practices to follow:
Refrigerate: Place the harvested mushrooms in a paper bag or a breathable container and store them in the refrigerator. This helps maintain their freshness and prevents moisture buildup that can lead to spoilage.
Enoki mushroom shelf life
Enoki mushrooms typically have a shelf life of 7 to 14 days when stored properly. Here are the key details regarding their shelf life and storage:
They should be stored at temperatures between 7-10°C (44.6-50°F) for optimal freshness. For short-term storage (7 days or less), a temperature range of 34-36°F (1-2°C) with 90-98% relative humidity is recommended.
Look for dark spots, slimy texture, discoloration, or unpleasant odors as indicators of spoilage.
Enoki mushrooms can be frozen, but their delicate texture may be compromised. If freezing, blanch them in boiling water for about a minute, then transfer to an ice bath before drying and storing in an airtight container. Frozen enoki mushrooms can last up to three months.
Harvesting and Storage Techniques
Benefits
Harvesting enoki mushrooms when they reach the desired size
– Ensures optimal freshness and flavor – Prevents overripe or underdeveloped mushrooms from being harvested
Gently cutting the mushroom clusters at the base of the stems
– Minimizes damage to the delicate stems – Facilitates future mushroom flushes
Properly cleaning and handling enoki mushrooms
– Preserves the delicate texture and flavor – Removes excess dirt or substrate – Enhances culinary presentation
Storing harvested enoki mushrooms in a paper bag or breathable container in the refrigerator
– Maintains freshness and extends shelf life – Prevents moisture buildup and spoilage – Allows for efficient organization and space utilization in the refrigerator
Troubleshooting Common Issues
Even with the best practices in place, enoki mushroom cultivation may encounter certain challenges. In this section, we will address common issues that growers may face and provide practical solutions to overcome them. By being aware of these potential problems and knowing how to troubleshoot them, you can ensure the success of your enoki mushroom cultivation endeavors.
1. Contamination
Contamination is a common problem in mushroom cultivation, including enoki mushrooms. It can occur due to improper sterilization techniques, contaminated growing mediums, or unclean working environments. To prevent contamination:
Ensure that all equipment and the cultivation area are properly cleaned and sanitized before starting the cultivation process.
Use a reliable sterilization method, such as pressure cooking or steam sterilization, to sanitize the growing medium.
Avoid cross-contamination by keeping different batches of mushrooms separate and using clean tools for each batch.
If you encounter contamination, it’s crucial to act quickly to prevent further spread. Remove the contaminated materials and sterilize the affected area before starting again with fresh supplies.
2. Slow or Stunted Growth
Slow or stunted growth can be frustrating for growers. Several factors can contribute to this issue:
Temperature: Enoki mushrooms thrive in cooler temperatures. Ensure that the growing environment maintains a temperature of around 50-55°F (10-13°C).
Humidity: Enoki mushrooms require high humidity levels. Maintain humidity between 85-95% by misting the growing area regularly and using a humidifier, if necessary.
Light: Enoki mushrooms prefer low light conditions. Avoid exposing them to direct sunlight or intense artificial light.
Nutrition: Check the nutrient content of your growing medium. Enoki mushrooms typically grow best in nutrient-rich substrates such as sawdust supplemented with bran or wheat straw.
By adjusting these factors, you can promote healthier and faster growth of your enoki mushrooms.
3. Disease Management
Enoki mushrooms can be susceptible to various diseases, including fungal, bacterial, and viral infections. Proper disease management techniques are crucial to maintaining a healthy crop:
Isolate infected mushrooms to prevent the spread of disease. Remove and dispose of affected mushrooms carefully.
Maintain proper ventilation to reduce humidity and prevent the growth of fungal pathogens.
Use disease-resistant varieties when possible.
Practice good hygiene by regularly cleaning and sanitizing the cultivation area and equipment.
Remember, prevention is key when it comes to disease management. By implementing good cultivation practices and monitoring your crop closely, you can minimize the risk of diseases and ensure the health and productivity of your enoki mushrooms.
Expand Your Enoki Mushroom Cultivation
Now that you have mastered the basics of enoki mushroom cultivation, it’s time to take your skills to the next level. In this section, I will provide you with valuable insights on how to expand your cultivation efforts and explore advanced techniques that can maximize your enoki mushroom yield. Additionally, I will share tips on turning your passion for growing enoki mushrooms into a small business opportunity.
Scale Up Your Cultivation Operation
Once you have successfully grown enoki mushrooms on a small scale, you may consider scaling up your operation to meet higher demands. Here are some key steps to help you expand your cultivation:
Assess your space: Determine the available space you have for larger cultivation setups, such as a greenhouse or a dedicated growing room.
Invest in equipment: Upgrade your equipment to accommodate larger quantities of growing medium, spawn, and harvest tools.
Optimize your workflow: Streamline your cultivation process by implementing efficient systems for inoculation, maintenance, and harvesting.
Manage your resources: Plan your cultivation cycles and allocate resources effectively to ensure consistent production.
Exploring Advanced Cultivation Techniques
As you gain experience in enoki mushroom cultivation, you may want to explore advanced techniques to enhance your yields and experiment with different growing methods. Here are some techniques to consider:
Alternative growing mediums: Experiment with alternative growing mediums like wood chips or compost to diversify the flavors and textures of your enoki mushrooms.
Cold shocking: Cold shock your enoki mushrooms by exposing them to lower temperatures for a short period, enhancing their aesthetic appeal and promoting denser growth.
Hydroponic cultivation: Explore hydroponic systems specifically designed for growing enoki mushrooms, which offer precise control over nutrient levels and environmental conditions.
Turning Your Passion into a Small Business
If you have a deep passion for enoki mushroom cultivation, you may even consider turning it into a small business venture. Here are some steps to get started:
Market research: Identify your target audience and research the demand for enoki mushrooms in your local market.
Develop a business plan: Outline your goals, strategies, and financial projections to give your business a solid foundation.
Build a network: Establish connections with local restaurants, farmers’ markets, and grocery stores to expand your customer base.
Brand your business: Create a unique brand identity that reflects the quality and sustainability of your enoki mushrooms.
Continuous learning: Stay updated with the latest advancements in enoki mushroom cultivation techniques and market trends to stay ahead of the competition.
Expanding your enoki mushroom cultivation can open up exciting opportunities for growth and success. Whether you choose to scale up your operation, explore advanced techniques, or turn your passion into a small business, remember to stay dedicated, adaptable, and always ready to learn. With the right mindset and perseverance, your enoki mushroom cultivation journey can lead to both personal fulfillment and financial prosperity.
FAQ
What are enoki mushrooms?
Enoki mushrooms, scientifically known as Flammulina velutipes, are a popular edible fungus native to East Asia. They have slender, elongated stems and small white caps, and are highly valued for their crunchy texture and delicate flavor.
How do I select the right enoki mushroom varieties for cultivation?
Enoki mushrooms come in different varieties, each with its unique characteristics and growing requirements. Some popular enoki mushroom varieties include white enoki and golden enoki. It’s important to choose the variety that suits your cultivation setup and preferences.
What elements should I consider when creating the ideal growing environment for enoki mushrooms?
Temperature, humidity, light, and ventilation are crucial elements to consider when creating the ideal growing environment for enoki mushrooms. Maintaining the right conditions will promote optimal growth and yield.
What are the suitable growing mediums for cultivating enoki mushrooms?
Enoki mushrooms can be cultivated using different growing mediums, such as sawdust, straw, or a combination of both. Each medium has its advantages and drawbacks, so it’s important to choose the most suitable one for your cultivation setup.
How do I prepare the chosen growing medium for enoki mushroom cultivation?
Proper preparation of the growing medium is essential for successful enoki mushroom cultivation. This involves sterilization techniques and substrate preparation to minimize the risk of contamination and promote healthy mushroom colonization.
What are the methods of inoculating the growing medium with enoki mushroom spawn?
Inoculation involves introducing enoki mushroom spawn to the prepared growing medium. This can be done using different methods, such as grain spawn or sawdust spawn. Maintaining a sterile environment during this stage is crucial for successful inoculation.
How do I manage the growing conditions for enoki mushrooms?
Proper care and management of the growing conditions are important for healthy enoki mushroom growth. This includes controlling temperature and humidity, watering appropriately, and managing pests effectively.
When and how should I harvest enoki mushrooms?
Harvesting enoki mushrooms at the right time and using proper techniques is crucial to enjoy them at their peak freshness and flavor. This section will guide you through the harvesting process and provide tips for handling the delicate mushroom clusters.
What are common issues in enoki mushroom cultivation and how can I troubleshoot them?
Common issues in enoki mushroom cultivation include contamination, slow or stunted growth, and disease management. By being aware of these potential issues and knowing how to troubleshoot them, you can overcome obstacles and achieve successful cultivation.
How can I expand my enoki mushroom cultivation?
Once you have mastered the basics of enoki mushroom cultivation, you may want to expand your operation. This section will provide insights into scaling up your efforts, exploring advanced techniques, and potentially turning your passion for enoki mushroom growing into a small business.