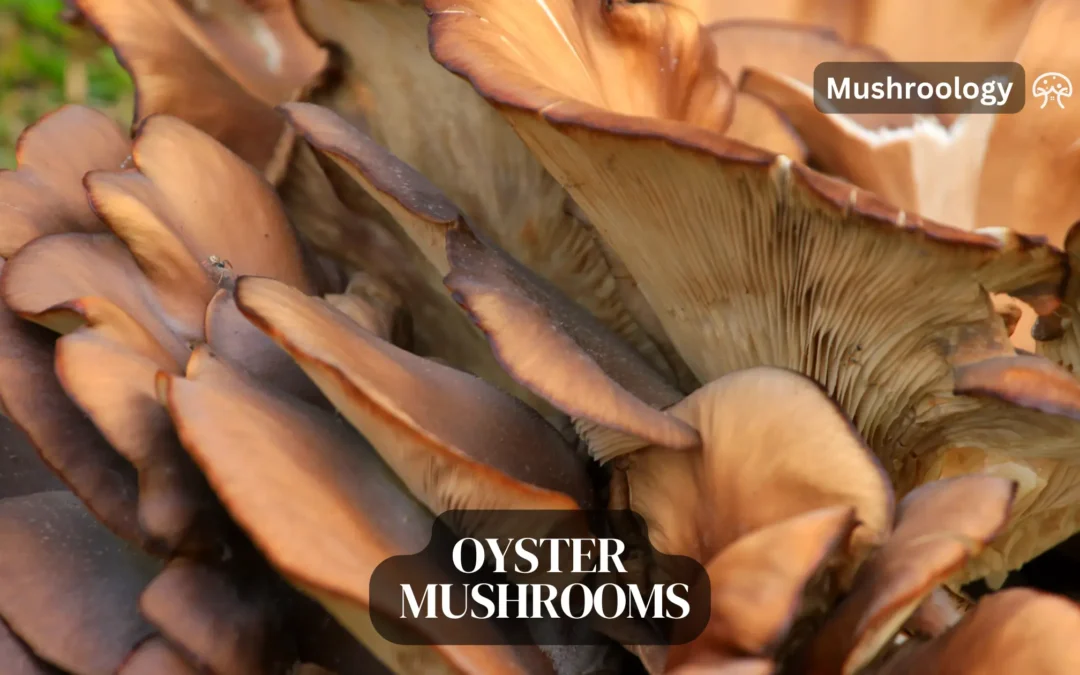
The first time I tried to grow Blue Oyster mushrooms, I suffocated them. I bought an expensive plastic bin, sealed it tight to “keep the humidity in,” and waited. Two weeks later, I didn’t have mushrooms—I had long, stringy, coral-like fingers stretching desperately for air.
Eight years and roughly 200kg (440lbs) of harvests later, I can tell you the secret that most overly complex guides miss: Oyster mushrooms (Pleurotus) are not plants. They are aggressive, oxygen-hungry fungi that thrive on neglect, provided you respect their need for fresh air.
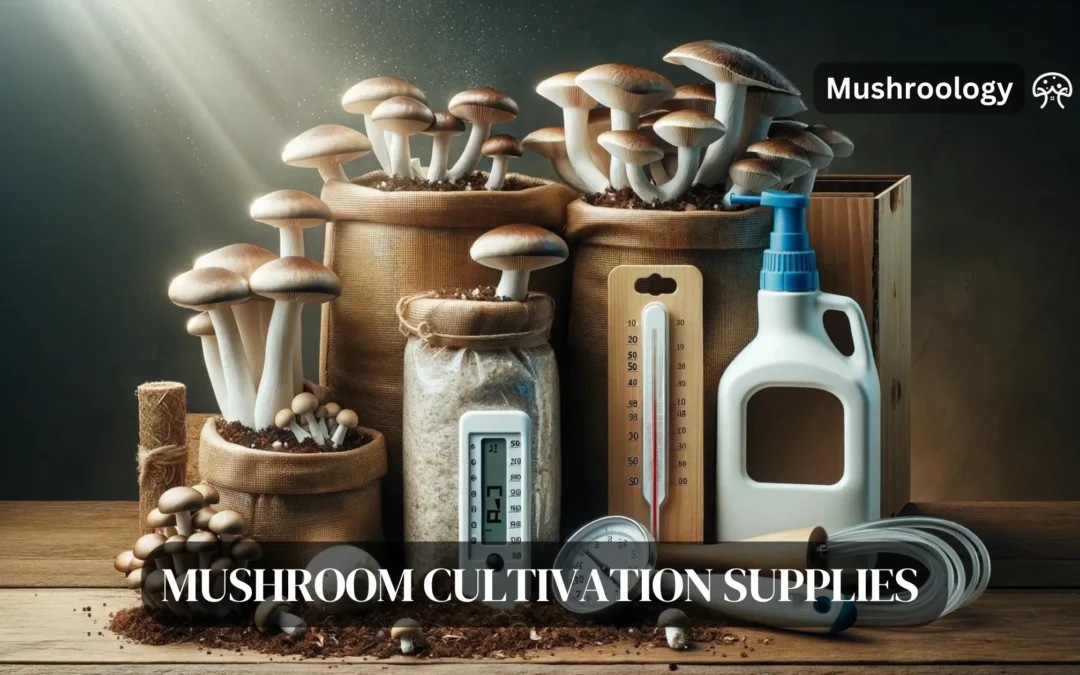
You don’t need a sterile laboratory or a $500 grow tent to start. In this guide, I will condense my years of trial and error into a single, comprehensive masterclass on the “Bucket Tek” method—the cheapest and most reliable way to fill your fridge with fresh mushrooms.
✅Why Trust This Guide?
👤 Author: Floris (Cultivating since 2017)
🍄 Experience: 200kg+ Harvested (Buckets & Logs)
🧪 Method Tested: Low-Tech Cold Pasteurization
💰 Cost to Start: Under $30 (Using Hardware Store supplies)
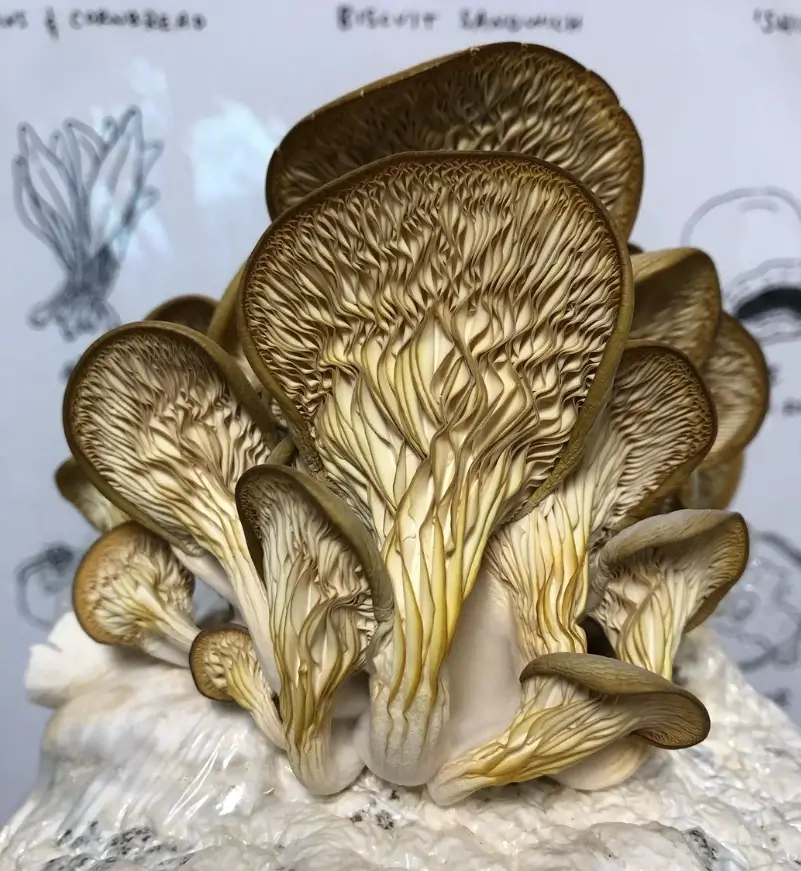
Part 1: Choose Your Fighter (Varieties Cheat Sheet)
Before you buy “Oyster Mushroom Spawn,” you need to know which oyster. I have seen countless beginners in Texas fail because they tried to grow Blue Oysters in July, or growers in Canada fail with Pink Oysters in a drafty garage.
Use this Variety Matrix to match the mushroom to your current climate.
The Oyster Variety Matrix
Variety
Scientific Name
Best Temp Range
Difficulty
Taste Profile
Notes
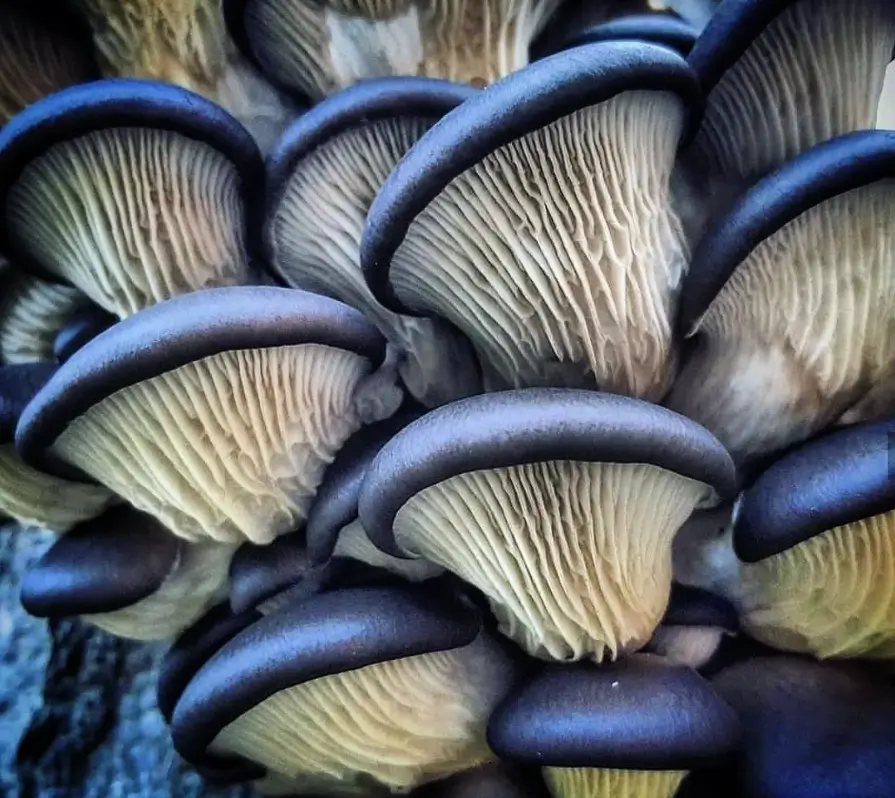
Blue / Pearl
P. ostreatus
10°C – 21°C (50°F – 70°F)
Beginner
Meaty, Mild, Savory
Loves “Cold Shocks.” The standard winter grower.
Pink
P. djamor
20°C – 30°C (68°F – 86°F)
Easy (Fast)
Bacon-like, Chewy
Tropical. Dies below 10°C. Do not put spawn in fridge!
Yellow / Golden
P. citrinopileatus
18°C – 29°C (64°F – 85°F)
Easy
Nutty, Delicate
Very fragile caps. Pick young before they break.
Phoenix / Summer
P. pulmonarius
18°C – 27°C (65°F – 80°F)
Robust
Classic Mushroom
The best “All Rounder” for variable spring/fall weather.
King Oyster
P. eryngii
12°C – 18°C (54°F – 65°F)
Hard
Scallop-like, Thick
Requires “Casing Layer” and top-fruiting. (Not for buckets).
My Advice: If it is winter or you have a cool basement, start with Blue Oysters. If it is summer and you have no AC, grow Pink Oysters.
Instagram @kaydubsthehikingscientist
Part 2: The Shopping List
You don’t need a lab. You need a trip to the hardware store and a pet shop.
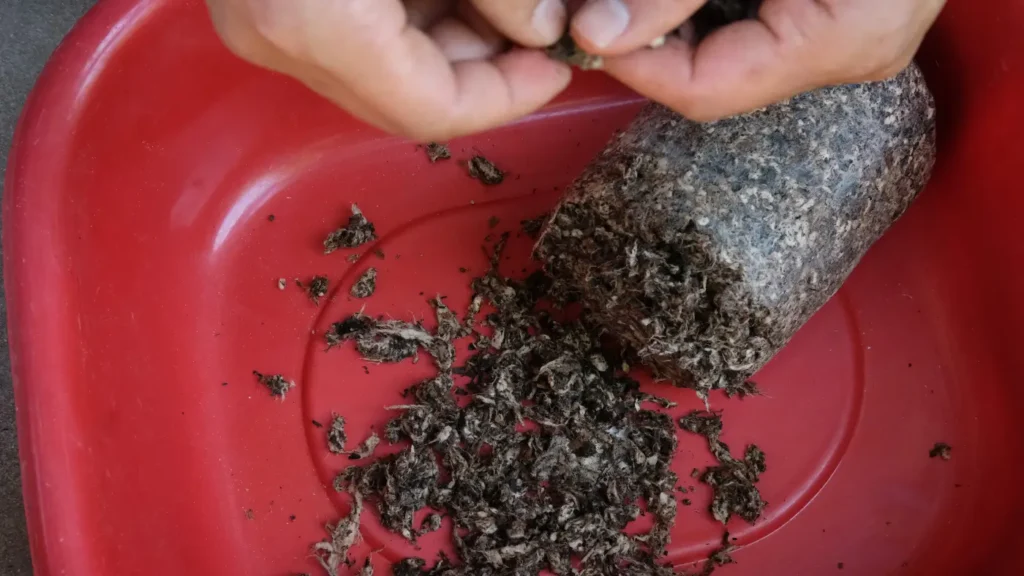
1. The Substrate (The Food)
Oyster mushrooms are wood-loving saprophytes. In the wild, they eat dead trees. In your house, they will eat:
Chopped Cereal Straw (Wheat or Oat): The gold standard for beginners. It is cheap, easy to pasteurize, and resists mold better than sawdust.
Pro Tip: Ensure it is dry and golden. Avoid green “hay” (which is grass and will rot).
Aspen Wood Chips (Pet Bedding): A cleaner alternative to straw, found in most pet stores.
2. The Spawn (The Seed)
You need Grain Spawn. This is millet, rye, or wheat that has already been colonized by mycelium.
The Golden Ratio: You want a 10% Spawn Rate.
The Math: For one 5-gallon bucket, you will use about 1kg (2.2 lbs) of grain spawn.
3. The Hardware
1x Plastic Bucket: 20 Liters (5 Gallons). Food grade is best, but hardware store buckets work fine.
Hydrated Lime (Calcium Hydroxide): Used for “Cold Pasteurization.”
Critical Warning: You must use Low Magnesium lime (High Calcium). If the bag says “High Magnesium” or “Dolomitic Lime,” do not use it. It will stun the mushroom growth. Look for “Builders Lime” or “Pickling Lime.”
Drill: With a 10mm (3/8″) bit.
Micropore Tape: (Optional) To cover holes during colonization.
Part 3: The Process (Bucket Tek Step-by-Step)
Here is the exact timeline you will follow.
The Growth Cycle Timeline
🍄 The 30-Day Growth Roadmap
1
Day 0-1
Prep & Pasteurize
Chop the straw and soak it in the lime bath for 16-24 hours. Drain well.
2
Day 1
Inoculation
Mix your grain spawn with the straw in the bucket. Seal the lid.
3
Days 2-14
Colonization (The Dark Phase)
Keep the bucket in a warm, dark place (20-24°C). The straw will turn white.
4
Days 15-20
Pinning (The Trigger)
Move to fresh air and light. Mist holes daily. Tiny “pins” will appear.
5
Days 21-30
Harvest Time! 🍽️
Mushrooms double in size daily. Pick when caps are large but edges are still curled down.
Step 1: Prep the Bucket
Take your drill and make holes all over the sides of the bucket.
Spacing: Every 10-15cm (4-6 inches).
Why: Unlike plants that grow up, Oysters will burst out of these holes.
Drainage: Drill 3-4 tiny holes (3mm) in the bottom to let excess water drain out.
Step 2: Chop the Straw
The mycelium hates bridging “air gaps.” If your straw is too long, the mushroom can’t jump from strand to strand.
Method: I put the straw in a clean trash can and attack it with a weed whacker (string trimmer) for 2 minutes. You want pieces 3-5cm (1-2 inches) long.
Step 3: Cold Pasteurization (The Lime Bath)
We need to kill the mold spores in the straw without killing the good bacteria. We do this by spiking the pH level of the water to 12+.
Fill a tote or large bin with water.
Add the Lime:
Metric: ~150g Hydrated Lime per 100 Liters of water.
Imperial: ~6 grams per Gallon (or roughly 1/3 cup per 5-Gallon bucket).
Mix well. The water should look milky.
Submerge the straw. Put the straw in a mesh laundry bag or pillowcase and push it underwater. Weigh it down with a brick.
Wait: Soak for 16 to 24 hours. (Do not soak longer than 24h, or the straw will start to ferment and smell bad).
Step 4: The Squeeze Test (Crucial)
This is where 80% of beginners fail.
Pull the straw bag out and let it drain for 30 minutes.
Perform the Test: Grab a handful of straw and squeeze it as hard as you can.
Streams of water?Too Wet. ( bacteria will grow).
No water at all?Too Dry. (Mycelium will die).
A few drops bead on your knuckles?Perfect. This is called “Field Capacity.”
👁️ Watch: The Perfect “Squeeze Test”
See that? Only a few drops. If water streams out, it’s too wet.
Step 5: The Lasagna Layering
Now, we mix the spawn and the straw. Clean your hands with sanitizer!
Put 5cm (2 inches) of straw in the bottom of the bucket.
Sprinkle a handful of Grain Spawn over it (focus on the edges near the holes).
Add another layer of straw.
Repeat until the bucket is full.
Snap the lid shut.
Part 4: Incubation & Fruiting
Phase 1: Colonization (The Takeover)
Location: A warm corner of your house, a closet, or a garage.
Light: Darkness is fine, but not strictly necessary. Avoid direct sun.
Time: 10 to 21 days.
What to look for: The straw will turn from gold to white. The holes might poke out white fluff.
Experience Note: If you see a little condensation inside, that’s good. If you see green patches, get the bucket outside immediately—that is Trichoderma mold.
Phase 2: Fruiting (The Explosion)
Once the bucket is 100% white and dense, the mushroom is ready to reproduce. It needs three triggers:
Fresh Oxygen (FAE): The most important factor.
Humidity: 85% – 90%.
Light: Indirect light (enough to read a book by).
Action: Move the bucket to your “fruiting spot.” This could be a shady spot in the garden (if humid) or a “Shotgun Fruiting Chamber” indoors. Mist the holes with water 2-3 times a day.
Within 3-5 days, you will see “Pins” (baby mushrooms) forming at the holes. They will double in size every 24 hours.
Instagram @kaydubsthehikingscientist
Part 5: Troubleshooting (The Mushroom Doctor)
Mushrooms talk to you through their shape. Use this diagnostic table to fix problems.
Oyster Mushroom Symptom Checker
Symptom
Diagnosis
The Fix
Long, thin stems & tiny caps
High CO2 (Suffocation)
Increase Fresh Air Exchange immediately. Open a window or fan.
Yellow/Brown slimy spots
Bacterial Blotch
You are spraying water directly on the fruits. Stop. Mist the air, not the mushroom.
Green patches in the straw
Trichoderma (Mold)
Contamination. Do not open inside. Toss the straw in the compost, bleach the bucket.
Dried out, shriveled pins
Low Humidity
The air is too dry. Build a humidity tent with a plastic bag (poke holes in it).
Mushrooms growing inside the bucket
Light Leak
Light is getting through the plastic. Use thick buckets or tape over the gaps.
Part 6: Harvest & Storage
When to Pick?
Harvesting is an art. You want to pick when the cap is flat but the edge is still slightly curled down.
Too Early: Small yield.
Too Late: The cap curls up and releases spores.
The Spore Warning
Oyster mushrooms are heavy spore producers. If you let them grow too long, they will cover your room in white dust. Inhaling this repeatedly can cause an allergy known as “Mushroom Worker’s Lung.”
My Rule: If in doubt, harvest early.
Storage
Blue/Phoenix/King: Store in a Paper Bag in the fridge. Plastic makes them slimy. They last 5-7 days.
Pink/Yellow: Eat immediately. These tropical varieties wither and die in the cold fridge.
Final Thoughts: Trust the Process
Don’t let the fear of contamination stop you. In my 8 years of growing, I have thrown away hundreds of green, moldy buckets. It is part of the tuition you pay to nature.
But remember: Oyster mushrooms are aggressive. They want to grow. If you respect the field capacity (the squeeze test) and give them fresh air, they will reward you.
🚀 Ready for the Next Level?
Buckets are great, but have you ever tasted a mushroom that resembles a lion’s mane and tastes like lobster? It is slightly harder to grow, but the medicinal benefits are incredible.
A: No. This is a common internet myth. Coffee grounds are too rich in nitrogen and will mold green (Trichoderma) within 48 hours unless sterilized in a pressure cooker. Only use coffee grounds if you mix them (20% ratio) into straw.
How many harvests will I get?
A: A typical bucket will give you a massive “First Flush,” a smaller “Second Flush” two weeks later, and maybe a tiny third flush. After the second flush, I usually dump the straw in my garden compost (where it often fruits again!).
is the white fuzz on the stems mold?
A likely not. If it is fuzzy and white at the base of the stem, it is “fuzzy feet” (mycelium). It just means the mushroom wanted a bit more oxygen. It is perfectly safe to eat.
Q: Can I reuse the bucket?
A: Absolutely. Scrub it with a 10% bleach solution or hot soapy water, and it’s ready for the next round. I have buckets that have been running for 5 years.
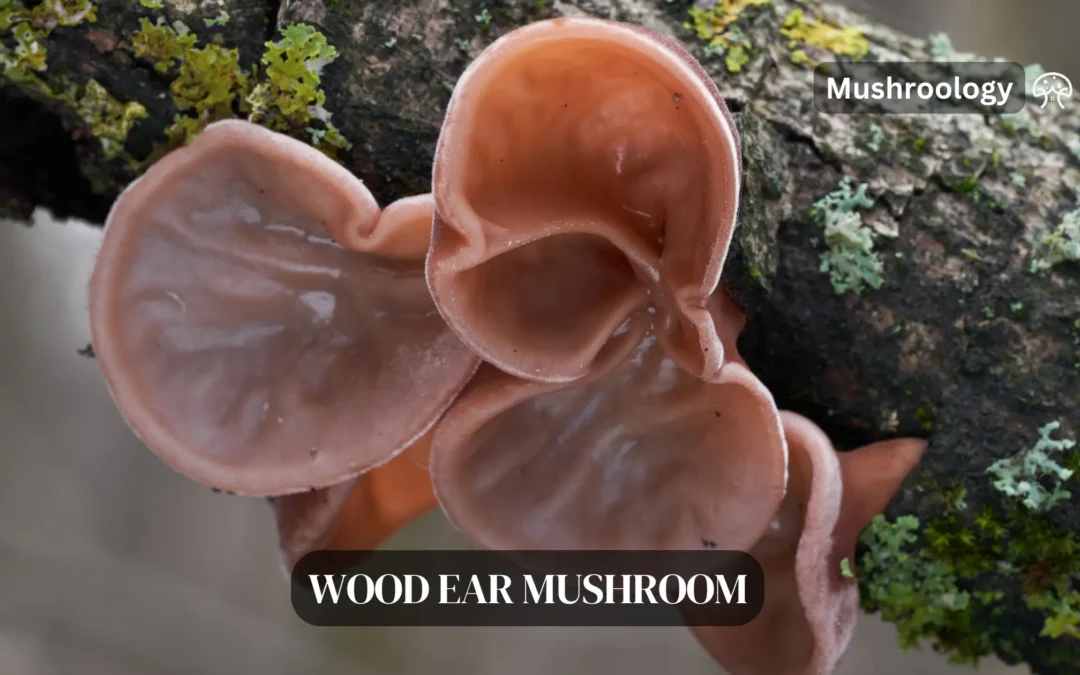
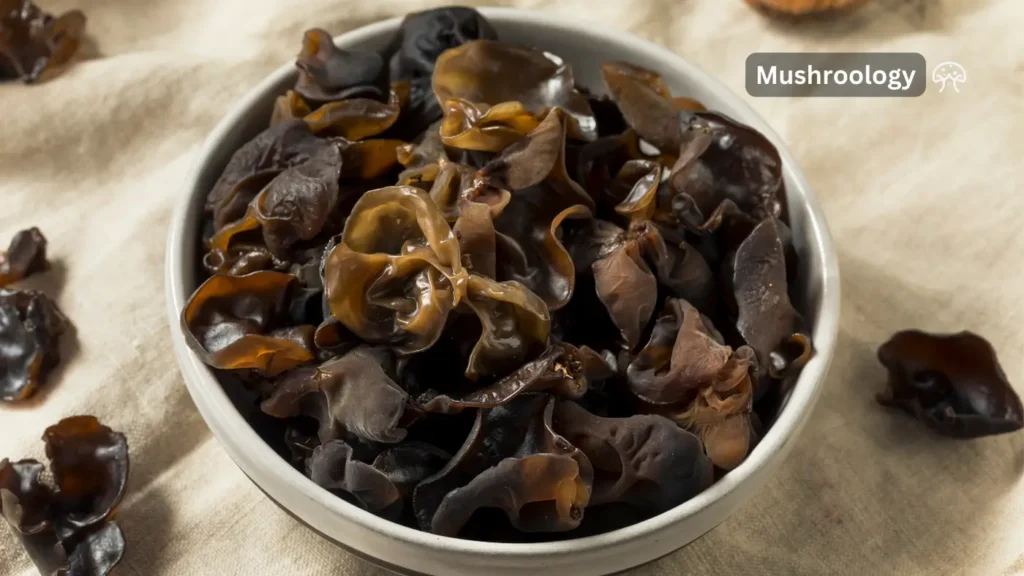
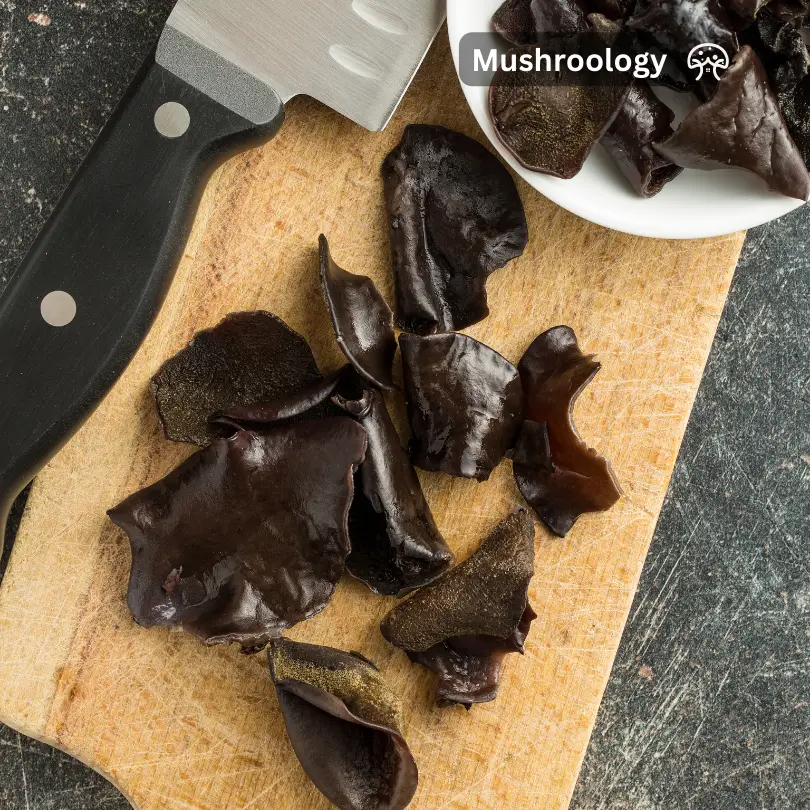
Quick Summary: Wood Ear (Auricularia spp.) is one of the easiest mushrooms for beginners to cultivate on logs. Known for its distinct “crunchy-jelly” texture, it thrives in cooler temperatures and is a staple in Asian cuisine.
What is a Wood Ear Mushroom?
If you have ever had Chinese Hot & Sour Soup, you have eaten Wood Ear. They don’t look like typical mushrooms; they have no gills, stems, or caps. Instead, they look like rubbery, brown ears growing directly out of wood.
As a chef and grower, I love them not for their flavor (which is mild/earthy), but for their texture. They soak up sauces like a sponge and add a “snappy” crunch that no other fungus offers.
Identification & Foraging
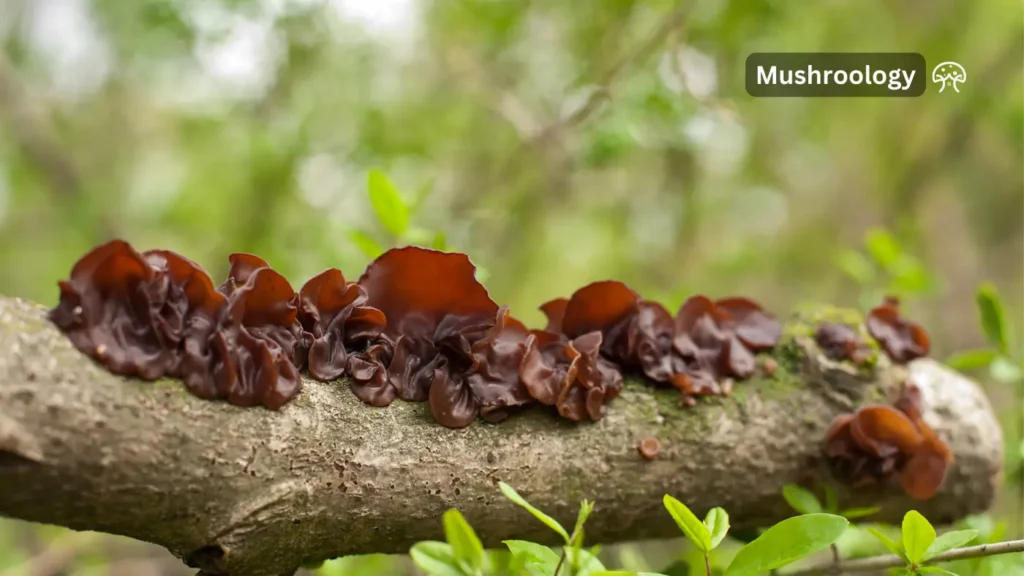
Scientific Name:Auricularia auricula-judae (Europe/Global) or Auricularia americana (North America).
Habitat: Almost exclusively on dead or dying deciduous wood. They love Elder trees (Sambucus), Oak, and Beech.
Season: They are frost-tolerant! You can often find them in late fall or even during winter thaws when other mushrooms have disappeared.
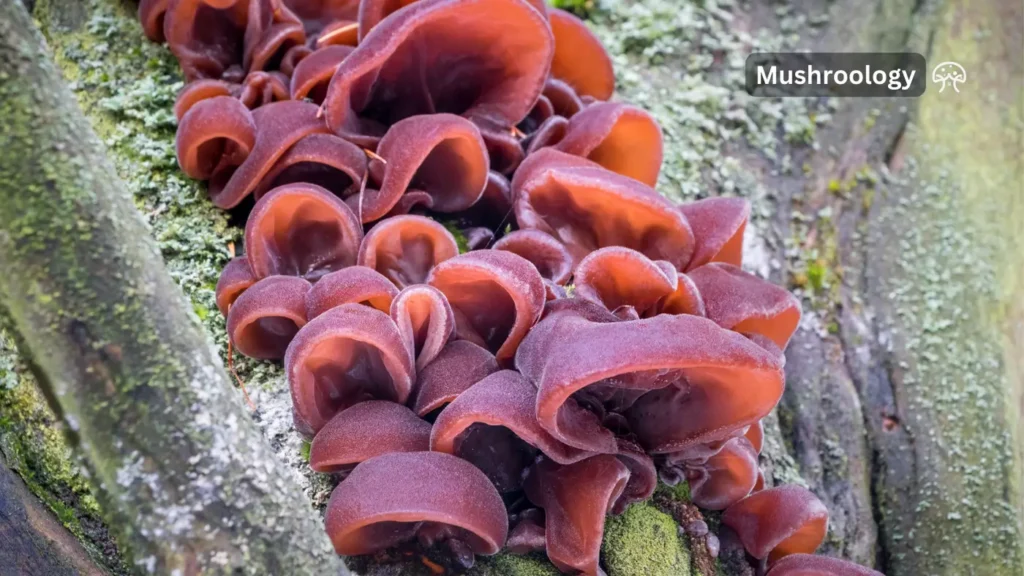
⚠️ The Lookalike Check: Don’t confuse Wood Ear with Amber Jelly Roll (Exidia recisa).
Wood Ear: Cup-shaped, looks like an ear, usually larger.
Amber Jelly Roll: looks like brain-like blobs, usually smaller and darker.
Good news: Both are non-toxic, so mistakes aren’t fatal, but Wood Ear tastes better.
How to Grow Wood Ear Mushrooms (The Log Method)
While you can grow these on sawdust blocks in bags, I highly recommend Log Cultivation for beginners. It is lower maintenance and mimics their natural environment perfectly.
Step 1: Select Your Wood
Wood Ears are saprophytic (wood-eating). They need hardwoods.
Timing: Cut your logs in late winter/early spring when the tree sugars are highest.
Step 2: Inoculation
Drill: Use a 5/16″ (8.5mm) drill bit to drill holes 6 inches apart in a diamond pattern.
Insert: Hammer in Wood Ear Plug Spawn.
Seal: Cover every hole with cheese wax or beeswax. This keeps the spawn moist and insects out.
Step 3: The “Spawn Run”
Place your logs in a shady spot outdoors. Ideally, stack them off the ground (on a pallet or bricks).
Timeframe: Wood Ear is slower than Oyster mushrooms. It takes 6–12 months to colonize the log.
Maintenance: If it doesn’t rain for 2 weeks, soak the logs with a hose.
Step 4: Fruiting & Harvest
Wood Ears love cool, wet weather. They will often fruit in the spring and fall rains.
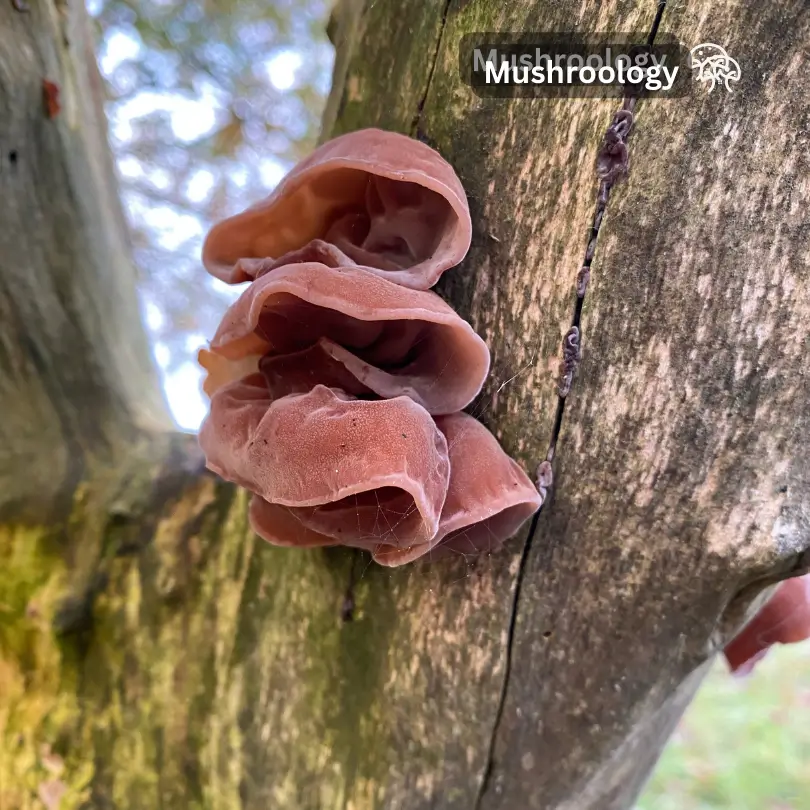
Harvest Sign: They will swell up with water and look like shiny brown jelly.
How to Pick: Twist them off at the base. If they dry out and shrivel on the log, just spray them with water; they will rehydrate and come back to life!
Troubleshooting Your Grow
Use this table to diagnose issues quickly.
The Symptom
The Cause
The Fix
Logs are drying out
Low humidity / Sun exposure
Move to total shade. Soak logs in a tub of water for 12 hours.
Green Mold on logs
Competitor fungus (Trichoderma)
Scrub the mold off with a wire brush. Don’t worry; Wood Ear mycelium is tough.
Mushrooms are tiny/hard
Lack of moisture
They have dried out. Mist heavily or wait for rain.
How to harvest Wood Ear Mushrooms
Whenever I set out to harvest wood ear mushrooms, I make sure they are nicely saturated. Usually, this is after rainfall, which makes harvesting easier and protects the host tree. I find using a sharp knife to cut the stalk where it attaches to the wood cleanly helps ensure the sustainable growth of future batches. And if I do decide to twist them off by hand gently, I’m always careful not to damage the mushroom’s delicate structure.
How to Store Wood Ear Mushrooms
After bringing home my trove of wood ear mushrooms, the next step is ensuring their preservation. I wash them thoroughly first and deal with the question: should I eat them soon or store them for later? Here are the methods I use for storing mushrooms:
Refrigeration: For the mushrooms I plan to use within the week, I place them in the refrigerator in a paper bag. It allows them to ‘breathe’, avoiding moisture accumulation that can lead to spoilage.
Drying: For long-term storage, I dry the mushrooms using a dehydrator until they’re completely moisture-free, then stash them in an airtight container. I’ve found that this method of wood ear mushroom preservation is excellent for maintaining their unique texture and flavor.
Storage Method
How?
Shelf Life
Refrigeration
Store in a paper bag within the fridge to keep fresh.
Up to 1 week
Drying
Dry thoroughly and seal in an airtight container.
Several months
With these methods, I can enjoy the unique texture and potential health perks of wood ear mushrooms throughout the year – an indispensable part of my kitchen arsenal.
Incorporating Wood Ear Mushrooms into Diverse Dishes
When it comes to the culinary uses of wood ear mushrooms, I see them as culinary chameleons, adept at taking on the flavours of accompanying ingredients. Renowned for their gelatinous and crunchy texture, wood ear mushrooms are a go-to ingredient for adding depth to soups, stirring up savory salads, and elevating stir-fries. These mushrooms must be cooked to actualize their full potential, as their raw form is unsuitable for consumption. Here’s a table showcasing a few ways to integrate wood ear mushrooms into your meals.
Dish
Preparation Method
Flavor Pairing
Texture Contribution
Hot and Sour Soup
Simmered
Pepper, Vinegar
Silky and Crunchy
Stir-Fried Vegetables
Flash Fried
Ginger, Soy Sauce
Chewy and Tender
Mixed Green Salad
Rinsed and Tossed
Sesame Oil, Rice Vinegar
Jelly-like and Moist
Delightful Wood Ear Mushroom Recipes to Try
As a food enthusiast who relishes exploring the versatility of mushrooms in the kitchen, I find that wood ear mushrooms, with their unique texture and ability to soak up flavors, are astonishingly adaptable to various gastronomic creations. I’m eager to share some of my favorite wood ear mushroom recipes that are sure to tantalize your palate and add an exotic touch to your dining experience.
Wood Ear Mushroom and Asparagus Salad with Citrus Miso Dressing
One of my go-to recipes is a vibrant wood ear mushroom and asparagus salad drizzled with a citrus miso dressing. The tangy and umami flavours of the dressing perfectly complement the woodsy notes of the mushrooms. This combination not only pleases the taste buds but also packs a nutritional punch. This salad strikes an excellent balance between the hearty texture of wood ear mushrooms and the crisp, green freshness of asparagus, making it an ideal dish for any season.
Cooking Techniques for Maximum Flavor Absorption
I recommend sautéing them with aromatics such as garlic, ginger, and scallions to harness their flavour-absorbing properties fully. This step is crucial for infusing the mushrooms with intense flavors and aromas, ensuring that every bite of your wood ear mushroom dishes is bursting with culinary delight. Whether you’re tossing them into a stir-fry or simmering them in a savory broth, wood ear mushrooms will elevate your cooking to new heights.
FAQ
What exactly is a Wood Ear Mushroom?
Wood ear mushrooms, scientifically known as Auricularia spp., are edible fungi recognized for their ear-like shape. They are widely utilized in Asian cuisine for their chewy texture, even though they lack a strong flavor.
Where and when is the best time to forage for Wood Ear Mushrooms?
You can forage for wood ear mushrooms in the spring and fall, especially after a good rainfall as they become quite prominent. If you’re in a warmer southern area like Zone 7b, you might find them in winter, but they tend not to appear in the summer months.
How can I tell if I’ve found a Wood Ear Mushroom and not a different species?
Wood ear mushrooms have a distinct ear or jellyfish-like shape, a rubbery texture when wet, and can range in color from pale to dark brown. You can also check the spore print; wood ear mushrooms have a white spore print, which is a reliable identification feature.
What’s the safest way to harvest Wood Ear Mushrooms?
To harvest wood ear mushrooms without damaging the tree or fungus, do so when the mushrooms are saturated. Use a sharp knife to slice them at the base or gently pull them from the wood. Always clean them well to remove any debris before using or storing them.
Can I grow my own Wood Ear Mushrooms at home?
Absolutely! You can cultivate wood ear mushrooms by inoculating soaked logs with the mushroom’s spores. Keep the environment moist and shaded, and with some patience, you should see the mushroom fruit within 8-12 months.
What challenges might I face when cultivating wood ear mushrooms?
You may encounter hurdles, such as selecting the right substrate and maintaining an optimal balance of humidity, light, and temperature. Air circulation and avoiding direct light exposure are key to growing healthy mushrooms.
Are Wood Ear Mushrooms good for my health?
Yes, they are! Wood ear mushrooms are known for various medicinal properties, including boosting the immune system and offering potential anti-cancer benefits. However, remember that they should only be eaten cooked, not raw.
How can I use Wood Ear Mushrooms in cooking for the best flavour?
Since wood ear mushrooms absorb flavours well, cook them with aromatic ingredients to enhance the dish. They add great texture and flavor to a variety of dishes, such as soups, salads, and stir-fries.
Do you have any wood ear mushroom recipes I can try?
Definitely! The wood ear mushroom and asparagus salad with a citrus miso dressing are a tasty option. It’s a refreshing way to enjoy wood ear mushrooms. Cooking them with aromatic ingredients helps them take on the delicious flavors of your dish.
⚠️ Harm Reduction & Safety WarningThe following guide is for educational and identification purposes only. Psilocybin mushrooms are illegal in many jurisdictions. Misidentification of wild fungi can lead to fatal poisoning. This site does not encourage the consumption, cultivation, or sale of controlled substances.
If you’re searching for information about types of psychedelic mushrooms, you’ve found the most comprehensive guide available. This scientific resource covers all major psilocybin mushroom species, including detailed identification characteristics, potency levels, and important safety information.
Ever wondered about the fascinating world of psychedelic mushrooms? These natural mind-altering fungi have been used for centuries in spiritual practices and are now gaining renewed attention for their potential benefits.
Small, frail, paper-thin cap, jet black spore print
Psilocybe cyanescens
Wavy Caps
High (0.85-1.7%)
Wavy cap margin, woodchip habitat (urban/parks)
What are psychedelic mushrooms
Psychedelic mushrooms are fungi containing psychoactive compounds, primarily psilocybin and psilocin. Over 200 species across multiple genera produce these compounds, with the Psilocybe genus alone containing over 100 psychoactive species.
Key facts about magic mushroom types:
Effects typically last 4-6 hours
Found on every continent except Antarctica
Greatest diversity in subtropical and tropical regions
Psilocybin content varies from 0.1% to 2.5% by dry weight
Complete list of psilocybin mushroom species by genus
Psilocybe genus – the most common psychedelic mushrooms
The Psilocybe genus contains the most species of psilocybin mushrooms. Here are the major types:
Psilocybe cubensis – “Golden Teacher” and other varieties
Scientific classification: Psilocybe cubensis Common names: Golden Teacher, B+, Penis Envy, Amazonian Potency: 0.6-1.2% psilocybin Habitat: Dung-loving, tropical/subtropical regions Identification:
Cap: 2-8cm, golden-brown to yellowish
Bruising: Blue when damaged
Spore print: Purple-brown to purple-black
Psilocybe cubensis types include over 60 cultivated strains, but they’re all the same species with minor variations in appearance and potency.
Psilocybe semilanceata – Liberty Caps
Potency: 0.8-1.0% psilocybin (higher than cubensis) Habitat: Grassy meadows, not on dung Distribution: Northern Europe, North America Key features:
Distinctive pointed cap (hence “liberty cap”)
Small size (1-2.5cm cap)
Never grows directly on dung
Psilocybe cyanescens – Wavy Caps
Potency: 0.85-1.68% psilocybin Habitat: Wood chips, mulched gardens Notable: Common in Pacific Northwest Identification:
Wavy cap margins when mature
Caramel to chestnut brown color
Strong blue bruising
Psilocybe azurescens – Flying Saucers
Potency: Up to 1.8% psilocybin (most potent psilocybin mushroom) Habitat: Coastal dune grasses, wood debris Range: Oregon/Washington coast Warning: Can cause temporary paralysis at high doses
Other notable Psilocybe species
Psilocybe stuntzii: “Blue Ringers,” urban lawns
Psilocybe mexicana: Historical use by Aztecs, produces sclerotia
Panaeolus – different types of hallucinogenic mushrooms
Are all Panaeolus hallucinogenic? No, but several species are psychoactive:
Panaeolus cyanescens – Blue Meanies
Not to be confused with: Psilocybe cubensis “Blue Meanie” strain Potency: 2.5% psilocybin (extremely potent) Habitat: Tropical, dung-loving Identification:
Small, light-colored caps
Intense blue bruising
Black spore print
Panaeolus cyanescens vs cubensis: Pan cyans are 2-3x more potent than cubensis.
Panaeolus cinctulus – Banded Mottlegill
Potency: 0.5-0.9% psilocybin Distribution: Worldwide, very common Habitat: Lawns, compost, gardens Note: Variable potency, some non-active
Other Panaeolus species
Panaeolus foenisecii: Not hallucinogenic despite rumors
Panaeolus olivaceus: Potentially psychoactive
Panaeolus tropicalis: Active, tropical distribution
Paul Stamets, a legendary mycologist, has been a pivotal figure in studying and advocating Psilocybe mushrooms. His work has led to the discovery of new species, such as Psilocybe stametsii, named in his honour. Stamets’ contributions to the field include extensive research, publications like “Psilocybin Mushrooms of the World,” and efforts in promoting the therapeutic potential of psilocybin.
Other genera containing psychedelic mushroom species
Effects: Known for causing uncontrollable laughter
Pluteus
Pluteus salicinus: Contains psilocybin
Habitat: Dead wood
Identification: Free gills, pink spore print
Amanita muscaria – different type of psychedelic
Important: Not a psilocybin mushroom Active compounds: Muscimol and ibotenic acid Effects: Completely different from psilocybin Safety: More toxic, requires preparation
Psilocybin content by species – potency comparison
Species
Psilocybin %
Psilocin %
Total Active %
Panaeolus cyanescens
2.5
1.2
3.7
Psilocybe azurescens
1.8
0.5
2.3
Psilocybe semilanceata
1.0
0.0
1.0
Psilocybe cyanescens
0.9
0.2
1.1
Psilocybe cubensis
0.6
0.1
0.7
Panaeolus cinctulus
0.5
0.1
0.6
Identification guide for common psychedelic mushrooms
What do psychedelic mushrooms look like?
Universal features of psilocybin mushrooms:
Blue bruising when handled (most reliable indicator)
Dark spore prints (purple-brown to black)
Small to medium size (rarely over 15cm tall)
Psilocybe mushroom identification characteristics
Cap features:
Hygrophanous (changes color when drying)
Often sticky when moist
Usually brown to golden
Stem characteristics:
Often has remnants of veil
Bruises blue when damaged
May have blue-green base
Dangerous look-alikes
Never consume wild mushrooms without expert identification
Deadly species that resemble psilocybin mushrooms:
Galerina marginata: Deadly, grows on wood like P. cyanescens
Conocybe filaris: Contains same toxins as death cap
Cortinarius species: Kidney-destroying toxins
Regional guide to psychedelic mushroom types
North American psilocybe species
Pacific Northwest:
P. cyanescens (most common)
P. azurescens (coastal)
P. stuntzii (urban)
P. baeocystis
Southern US:
P. cubensis (Gulf states)
Panaeolus cyanescens (Florida, Hawaii)
P. caerulescens (rare)
Types of psychedelic mushrooms in Washington state
Washington has high diversity:
P. cyanescens – wood chips
P. stuntzii – lawns
P. baeocystis – conifer mulch
P. semilanceata – mountain meadows
Liberty caps in Oregon
Oregon liberty caps (P. semilanceata) fruit September-December in:
Coastal grasslands
Mountain meadows above 1000ft
Never in forests or on dung
Cultivation information
Can you grow different types of psilocybin mushrooms?
Easily cultivated species:
P. cubensis (all varieties)
P. mexicana
P. tampanensis
Panaeolus cyanescens (advanced)
Difficult/impossible to cultivate:
P. semilanceata
P. azurescens
P. cyanescens (very difficult)
Growing psilocybe cyanescens
Requires:
Hardwood chips
Outdoor bed
Cool temperatures
6-12 months establishment
Safety Profile & Risk Assessment
Disclaimer: The following information is based on current pharmacological research and is for harm reduction education only. It does not constitute medical advice.
1. Physiological Toxicity
Research generally classifies psilocybin as having a low toxicity profile compared to other psychoactive substances.
Lethal Dose: According to a widely cited comparative analysis by Gable (2004), psilocybin has one of the highest “safety ratios” (the gap between an active dose and a lethal dose) of all commonly used drugs, ranking safer than alcohol, tobacco, or caffeine in terms of acute lethal toxicity.
Organ Damage:A 2010 study by Professor David Nutt published in The Lancet ranked magic mushrooms as having the lowest harm score to both the user and others among 20 drugs studied.
The Real Physical Danger: The primary physical risk associated with psilocybin is not the compound itself, but misidentification. Confusing a Psilocybe species with a deadly Galerina or Conocybe species can be fatal.
2. Psychological Risks (“The Bad Trip”)
While physical toxicity is low, psychological risks are significant.
Challenging Experiences:A 2016 study by Johns Hopkins University (Carbonaro et al.) found that while 84% of respondents reported benefiting from their experience, 39% rated a challenging experience as one of the top five most difficult of their lives. These experiences can include intense panic, anxiety, and paranoia.
Psychosis Risk:Clinical guidelines for hallucinogen research (Johnson et al., 2008) strictly exclude individuals with a personal or family history of psychotic disorders (such as schizophrenia or bipolar mania), as psychedelics may trigger or exacerbate latent symptoms in predisposed individuals.
3. Legal Status (2025 Outlook)
Exceptions: In nations like Jamaica, Brazil, and The Netherlands (specifically psilocybin truffles), legal frameworks differ, allowing for consumption in certain contexts.
International: Psilocybin and psilocin are listed as Schedule I substances under the UN Convention on Psychotropic Substances (1971).
United States: Federally, psilocybin remains a Schedule I drug. However, states like Oregon and Colorado have enacted specific regulated access frameworks.
Mushroom identification safety rules
Never eat wild mushrooms without 100% identification
Multiple features must match for positive ID
Spore prints are essential for identification
When in doubt, don’t consume
Frequently asked questions about psychedelic mushroom types
What are the most common psychedelic mushrooms? P. cubensis globally, P. semilanceata in temperate regions, Panaeolus cinctulus in lawns worldwide.
How many types of magic mushrooms are there? Over 200 species across at least 8 genera contain psilocybin or related compounds.
Are shiitake mushrooms psychedelic? No, shiitake mushrooms contain no psychoactive compounds.
What’s the difference between different types of shrooms? Main differences are potency (0.1-2.5% psilocybin), habitat, appearance, and growing region.
Which mushrooms have psilocybin? Primarily Psilocybe species, some Panaeolus, Gymnopilus, Pluteus, and others. Blue bruising is the best indicator.
Are turkey tail mushrooms psychedelic? No, turkey tail mushrooms are medicinal but not psychoactive.
What type of mushrooms are psychedelic? Small to medium gilled mushrooms that bruise blue, primarily from Psilocybe and Panaeolus genera.
Most potent psilocybin mushroom? Psilocybe azurescens (up to 1.8% psilocybin) and Panaeolus cyanescens (up to 2.5%).
Conclusion
This guide covers all major types of psychedelic mushrooms for educational purposes. Remember that these mushrooms are illegal in most places and can be dangerous if misidentified. Never consume wild mushrooms without absolute certainty of identification, and always follow local laws.
Educational disclaimer: This information is provided for academic and harm reduction purposes only. It does not encourage illegal activities or consumption of controlled substances.
Scientific references
Stamets, P. (1996). Psilocybin Mushrooms of the World
Guzman, G. (2005). Species diversity of the genus Psilocybe
Arora, D. (1986). Mushrooms Demystified
Nicholas, L.G. & Ogame, K. (2006). Psilocybin Mushroom Handbook
consumed. Muscimol and ibotenic acid can cause respiratory distress, convulsions, or coma in extreme overdoses.
Tolerance and Addiction
Psilocybin mushrooms are not addictive. After use, the body rapidly builds tolerance, making daily use ineffective. This tolerance typically resets after 1-2 weeks. Classical psychedelics show virtually no addiction potential in drug harm assessments.
Legal Considerations
Possession of psilocybin mushrooms is illegal in many countries (Schedule I in the USA). However, some jurisdictions have decriminalized or legalized them for therapeutic use. Amanita muscaria is not controlled in most places since it doesn’t contain psilocybin.
Always know your local laws to avoid legal trouble.
Lab Work: A homemade Still Air Box (cost me $15 to make).
Level 1: The Absolute Essentials (Start Here)
If you are just starting, do not buy a flow hood. Do not buy an autoclave. You only need these basics.
Setup Level
Est. Cost
Best For
Key Gear Needed
Level 1: Beginner
$50 – $100
Oyster Mushrooms, Kits
Spray Bottle, Bucket, Storage Bin
Level 2: Hobbyist
$150 – $250
Medicinals (Lion’s Mane)
Pressure Cooker (23qt), Monotubs, SAB
Level 3: Automated
$300+
High Yield / Consistency
Martha Tent, Humidifier, Inkbird Controller
1. The Growth Medium (Substrate)
You can’t grow mushrooms on nothing.
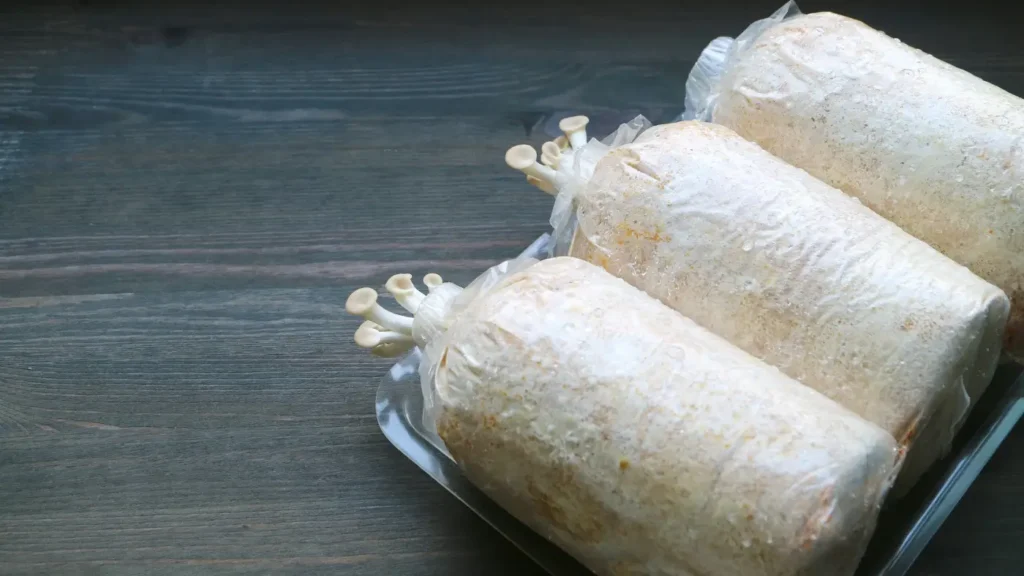
For Wood Lovers (Lion’s Mane, Reishi, Shiitake): They need Hardwood Sawdust.
Floris’s Take: Don’t try to mix your own sawdust blocks yet. Buy Pre-Sterilized Fruiting Blocks. They save you the headache of sterilization while you learn the basics.
Floris’s Take: You can pasteurize straw in a bucket with hot water or hydrated lime. It’s the cheapest way to start.
For Compost Lovers (Button Mushrooms): They need composted manure.
2. The Container (The “House”)
You need to keep humidity high.
Grow Bags: Look for “Filter Patch” bags. The filter allows the mushroom to breathe without letting mold spores in.
Plastic Tubs (Monotubs): A standard clear storage bin (like Sterilite) works wonders.
DIY Tip: Drill 1-inch (2.5 cm) holes along the sides and cover them with Micropore Tape or Polyfill. This allows air exchange without losing humidity.
3. Humidity Control
Mushrooms are 90% water. If they dry out, they die.
Spray Bottle: A fine-mist hairdresser’s spray bottle is better than a standard garden sprayer. It prevents “bruising” the mycelium with heavy droplets.
Hygrometer: A cheap digital gauge to measure humidity. Aim for 80–90% RH (Relative Humidity).
Level 2: The “Serious Hobbyist” Upgrades
This is where the real investment happens. Once you buy these tools, you are no longer dependent on buying kits—you can make everything yourself.
1. The Pressure Cooker (Non-Negotiable)
If you want to make your own grain spawn or sawdust blocks, you must sterilize them. Boiling water is not enough (it only reaches 212°F / 100°C). You need to reach 250°F (121°C) at 15 PSI (1 Bar) to effectively kill mold spores.
The Recommendation:Presto 23-Quart (22 Liter) Induction Compatible Pressure Canner.
Why: Do not buy the smaller 16-quart (15 Liter) versions. They are too small to fit standard spawn bags. The 23-quart fits 7 quart jars or multiple bags perfectly.
2. The Still Air Box (SAB)
You need a sterile place to inoculate your jars.
The Myth: “I need a $1,000 Laminar Flow Hood.”
The Reality: You can make a Still Air Box for $20. Take a large clear plastic storage bin, cut two holes for your arms, and flip it upside down.
Crucial Tip:Do NOT attach gloves to the holes. This creates a “piston effect” that sucks dirty air in when you move your arms. Leave the holes open and move slowly.
3. Mason Jars & Lids
Wide Mouth Quart (1 Liter) Jars: Easier to get grain cakes out of than regular mouth jars.
Modified Lids: Drill a small hole in the metal lid and cover it with micropore tape. This is your gas exchange filter.
Level 3: The Automation Setup
1. The “Martha” Tent
Instead of using bins, you use a small 4-tier greenhouse (often sold for indoor plants).
The Upgrade: You pipe in humidity from an ultrasonic humidifier.
The Controller: You plug the humidifier into a humidity controller (like the Inkbird IHC-200).
Set it and forget it: Set the Inkbird to 85%. When it drops to 80%, the humidifier kicks on. When it hits 90%, it turns off.
2. Temperature Control
Mushrooms create their own heat.
Winter: A seedling heat mat works, but ensure it has a thermostat so you don’t cook your mycelium.
Summer: This is harder. You may need a portable AC unit if your room gets above 80°F (27°C), as high heat invites bacterial contamination.
🍄 How the Automated “Martha” System Works
🌡️
1. The Sensor
Probe inside the tent detects humidity dropping below 85%.
➜
🧠
2. The Controller
Inkbird detects the drop and switches Power ON.
➜
💨
3. The Humidifier
Receives power and pumps cool fog into the Top Port.
If I had to start over with $150, here is exactly what I would buy:
Presto 23qt (22L) Pressure Cooker ($100 – used or on sale)
10x Wide Mouth Quart (1L) Mason Jars ($15)
Rye Berries or Oats (Feed store, $15 for 50lbs/22kg)
Coco Coir Bricks ($10)
Plastic Storage Bin (SAB) ($10)
Everything else (flow hoods, autoclaves, commercial fridges) can wait until you are selling mushrooms for profit.
Looking for Commercial Equipment?
If you are planning to build a commercial farm with walk-in fridges and industrial autoclaves, check out my upcoming guide: [The Guide to Commercial Mushroom Farming Equipment] (Coming Soon).
The content on this page is for educational purposes only and has not been evaluated by the FDA. Mushroom supplements are not intended to diagnose, treat, cure, or prevent any disease. Always consult your doctor before starting new supplements, especially if you are pregnant, nursing, or taking medication (particularly blood thinners or insulin).
Mushroom gummies are convenient, tasty, and easy to take, but the supplement aisle is filled with misleading labels. Many products currently on the shelf contain mostly starch fillers rather than actual mushrooms.
If you are looking to support your focus, energy, or immune system, the difference between a high-quality product and a waste of money often comes down to one detail: Fruiting Body vs. Mycelium.
In this guide, I break down the scientific differences so you can read the label with confidence and choose a product that actually works.
Fruiting Body vs. Mycelium: Understanding the parts
When you buy mushroom gummies, you are getting one of two main parts of the fungal organism.
The Fruiting Body: This is the cap and stem that you see above ground. Think of this like the “apple” on an apple tree.
The Mycelium: This is the root system—a web of tiny threads that grows underground or inside a log. Think of this like the “roots” of the tree.
Why This Difference Matters
Research generally indicates that the fruiting body contains the highest concentration of beta-glucans, the active compounds responsible for many of the immune-supporting benefits of mushrooms.
The Problem with “Mycelium on Grain”
Many mass-market gummies use mycelium that is grown in a lab on bags of rice or oats. Because the mycelium cannot be perfectly separated from the grain it grows on, the final product is often ground up with the grain included.
Fruiting Body Extracts: Typically contain 30–40% beta-glucans.
Mycelium on Grain: Often contains only 5–7% beta-glucans, with up to 40-50% starch (filler).
When you buy a “Mycelium on Grain” product, you are often paying premium prices for expensive rice powder. For the most potent effects, look for products that explicitly state “100% Fruiting Body” on the label.
What Does “10:1 Extract” Mean?
You will often see ratios like “10:1” or “8:1” on gummy bottles. This refers to the concentration of the mushroom powder.
A 10:1 extract means that 10 grams of raw, dried mushrooms were used to create 1 gram of the final extract.
Why do we extract? Raw mushrooms contain chitin, a tough cell wall that the human digestive system struggles to break down.
The Benefit: Hot water or alcohol extraction breaks down this chitin, making the beta-glucans and triterpenoids bioavailable (absorbable) for your body.
Buyer’s Note: A high ratio (like 50:1) isn’t always better if the starting material was low quality. A 1:1 extract of pure organic fruiting body is often better than a 10:1 extract of mycelium-on-grain.
5 Popular Mushrooms Found in Gummies
Different mushrooms are studied for different functional benefits. Here is a quick breakdown of the most common types you will see.
Lion’s Mane is widely studied for its potential to stimulate Nerve Growth Factor (NGF). It is a popular choice for students or professionals looking to support mental clarity and focus without the jitters of caffeine.
Historically known as the “Mushroom of Immortality,” Reishi is an adaptogen often used to support the body’s response to stress. It contains triterpenes, which may help support healthy sleep cycles.
Cordyceps is a favorite among athletes. Studies suggest it may help support the body’s production of ATP (energy) and improve oxygen utilization during exercise.
Turkey Tail is one of the most researched mushrooms in the world regarding immune health. It is rich in Polysaccharide-K (PSK) and Polysaccharide Peptide (PSP), both of which are used to support immune response.
Chaga is dense with antioxidants, which help the body neutralize free radicals and reduce oxidative stress.
How to read the label
Caption: When checking labels, ignore the front marketing text and look strictly at the “Supplement Facts” panel.
The Red Flags to Watch For:
❌ “Mushroom Proprietary Blend”: If a brand hides the exact amount of each mushroom under a “blend,” you have no way of knowing if you are getting a functional dose.
❌ “Mycelial Biomass”: This is the industry term for mycelium grown on grain. It implies high starch content.
❌ “Other Ingredients”: Watch out for high fructose corn syrup or artificial dyes (Red 40) in cheaper gummies.
A Buyer’s Checklist for Mushroom Gummies
Before you buy, run the product through this 4-point check:
Check the Source: Does the label say “Fruiting Body”? If it just says “Mushroom Powder,” proceed with caution.
Check the Dose: Effective doses in studies often range from 500mg to 2000mg. Many gummies only contain 50mg per serving—check the math!
Check for Beta-Glucans: The best brands list the percentage of beta-glucans on the label (e.g., “>25% Beta-glucans”). This guarantees potency.
Third-Party Testing: Look for a seal or QR code that shows the product has been tested for heavy metals and purity.
Final thoughts
Mushroom gummies can be an excellent, tasty way to incorporate functional fungi into your daily routine. However, the quality varies wildly between brands.
By sticking to fruiting body extracts and avoiding “proprietary blends” full of grain filler, you ensure you are getting the real benefits these ancient fungi have to offer.
About the Author
Floris is a mushroom cultivator and researcher with over 10 years of experience in mycology. He has successfully cultivated 15+ species of gourmet and medicinal mushrooms and is passionate about helping beginners navigate the science of fungi.