Discover the Paddy Straw Mushroom
magine walking through misty rice fields at dawn in Southeast Asia. Between stacks of harvested rice straw, small egg-shaped mushrooms peek out. These are paddy straw mushrooms, also called straw mushrooms or Chinese mushrooms. With the scientific name Volvariella volvacea, these mushrooms have been grown for centuries and are treasured for their taste and quick growth.
The story of these mushrooms begins around 1822 in China. Buddhist monks at the Nanhua Temple in Guangdong province discovered they could grow these mushrooms on leftover rice straw to add flavor to their vegetarian meals. The mushrooms became so popular that they were even given as gifts to Chinese royalty!
Today, paddy straw mushrooms are grown throughout East and Southeast Asia. You can find them fresh in local markets or canned and dried in stores worldwide. They’re a key ingredient in many Asian dishes, from Chinese stir-fries to Thai tom yum soup.
Why Paddy Straw mushrooms matter?
These mushrooms are important for several reasons:
- They turn farm waste (rice straw) into valuable food
- They grow quickly, providing income for farmers
- They’re nutritious and may have health benefits
- They help reduce pollution by using straw that might otherwise be burned
China produces about 80% of the world’s paddy straw mushrooms, with thousands of tons harvested annually. But they’re also grown by small farmers across Asia who use them to earn extra money between rice seasons.
The biology of paddy straw mushrooms
Paddy straw mushrooms are saprotrophic, which means they feed on dead plant material. In nature, they break down rice straw, banana leaves, oil palm fiber, and even water hyacinth.
The mushroom’s main body is a white network called mycelium that spreads through the straw. This mycelium produces special enzymes that break down tough plant fibers, turning them into food for the fungus.
Life cycle of Paddy Straw Mushrooms
The life cycle of paddy straw mushrooms follows these steps:
- Microscopic spores released from mature mushrooms land on damp straw
- Spores germinate into thin mycelial threads
- Mycelium grows through the straw, digesting it
- Small round “buttons” form, covered by a protective veil
- The veil splits open, revealing the mushroom cap and stem
- Mature mushrooms release new spores, starting the cycle again
From spore to mature mushroom takes just 4-5 weeks, making them one of the fastest-growing mushrooms. Once the mycelium fills the straw, mushrooms appear within 4-5 days!
Growing conditions of Paddy Straw mushrooms
Paddy straw mushrooms love warm weather. They grow best at temperatures between 28°C and 35°C (82°F-95°F), earning them the nickname “warm mushrooms.” If temperatures drop below 20°C (68°F), growth slows down significantly.
They also need high humidity (around 80% or more) and some air circulation. While they don’t need direct sunlight, a little ambient light helps trigger mushroom formation.

How to Grow Paddy Straw Mushrooms: A Step-by-Step Guide
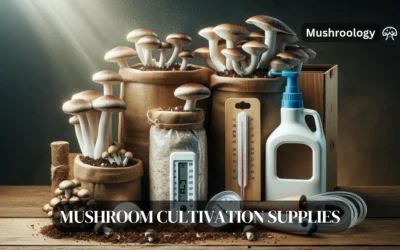
What you’ll need
- Clean rice straw
- Paddy straw mushroom spawn (mycelium)
- Water
- Transparent plastic sheet
- Raised platform for the mushroom bed
1. Straw:
Choose clean, dry, and pesticide-free straw. Rice or wheat straw are ideal due to their readily digestible cellulose content. Other options like oat straw or barley straw can also work, but may require slightly longer soaking times.
Aim for approximately 1 kg (2.2 lbs) of straw for a single cultivation cycle. This amount can be adjusted based on the size of your container and desired yield.
2. Paddy straw mushroom spawn (mycelium):
Purchase high-quality Volvariella volvacea spawn from a reputable supplier. This ensures you’re getting the specific fungal strain suitable for growing straw mushrooms.
Spawn typically comes in various forms like grain spawn or sawdust spawn. Both options work well, but grain spawn may colonize the straw slightly faster due to its readily available nutrients.
Generally, a spawn-to-substrate ratio of 1:10 is recommended. For 1 kg (2.2 lbs) of straw, you’ll need around 100 g (3.5 oz) of spawn.
3. Container:
Choose a large container with good ventilation to allow for air circulation and prevent moisture buildup. Plastic tubs, buckets, or even large grow bags with ventilation holes can work well.
The size of the container will depend on the amount of straw you’re using. Aim for a container that can comfortably hold the straw without being crammed, allowing for some space for air circulation. A 50 L (13 gallons) container is a good starting point for 1 kg (2.2 lbs) of straw.
4. Hydrated Lime:
Adding hydrated lime (calcium hydroxide) to the soaking water helps regulate the pH level of the straw, creating a slightly alkaline environment that favors the growth of Volvariella volvacea while suppressing potential contaminants.
Use approximately 50 g (1.75 oz) of hydrated lime per liter (gallon) of water during the soaking process.
5. Spray Bottle:
A clean spray bottle filled with water will be essential for maintaining humidity inside the container throughout the growing process.
6. Thermometer:
Monitoring the temperature is crucial for optimal mushroom growth. A thermometer will help you ensure the environment stays within the ideal range for Volvariella volvacea (25-30°C / 77-86°F).
Optional Equipment:
- Gloves: Wearing gloves while handling the straw and spawn can help maintain hygiene and prevent contamination.
- Heat Mat: If you struggle to maintain consistent warm temperatures, a heat mat placed underneath the container can provide supplemental warmth.
Additional Considerations:
- Water quality: Use clean, chlorine-free water for soaking the straw and maintaining humidity.
- Lighting: Straw mushrooms do not require direct sunlight. Avoid exposing the container to bright light, as this can inhibit growth.
Step-by-Step Instructions for Growing Straw Mushrooms
Growing straw mushrooms at home involves a straightforward process, but following each step carefully is crucial for successful cultivation. Here’s a detailed guide with scientific explanations for each step:
1. Prepare the Straw:
- Chopping: Cut the straw into small pieces, ideally between 3-5 cm (1-2 inches) in length. This size provides optimal surface area for efficient fungal colonization while maintaining good air circulation within the substrate.
- Soaking: Submerge the chopped straw in a large container filled with lukewarm water (around 30°C / 86°F) for 24-48 hours. This process hydrates the straw, making it easier for the fungal mycelium to colonize and absorb nutrients.
- Adding Hydrated Lime: During soaking, add approximately 50 g (1.75 oz) of hydrated lime per liter (gallon) of water. The slightly alkaline environment created by lime helps suppress the growth of competing bacteria and fungi while favoring the growth of Volvariella volvacea.
- Draining: After the soaking period, thoroughly drain the straw using a colander or mesh sieve. Squeeze out excess water gently, aiming for the straw to be moist but not dripping. Excessive moisture can lead to contamination and hinder fungal growth.
2. Pasteurization (Optional):
- Purpose: Pasteurization is an optional step that helps eliminate potential contaminants like bacteria and mold spores that may be present in the straw. While not strictly necessary for all situations, it can improve the chances of successful cultivation, especially for beginners.
- Methods: There are two common methods for pasteurizing straw:
- Submersion: Bring a large pot of water to a boil. Place the straw in a heat-resistant mesh bag or colander and submerge it in the boiling water for 1-2 hours. Maintain a rolling boil throughout the process.
- Steaming: Spread the straw on a baking sheet and steam it for 1-2 hours using a steamer or pot with a steamer basket. Ensure adequate steam is generated and reaches all parts of the straw.
- Cooling: After pasteurization, allow the straw to cool completely before proceeding to inoculation. This typically takes several hours.
3. Inoculate the Straw:
- Spreading the Straw: Evenly distribute the cooled and prepped straw in the chosen container. Aim for a loose and fluffy arrangement to allow for proper air circulation and prevent compaction.
- Adding Spawn: Break up the mushroom spawn into small pieces and sprinkle it evenly over the surface of the straw. Ensure good distribution throughout the substrate.
- Mixing: Gently mix the top layer of straw with the spawn, incorporating it slightly without disturbing the overall structure of the substrate. This ensures close contact between the spawn and the straw, facilitating fungal colonization.
4. Create a Humid Environment:
- Covering: Cover the container loosely with a plastic bag or cloth that allows for some air exchange. This helps trap moisture inside and maintain high humidity levels necessary for fungal growth.
- Misting: Regularly mist the inside of the container with clean water using the spray bottle. Aim for a fine mist that creates a humid environment without saturating the straw.
5. Maintain Ideal Conditions:
- Temperature: Place the container in a warm location with temperatures between 25-30°C (77-86°F). This temperature range is optimal for the growth of Volvariella volvacea. If needed, use a heat mat placed underneath the container to maintain consistent warmth.
- Humidity: Monitor the humidity level inside the container and maintain it around 80-90% by misting regularly and adjusting the ventilation as needed. Too much humidity can lead to mold growth, while insufficient moisture can hinder fungal development.
- Lighting: Avoid exposing the container to direct sunlight. Straw mushrooms do not require light for growth and may even be inhibited by excessive light exposure.
6. Incubation and Fruiting:
- Mycelial Colonization: Allow the container to remain undisturbed for 7-10 days. During this incubation period, the fungal mycelium will colonize the straw, spreading throughout the substrate as white threads become visible.
- Fruiting Body Formation: Once the straw is fully colonized, small pinheads will begin to form on the surface, indicating the initiation of fruiting body development. This typically takes another 3-5 days.
7. Harvest and Enjoy:
- Maturity: Harvest the mushrooms when the caps are fully expanded but before the veil breaks (the thin membrane connecting the cap to the stem). This ensures optimal flavor and texture.
- Harvesting Technique: Gently twist the mushrooms at the base to detach them from the substrate. Avoid pulling or cutting, as this can damage
Tips for success in growing Paddy Straw Mushrooms
Following the outlined steps is crucial, but incorporating these additional tips can significantly enhance your chances of cultivating healthy and abundant straw mushrooms:
Maintaining Optimal Conditions:
- Consistent Humidity: Fluctuating humidity levels can stress the mycelium and hinder fruiting. Aim for consistent moisture levels around 80-90% throughout the cultivation process. Monitor humidity regularly and adjust misting frequency or ventilation as needed.
- Proper Air Circulation: While maintaining humidity is important, stagnant air can promote mold growth. Ensure the container has adequate ventilation holes to allow for some air exchange. Briefly remove the cover for a few minutes daily to refresh the air, especially during fruiting.
- Temperature Control: Volvariella volvacea thrives in warm temperatures. Maintain consistent temperatures between 25-30°C (77-86°F) throughout the process. If using a heat mat, ensure it doesn’t directly touch the container to avoid overheating the substrate.
Hygiene and Sanitation:
- Cleanliness: Wash your hands thoroughly before handling the straw, spawn, and mushrooms. This helps prevent contamination from introducing unwanted bacteria or fungi.
- Sterilization: Consider sterilizing the container and tools used in the process with a diluted bleach solution or rubbing alcohol before use. This further minimizes the risk of contamination.
Additional Tips:
- Spawn Quality: Choose high-quality, fresh spawn from a reputable supplier. This ensures the viability of the fungal spores and increases the chances of successful colonization.
- Avoiding Direct Sunlight: While light is not necessary for growth, Volvariella volvacea can be sensitive to direct sunlight. Keep the container in a shaded location or covered to prevent potential negative effects.
- Monitoring and Observation: Regularly check the container for signs of mold growth, which appears as fuzzy patches of different colors. If mold is present, isolate and discard the contaminated material immediately to prevent further spread.
- Multiple Flushes: After the initial harvest, the straw may produce additional flushes of mushrooms over a period of several weeks. Continue maintaining optimal conditions and harvesting as new mushrooms appear.
- Spent Substrate: Once fruiting has ceased, discard the spent straw and thoroughly clean the container before starting a new cultivation cycle.
By following these tips and paying close attention to the details throughout the process, you can create a favorable environment for your straw mushrooms to thrive and enjoy a rewarding harvest of delicious and nutritious homegrown fungi.
Common challenges and solutions
Contamination
Problem: Other fungi or molds invade the straw bed.
Solution: Use clean straw and work in a clean area. Keep the temperature high (around 35°C/95°F) during incubation to suppress molds. If you see unwanted mold patches, remove that part of the bed.
Pests
Problem: Insects or mites attack the mushrooms.
Solution: Cover the growing area with mesh screens. Keep the area clean by removing old mushrooms and debris. Some growers create light smoke from burning organic material to keep insects away.
Climate issues
Problem: Temperature gets too low or rain soaks the bed.
Solution: In cool weather, insulate the bed or move it to a warm place. In rainy conditions, provide drainage and cover the bed with a roof or tarp.
Nutritional Benefits of Paddy Straw Mushrooms
Paddy straw mushrooms are packed with nutrients while being low in calories and fat. Here’s what makes them nutritious:
Protein Powerhouse
A cup of straw mushrooms (about 150 grams) contains 6-7 grams of protein. When dried, they’re 20-30% protein by weight—similar to soybeans or meat! They contain all the essential amino acids humans need.
Vitamins and Minerals
These mushrooms provide:
- B vitamins (folate, riboflavin, niacin)
- Selenium (a powerful antioxidant)
- Potassium (for heart and muscle function)
- Phosphorus
- Iron (for red blood cell production)
- Zinc
A 100-gram serving provides about half the recommended daily selenium intake.
Heart-Healthy Profile
Paddy straw mushrooms are low in sodium and contain no cholesterol. The small amount of fat they do have is mostly unsaturated fatty acids, which are good for heart health.
Health benefits and medicinal properties of paddy straw mushrooms
Beyond basic nutrition, paddy straw mushrooms contain compounds with potential health benefits:
Antioxidant Effects
The mushrooms contain substances that help neutralize harmful free radicals in the body. This may help protect cells from damage.
Immune System Support
Research shows that polysaccharides and peptides in paddy straw mushrooms may help regulate the immune system.
Anti-inflammatory Properties
Some compounds in these mushrooms appear to reduce inflammation.
Potential Anti-cancer Effects
Laboratory studies suggest that certain mushroom extracts may have anti-tumor activity, though more research is needed.
Blood Pressure Benefits
Early research indicates that some compounds in paddy straw mushrooms may help lower blood pressure.
While most of these findings come from lab studies, they support the traditional belief that mushrooms are “health foods” with benefits beyond basic nutrition.
FAQs about Growing Straw Mushrooms:
1. What type of straw is best for growing straw mushrooms?
Answer: Rice straw or wheat straw are ideal choices due to their readily digestible cellulose content. Other options like oat straw or barley straw can also work, but may require slightly longer soaking times.
2. Where can I buy mushroom spawn for growing straw mushrooms?
Answer: You can purchase high-quality Volvariella volvacea spawn from reputable online mushroom suppliers or specialty gardening stores.
3. What is the ideal temperature for growing straw mushrooms?
Answer: The optimal temperature range for Volvariella volvacea is between 25-30°C (77-86°F). If needed, use a heat mat to maintain consistent warmth.
4. How often should I mist the container during cultivation?
Answer: Misting frequency depends on humidity levels. Aim to maintain consistent moisture around 80-90%. Mist regularly as needed to create a humid environment without saturating the straw.
5. How long does it take for straw mushrooms to grow?
Answer: It typically takes around 7-10 days for the mycelium to colonize the straw, followed by another 3-5 days for fruiting bodies to form. The entire process from inoculation to harvest can take 2-3 weeks.
6. How many flushes of mushrooms can I expect from one batch of straw?
Answer: Under optimal conditions, you can typically harvest multiple flushes of mushrooms over a period of several weeks. The number of flushes can vary depending on various factors like spawn quality and environmental conditions.
7. What do I do with the spent straw after harvesting?
Answer: Once fruiting has ceased, discard the spent straw and thoroughly clean the container before starting a new cultivation cycle. You can compost the spent straw as it can still contain some nutrients beneficial for plants.
8. Can I eat straw mushrooms raw?
Answer: It’s generally not recommended to eat straw mushrooms raw. Cooking helps ensure their safety and digestibility. They can be enjoyed in various cooked dishes like stir-fries, soups, or omelets.
9. What are the health benefits of straw mushrooms?
Answer: Straw mushrooms are low in calories and fat and a good source of protein, dietary fiber, vitamins, and minerals. They also contain unique bioactive compounds with potential anti-inflammatory and antioxidant properties.
10. Is growing straw mushrooms difficult?
Answer: Growing straw mushrooms is considered a relatively easy and beginner-friendly option compared to other mushroom varieties. By following proper procedures and maintaining suitable conditions, you can successfully cultivate these delicious fungi at home.