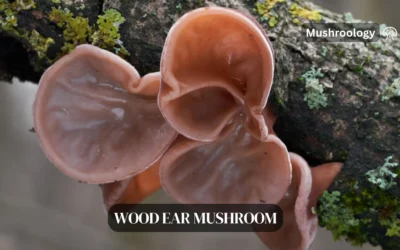
The Humble Button Mushroom
Button mushrooms (Agaricus bisporus) are the unsung heroes of the culinary world and a perfect entry point for mushroom growing enthusiasts. These small white fungi are not only the most commercially cultivated mushrooms globally but also one of the most accessible species for home growers to master.
Whether you’re a complete beginner or have some experience with other fungi, this comprehensive guide will walk you through everything you need to know about growing these versatile mushrooms at home.
What makes Button Mushrooms special?
Button mushrooms are the same species as cremini and portobello mushrooms—they’re just harvested at different stages of maturity. These mushrooms offer:
- Beginner-friendly cultivation: Relatively forgiving for new growers
- Consistent yields: With proper care, they produce multiple flushes
- Versatility in the kitchen: From salads to stir-fries, these mushrooms enhance countless dishes
- Impressive nutrition: Low in calories yet high in protein, B vitamins, and minerals
- Year-round growing potential: Can be cultivated indoors regardless of season
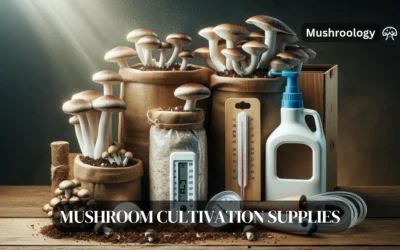
Essential Equipment for growing Button Mushrooms
To successfully grow button mushrooms indoors, you’ll need:
- Temperature control system: Button mushrooms prefer 60-65°F (15-18°C) during fruiting
- Humidity monitoring tools: Hygrometers are essential as mushrooms require 80-90% humidity
- Proper ventilation equipment: Fresh air exchange prevents CO₂ buildup and contaminants
- Lighting setup: Indirect, diffused lighting works best
- Sterilization tools: Pressure cooker or autoclave for substrate preparation
- pH testing kit: Aim for slightly alkaline conditions (pH 7-7.5)
Personal tip: I’ve found that a small indoor greenhouse tent with a humidifier works wonders for maintaining perfect conditions without modifying your entire room.
The complete cultivation process for Button Mushrooms
1. Substrate Preparation
Button mushrooms require a nutrient-rich growing medium. Unlike oyster mushrooms that can grow on simple materials like straw, button mushrooms need a more complex substrate.
Traditional compost recipe:
- 40% fresh horse manure (primary nitrogen source)
- 40% wheat straw (carbon source and structure)
- 10% chicken manure (nitrogen boost)
- 5% gypsum (calcium source and pH adjuster)
- 5% agricultural lime (pH adjuster)
Phase I Composting
This initial decomposition process breaks down raw materials and kills competing organisms:
- Mix all ingredients thoroughly, adding water until 65-70% moisture content is reached
- Form a pile approximately 3ft high by 4ft wide
- Turn the pile every 2-3 days to ensure even decomposition
- Monitor internal temperature (should reach 160°F/71°C to kill pathogens)
- Continue this process for 14-21 days until the compost darkens and becomes pliable
Phase II Pasteurization
This critical step eliminates ammonia and unwanted microorganisms:
- Place compost in trays or containers 6-8 inches deep
- Heat to 140°F (60°C) for 2 hours to kill insects and pests
- Reduce temperature to 126°F (52°C) for 8-10 hours to eliminate harmful bacteria
- Allow temperature to gradually drop to 75-80°F (24-27°C)
Troubleshooting tip: If your compost smells strongly of ammonia after Phase II, it’s not ready. Continue conditioning until the ammonia smell dissipates.
2. Spawn Selection and Inoculation
Types of Spawn
Spawn is essentially the mushroom “seed” material. For button mushrooms, options include:
- Grain spawn: Typically rye or millet colonized by mushroom mycelium
- Sawdust spawn: Hardwood sawdust blocks colonized by mycelium
- Plug spawn: Wooden dowels colonized by mycelium (less common for button mushrooms)
For beginners, grain spawn is recommended as it colonizes compost more efficiently.
Inoculation Techniques
- Allow compost to cool to 75°F (24°C) before introducing spawn
- Break spawn into small pieces to distribute evenly
- Mix thoroughly using the rate of 1lb spawn per 15-20lbs compost
- Pack inoculated compost into trays or containers
- Cover loosely with clean plastic to maintain humidity
Personal experience: When I first started growing, I tried to save money by using less spawn. Big mistake! Adequate spawn ensures faster colonization, reducing contamination risk.
3. Spawn run (Mycelium Development)
This is where patience becomes crucial:
- Maintain temperature at 75-78°F (24-25°C)
- Keep relative humidity at 85-90%
- Ensure minimal light exposure
- Allow 14-21 days for complete colonization
- Monitor for even white mycelial growth throughout the substrate
During this time, the mycelium creates a network throughout the compost, digesting nutrients and preparing for fruiting.
4. Apply the casing layer
The casing layer is what triggers button mushrooms to form pins and fruit bodies:
Traditional Casing Mix:
- 80% sphagnum peat moss (pasteurized)
- 20% limestone or calcium carbonate
- Water to reach field capacity (when squeezed, a few drops emerge)
Application Process:
- Apply a 1-1.5 inch layer evenly across colonized compost
- Lightly pat down but don’t compact
- Mist with water to maintain moisture
- Maintain at 75°F (24°C) for 5-7 days until mycelium begins to appear in casing
Insight from commercial growers: Adding a small amount of activated charcoal to your casing mix can help prevent diseases and improve moisture retention.
5. Pinning and fruiting conditions of Button Mushrooms
This is when visible mushroom formation begins:
- Drop temperature to 60-65°F (15-18°C)
- Maintain high humidity (85-95%)
- Introduce indirect light (12 hours on/off cycle)
- Increase fresh air exchange
- Mist casing layer lightly to prevent drying out
You’ll notice small white dots (pins) forming within 7-14 days after casing. These will develop into harvestable button mushrooms over the next week.
6. Harvesting your Button Mushrooms
Proper harvesting ensures maximum yield and quality:
- Harvest when caps are firm and closed, before the veil breaks
- Gently twist and pull entire mushroom from substrate
- Use a sharp knife to cut at base if twist method causes damage
- Handle gently to prevent bruising
- Harvest daily as mushrooms mature at different rates
Expected Yields: A well-managed indoor cultivation setup can produce approximately 5-7lbs of button mushrooms per square foot over three flushes.
7. Multiple Flush Management
Button mushrooms typically produce 3-4 flushes (harvests) from a single substrate:
- After first harvest, lightly mist casing layer
- Return to fruiting conditions
- Wait 7-10 days for next flush to appear
- Expect diminishing yields with each subsequent flush
- Discard substrate after 3-4 flushes or when yields become minimal
Common Cultivation Challenges
Pest Management
The most common pests affecting indoor button mushroom cultivation:
- Fungus gnats: Tiny flying insects that lay eggs in the substrate
- Solution: Yellow sticky traps and reducing excess moisture
- Mites: Microscopic arthropods that feed on mycelium
- Solution: Maintain proper air circulation and humidity levels
- Nematodes: Microscopic worms that damage mycelium
- Solution: Proper pasteurization of all growing materials
Disease Prevention
Common diseases that affect button mushrooms:
- Green mold (Trichoderma): Fast-growing green fungus that competes with mushroom mycelium
- Prevention: Proper sterilization and clean cultivation practices
- Wet bubble (Mycogone): Causes deformed, wet-looking mushrooms
- Prevention: Strict hygiene, proper air circulation
- Dry bubble (Verticillium): Creates dry, cracked caps
- Prevention: Maintain proper humidity and avoid temperature fluctuations
- Bacterial blotch: Brown spots on caps
- Prevention: Avoid over-watering, ensure good air circulation
From experience: The best defense against all these issues is prevention through cleanliness. I keep a dedicated set of clothes for mushroom work and always shower before entering my grow room.
Advanced cultivation techniques for Button Mushrooms
Temperature Manipulation for Higher Yields
Research from Pennsylvania State University shows that a cold shock (dropping temperature to 50°F/10°C for 12 hours) can trigger more uniform fruiting in button mushrooms.
Controlled CO₂ Levels
Commercial growers maintain CO₂ levels between 800-1000ppm during fruiting. While hobbyists may not need CO₂ monitors, ensuring regular fresh air exchange helps manage CO₂ buildup.
Supplementing Substrate
Adding nitrogen supplements like soybean meal (1-2% by weight) to the substrate after Phase II composting can increase yields by 15-25% according to studies from the Mushroom Research Center.
Tips for Success
- Start small: Begin with 1-2 trays until you understand the process
- Keep detailed records: Track temperature, humidity, and results to improve
- Practice patience: Mushroom cultivation rewards methodical growers
- Join communities: Connect with other growers online to share experiences
- Experiment gradually: Once you master basics, try different techniques
Sources and Further Reading
This guide synthesizes information from several authoritative sources:
- Paul Stamets’ “The Mushroom Cultivator” (Ten Speed Press)
- Pennsylvania State University’s Mushroom Research Center publications
- The American Mushroom Institute’s cultivation guidelines
- Journal of Agricultural and Food Chemistry research on Agaricus bisporus
- Commercial cultivation practices from mushroom farms in Pennsylvania and the Netherlands
Happy growing! There’s nothing quite like watching your first pin set emerge from the casing layer. With patience and attention to detail, you’ll soon be enjoying the fruits of your mycological labor!
Frequently Asked Questions
1. How long does it take from start to harvest for button mushrooms?
Answer: The entire process from substrate preparation to first harvest typically takes 8-10 weeks. This includes approximately 2-3 weeks for composting, 2-3 weeks for spawn run, 1-2 weeks for casing colonization, and 2-3 weeks for fruiting. Subsequent flushes will appear every 7-10 days after the previous harvest.
2. Can I grow button mushrooms without manure?
Answer: Yes, though yields may be lower. Alternative substrates include:
- Straw-based compost supplemented with cottonseed meal
- Commercial mushroom growing kits that use pre-composted substrates
- Synthetic compost utilizing agricultural byproducts like spent brewery grains
These alternatives are especially useful for indoor growers concerned about odors. However, traditional manure-based compost typically produces the highest yields due to its nutrient profile.
3. Why do my button mushrooms develop brown spots?
Answer: Brown spots on button mushrooms usually indicate bacterial blotch, which is caused by:
- Excessive moisture on mushroom caps
- Poor air circulation
- Watering directly onto developing mushrooms
- Pseudomonas bacteria contamination
To prevent this, improve ventilation, water only the casing layer (not the mushrooms), and maintain clean growing conditions. If brown spots appear, harvest affected mushrooms immediately to prevent spread.
4. Do I need a special strain of button mushroom for indoor growing?
Answer: While wild Agaricus bisporus strains exist, commercial cultivation strains have been selectively bred for indoor growing conditions. For best results, purchase spawn from reputable suppliers that offer strains specifically developed for home cultivation. These strains typically have better resistance to common diseases and are adapted to perform well in controlled indoor environments.
5. Is a casing layer absolutely necessary for button mushrooms?
Answer: Yes, unlike some other mushroom species, button mushrooms (Agaricus bisporus) absolutely require a casing layer to fruit properly. The casing layer:
- Creates a microclimate that initiates pinning
- Maintains moisture levels critical for fruiting
- Provides a protective barrier for developing mushrooms
- Contains beneficial microorganisms that stimulate fruiting
Without a proper casing layer, the mycelium may fully colonize the substrate but fail to produce mushrooms or produce very poor yields.
6. Can I reuse the substrate for another batch of mushrooms?
Answer: After 3-4 flushes, the substrate is generally depleted of nutrients and should not be used for another batch of button mushrooms. However, it has several valuable uses:
- As a soil amendment for garden beds (fully composted spent substrate is excellent for plants)
- To grow outdoor garden mushrooms in summer months (placed in shaded areas)
- As a component (10-20%) in new compost batches
The substrate should be thoroughly pasteurized again before any reuse to eliminate potential disease organisms.
7. How do I know if my substrate is properly colonized before applying the casing layer?
Answer: A properly colonized substrate will show these signs:
- Even, white mycelial growth throughout the entire substrate
- A slightly sweet, mushroom-like smell (no ammonia or sour odors)
- The substrate holds together when gently handled
- Temperature stabilized (no more heat generation from composting)
If you observe uncolonized patches, allow more time before casing. Rushing to case before full colonization increases contamination risks and reduces yields.
8. What is the ideal room size for a home button mushroom operation?
Answer: For a hobbyist or small-scale grower, a dedicated space as small as 6′ x 6′ (36 square feet) can be sufficient to produce 5-10 pounds of mushrooms weekly. This space should accommodate:
- Growing shelves for 4-6 standard trays (16″ x 24″)
- Work area for preparation and harvesting
- Storage for supplies
- Room for air circulation equipment
Temperature-controlled basements or spare rooms work well. The space should allow for easy cleaning and have access to electricity for temperature/humidity control systems.
9. How do I prevent contamination in my mushroom growing area?
Answer: Contamination prevention is critical for successful cultivation:
- Designate clean clothes and footwear for your growing area
- Install a HEPA air purifier to reduce airborne contaminants
- Clean all surfaces with 70% isopropyl alcohol before working
- Work with spawn in still air (avoid drafts and ventilation during inoculation)
- Use a face mask to prevent breathing onto sterile materials
- Consider using UV sterilization lamps when the growing area is unoccupied
- Maintain a positive pressure environment if possible (air flows out, not in)
Remember that prevention is much easier than treating contamination once it appears.
10. Can I grow white and brown button mushrooms (cremini) using the same method?
Answer: Yes, white button mushrooms and brown button mushrooms (cremini) are the same species (Agaricus bisporus) with different strain characteristics. The cultivation process is identical for both varieties. The main differences are:
- Brown varieties typically have a slightly stronger flavor
- Some brown strains may be more resistant to certain diseases
- Brown varieties often command higher market prices
- White varieties tend to show contamination more visibly
You can even grow both varieties simultaneously using the same methods, equipment, and growing conditions