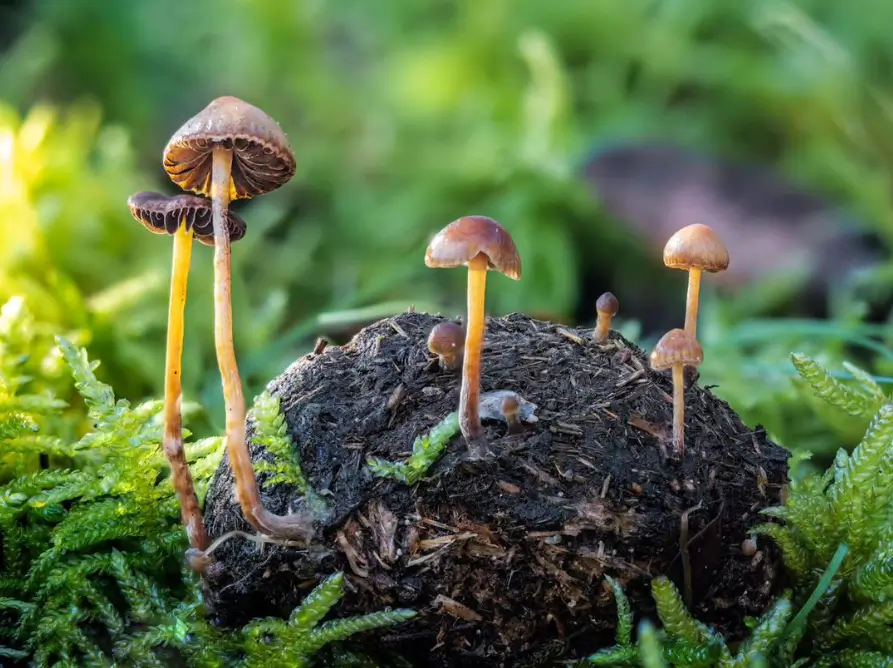
Psilocybin mushrooms, commonly known as magic mushrooms or shrooms, are fungi containing the psychoactive compound psilocybin. This comprehensive guide explores the science, history, effects, and current research surrounding these fascinating organisms from a strictly educational perspective.
What are psilocybin mushrooms?
Psilocybin mushrooms are fungi that naturally produce psilocybin and psilocin, compounds that can alter perception, mood, and cognitive processes. Over 200 species of mushrooms contain psilocybin, with the most common belonging to the genus Psilocybe.
Key species of psilocybin mushrooms
Most researched species:
Psilocybe cubensis: Most widely cultivated, contains 0.63% psilocybin
Psilocybe semilanceata (Liberty Caps): Found in grassy areas, 0.98% psilocybin
Psilocybe azurescens: Most potent, up to 1.78% psilocybin
Psilocybe cyanescens (Wavy Caps): Common in urban areas, 0.85% psilocybin
Psilocybe mexicana: Historical use by indigenous peoples, 0.6% psilocybin
Important note: This information is for educational purposes only. The cultivation, possession, and use of psilocybin mushrooms is illegal in most jurisdictions.
Instagram @sergio_donamaria
How psilocybin works in the brain
The neuroscience of psilocybin
When consumed, psilocybin is converted to psilocin in the body through a process called dephosphorylation. Here’s what happens:
Serotonin receptor activation: Psilocin primarily binds to 5-HT2A serotonin receptors
Neural connectivity changes: Brain imaging shows increased communication between normally disconnected brain regions
Default Mode Network suppression: The brain’s “ego center” becomes less active
Neuroplasticity enhancement: Promotes formation of new neural connections
Timeline of psilocybin effects
Typical progression:
20-40 minutes: Onset of effects
60-90 minutes: Peak intensity
3-6 hours: Total duration
24-48 hours: Integration period
Factors affecting duration:
Dosage amount
Individual metabolism
Stomach contents
Species potency
Historical and cultural significance
Ancient use of psilocybin mushrooms
Archaeological evidence suggests psilocybin mushroom use dates back thousands of years:
9000 BCE: Rock art in North Africa depicting mushroom imagery
1500 BCE: “Mushroom stones” found in Guatemala and Mexico
500 BCE – 900 CE: Extensive use by Maya and Aztec civilizations
Aztec terminology: “Teonanácatl” meaning “flesh of the gods”
Modern rediscovery
Key timeline:
1957: R. Gordon Wasson publishes Life Magazine article on Mexican mushroom ceremonies
Are psilocybin mushrooms addictive? No, psilocybin mushrooms are not considered physically addictive. They don’t cause withdrawal symptoms and actually have anti-addictive properties being studied for treating other addictions.
How long do psilocybin mushrooms stay in your system? Psilocin is typically eliminated within 24 hours. Standard drug tests don’t screen for psilocybin, though specialized tests can detect it for up to 3 days.
What’s the difference between psilocybin and psilocin? Psilocybin is the prodrug found in mushrooms. When consumed, it’s converted to psilocin, which is the active compound that affects the brain.
Can psilocybin mushrooms be lethal? The lethal dose is extremely high – estimated at 1,000 times the effective dose. No verified deaths from psilocybin toxicity alone have been documented.
What’s microdosing? Taking sub-perceptual doses (typically 0.1-0.3g) on a regular schedule. While popular, scientific evidence for benefits remains limited.
Conclusion
Psilocybin mushrooms represent a fascinating intersection of nature, neuroscience, and human consciousness. While they remain illegal in most jurisdictions, the growing body of research suggests significant therapeutic potential. As our understanding evolves and policies potentially shift, these remarkable fungi may play an important role in mental health treatment.
Disclaimer: This article is for educational and informational purposes only. It does not encourage or condone illegal activities. Always comply with local laws and regulations. If you’re struggling with mental health issues, please consult qualified healthcare professionals.
Resources for further learning
Scientific journals and databases:
Journal of Psychopharmacology
Psychopharmacology
MAPS (Multidisciplinary Association for Psychedelic Studies)
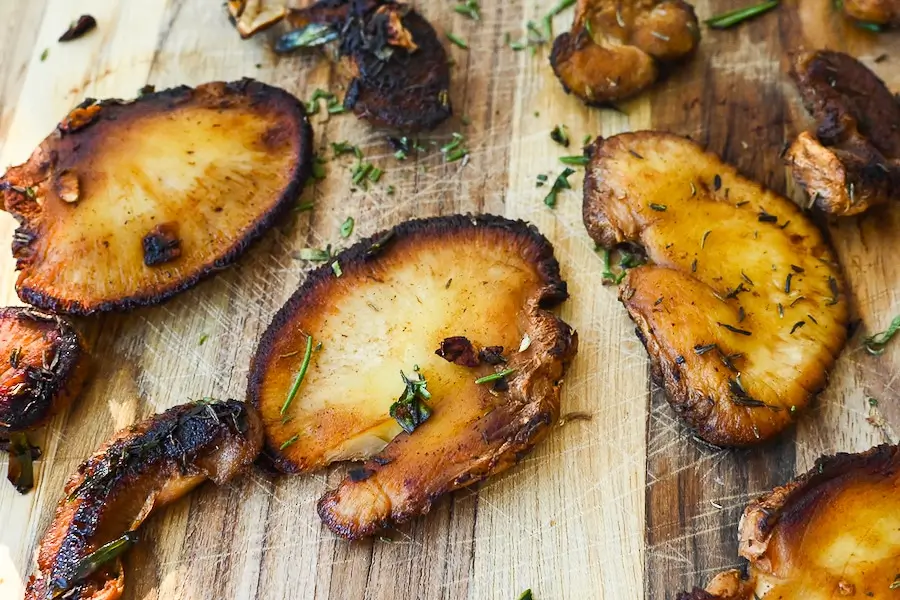
Why Mushroom Meat Substitutes Are Taking Over the Plate
Are mushrooms a good meat substitute? Absolutely. If you’re looking to replace meat with mushrooms, you’ve found the right guide. I’ll show you exactly which mushrooms work best as meat substitutes, how to prepare them, and why they’re becoming the go-to alternative for everyone from vegans to flexitarians.
Why mushrooms as meat substitute work so well
Let me answer the big question first: Is mushroom meat? No, mushrooms aren’t meat – they’re fungi. But here’s why mushrooms make the best meat substitute:
Texture: Mushrooms have a naturally meaty, fibrous structure that mimics muscle tissue
Umami flavor: Rich in glutamates, giving that savory, meat-like taste
Protein: While not as high as meat (3-4g vs 25g per 100g), they’re complete proteins with all essential amino acids
Zero cholesterol: Unlike meat, mushrooms contain no cholesterol
Minimal processing: Whole mushrooms need no additives to taste meaty
Why they’re #1: Large, flat caps perfect for grilling Texture: Dense and meaty when grilled Best for: Burger patties, steaks, grilled “meat” Protein: 3.1g per 100g Prep tip: Remove gills for less moisture, marinate 30 minutes before grilling
Texture: Shreds like pulled meat when cooked Best for: Pulled “pork,” vegan scallops, “chicken” strips Unique feature: Thick stems that can be scored and seared Protein: 3.3g per 100g
Why they work: Tender texture, mild flavor takes on seasonings Best for: Fried “chicken,” nuggets, general meat substitute Cost: Usually cheapest option Growing: Easiest to grow at home
Mushroom vs meat – nutritional comparison
Nutrient (per 100g)
Mushrooms
Beef
Chicken
Pork
Calories
22-35
250
165
242
Protein
2-4g
26g
31g
27g
Fat
0.3g
15g
3.6g
14g
Cholesterol
0mg
90mg
85mg
80mg
Fiber
1-2g
0g
0g
0g
Iron
0.5mg
2.6mg
0.9mg
0.9mg
Key point: While mushrooms have less protein, they’re much lower in calories and fat, making them ideal for weight management.
Mycelium-based meat – the future of fake meat from mushroom roots
What is mycelium-based meat?
Mycelium is the root-like structure of mushrooms. Companies are now growing mycelium into meat-like products:
Texture: Can mimic whole muscle cuts like steak or chicken breast
Protein: Up to 20g per 100g (much higher than whole mushrooms)
Process: Grown in fermentation tanks in 5-10 days
Brands: Meati, MyBacon, Atlast Food Co.
Why mycelium matters for mushroom based meat
Minimal processing required
Creates more realistic meat textures
Higher protein content than whole mushrooms
Can be shaped into any form
Can mushrooms replace meat completely?
The honest answer: Yes, but with planning. Here’s how to make mushrooms a complete meat replacement:
Protein considerations when replacing meat with mushrooms
Since mushrooms are lower in protein, combine them with:
Legumes: Add 15-20g protein per cup
Nuts/seeds: Add 5-7g protein per ounce
Whole grains: Add 5-8g protein per cup
Nutritional yeast: Adds B12 (missing in mushrooms)
Mushroom meat substitute recipes for complete nutrition
High-protein mushroom “meatballs”:
2 cups chopped mushrooms
1 cup cooked lentils
1/2 cup breadcrumbs
2 tbsp ground flax
Seasonings Total protein: 18g per serving
How to prepare mushrooms as meat substitute
Don’t wash – wipe with damp cloth to preserve texture
Remove excess moisture – press between paper towels
Marinate – 15-30 minutes in umami-rich marinades
High heat – sear or grill for meat-like exterior
Don’t overcrowd – cook in batches for proper browning
Best marinades for mushroom meat alternative
Basic umami marinade:
3 tbsp soy sauce
1 tbsp balsamic vinegar
2 cloves garlic, minced
1 tsp smoked paprika
1 tbsp olive oil
BBQ-style marinade:
1/4 cup BBQ sauce
2 tbsp apple cider vinegar
1 tbsp liquid smoke
1 tsp onion powder
Cooking methods for meat-like mushrooms
Grilling (best for portobellos):
400°F, 4-5 minutes per side
Brush with oil to prevent sticking
Pan-searing (king oysters, shiitake):
High heat, minimal oil
Don’t move for 3-4 minutes for crispy exterior
Roasting (all varieties):
425°F for 20-25 minutes
Flip halfway through
Slow-cooking (for pulled textures):
Low heat, covered, with liquid
45-60 minutes until shreddable
Are mushrooms a good substitute for meat nutritionally?
What mushrooms provide:
Complete protein (all essential amino acids)
B vitamins (except B12)
Vitamin D (when UV-exposed)
Minerals: selenium, potassium, copper
Fiber (absent in meat)
Antioxidants: ergothioneine, glutathione
What’s missing compared to meat:
B12: Supplement needed
Iron: Lower amounts (pair with vitamin C foods)
Zinc: Present but less bioavailable
Protein quantity: Need larger portions or combinations
Environmental benefits of mushroom plant based meat
Mushrooms vs meat environmental impact:
Water usage:
Mushrooms: 1.8 gallons per pound
Beef: 1,800 gallons per pound
Carbon emissions:
Mushrooms: 0.7 kg CO2 per pound
Beef: 27 kg CO2 per pound
Land use:
Mushrooms: Can grow vertically, minimal space
Beef: 20x more land required
Frequently asked questions
What mushrooms are good meat substitute? Portobello for burgers, king oyster for pulled textures, shiitake for bacon, lion’s mane for seafood, oyster for fried “chicken.”
Is mushroom a meat? No, mushrooms are fungi, not meat. But they provide similar umami flavors and meaty textures.
Are mushrooms meat for vegetarians? Mushrooms are 100% vegetarian and vegan. They’re often called “vegetarian meat” due to their meaty qualities.
Best mushrooms to substitute for meat in specific dishes?
Burgers: Portobello caps
Tacos: Diced oyster or shiitake
Stir-fry: Mixed Asian mushrooms
Pasta: Sliced baby bellas
BBQ: King oyster “pulled pork”
Can I replace all meat with mushrooms? Yes, but ensure adequate protein by combining with legumes, nuts, and grains. Supplement B12.
Do mushrooms taste like meat? They have natural umami (savory) flavor similar to meat. Proper seasoning and cooking enhances meat-like taste.
Start replacing meat with mushrooms today
Now you know exactly which mushrooms work as meat substitutes and how to prepare them. Start with one meal – try grilled portobello burgers or king oyster “scallops.” Once you experience how satisfying mushroom meat alternatives can be, you’ll understand why millions are making the switch.
Remember: mushrooms aren’t trying to be meat – they’re something better. Lower in calories, zero cholesterol, packed with nutrients, and incredibly sustainable. Whether you’re fully plant-based or just reducing meat intake, mushrooms as meat substitute offer the perfect solution.
Ready to try? Pick up some portobellos and start with the basic marinade recipe above. Your body (and the planet) will thank you!
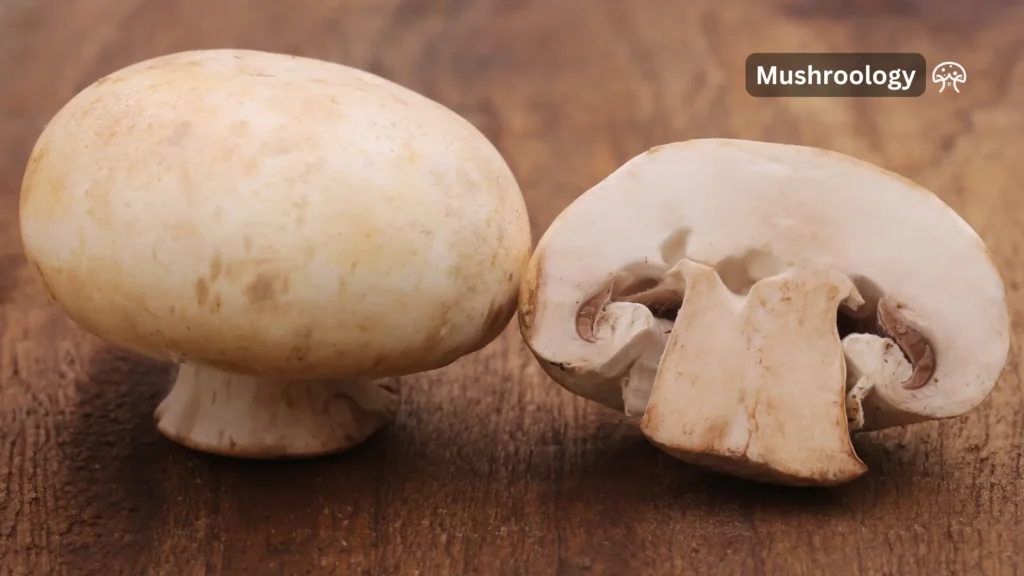
Did you know that button mushrooms, cremini mushrooms, and portobello mushrooms are all the exact same species – just harvested at different ages? If you’ve ever wondered what a button mushroom becomes when it matures, you’re about to discover the fascinating transformation of Agaricus bisporus through its lifecycle.
Agaricus bisporus at a glance
Species: Agaricus bisporus (the same for all three types!)
Common varieties: Button mushroom, cremini (baby bella), portobello mushroom
Key difference: Maturity stage only – it’s literally just age
Growing time: 14-28 days from pin to portobello
Whether you’re comparing button mushrooms vs baby bella or wondering if portobello and button mushrooms are the same species – yes, they absolutely are! Let’s trace this incredible journey step-by-step.
The Agaricus bisporus mushroom lifecycle: from spore to fruiting body
1. Spore germination (Days 1-10)
All Agaricus bisporus mushrooms – whether destined to become button, cremini, or portobello – begin as microscopic spores. When these spores land on suitable substrate under the right conditions:
Temperature needed: 70-75°F (21-24°C)
Humidity required: 85-95%
Time to germinate: 5-10 days
What forms: Thread-like filaments called hyphae
2. Mycelial growth (Days 10-25)
The portobello mushroom mycelium (same as button mushroom mycelium) expands rapidly:
Forms a white, cotton-like network throughout the substrate
Breaks down organic matter for nutrients
Establishes the foundation for fruiting bodies
Critical fact: This mycelium is identical whether growing button or portobello mushrooms
3. Primordia formation (Days 25-30)
Pin-like structures emerge from the mycelium:
Size: 2-5mm initially
Color: White to light brown
Key point: These pins will become button, cremini, or portobello depending on when harvested
4. Fruiting body formation (Days 30+)
This is where the magic happens – the rapid transformation begins!
Distinct maturity stages of Agaricus bisporus
Stage 1: Button mushrooms (button stage of mushroom)
Timeline: 14-17 days from pinning
Cap size: 20-30mm (about 1 inch) Velum mushroom characteristic: Completely intact, covering all gills Color: Pure white to cream Texture: Soft, high moisture content (92-94%) Flavor: Very mild, almost neutral
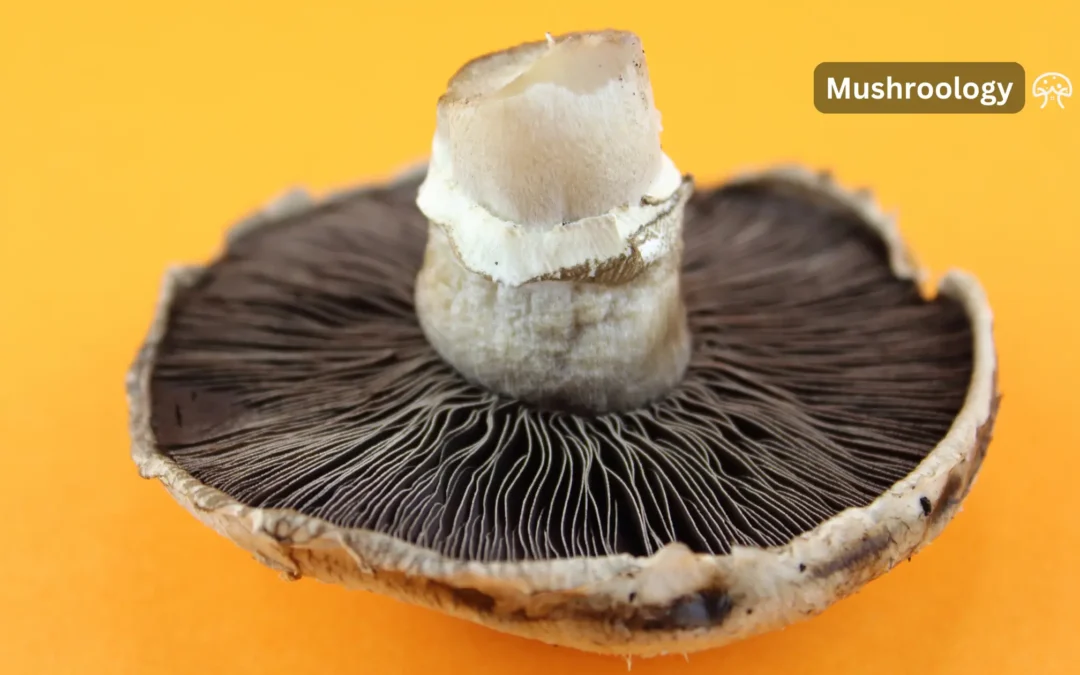
Button mushroom gills: Completely hidden by the velum (veil). If you cut a button mushroom in half, you’ll see pink gills tightly enclosed.
Growing tip: Button mushrooms double in size every 24 hours at this stage!
Stage 2: Cremini mushrooms (baby bella mushrooms)
Timeline: 17-21 days from pinning Cap size: 30-40mm (1.5-2 inches) Velum: Starting to tear, partially revealing gills Color: Light to medium brown Texture: Firmer than buttons, moisture content drops to 90-92% Flavor: Noticeably earthier and richer
Are cremini mushrooms same as baby bella? Yes! These are just marketing names for the same developmental stage.
Key identifier: The veil is breaking but not completely gone – you can see some gills peeking through.
Stage 3: Cup stage (button cup mushroom)
Timeline: 19-23 days from pinning Cap size: 30-50mm (2-3 inches) Velum: Mostly torn away Cap shape: Cup-like, beginning to flatten Gills: Clearly visible, turning from pink to light brown
This intermediate stage is rarely sold commercially but represents the transition from cremini to portobello.
Timeline: 21-28 days from pinning Cap size: 40-150mm (4-6 inches typically) Cap shape: Completely flat or slightly curved upward Gills: Fully exposed, dark brown to black Texture: Dense, meaty, moisture content 88-90% Flavor: Rich, intense, umami-packed
Important: A mature button mushroom IS a portobello mushroom – they’re the same organism!
Fun Fact: Button mushrooms almost double in size every 24 hours during this early stage. They are popular for their subtle taste and can easily absorb spices and sauces.
Chemical and nutritional changes through maturity
1. Dry matter and water content progression
Stage
Water Content
Dry Matter
Result
Button
92-94%
6-8%
Soft, delicate
Cremini
90-92%
8-10%
Firmer bite
Portobello
88-90%
10-12%
Dense, meaty
2. Protein and carbohydrate shifts
Protein changes:
Button: 2.5g per 100g fresh weight
Cremini: 2.7g per 100g
Portobello: 3.1g per 100g
The protein concentration increases as water content decreases.
3. Chitin and texture development
What makes portobellos meaty?
Chitin content increases 40% from button to portobello stage
Cell walls thicken and strengthen
Fiber content rises from 0.9g to 1.3g per 100g
4. Flavor compound intensification
Umami development:
Glutamate levels increase 300% from button to portobello
5′-nucleotides double in concentration
Volatile aroma compounds multiply by factor of 5
How to cook button mushrooms at each stage
Button mushrooms: mild versatility
Raw applications:
Thinly slice for salads (2-3mm thick)
Whole in crudité platters
Quick pickle in vinegar for 30 minutes
Cooked methods:
Sauté 5-7 minutes until golden
Add to soups in final 10 minutes
Stuff whole buttons with cheese mixture
Pro tip: Don’t wash button mushrooms – wipe with damp paper towel to preserve texture.
Cremini mushrooms (baby bella): balanced flavor
Best uses:
Pasta sauces (slice 5mm thick)
Risotto (quarter or halve)
Pizza toppings (slice thin)
Cooking technique: Sauté on high heat to evaporate moisture first (3-4 minutes), then reduce heat and add seasonings.
Days 1-14: Substrate preparation and pasteurization
Days 15-25: Spawn inoculation and colonization
Days 26-30: Casing layer application
Days 31-35: Pinning initiation
Days 36-42: Button stage (harvest here for buttons)
Days 43-47: Cremini stage (harvest for baby bellas)
Days 48-56: Portobello stage (harvest for full size)
Frequently asked questions
Are portobello and button mushrooms the same? Yes! They’re the exact same species (Agaricus bisporus) at different maturity stages. Button mushrooms are harvested at 2-3 weeks, portobellos at 4-5 weeks.
What’s the difference between baby bella vs button mushrooms? Baby bella (cremini) mushrooms are 3-7 days older than button mushrooms. They’re browner, slightly larger, and have a deeper flavor.
Can you see button mushroom gills? No, button mushroom gills are completely covered by the velum (veil). Once this veil breaks, it becomes a cremini.
How long does it take to grow portobello mushrooms? From spore to portobello takes 45-60 days total. From pinning to portobello-ready is about 21-28 days.
Are button cremini portobello all the same mushroom? Absolutely yes – all three are Agaricus bisporus at different ages: button (youngest), cremini (middle), portobello (mature).
What does mature button mushroom look like? A mature button mushroom IS a portobello – flat cap, exposed dark gills, 4-6 inches diameter.
Ready to explore mushroom development?
Now that you understand how button mushrooms transform into portobellos, you can make more informed choices at the grocery store or even try growing your own. Remember – whether you prefer delicate buttons, earthy creminis, or meaty portobellos, you’re enjoying the same amazing species at different points in its fascinating lifecycle.
Want to see this transformation yourself? Consider starting a mushroom growing kit and harvest at different stages to taste the evolution of flavor firsthand!
If you’re searching for tremella mushroom benefits, you’ve probably heard it called “the beauty mushroom” or “nature’s hyaluronic acid.” But does it actually work? I’ve spent months researching tremella fuciformis, and I’m going to tell you exactly what the science says – including the stuff beauty brands don’t want you to know.
What is tremella mushroom?
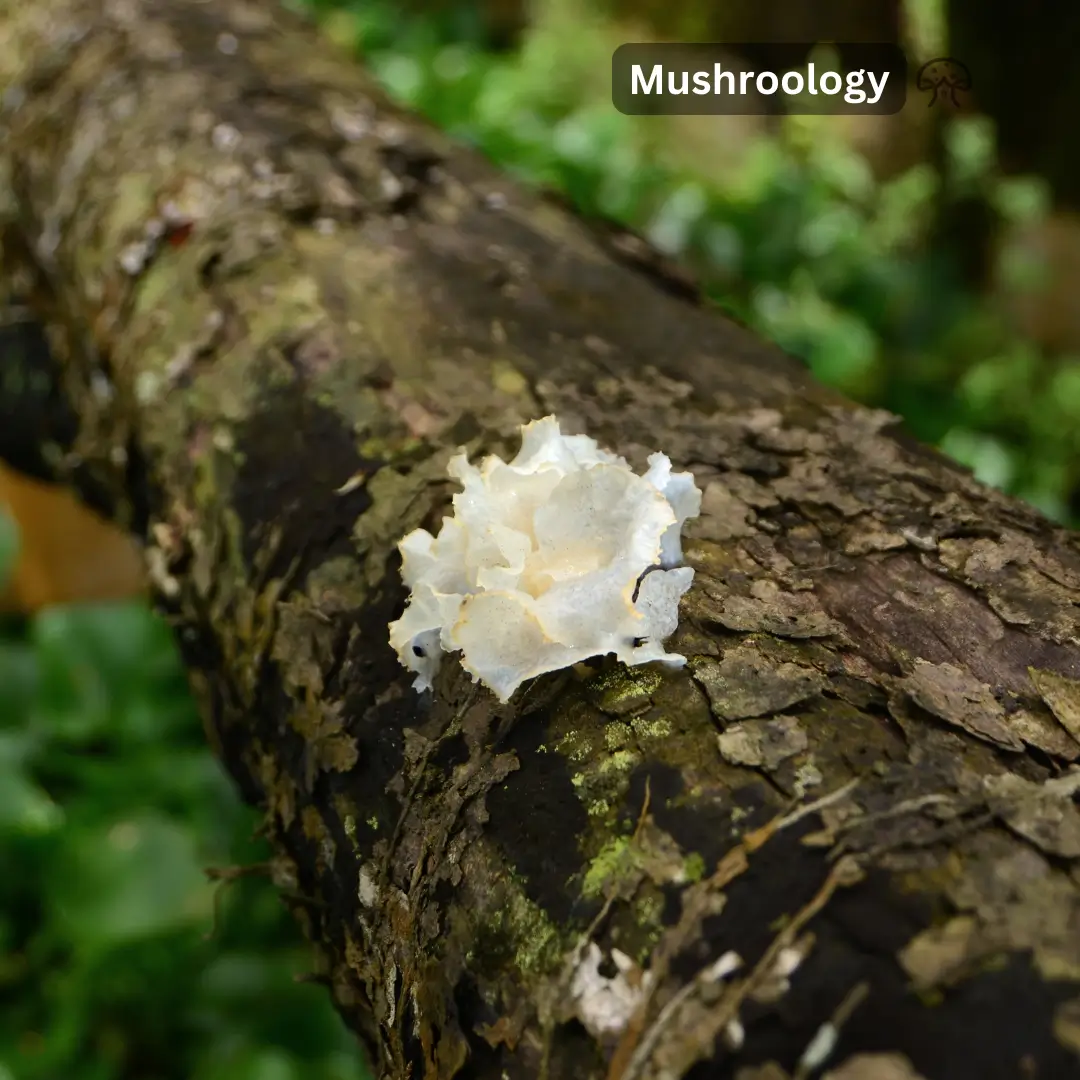
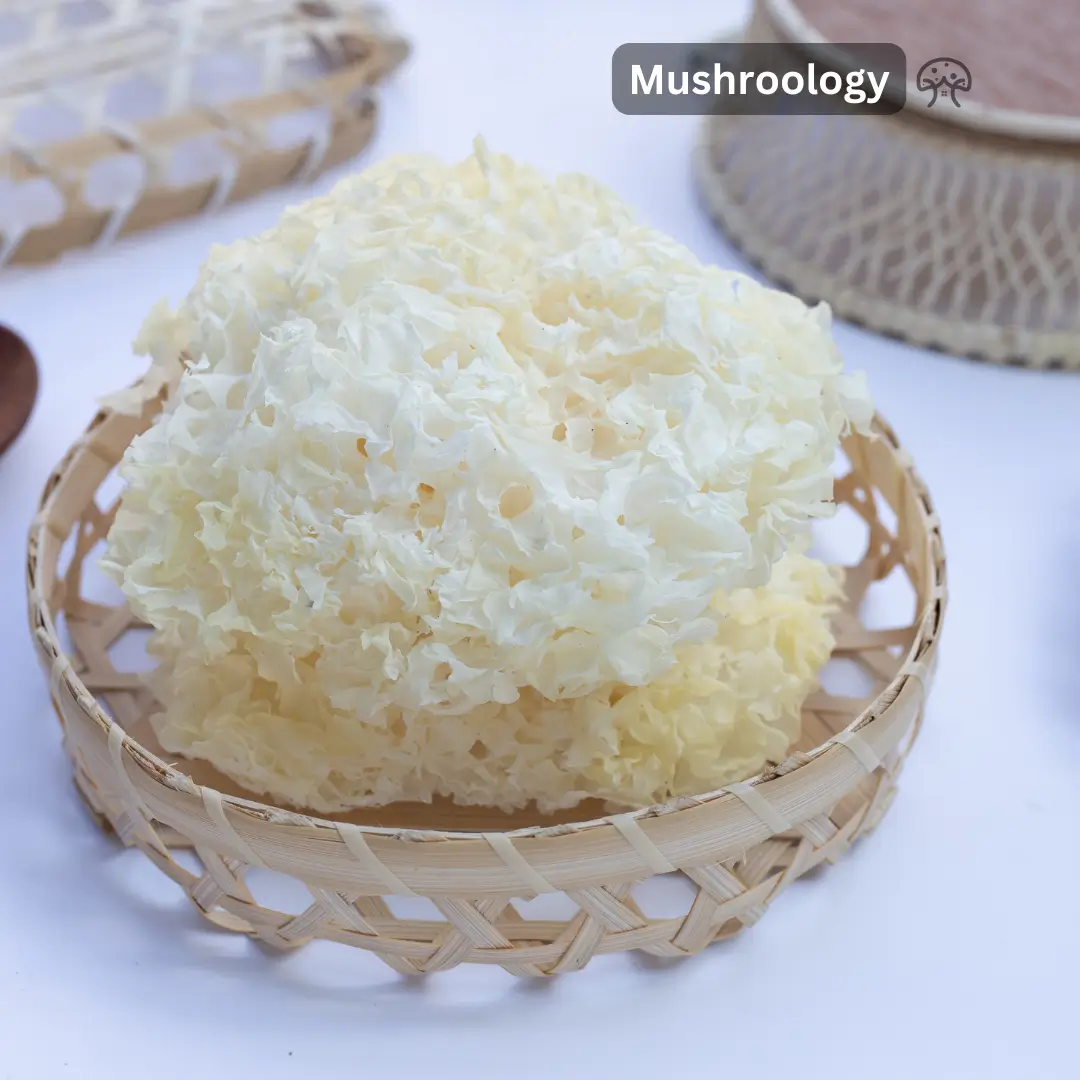
Tremella fuciformis (also called snow mushroom, silver ear mushroom, or white jelly mushroom) is a translucent, jelly-like fungus that looks like a underwater coral. It grows on dead hardwood branches in tropical and subtropical regions, particularly in Asia.
Key facts about tremella mushroom:
Contains up to 70% polysaccharides (mainly glucuronoxylomannan)
Can hold up to 500 times its weight in water
Used in Chinese medicine for over 2,000 years
Now popular in skincare products worldwide
Tremella mushroom benefits for skin (what actually works)
Let’s address what everyone’s really here for – does tremella mushroom actually improve your skin? Here’s what the research shows:
Tremella mushroom skin benefits backed by science
1. Superior hydration to hyaluronic acid A 2016 study found tremella’s polysaccharides create a moisture-retaining film on skin that’s actually more effective than hyaluronic acid. The particles are smaller (0.5 million Daltons vs 1.5 million), so they penetrate better.
Reduced MMP-1 (the enzyme that breaks down collagen) by 30%
Improved skin elasticity in 88% of participants
3. Skin whitening and brightening Studies show tremella can:
Reduce melanin production by inhibiting tyrosinase activity
Fade dark spots and hyperpigmentation
Even out skin tone over 8-12 weeks of use
Tremella mushroom before and after – realistic expectations
People searching for “tremella mushroom before and after” should know:
Week 1-2: Increased hydration, skin feels softer
Week 4-6: Fine lines may appear reduced, skin looks plumper
Week 8-12: Potential improvement in dark spots and overall radiance
3+ months: Maximum benefits for collagen production
Important: Results vary significantly based on age, skin type, and whether you’re using it topically or internally.
Tremella mushroom health benefits beyond beauty
Immune system support
Tremella contains beta-glucans that can:
Stimulate macrophage activity (your immune system’s first responders)
Increase production of immune cells
Potentially reduce frequency of colds and infections
A 2015 study showed participants taking tremella extract had 35% fewer upper respiratory infections.
Brain health and cognitive function
Recent research (2019-2021) suggests tremella may:
Protect neurons from oxidative damage
Improve memory and learning in animal studies
Potentially slow cognitive decline
Note: Human studies are still limited in this area.
Blood sugar and cholesterol management
Studies indicate tremella mushroom can:
Reduce post-meal blood sugar spikes by up to 20%
Lower LDL cholesterol by 10-15% over 8 weeks
Improve insulin sensitivity
Tremella mushroom side effects and safety concerns
Let’s be honest about potential side effects – this is what many of you are worried about:
Common tremella mushroom side effects
Generally mild and rare:
Digestive upset (if taking large doses)
Mild allergic reactions (itching, rash)
Temporary bloating
Serious side effects: None reported in clinical studies at normal doses.
Tremella mushroom pregnancy and breastfeeding safety
The honest answer: There are NO safety studies on tremella during pregnancy or breastfeeding. Most healthcare providers recommend avoiding it during these times. If you’re pregnant and considering tremella, talk to your doctor first.
Who should avoid tremella mushroom?
People with mushroom allergies
Those on immunosuppressant drugs (tremella boosts immune function)
Anyone scheduled for surgery (stop 2 weeks before)
How to use tremella mushroom (dosage and methods)
Tremella mushroom supplements dosage
Standard dosing based on research:
Powder: 1-3 grams daily
Extract (10:1): 500-1000mg daily
Fresh/dried mushroom: 5-10 grams daily
For skin benefits specifically: Most studies showing skin improvements used 1000-2000mg of extract daily for 8-12 weeks.
Best ways to take tremella mushroom
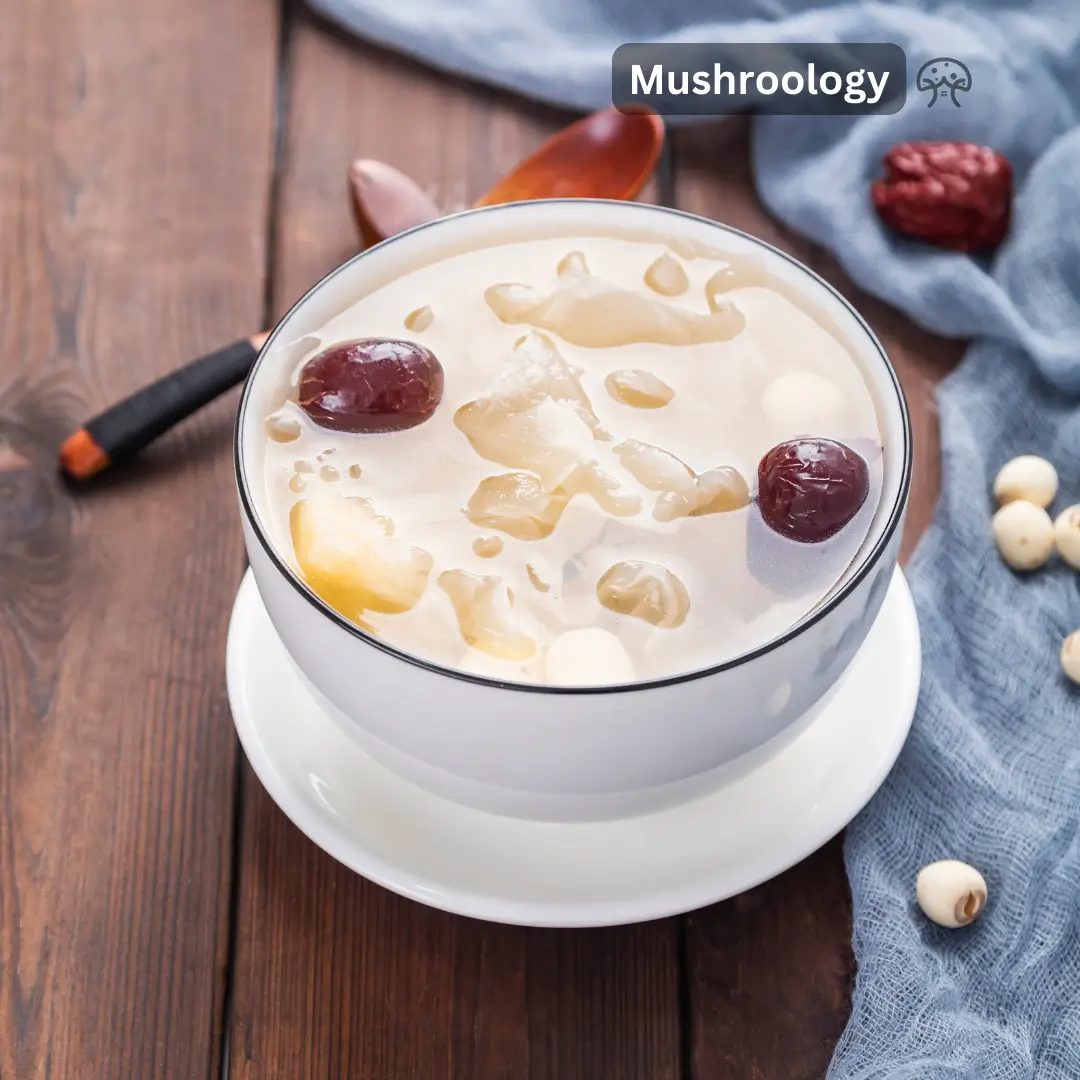
1. Tremella mushroom tea
Soak 5g dried tremella in water for 30 minutes
Simmer for 45-60 minutes until gelatinous
Add honey or dates for sweetness
2. Tremella powder in smoothies
Start with 1/2 teaspoon daily
Blends well with fruits and doesn’t affect taste
Best absorbed with some fat (add nuts or avocado)
3. Tremella supplements
Look for standardized extracts (30-50% polysaccharides)
Bottom line: They work differently and can be used together for best results.
Tremella mushroom nutrition facts
Per 100g dried tremella:
Calories: 200
Protein: 2.6g
Carbohydrates: 67g (mostly polysaccharides)
Fat: 0.2g
Fiber: 18g
Vitamin D: 28% DV
Iron: 30% DV
Potassium: 15% DV
How to grow tremella mushroom (spoiler: it’s complicated)
Unlike oyster mushrooms, tremella is parasitic and requires a host fungus (usually Hypoxylon archeri) to grow. This makes home cultivation extremely difficult.
Why growing tremella mushroom is challenging:
Needs two different fungi to fruit
Requires precise temperature (65-75°F) and humidity (85-95%)
Takes 2-3 months from inoculation to harvest
Success rate for beginners: less than 20%
If you want to try growing mushrooms at home, start with oyster or shiitake instead.
Frequently asked questions about tremella
Is tremella safe for daily use? Yes, studies show daily use for up to 3 months is safe for most people. Some traditional users consume it regularly for years.
What does tremella taste like? Very mild, slightly sweet flavor. The texture is more notable – gelatinous and slightly crunchy when rehydrated.
Can tremella help with weight loss? No direct evidence for weight loss. However, its fiber content (18g per 100g) may help with satiety.
How long before I see skin benefits from tremella? Most people notice improved hydration within 1-2 weeks. Anti-aging benefits typically take 6-12 weeks of consistent use.
Can I use tremella with retinol or vitamin C? Yes, tremella is gentle and works well with other skincare ingredients. It may actually help reduce irritation from actives.
Is tremella fuciformis the same as snow mushroom? Yes, they’re the same species. Also called silver ear mushroom, white jelly mushroom, or snow fungus.
The bottom line on tremella mushroom benefits
Tremella mushroom offers legitimate benefits, especially for skin hydration and anti-aging. The science backs up many traditional uses, though some claims need more research. It’s generally safe, well-tolerated, and can be a valuable addition to both your skincare routine and diet.
Who should try tremella:
Anyone looking for natural skin hydration
People interested in anti-aging support
Those wanting immune system benefits
Anyone already using hyaluronic acid (they work great together)
Who should skip it:
Pregnant or breastfeeding women (insufficient safety data)
People with mushroom allergies
Those expecting overnight miracles
Start with a quality supplement or try making tremella tea. Give it at least 8 weeks to see real benefits, and remember – consistency is key.
Got questions about tremella mushroom? Leave them below. I’ve researched this stuff extensively and happy to help!
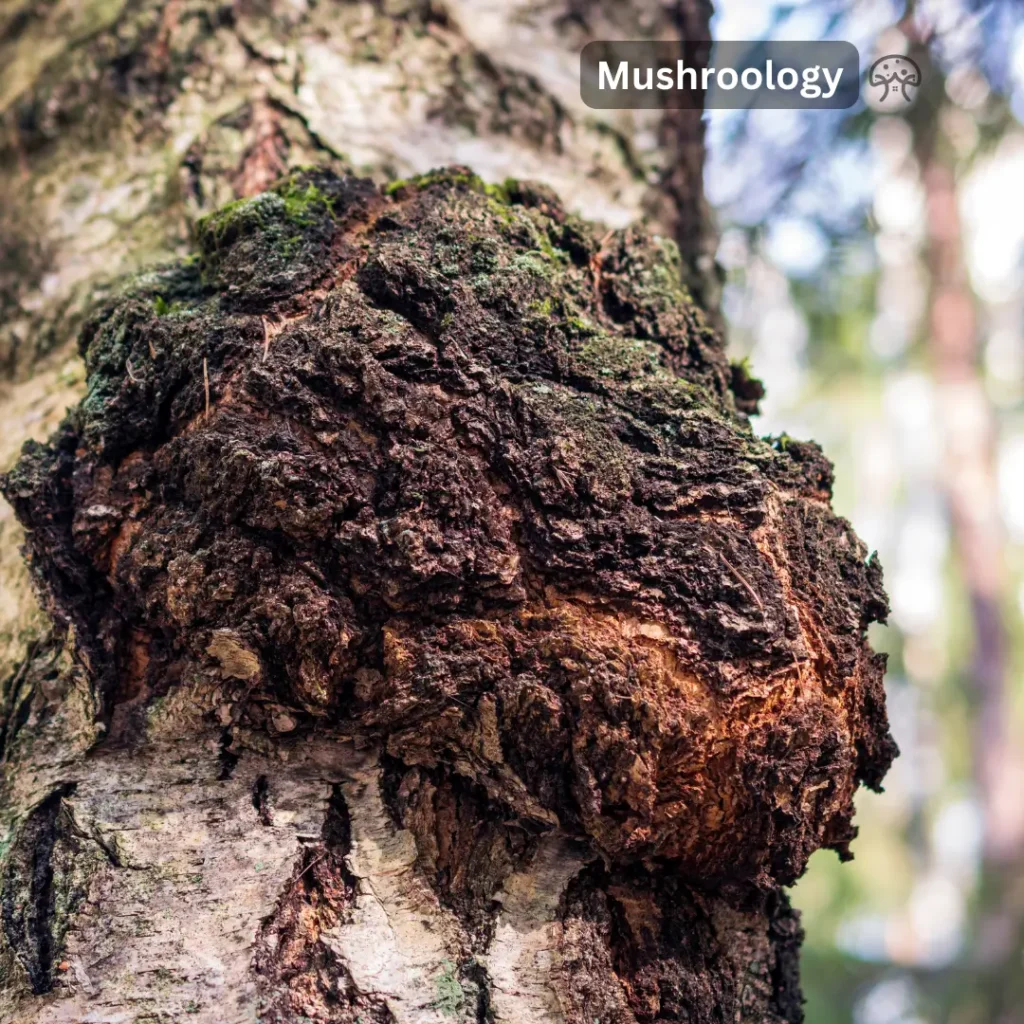
Let’s talk about chaga mushrooms – that weird, burnt-looking growth on birch trees that’s actually one of nature’s most powerful immune boosters. I’ve been researching and using chaga for years, and I’m going to tell you everything you need to know, including the stuff other articles gloss over.
What is chaga mushroom and why should you care?
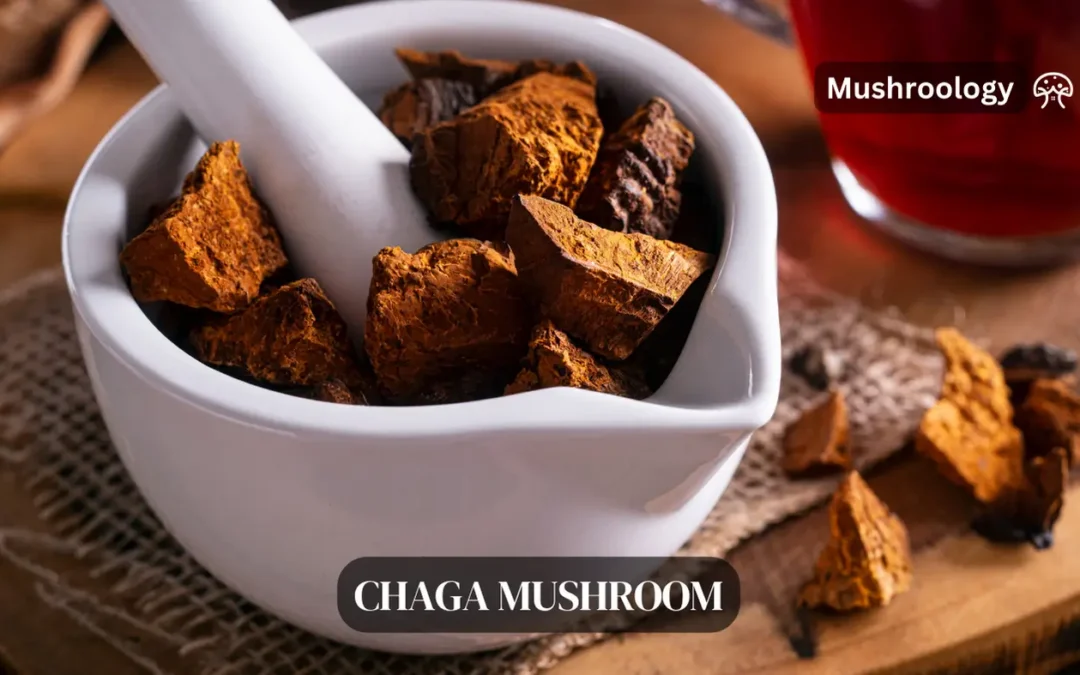
Chaga mushroom (Inonotus obliquus) isn’t your typical mushroom. It looks like someone glued a chunk of charcoal to a birch tree. But here’s the thing – this ugly fungus is packed with more antioxidants than almost any other natural food on the planet.
Quick facts about chaga mushroom:
Has been used medicinally for over 500 years resembles burnt charcoal.
Grows mainly on birch trees in cold climates (Siberia, Alaska, Northern Canada)
Takes 3-5 years minimum to mature
Contains the highest ORAC score (antioxidant level) of any superfood
Chaga mushroom immune system benefits (backed by science)
How chaga mushroom boosts your immune system
Here’s what makes chaga mushroom such a powerful immune booster:
Beta-glucans: These are the real stars. Chaga contains 29% beta-glucans (way more than most medicinal mushrooms). These compounds literally train your immune cells to work better. Studies show beta-glucans can increase white blood cell production by up to 30%.
Polysaccharides: Work alongside beta-glucans to activate macrophages (your body’s cleanup crew) and natural killer cells.
Betulinic acid: Unique to birch trees and chaga, this compound has antiviral properties that help your immune system fight infections.
I started taking chaga tea daily during flu season three years ago, and I’ve noticed I get sick way less often. But that’s just my experience – let’s look at what else chaga can do.
Chaga mushroom for weight loss – does it actually work?
This is what everyone’s asking about, so let’s address it honestly. Can chaga mushroom help with weight loss? The answer is… maybe, but not in the way you think.
What the research actually says about chaga and weight loss
The science:
A 2019 study on mice showed chaga reduced body weight and fat when combined with fermented foods
Chaga contains betulinic acid, which may help reduce fat storage
The high fiber content (about 20%) can help you feel fuller longer
The reality: Chaga mushroom isn’t a magic weight loss pill. It won’t melt fat off your body. What it might do:
Support healthy metabolism through better blood sugar regulation
Reduce inflammation that can interfere with weight loss
Provide a zero-calorie alternative to sugary drinks
If you want to use chaga tea for weight loss, drink it instead of juice or soda. That simple swap alone could help you lose weight – not because chaga is magical, but because you’re cutting calories.
Chaga mushroom and inflammation – a natural solution
Chronic inflammation is linked to basically every major disease. Here’s how chaga mushroom helps with inflammation:
Anti-inflammatory compounds in chaga:
Betulinic acid: Reduces inflammatory markers by up to 40% in studies
Inotodiol and trametenolic acid: Target specific inflammation pathways
Melanin: The dark pigment in chaga has anti-inflammatory properties
Real-world application: Many people with arthritis report less joint pain after taking chaga regularly. While we need more human studies, the anti-inflammatory effects are well-documented in lab research.
Chaga mushroom interactions and safety concerns
Let’s address the elephant in the room – is chaga safe for everyone? Short answer: no. Here’s what you need to know:
Chaga mushroom medication interactions
Blood thinners (warfarin, aspirin, etc.): Chaga can enhance blood-thinning effects. If you’re on these medications, DO NOT take chaga without talking to your doctor first.
Diabetes medications: Chaga mushroom can lower blood sugar. Combined with diabetes meds, it might drop your blood sugar too low. Monitor closely and adjust medications with your doctor.
Immunosuppressants: Since chaga boosts immune function, it can interfere with drugs designed to suppress your immune system
Chaga tea and pregnancy – is it safe?
The honest answer: We don’t know. There are zero studies on chaga tea during pregnancy. Most herbalists recommend avoiding it while pregnant or breastfeeding. Why risk it?
Chaga oxalate content – kidney stone concerns
This is important: chaga mushroom contains high levels of oxalates. One study found chaga powder contained 14.2 mg/g of oxalates. That’s really high.
Who should be concerned:
People with a history of kidney stones
Those with kidney disease
Anyone on a low-oxalate diet
Safe consumption guidelines:
Limit to 1-2 cups of chaga tea daily
Don’t use super concentrated extracts
Take breaks (use for 3 months, break for 1 month)
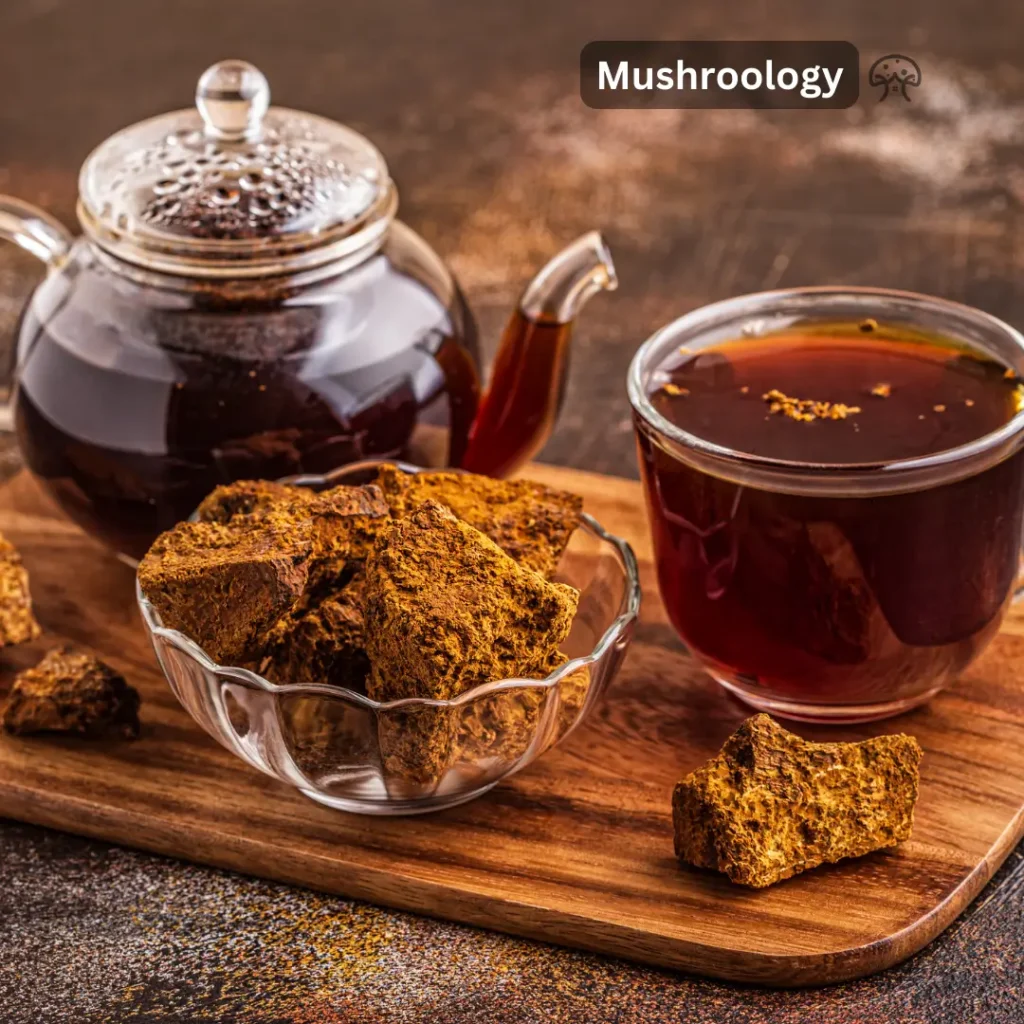
How to prepare and consume chaga mushroom
Making chaga tea (the right way)
Most people make chaga tea wrong. Here’s the proper method:
Use chunks, not powder for tea (powder is for other uses)
Simmer, don’t boil – 140-160°F is ideal (80°C max)
Go low and slow – simmer for at least 45 minutes, up to 3 hours
Reuse the chunks – you can brew the same chunks 3-5 times
Pro tip: Make a big batch and store it in the fridge for up to 5 days.
Chaga powder dosage and usage
Standard dosage:
Start with 1/2 teaspoon (about 1 gram) daily
Work up to 1-2 teaspoons maximum
Mix into coffee, smoothies, or oatmeal
Timing matters: Take chaga in the morning or afternoon. Some people find it too energizing for evening use.
Chaga tinctures – concentrated benefits
Tinctures extract different compounds than water alone. A dual-extraction tincture (alcohol and water) gives you the full spectrum of benefits.
Tincture dosage:
1-2 ml (about 30-60 drops) twice daily
Can add to water, tea, or take directly
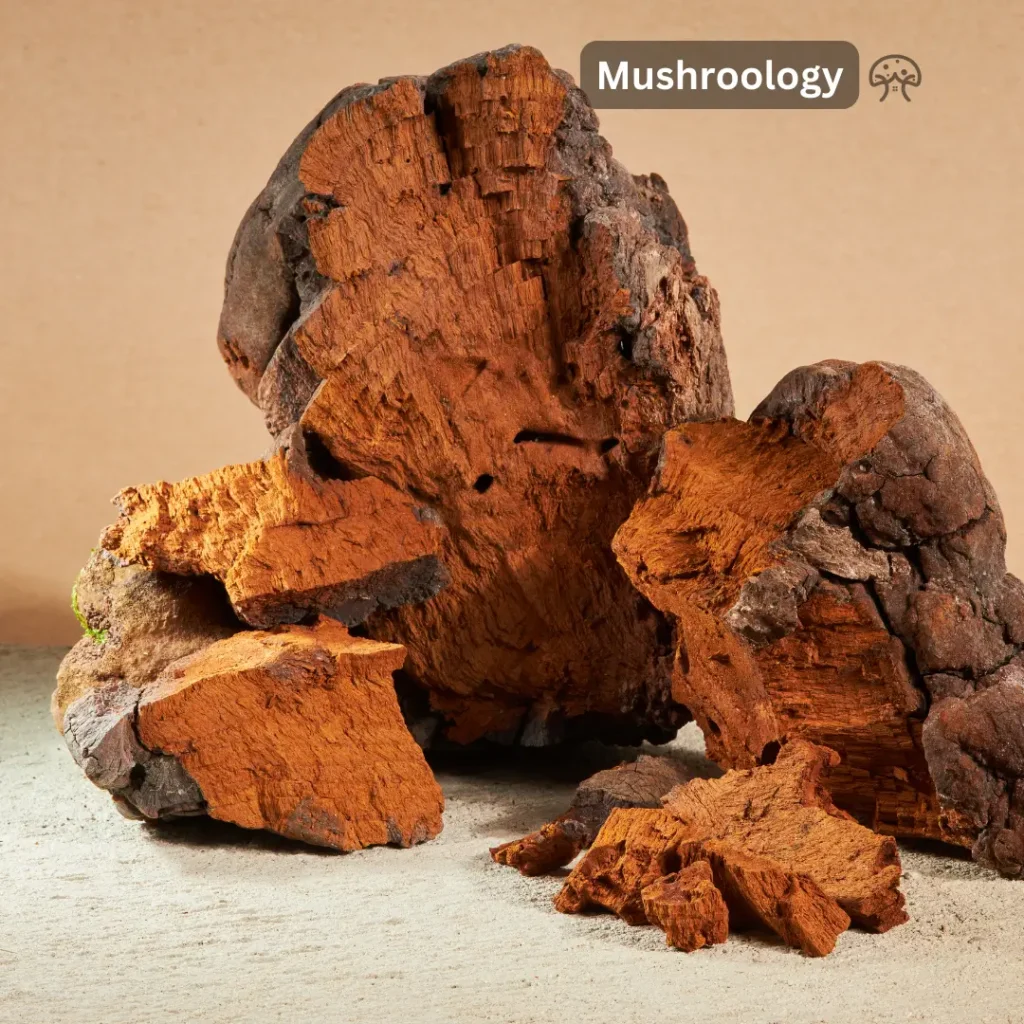
Sustainable chaga harvesting and growing chaga mushrooms
Here’s something most articles won’t tell you: you can’t really grow chaga mushrooms at home. Anyone claiming otherwise is misleading you.
Why growing chaga mushrooms is nearly impossible
Takes 3-5 years minimum to form
Requires live birch trees
Needs specific climate conditions (cold winters)
Success rate for cultivation is extremely low
Where do chaga mushrooms grow naturally?
Chaga grows on birch trees in:
Russia (Siberia)
Northern Canada
Alaska
Northern USA (Minnesota, Maine, etc.)
Scandinavia
Sustainable harvesting practices
If you’re going to harvest wild chaga:
Never take it all – leave at least 30% on the tree
Only harvest from trees over 8 inches diameter
Use proper tools – don’t damage the tree
Follow local regulations – many areas restrict harvesting
Better yet – buy from sustainable sources
Chaga mushroom nutrients and compounds
Let’s break down what’s actually in chaga that makes it so beneficial:
Reduce fatty liver disease markers in animal studies
Chaga and blood pressure
Does chaga lower blood pressure? Some evidence suggests it might:
Contains compounds that relax blood vessels
Anti-inflammatory effects support cardiovascular health
May help reduce LDL cholesterol
Important: If you’re on blood pressure medication, monitor closely when starting chaga.
Chaga mushroom and diabetes
Research shows chaga may help with type 2 diabetes by:
Improving insulin sensitivity
Reducing blood glucose levels
Protecting pancreatic cells
Note: Always work with your doctor to adjust diabetes medications if using chaga.
Frequently asked questions about chaga mushroom
How much chaga tea should you drink per day? Start with 1 cup daily, work up to 2-3 cups maximum. More isn’t always better due to oxalate content.
Does chaga work immediately? No. Most people notice benefits after 2-4 weeks of consistent use. Immune benefits may take 6-8 weeks to fully develop.
Can chaga mushroom help with cancer? Lab studies show anti-cancer properties, but there’s no evidence chaga cures cancer in humans. It may support overall health during treatment, but always consult your oncologist.
Is chaga good for autoimmune conditions? It’s complicated. Since chaga boosts immune function, it could theoretically worsen autoimmune conditions. Consult your doctor first.
Does chaga interact with chemotherapy? Possibly. Some compounds in chaga might interfere with certain chemo drugs. Always tell your oncologist about any supplements.
What does chaga do to your body? Primarily: boosts immune function, provides antioxidants, reduces inflammation, and may support metabolic health.
The bottom line on chaga mushroom benefits
Chaga mushroom is a legitimate superfood with real benefits, especially for immune support and inflammation. But it’s not a miracle cure, and it’s definitely not for everyone.
Who should try chaga:
People looking for immune support
Those dealing with inflammation
Anyone wanting more antioxidants
People interested in traditional remedies
Who should avoid chaga:
Anyone on blood thinners
People with kidney stones
Pregnant or breastfeeding women
Those with autoimmune conditions (without doctor approval)
Start slow, pay attention to how your body responds, and always buy from reputable sources. And remember – no supplement replaces a healthy diet and lifestyle.
Got questions about chaga mushroom? Drop them below. I’ve been researching this stuff for years and happy to help clarify anything!
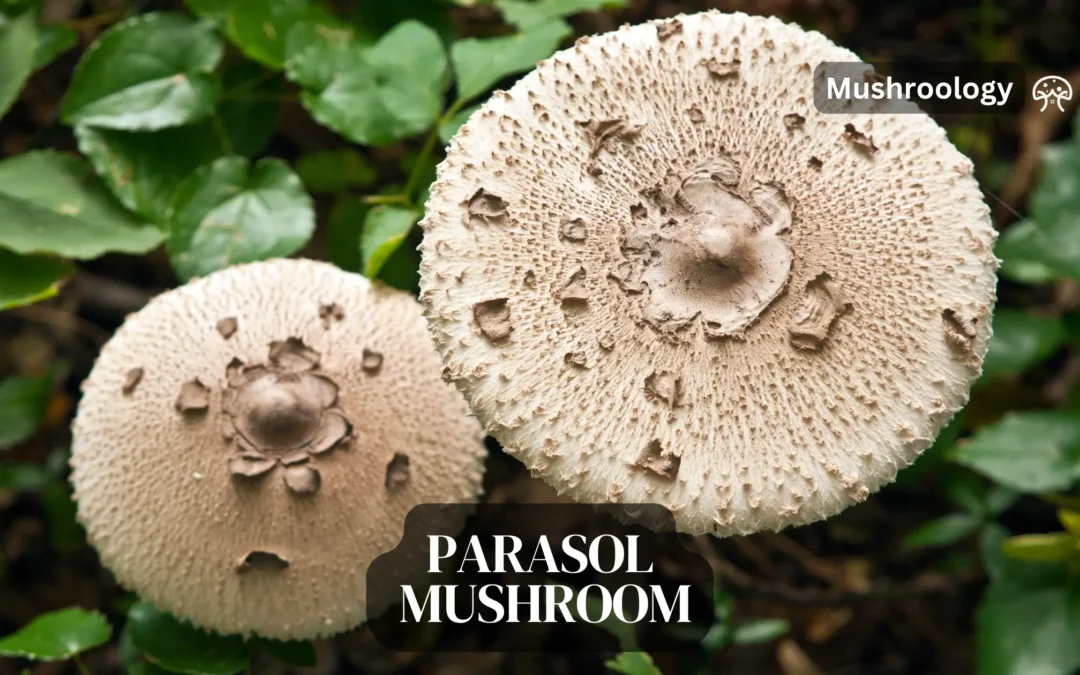
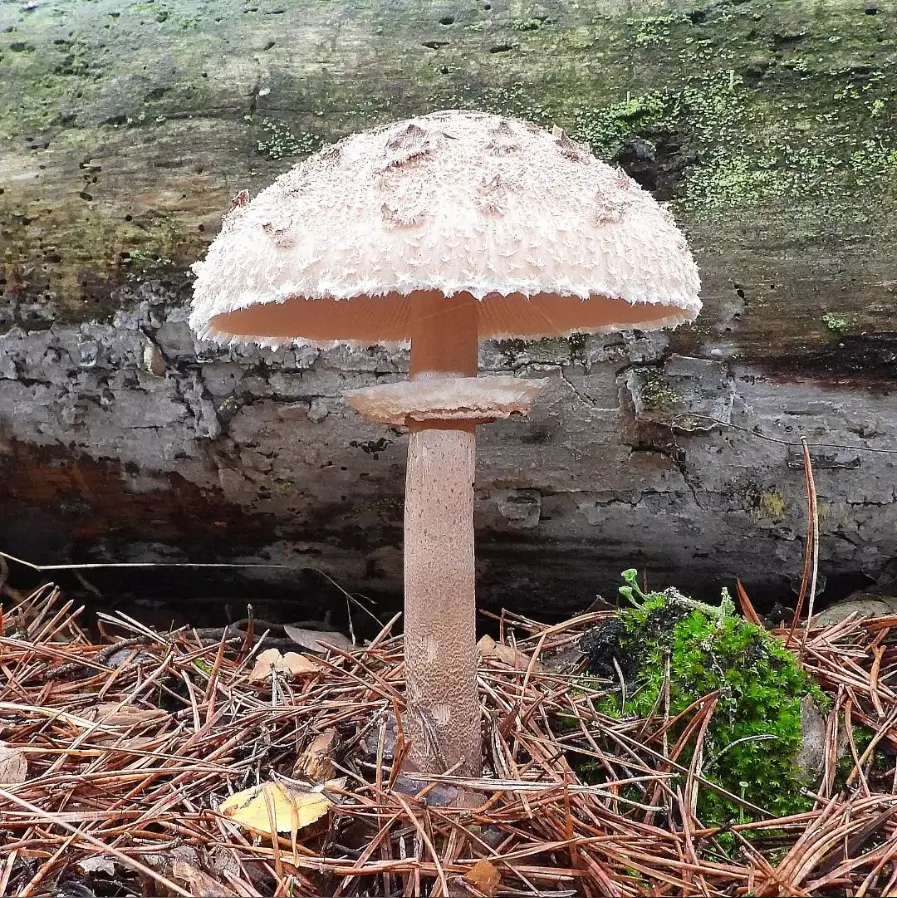
Let’s be real here – parasol mushrooms (Macrolepiota procera) are one of the trickiest mushrooms to grow at home. Unlike oyster or shiitake mushrooms that you can grow in bags, parasol mushrooms need outdoor soil and a lot of patience. But if you’re up for the challenge, I’ll show you exactly how to do it.
What are parasol mushrooms?
Parasol mushrooms are those huge mushrooms you see in fields that look like, well, parasols. They can grow up to 12 inches tall with caps spreading 8-10 inches wide. They’re absolutely delicious – kind of nutty and meaty – but here’s the thing: they’re mycorrhizal mushrooms, which means they need to form relationships with plant roots to grow properly.
Quick facts about parasol mushrooms:
Growing season: Early summer through late fall
Time to first harvest: 6-12 months (sometimes longer)
Growing difficulty: Advanced
Best location: Open grassy areas or meadows
Temperature range: 60-75°F (15-24°C)
Why parasol mushrooms are challenging to grow
I need to be upfront with you – parasol mushrooms aren’t like growing button mushrooms in a kit. Here’s why:
They’re mycorrhizal: They need living plant roots nearby
Long establishment time: Can take 1-2 years before you see any mushrooms
Unpredictable fruiting: Even when established, they fruit when they want to
Space requirements: Need a decent-sized outdoor area
If you’re looking for quick results, honestly, try oyster mushrooms instead. But if you’ve got patience and outdoor space, let’s do this.
This is the most reliable method for home growers:
Spread spawn: Scatter grain spawn over your prepared area (1 pound per 50 square feet)
Lightly rake in: Just barely cover the spawn with soil
Plant grass: If no grass exists, overseed with a grass mix
Water gently: Keep moist but not soggy
Wait: This is the hard part – it takes months
Method 2: Transplanting wild mycelium (advanced)
If you know where parasol mushrooms grow wild:
Get permission: Always ask before digging on someone’s property
Dig carefully: Take a shovelful of soil from near wild parasols
Transplant quickly: Move to your prepared area within hours
Water well: Keep the area moist for several weeks
Cross your fingers: Success rate is maybe 50%
The waiting game with parasol mushrooms
Here’s what happens after inoculation:
Months 1-3: You’ll see nothing. The mycelium is spreading underground.
Months 4-6: Still nothing visible. Keep the faith.
Months 6-12: You might see your first mushrooms, or you might not.
Year 2+: If established, you should get regular flushes each year.
Seasonal care for parasol mushrooms
Spring:
Check for early mushrooms
Add a thin layer of compost
Ensure good drainage after snow melt
Summer:
Water during dry spells (once a week if no rain)
Watch for mushrooms after summer rains
Don’t mow when mushrooms are present
Fall:
Peak fruiting season for parasol mushrooms
Check every few days after rain
Harvest promptly when ready
Winter:
Leave the area undisturbed
Mycelium is dormant but alive
Plan for next year
Common problems growing parasol mushrooms
“It’s been a year and no mushrooms!” This is normal. Parasol mushrooms are slow. Keep maintaining the area and be patient. Some patches take 2-3 years to establish.
“Other mushrooms are growing instead” That’s actually fine! It means your soil is healthy. Just make sure you can identify parasol mushrooms correctly before eating anything.
“My parasol mushrooms grew but fell over” They’re top-heavy by nature. Next time, harvest a bit earlier or stake them if you want perfect specimens.
When to harvest parasol mushrooms
The timing is crucial for best flavor and texture:
Cap still closed: Too early – wait a bit
Cap just opening: Perfect for grilling whole
Cap fully open but edges down: Ideal for most uses
Cap flat or edges turning up: Getting old, use quickly
How to harvest parasol mushrooms properly
Use a knife: Cut at ground level, don’t pull
Leave the base: This helps the mycelium recover
Harvest in morning: They’re freshest then
Check for bugs: Slugs love these mushrooms too
Process quickly: They don’t store well fresh
Using and storing parasol mushrooms
Cleaning parasol mushrooms
Brush off dirt with a soft brush
Don’t soak in water – they’ll get mushy
Trim the tough stem base
Check inside hollow stems for bugs
Cooking parasol mushrooms
These are seriously good eating:
Grilled whole caps: Brush with oil, season, grill like a burger
Breaded cutlets: Slice, bread, and fry like schnitzel
Stuffed caps: Fill with herbs, cheese, breadcrumbs
Dried: Intense flavor for soups and sauces
Storing your parasol mushroom harvest
Fresh storage:
Paper bag in fridge: 3-5 days max
Never in plastic – they’ll get slimy
Long-term storage:
Dehydrate: Slice and dry at 125°F
Freeze: Cook first, then freeze
Pickle: Great for preserving texture
Frequently asked questions
Can I grow parasol mushrooms indoors? No, they need outdoor soil and likely plant root associations. This isn’t like growing oyster mushrooms in a bucket.
How many parasol mushrooms will I get? Varies wildly. An established patch might produce 10-50 mushrooms per year, or just a few. Nature decides.
Are parasol mushrooms hard to identify? They’re fairly distinctive, but always verify with multiple sources or an expert before eating any wild or homegrown mushroom.
What’s the difference between parasol mushrooms and false parasols? Several look-alikes exist. True parasols have a distinctive snake-skin pattern on the stem and a moveable ring. When in doubt, don’t eat it.
Can I speed up parasol mushroom growth? Not really. They grow on their own schedule. Extra watering or fertilizer won’t make them fruit faster.
Is growing parasol mushrooms worth it?
Let’s be honest – if you want easy mushrooms, grow oyster or shiitake mushrooms instead. But if you:
Have outdoor space
Enjoy long-term garden projects
Want something unique
Have patience
Then absolutely give parasol mushrooms a try. When that first mushroom pops up after a year of waiting, it’s magical. Plus, once established, they can produce for many years.
Your next steps for growing parasol mushrooms
Ready to try? Here’s your action plan:
Find a spawn supplier (start looking in winter)
Choose your location (observe it through a season first)
Order spawn for spring delivery
Prepare your area when soil is workable
Inoculate and start your patience practice
Join mushroom forums for support during the wait
Remember, growing parasol mushrooms is a marathon, not a sprint. But hey, the best things in gardening usually are. Good luck!
Got questions about growing parasol mushrooms? Drop them below. I’ve been growing (and waiting for) these beauties for years and happy to help!