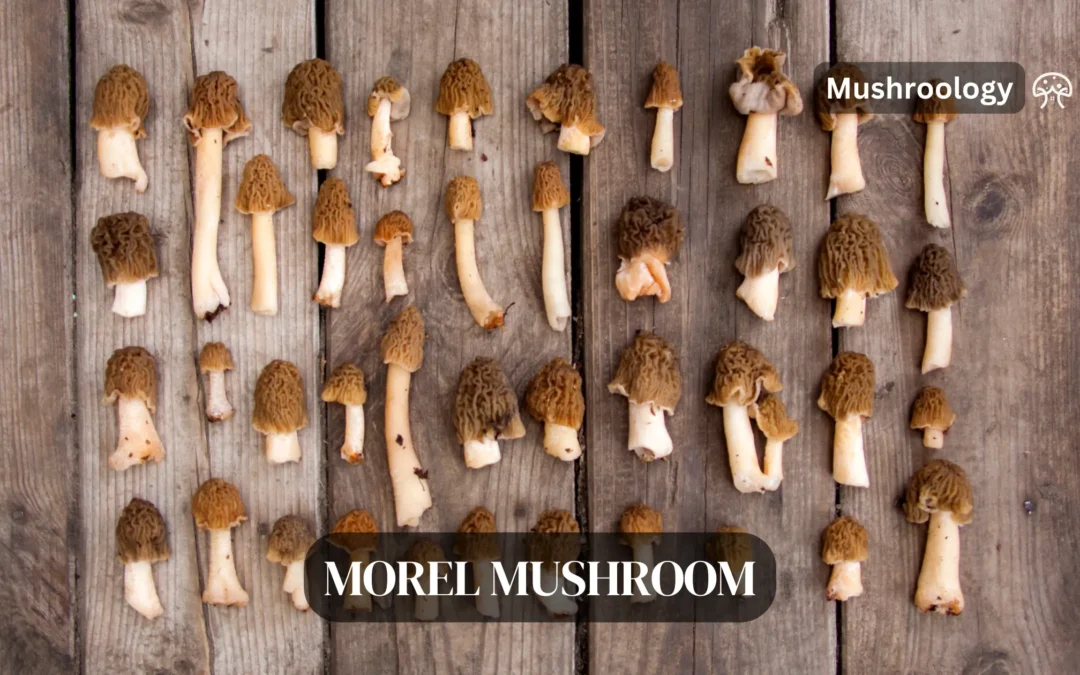
Morel Mushrooms Growing Guide
Morel mushrooms, belonging to the genus Morchella, are highly prized for their unique flavor and texture, making them one of the most sought-after mushrooms for culinary use. They are also known for their distinctive appearance, featuring a honeycomb-like surface on their caps. Morels are foraged in the wild and are found in various parts of the world, including North America, Europe, and Asia, usually in woodland and forested areas.
Classification
- Kingdom: Fungi
- Division: Ascomycota
- Class: Pezizomycetes
- Order: Pezizales
- Family: Morchellaceae
- Genus: Morchella
Can morel mushrooms be cultivated?
Yes, morel mushrooms can be cultivated, though it has historically been challenging. After decades of research, significant breakthroughs have made commercial cultivation possible.
Danish biologists Jacob and Karsten Kirk developed a reliable method for year-round indoor cultivation of black morel mushrooms in climate-controlled environments after four decades of research. Their method produces approximately:
- 4.2 kilograms of mushrooms over a 22-week growing cycle
- 10 kilograms per square meter annually (equivalent to 20 pounds per square yard)
Their best strain, Variant 195, is a type of black morel that develops quickly and can be harvested early. The specific methods are protected under patent law, but they involve special soil blends and precise environmental controls.
Morels are saprotrophic fungi, meaning they derive nutrients from decomposing organic matter. They are commonly found in woodland areas, especially in temperate regions. Morels have a symbiotic relationship with certain tree species, such as elms, ashes, and oaks, and are often found in areas where these trees are present. They prefer moist, well-drained soils rich in organic matter.
Preparing and Inoculating Grain Spawn
Grain spawn is grain (such as rye berries or wheat) that has been sterilized and inoculated with morel mycelium. It serves as an excellent “seed” to introduce morel fungus into a larger substrate or outdoor bed. Follow these steps to make morel grain spawn:
- Choose and Hydrate Grain: Rye is a popular choice for morel spawn, though wheat or brown rice can also work. Rinse the grain to remove dust, then soak it in water for 12–24 hours . Soaking allows the grains to absorb moisture. (Avoid soaking beyond 24 hours to prevent sprouting or souring of the grain.
- Parboil and Drain: After soaking, simmer the grains in a pot of water for ~10–15 minutes to fully hydrate them (they should swell but not burst). Drain thoroughly and spread the grains on a clean surface or screen to steam off excess moisture. The grains should be plump but the surface dry to the touch (no standing water). Excess moisture can invite contamination, so ensure grains are dry on the outside.
- Load and Sterilize: Fill heat-resistant jars or spawn bags about 2/3 full with the prepared grain. If using jars, lid them with a filter (or loose lid with foil) to allow gas exchange but prevent contaminants. Sterilize the grain containers in a pressure cooker at ~15 PSI for 90 minutes (or as recommended) to kill all mold or bacteria spores. Let them cool completely before inoculation.
- Inoculate Grain: Work in the cleanest environment possible (use a glove box or in open air cleaned with alcohol). Inoculate the sterilized grain with morel spores or mycelium:
- If you have a liquid culture or spore syringe of morel, inject a few milliliters into each jar (through a self-healing injection port or by cracking the lid open briefly).
- If you have a piece of morel mycelium grown on agar or an existing spawn, transfer a small piece into the grain jar. (Morel cultures can be obtained from reputable labs or created by cloning a fresh morel on agar, though that is advanced.)
- Quickly reseal the containers after inoculation to keep them sterile.
- Colonize the Spawn: Incubate the inoculated grain at moderate room temperature (around 65–70 °F / 18–21 °C is suitable for morel mycelium growth) in the dark. After a couple of weeks, you should see white mycelium spreading through the grains. Allow the jars to fully colonize until all grains are covered in white mycelium. Shake the jar gently (once at ~30% colonization) to help distribute the mycelium for even growth.
- Ready to Use: Once the grain spawn is fully colonized, it’s ready to inoculate larger substrates or outdoor beds. You now have robust morel mycelium on grain , which will serve as the starter for the next stage of cultivation. Keep the jars refrigerated if you’re not using them immediately to slow down metabolism and preserve viability for a few weeks.
Practical Tips: Maintain sterility throughout the grain spawn process – contamination is the biggest pitfall at this stage. Always let the pressure cooker cool naturally (don’t open early) and ensure the grain isn’t too wet. If you notice any odd-colored molds or smells in the jar, discard that batch and start over. Patience is key, as morel mycelium might grow slower than easier species like oyster mushrooms.
Morel Mycelium Slurry Techniques
An alternative to grain spawn is the spore slurry method, sometimes called the “morel milkshake.” This technique multiplies morel spores in a liquid solution that can be poured over outdoor areas to encourage morels to grow over time. It’s a low-cost, though less reliable, way to propagate morels. To create and use a morel slurry:
- Gather Fresh Spores: Collect a few fresh ripe morel mushrooms (or use dried morels if fresh are unavailable). Mature morels contain millions of microscopic spores. Do not rinse or clean them – you want as many spores as possible in the mix . If using dried morels, rehydrate them in a bit of non-chlorinated water first.
- Mix the Slurry Solution: Fill a large, food-safe container (like a bucket or jar) with non-chlorinated water. Chlorine can kill spores, so rainwater or dechlorinated tap water is best. For each gallon (~4 L) of water, add about 1 tablespoon of molasses or honey (sugar source) and a pinch of salt . Stir to dissolve. The sugar provides energy for germinating spores, and a tiny bit of salt helps inhibit bacterial growth while not harming the fungi.
- Blend in Morels: Add the morel mushrooms to the sweetened water. If using a blender, pulse the mixture a few times to break up the morels into small pieces (pea-sized is fine). This releases spores into the liquid. If you don’t have a blender, you can crumble or chop the morels into the water and stir vigorously. Cover the container with a loose lid or a cloth to keep insects out but allow the mixture to breathe.
- Ferment the Slurry: Let the mixture sit at room temperature for 24–48 hours. This steeping period allows the morel spores to disperse into the liquid. Do not leave it much longer than two days to avoid unwanted bacterial overgrowth . You may notice some fizz or fermentation smell – that’s okay in moderation.
- Strain and Dilute: After 1–2 days, strain out the solid mushroom pieces by pouring the slurry through cheesecloth or a fine strainer. You’ll be left with a spore-rich liquid. You can further dilute this by mixing the concentrated slurry into a larger volume of water (e.g. tip the jar of spore concentrate into a 5-gallon bucket of non-chlorinated water). Optionally, add a handful of wood ash into the bucket and stir – ash provides nutrients like calcium/potassium and simulates a post-fire environment favored by morels.
- Apply the Slurry Outdoors: Pour the morel spore slurry over areas where you’d like morels to grow. Ideal spots include a prepared mushroom bed (see next section), around the base of deciduous trees (especially elm, ash, apple, or oak), along wooded edges, or in a shady garden area with wood mulch. Morels often pop up near dying trees or disturbed, woody areas, so those locations are good targets. You can sprinkle the slurry over the soil and lightly rake or water it in so it penetrates the ground.
- Be Patient: Unlike using established spawn, the slurry method is essentially sowing spores – it can take several years for the spores to germinate, form mycelium, establish sclerotia, and eventually fruit. It’s normal to wait 2–5 years before seeing any morels (if at all) from a slurry application . During this time, do not till or heavily disturb the spots you treated, so the mycelium can develop. Keep the area moderately moist in dry periods. In climates with cold winters, the yearly freeze-thaw cycle will help trigger future fruiting so morels are more likely to appear a year or more after you spread the slurry (often in a spring season).
Advantages & Pitfalls: The spore slurry is easy and cheap – perfect for inoculating a large area like a backyard woodlot without buying lots of spawn. However, success rates are lower than using live spawn because the spores still have to compete with native microbes to get established
Tip: Increase your odds by pouring slurry in multiple locations, focusing on areas where morels naturally grow (shady, near certain trees, or where wood debris and ash are present). Even if only one spot takes off in a few years, you’ll have a personal morel patch! Remember that this method requires patience – many people never see results, but it’s a fun experiment that could surprise you down the line.
How to Grow Morel Mushrooms
Outdoor Morel Bed Inoculation
Growing morels in an outdoor bed or garden patch is a popular approach. Essentially, you’ll be creating a mini woodland habitat for the morel mycelium to colonize and eventually fruit. This method uses spawn (grain or sawdust spawn) or a prepared kit to introduce the fungus, and nature does the rest. Below are the steps for setting up an outdoor morel bed:
- Choose an Ideal Location: Pick a shady, moisture-retaining spot in your yard that mimics a forest floor. Morels do best in partial to full shade – an area that gets little direct summer sun is ideal.
- Near the north side of a building or under deciduous trees can work well. Ensure you have a water source nearby, as you’ll need to keep the bed moist during dry spells. If possible, select a spot near old hardwood trees or stumps (morels naturally feed on decaying roots). Avoid high-traffic areas since you want the bed to remain undisturbed.
- Prepare the Bed Substrate: Mark out the bed area, typically about 4 ft by 4 ft (1.2 m x 1.2 m) per spawn kit or batch of spawn. Remove any sod or surface debris. Loosen the top 4–6 inches (10–15 cm) of soil. If the native soil is poor (excessively sandy or heavy clay), mix in organic amendments. Add a few inches of compost to sandy soil to improve water retention, or sand to clay soil to improve drainage.
- Aim for a loamy, well-drained mix with lots of organic matter and a slightly acidic to neutral pH (6.0–7.5). This rich bed will feed the morel mycelium. Work in some wood chips (from hardwood trees like elm, ash, apple) and a cup or two of wood ash throughout the bed soil. These additions provide the carbon-rich food and minerals morels love, and emulate their natural habitat (woods and burn sites) .
- Rake the bed surface smooth.
- Inoculate with Morel Spawn: Obtain morel mushroom spawn from a reputable supplier or use your homemade grain spawn. Sawdust spawn or peg spawn (wooden dowels inoculated with morel mycelium) are commonly sold for outdoor use, but grain spawn works too .
- If using a commercial morel grow kit, follow its specific instructions; usually it will have you simply spread the provided spawn. Generally, sprinkle or scatter the spawn evenly across the prepared bed surface. Inoculation is just a term for introducing the mushroom mycelium to the substrate .
- Gently mix the spawn into the top 1–2 inches of the loosened soil with your hands or a rake. Do not bury it too deep; the mycelium should be near the surface where there is plenty of oxygen. If you are using the spore slurry method instead, pour the slurry over the bed now, making sure to cover the area uniformly.
- Cover and Mulch: After adding spawn, cover the bed with a layer of moisture-retaining mulch. Apply about a 1–2 inch (2.5–5 cm) layer of organic mulch such as straw, leaf litter, compost, or additional wood chips over the inoculated area. This mulch layer helps keep the bed from drying out, adds more food for the mycelium as it breaks down, and deters weeds. If you applied a slurry, this mulch will also protect the spore liquid and give spores a supportive medium to grow in. Lightly water the mulch after applying to settle it.
- Incubation & Maintenance: Now the hard part – waiting and maintaining the bed. The morel mycelium will spend the next months (or years) colonizing the bed. During this incubation phase, your job is to keep conditions stable:
- Moisture: Check the bed periodically, especially in warm or dry weather. The soil under the mulch should stay damp. If you stick a finger into the bed and it feels dry an inch down, it’s time to water. Use a gentle sprinkler or watering can to re-moisten the bed if needed.
- Avoid overwatering! Soggy, waterlogged conditions can lead to mold or rot that kills the morel mycelium. The goal is consistent moisture, not standing water.
- Temperature: There’s not much you can control outdoors, but be aware morel mycelium will grow in a broad range of temperatures. It may go dormant in high summer heat or deep winter cold. This is expected.
- Protection: Keep an eye out for weeds, mushrooms from other species, or pests. Gently remove any invasive weeds that root in the bed, and discourage animals from digging there. If you see other fungi fruiting (mushrooms that are not morels), pluck them out to reduce competition for nutrients.
- Patience: It’s common for an outdoor morel bed to not fruit for several seasons. Don’t be discouraged. As long as the bed smells earthy (not foul) and you can observe whitish threads of mycelium under the mulch or in the soil, the morel colony is alive.
- Fruiting Season: Morels typically fruit in spring (sometimes early summer in cooler climates). When the time is right (usually after at least one overwintering), watch for the telltale caps pushing through the mulch. Triggers for morel fruiting include a cool, damp winter followed by warming soil temperatures of about 43–50 °F (6–10 °C) in spring. If spring weather is dry, watering the bed as temperatures climb into this range can encourage mushrooms to form. Once daytime highs reach ~60–70 °F (15–21 °C) in spring, conditions are prime for morels to appear . Stroll out and inspect your bed often when the season arrives.
- Be prepared to wait 2–5 years for that first flush of morels. Some fortunate growers get morels the next spring after planting, but many beds take multiple years to establish and fruit. The mycelium often needs to mature and form sclerotia (food-storage knots) before it can produce mushrooms.
- When the morels finally do pop, they may come back in subsequent springs as well, as long as the mycelial network remains healthy. A well-maintained bed can yield morels for several years.
Tips for Outdoor Success: Start your outdoor bed at a time that allows at least one cold season before you expect mushrooms – for example, inoculate in late summer or fall, so the mycelium grows in fall and gets a winter chill, possibly fruiting in spring. If you live in a region without a real winter, outdoor morel cultivation will be more challenging (consider trying the landscape morel species which is adapted to milder climates). Finally, mark the area so you remember where your bed is, and avoid stepping on it or disturbing it with garden tools. Patience is key – think of your morel bed as a long-term garden project that might eventually reward you with a delightful surprise!
Indoor Morel Cultivation in Controlled Environments
Growing morels indoors allows you to control the environment closely – potentially leading to faster fruiting cycles – but it requires more setup and still isn’t guaranteed. Indoor morel cultivation typically involves creating conditions for mycelium to form sclerotia (hardened nutrient balls), then “shocking” them into fruiting by simulating winter to spring. Below is a generalized indoor method:
- Setup and Materials: Gather the needed materials:
- Containers/Trays: Shallow trays or tubs work well (e.g. plastic dish pans or gardening trays). Ensure they have drainage holes, since morels do not like waterlogged substrate.
- Substrate Ingredients: Use a similar substrate as described earlier (compost, soil, sand mix). You can start with the simple 50/30/20 compost-soil-sand mix. It’s wise to pasteurize or sterilize your substrate for indoor use to kill pests or mold spores, especially if it contains nutrient additives. (You can bake moist soil/compost in an oven at ~160–180 °F (71–82 °C) for an hour to pasteurize, or pressure cook as you would for grain spawn if using a very nutrient-rich recipe
- Spawn: Use your prepared morel grain spawn or a purchased spawn kit. While you can attempt to inoculate indoor trays with a spore slurry or spores, using live spawn greatly improves the chances of success. Also, be sure the spawn is a saprotrophic morel species that doesn’t require tree roots (e.g. Morchella rufobrunnea or M. importuna, often sold for cultivation) .
- Growing Space: Find a spot where you can control temperature, humidity, and light. Many people use a spare room, basement, or large indoor greenhouse tent. You might need a fruiting chamber or large clear plastic tote to help keep humidity high.
- Fill Trays with Substrate: Load your clean trays with the prepared substrate mix. A depth of about 4–5 inches (10–13 cm) of substrate is sufficient; morels do not need extremely deep soil. Lightly water the substrate so it’s uniformly moist. Let excess water drain off – the mix should be damp but not dripping . If water pools at the bottom, empty it out.
- Inoculation of Trays: Once the substrate is at field capacity (moist), evenly spread your morel spawn across the surface. You can crumble grain spawn into small pieces and mix those into the top 1–2 inches of the tray’s substrate. Ensure the spawn is well-distributed; this will become the inoculation points from which mycelium will colonize the entire tray. Work quickly and in clean conditions to avoid contamination.
- Incubation (Mycelium Colonization): After inoculating, cover the tray with a loose lid or plastic wrap with some air holes to keep humidity in. Place the tray in a dark environment at 65–70 °F (18–21 °C) and high humidity (~90%). This could be inside a large plastic tub or tent; you may use a humidifier or mist the sides to keep humidity up. Allow the mycelium to grow undisturbed. Within a couple of weeks, you should see white mycelial growth spreading through the soil. It usually takes about 4–6 weeks for the morel mycelium to fully colonize the substrate and form sclerotia (dense tan/black lumps) ). The sclerotia often form at or near the surface of the substrate and look like little clumps or beads – this is a good sign that the fungus has stored enough energy to fruit.
- Cold Shock (Simulating Winter): Once you observe plenty of sclerotia in the trays (or at the 4–6 week mark even if you can’t see them clearly), initiate a cold period. Move the trays to a refrigerator or cold area at about 34–40 °F (1–4 °C) for roughly 2 weeks. Keep the substrate from drying out (you might place a loose plastic cover to retain moisture, but still allow a bit of airflow to prevent mold). This cold treatment mimics winter conditions and “primes” the sclerotia for fruiting by causing them to go dormant briefly.
- Note: If using a refrigerator, ensure no fruits/veggies are stored with the trays to avoid cross-contamination. A dedicated spare fridge or a cold garage in winter works well.
- Fruiting Conditions: After two weeks of cold, bring the trays out and set them in fruiting conditions. Remove any covers and place the trays in a spot with fresh, humid air and light. Ideal fruiting conditions for morels are around 70–72 °F (~21–22 °C) with 85–95% humidity, plus a 12-hour light / 12-hour dark cycle (. They do not need intense light – indirect sunlight or a fluorescent grow light is enough to signal the mushrooms to form . Good airflow is important: ensure there is some air exchange so mold doesn’t grow (for instance, fan the chamber a couple of times a day or use a computer fan on low). Keep the substrate surface moist by misting gently as needed, but avoid pooling water. Within about 7–14 days, if all goes well, small beige morel mushrooms (primordia) will start to pop through the soil!
- Harvest Indoor Morels: Once the morels expand and the caps have their characteristic honeycomb pits, they are ready to pick (details on harvesting in the next section). Indoor-grown morels may be smaller or fewer than wild ones, especially on the first flush. You can attempt to get a second flush by allowing the tray to dry out slightly for a week and then re-wetting to see if new morels form, but often the first flush is the main yield.
Important Indoor Tips:
- Cleanliness cannot be overemphasized – contaminants grow even faster in the controlled warmth and humidity of indoor grows.
- Work sterilely when inoculating, and if you see green mold or an unpleasant odor in your tray, remove the contaminated portion (or discard the whole tray if severe) to protect other trays.
- Providing adequate humidity without stale air is a balancing act: you might crack the lid of a tub or use an automated fruiting chamber to keep humidity high and exchange air.
- Morels also require a nutrient transition (from rich food to less food) to trigger fruiting – the above method naturally achieves this by the mycelium consuming the grain spawn and then living on the less nutritious soil while cold shocking.
- Finally, don’t give up if your first indoor attempt fails; even professional cultivators file patents after many trials. Learn from any contamination issues or environmental problems and adjust – indoor morel growing is an evolving art.
Varieties of Morel Mushrooms
Morel mushrooms, scientifically known as Morchella sp., are a diverse group of fungi that are highly sought after by foragers and chefs alike. With their distinctive honeycomb appearance, morels are a culinary delight and an interesting study in mycology. Recent DNA analysis has provided a clearer understanding of the different types of morels, which are now classified into three clades based on evolutionary divisions.
The Rufobrunnea Clade
This clade contains only two species, with one being present in North America. The Morchella rufobrunnea is known for its cap that bruises salmon pink or rusty brown, a unique feature among North American morels.
The Esculenta Clade
The esculenta clade represents the yellow morels, which are the most common and widely distributed. These morels are characterized by their yellow to tan caps and are typically found during the spring months from March through June.
The Elata Clade
The elata clade includes the black morels, which are often referred to as “burn” or “burn-site” morels due to their association with recently burned forest areas. This clade likely originated in Western North America and includes 14 described species. Black morels are distinguished by their darker caps with off-white to grey or charcoal-black ridges.
One of the most widely distributed black morels in North America is Morchella angusticeps, known for its choice edible qualities and early fruiting season.
Half-Free Morels
Within the elata clade, there are also half-free morels like Morchella semilibera. These have caps that hang partially free over the sides of the stipe, giving them a distinct bell-shaped appearance.
White Morels
There is also a species of white morel, which is found on the west coast of the United States. Unlike other morels, the white morel does not grow in association with trees and has a unique ecology.
Nationwide and Regional Varieties
In the United States, there are 18 described species of morels, including 12 types of black morels, 5 species of yellow morels, and 1 species of white morel. These species vary widely in location, color, size, and ease of identification.
Common Names and Identification
Morels have been traditionally identified by their coloring, with common names such as black morels, yellow morels, gray morels, or greenies. However, it’s important to note that some morels that appear gray when young may actually be immature yellow or black morels.
Morphological Features
All morels have a conical or egg-shaped cap with a honeycombed surface. The cap is attached to a stubby-looking white stem, and both the cap and stem are hollow, creating a long uninterrupted hollow tube from top to bottom.
Foraging Importance
Knowing the different morel species is important for foraging, as it can help identify the mushrooms correctly and ensure they are safe to consume. All morels are edible, but it’s crucial to distinguish them from their poisonous look-alikes, the false morels.
Understanding the varieties of morel mushrooms is not only important for safe foraging but also adds depth to the appreciation of these fascinating fungi. Whether you’re a seasoned forager or a curious newcomer, recognizing the different types of morels can enhance your outdoor adventures and culinary experiences.
Morel Mushrooms vs. False Morels
When foraging for morel mushrooms, it’s crucial to distinguish between true morels (Morchella sp.) and false morels, as the latter can be toxic and should not be consumed. Here’s how to tell them apart:
True Morel Characteristics
- Cap Structure: True morels have caps with a distinctive honeycomb pattern, featuring numerous pits and ridges.
- Hollowness: Upon cutting a morel mushroom lengthwise, you’ll find that both the cap and stem are completely hollow, forming a continuous cavity from top to bottom.
- Cap Attachment: The cap of a true morel is attached directly to the stem at its base.
- Varieties: True morels include the white morel (Morchella americana), black morel (Morchella angusticeps), and burn-site morel, among others.
- Seasonality: Morels typically appear in the spring, from late March through June, depending on the region and climate.
False Morel Characteristics
- Cap Structure: False morels may have wrinkled caps, waved, or even smooth, but they lack the distinctive honeycomb pattern of true morels.
- Stem Interior: False morels have stems that are not hollow. They may contain cottony or chambered flesh inside.
- Cap Attachment: Some false morels, like those in the Verpa genus, have caps that are only attached at the top, with the sides hanging free like a skirt.
- Toxicity: False morels contain gyromitrin, a toxin that the body converts into monomethylhydrazine, which is both a toxin and a carcinogen.
- Varieties: Common false morels include species from the Gyromitra genus, such as Gyromitra esculenta (the “beefsteak morel”), and species from the Verpa genus, like Verpa bohemica and Verpa conica.
Identification Tips
- Cutting Test: Slice the mushroom from top to bottom. True morels will be hollow inside, while false morels will have a solid or chambered interior.
- Cap Analysis: Examine the cap for the characteristic honeycomb pattern. If the cap is wrinkled or lobed without the honeycomb pattern, it may be a false morel.
- Color and Shape: Note the color and shape of the mushroom. While color alone is not a definitive identifier, it can provide clues when combined with other features.
- Consult Experts: If you’re unsure about a mushroom’s identity, consult with local mycologists or experienced foragers. Never consume wild mushrooms unless you are absolutely certain of their safety.
Foraging for morel mushrooms can be a delightful and rewarding experience, but safety should always be the top priority. By learning to identify the key differences between true and false morels, foragers can enjoy their harvest without risking their health. Remember, when in doubt, leave it out.
Harvesting Morel Mushrooms
After all your hard work, when those wrinkled caps finally poke up, you’ll want to harvest and store your morels properly to enjoy them at their best. Here’s how to handle the harvest and preserve your morels:
Harvesting Morels:
Check your morel patch or trays daily when mushrooms are developing – they can grow quickly. Harvest morels when they are fully grown (cap well-formed with deep pits, and before they start to decay or get too soggy from rain).
To harvest, it’s best to cut or pinch the mushroom at the base of the stem . Use a small sharp knife to slice the stem just above the soil line .
Cutting (or carefully pinching) avoids pulling up chunks of dirt and disturbing the underlying mycelium . It also leaves the base of the stem and any attached sclerotia in the ground, which might allow the mycelium to regrow.
Avoid yanking the mushrooms out, as this can create a crater and drag dirt into the mushroom – morels have a hollow, honeycombed structure that traps grit easily.
Cleaning your morels:
Morels often have dirt or sand stuck in their pits and may even harbor tiny insects. Directly after harvesting, gently knock off or brush away visible dirt in the field.
A soft brush (like a pastry brush or toothbrush) works well to dislodge debris from the ridges. At home, you can cut the morels in half lengthwise to inspect inside for bugs. Many foragers like to soak morels briefly in cool saltwater to flush out insects – you can do this for 15–30 minutes if needed, but not much longer or the mushrooms may become waterlogged. Alternatively, a quick rinse under the faucet or swishing in a bowl of water is fine . Do not soak for hours. After rinsing, lay the morels on paper towels or a clean cloth and pat them dry.
Short-Term Storage (Refrigeration):
Fresh morels are best eaten within a few days. To store in the refrigerator, avoid sealing them in plastic which traps moisture and accelerates spoilage. Instead, place the cleaned morels in a paper bag or a breathable cloth bag (mesh or canvas) . You can put a slightly damp paper towel in the bag to keep humidity up without wetness . Keep them in the fridge crisper drawer or a cool, dark spot around 33–40 °F (0–4 °C). In this condition, morels can stay fresh for about 3 to 5 days. Check daily and remove any that show signs of sliminess or mold. Tip: Storing morels separate from strong odor foods is wise – they can absorb smells like onions or garlic due to their porous texture .
Long-Term Preservation – Drying:
Drying is a popular way to preserve morels while intensifying their flavor. To dry morels, first clean them thoroughly and let them air-dry on a towel for an hour or two (surface moisture gone). Slice larger morels in half so they dry faster and any bugs can escape . Use a food dehydrator set to ~125–135 °F (52–57 °C) if possible; arrange the morels in a single layer. Drying typically takes 6–8 hours for morels in a dehydrator . They are done when they are cracker-dry (they should snap, not bend). If you don’t have a dehydrator, you can dry morels by stringing them on a thread in a well-ventilated, dry area, or placing them on a baking sheet in an oven on the lowest setting with the door ajar (watch carefully to avoid cooking them). Once fully dried and cooled, store the morels in an airtight container (glass jar with tight lid or vacuum-sealed bag) in a cool, dark pantry. Properly dried morels can last up to a year with excellent flavor . To use dried morels, simply rehydrate in warm water or broth for 20–30 minutes until soft, and remember to strain the soaking liquid to remove any grit (the liquid itself is a tasty broth).
Long-Term Preservation – Freezing:
Morels can be frozen, though they need a bit of prep for best results. Freezing fresh raw morels often makes them mushy upon thawing. A better method is to par-cook them first: after cleaning, sauté the morels in a bit of butter or oil for a few minutes until just starting to soften, or blanch them in boiling water for 2 minutes, then immediately cool in ice water. Pat them dry, then spread the pieces on a baking sheet and pre-freeze for a couple of hours (so they don’t clump) . Finally, transfer the frozen morels to a freezer-safe bag or container, squeeze out excess air, label, and store in the freezer. Frozen morels maintain quality for around 6 months . When ready to use, you can cook them straight from frozen or thaw in the fridge. They are excellent in soups, stews, or sauces after freezing.
Eating and Food Safety:
Always cook morels before eating; they are generally not consumed raw. A simple preparation is to sauté them in butter with a pinch of salt to bring out their nutty, earthy flavor. Because you’ve taken care to clean them, they should be free of grit – a common complaint with poorly cleaned wild morels. Enjoy the fruits of your cultivation in your favorite recipes!
By harvesting carefully and storing your morels properly, you’ll get the maximum freshness and shelf-life from these precious mushrooms. There’s nothing quite like enjoying a meal of morels that you cultivated yourself, whether fresh in season or rehydrated months later. Happy morel growing and bon appétit!