Everything you need to know about creating perfect grain spawn for your mushroom growing projects
You’ve decided to grow mushrooms at home, but you’re wondering how to make grain spawn that actually works. Here’s the step-by-step process that transforms ordinary grains into the foundation of your mushroom cultivation success.
Grain spawn acts like seeds in your mushroom garden – it’s sterilized grain that’s been inoculated with mushroom mycelium. When you get this right, you’ll have the building blocks for pounds of fresh mushrooms.
Why you need perfect grain spawn preparation
Your grain spawn quality determines everything that follows in mushroom cultivation. The North American Mycological Association (NAMA) emphasizes that proper grain spawn preparation prevents contamination and ensures strong mycelium growth.
You’re aiming for three critical conditions: complete water saturation inside each grain, a dry exterior surface, and intact kernels. When grains explode or break apart, bacteria can easily consume the porridge-like material while your mushroom mycelium struggles.
What grains work best for mushroom cultivation
Rye grain stands out as the preferred choice for most home cultivators. It offers exceptional nutritional density and water absorption properties, though it requires more careful preparation than alternatives.
You can also use these grain spawn alternatives:
- Sorghum and millet – smaller grains that colonize faster
- Wheat – readily available and nutritious
- Oats – popular for low cost and easy sourcing
- Brown or white rice – works well for various mushroom species
Choose organic grains whenever possible. Conventional grains often contain fungicides that prevent fungal growth – exactly what you don’t want when growing mushrooms. Plus, mushrooms bioaccumulate environmental toxins at much higher levels than their growing environment.
Step-by-step grain spawn preparation process
Step 1: Clean and soak your grains
Start by rinsing your grains thoroughly to remove debris and floating materials. You’ll soak them for 12-24 hours to allow gradual moisture absorption.
Adjust soaking time based on your climate – longer soaking in cooler weather (below 60°F/15°C), shorter in warmer conditions (above 75°F/24°C).
Step 2: Cook grains to perfect moisture levels
Bring your soaked grains to a full rolling boil using high heat. Cook until they reach an al dente state – translucent exterior with a slightly raw center. This typically takes 10-20 minutes depending on grain type.
Here’s what you’re looking for: grains that are fully saturated inside but won’t turn to mush when you handle them.
Step 3: Drain and dry the surface
Strain your hot grains and spread them on clean towels or screens. The surface moisture evaporates as steam, creating that ideal dry exterior with saturated interior condition. This process takes 1-2 hours.
Don’t rush this step – proper surface drying prevents contamination during sterilization and inoculation.
Step 4: Load containers and prepare lids
Fill sterilized mason jars or grow bags to about 2/3-3/4 capacity, leaving room for shaking during colonization. You’ll need specialized lids with injection ports and breathable filter patches for sterile inoculation.
Cover everything with aluminum foil during sterilization to protect the filters.
Sterilization: Your grain spawn safety checkpoint
Pressure cooking requirements for grain spawn
You must sterilize at 15 PSI for 90 minutes minimum. This combination reaches 250°F (121°C), eliminating all potential contaminants while preserving grain integrity.
Military and academic research confirms that properly operated home pressure cookers achieve sterilization equivalent to professional autoclaves. Studies show 100% sterility when maintaining 15 PSI for appropriate durations.
Using an Instant Pot? These units typically operate at 13 PSI, so extend cooking time by 30 minutes for reliable sterilization.
Safety Warning
- Never skip sterilization – contaminated grain spawn ruins entire mushroom projects
- Always verify your pressure cooker reaches proper pressure and temperature
- Contact your local extension office for pressure cooker testing services
How you inoculate grain spawn for best results
Why liquid culture beats spore syringes
Liquid culture inoculation provides superior results compared to spore syringes every time. You’ll see faster colonization (2-3 weeks ahead of spore methods), reduced contamination risk, and consistent results with established mycelium cultures.
Standard inoculation ratios:
- 1-2ml per quart (946ml) jar of prepared grain
- 5-10ml per 5-pound (2.3kg) bag of sterilized grain
- Shake gently after inoculation for even distribution
Creating optimal incubation conditions
Maintain these environmental parameters during colonization:
- Temperature: 68-75°F (20-24°C) for most species
- Humidity: Natural humidity within sealed containers
- Light: Dark or minimal diffuse lighting
- Duration: 14-45 days depending on species and conditions
You won’t need to add moisture during this phase – your sealed containers maintain perfect humidity levels.
Advanced technique: Break and shake method for faster colonization
When and how to shake your grain spawn
The “break and shake” technique dramatically speeds up colonization by creating multiple inoculation points throughout your grain spawn. Apply this method when you see 20-30% colonization (some growers prefer waiting until 40-50%).
Benefits you’ll see:
- 2-3 week reduction in total colonization time
- More uniform mycelium distribution
- Increased inoculation points throughout the substrate
- Prevention of slow-colonizing dead zones
Proper technique: Gently but thoroughly agitate containers to break mycelium clumps, then redistribute colonized grains completely. One application typically provides sufficient acceleration for most cultivations.
Troubleshooting common grain spawn problems
Identifying healthy vs. contaminated grain spawn
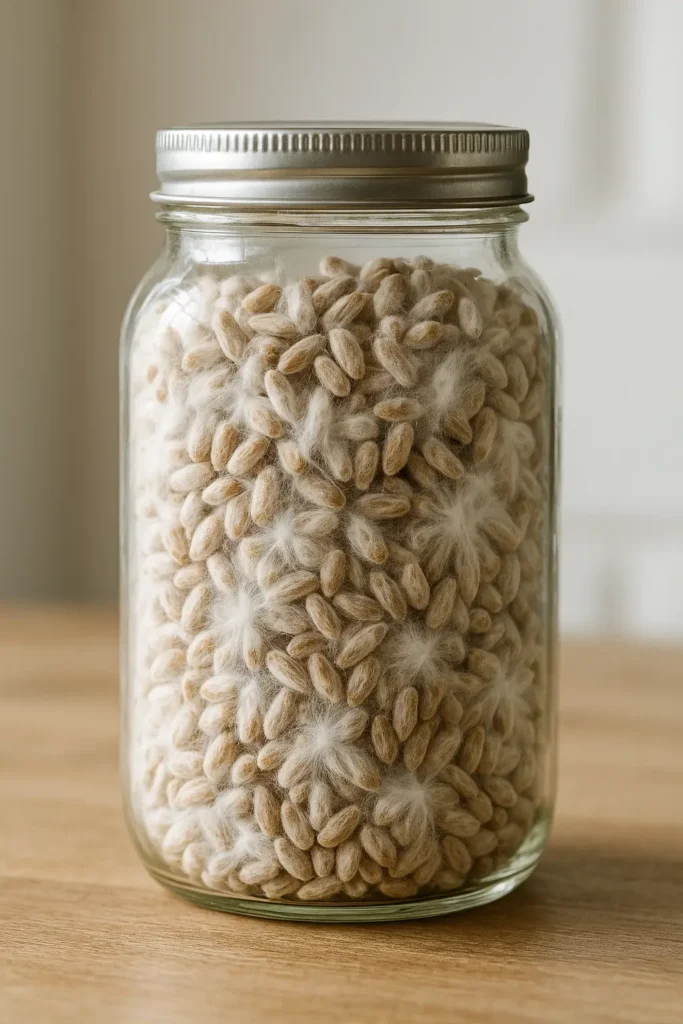
Successful grain spawn shows:
- Dense white mycelium coating individual grains
- Rope-like mycelial structures rather than fluffy growth
- Pleasant mushroom aroma without sour or ammonia odors
- Firm substrate consistency with intact grain structure
Warning signs of contamination:
- Bright green patches (Trichoderma mold) that spread rapidly
- Slimy, wet areas with foul odors (bacterial contamination)
- Alcoholic fermentation smells (yeast contamination)
Slow colonization usually results from insufficient temperature, inadequate moisture, or poor air exchange. Any contamination requires immediate isolation and disposal.
Scaling grain spawn production for larger projects
Mathematical approach to consistent batches
For larger operations, use this proven scaling method: Calculate your baseline ratio by dividing total dry grain weight by total wet weight after cooking. For rye grain, this typically equals 0.58.
Production calculations:
- Desired total wet weight × 0.58 = Required dry grain weight
- Total target weight – Soaked grain weight = Additional water needed
This eliminates guesswork and ensures consistent moisture ratios across batches of any size.
Frequently asked questions about grain spawn
Q: How long does grain spawn take to fully colonize? A: Most grain spawn takes 2-6 weeks under ideal conditions of 68-75°F (20-24°C), depending on species and inoculation method.
Q: What’s the best grain for beginners? A: Start with organic rye grain if available, or oats for a more forgiving option. You’ll need about 2-4 pounds (0.9-1.8kg) of dry grain per 5-pound growing project.
Q: When should I use my finished grain spawn? A: Use fresh grain spawn within 1-2 months for optimal viability. Refrigerated storage extends shelf life, though some species like Pink Oyster prefer room temperature.
Q: Can I store grain spawn long-term? A: Fresh grain spawn works best, but properly stored spawn lasts 2-3 months refrigerated at 35-40°F (2-4°C).
Your next step: Gather organic grains, a pressure cooker, and mason jars with modified lids. Start with small batches to perfect your technique.