What you need to know about growing fresh gourmet mushrooms at home using simple bucket containers
You’ve probably wondered if you can cultivate mushrooms in buckets right at home. The answer is absolutely yes, and it’s one of the most reliable methods for beginners. This approach scales from hobby growing to commercial production.
Buckets are easy to come by. The buckets can be reused, reducing the amount of plastic waste produced, as opposed to growing mushrooms in bags. Buckets are self-supporting and do not require additional support like larger grow bags. When you cultivate mushrooms in buckets, you’ll get consistent results with minimal equipment investment.
How you can cultivate mushrooms in buckets successfully
When you’re starting to cultivate mushrooms in buckets, you’ll want to focus on oyster mushrooms first. Oyster mushrooms are the greatest choice for bucket growing. They grow quickly, are less sensitive to environmental factors than many other mushrooms, and maybe grown on a variety of substrates. These forgiving mushrooms will give you confidence before trying more challenging species.
Growing oysters on pasteurized straw or cottonseed hulls is the highest yield per substrate method of oyster mushroom production. According to research from Penn State Extension, the spawn appears as a white to blue-white mass throughout the compost after fusion has occurred when colonization succeeds.
What you should expect when you cultivate mushrooms in buckets
You won’t see results immediately, but the process moves faster than you might think. Complete colonisation should take 10-14 days at room temperature. Cornell Small Farms research shows that specialty mushrooms are defined by USDA as any species not belonging to the genus Agaricus (button, crimini, portabella), and oyster mushrooms are perfect for this method.
The optimal temperature for incubation when you cultivate mushrooms in buckets is between 18 and 24 degrees Celsius or 64-75°F. You’ll need to maintain consistent temperatures throughout the colonization period.
Critical Safety Warning
- Never eat any wild mushroom without 100% expert identification
- Contact your local mycological society for hands-on training
- Always use food-grade buckets that haven’t contained chemicals
- The North American Mycological Association emphasizes proper identification training
Why you need proper substrate preparation to cultivate mushrooms in buckets
Here’s what most people don’t realize about successful bucket cultivation. Pasteurization is the process used to reduce the number of harmful competitor organisms in a mushroom substrate before inoculating it with mushroom spawn. Research from GroCycle shows this gives your mushrooms a crucial head start.
It involves submerging your substrate in hot water between 149 and 167°F (65 and 75°C) for one to two hours. This temperature range kills harmful competitors while preserving beneficial bacteria that help your mushrooms thrive.
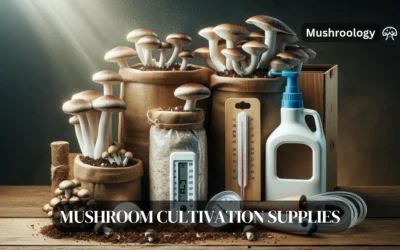
Equipment you’ll need to cultivate mushrooms in buckets:
- Food-grade 5-gallon (19-liter) bucket with lid
- Drill with 1/2-inch (1.3 cm) bit
- Wheat or oat straw (avoid hay)
- Oyster mushroom grain spawn
- Large pot for pasteurization
- Thermometer
- Micropore tape or polyfill
Best substrate choices when you cultivate mushrooms in buckets
You’ll have several substrate options, but straw works best for beginners. Oyster mushrooms can grow on a variety of things including wood logs, cottonseed hulls, corn cobs or office paper, but in North America, cereal straws are the substrate of choice (wheat and oat straw do particularly well).
One 4 lb. bag of grain spawn is enough to inoculate approximately 8 5-gallon buckets or 4-5 oyster bag. This translates to about 1 small bale of straw. This ratio ensures proper colonization when you cultivate mushrooms in buckets.
Research from Fungi Ally found that the highest biological efficiency achieved, 65% used the lime soak and Pleurotus ostreatus Elm A. Of the 8 bags inoculated in total 15 pounds was harvested. Their studies show yields of 2-3 pounds (0.9-1.4 kg) per 5-gallon (19-liter) bucket.
Step-by-step process to cultivate mushrooms in buckets
Step 1: Prepare your bucket Buckets need to be drilled all the way around in 8-12 places, which is where the mushrooms will eventually grow from. The holes should be at least 4″ from the top and bottom, and at least 4 inches apart from each other. Use a 1/2-inch (1.3 cm) bit and stagger holes to prevent mushrooms from growing into each other.
When growing in buckets the mushrooms need a way to breath. Drill two 1/2″ holes in the lid. You can stuff the holes with Poly-fil or purchase PTFE filter stickers to stick on them, both will work just fine.
Step 2: Pasteurize your straw Chop straw into 1-3 inch (2.5-7.6 cm) pieces first. Before using any of these techniques, you should first cut your straw into 1 to 3-inch segments. Use a lawnmower, blender, or any other machine that will do the job. This dramatically improves colonization speed.
Heat water to 160-170°F (71-77°C) in a large pot. Pasteurization involves heating the substrate to a temperature range of 140°F to 160°F (60°C to 71°C) for a period of time sufficient to kill harmful bacteria, fungi, and pests, while preserving a significant portion of the beneficial microorganisms. Submerge straw for 60-90 minutes.
Step 3: Cool and drain Be sure to let it cool completely, because if it is even warm to the touch it will kill the mushroom mycelium. Allow straw to cool to room temperature, around 70°F (21°C) or below, before proceeding.
Step 4: Inoculate your substrate Layer the bucket with 1 inch of the pasteurized straw, then sprinkle some spawn on top of the straw. Add another couple of inches of straw to the bucket and repeat the inoculation process layering in the spawn. Use about 1 pound (454g) of spawn per 5-gallon (19-liter) bucket.
Step 5: Incubation period Place the buckets in a dark place between 75F and 80F. Make sure the air in the room is cycled, especially if you are doing multiple buckets. This translates to 24-27°C for optimal colonization.
After 4 days lift the lid on one of the buckets to check it’s progress. You’ll see white, cottony mycelium spreading through the straw when colonization succeeds.
Fruiting your bucket-cultivated mushrooms
You’ll know it’s time for fruiting when you should see pins, or small clusters of mushroom-shaped structures poking through some of the holes in the bucket. Fruiting has begun! This typically occurs 10-21 days after inoculation.
Move your buckets to a location with:
- Temperature: 55-75°F (13-24°C)
- Humidity: 80-90%
- Indirect light
- Fresh air circulation
Try this: Mist around your buckets (not directly on mushrooms) 2-3 times daily to maintain humidity. Place buckets on elevated surfaces for better air circulation.
Frequently asked questions about cultivating mushrooms in buckets
Q: How long does it take to cultivate mushrooms in buckets from start to harvest?
A: Most oyster mushrooms take 2-4 weeks (14-28 days) from inoculation to first harvest when maintained at optimal temperatures of 65-75°F (18-24°C).
Q: What’s the best bucket material for beginners to cultivate mushrooms?
A: Start with food-grade polypropylene buckets. You’ll need about 5 gallons (19 liters) capacity with tight-fitting lids that can be drilled safely.
Q: When is harvesting time for bucket mushroom cultivation?
A: Harvest oyster mushrooms when caps flatten out but before they become tough, typically when clusters reach 3-6 inches (7.6-15 cm) across.
Q: How many flushes can you get when you cultivate mushrooms in buckets?
A: Most buckets produce 2-3 flushes over 6-8 weeks, with yields decreasing each time as nutrients deplete.
Q: What mushroom species work best for bucket cultivation besides oysters?
A: Lion’s mane and oyster mushrooms are examples of wild mushrooms that grow on trees and would sprout sideways. Wine cap mushrooms also work well on straw substrates.
Alternative substrates for cultivating mushrooms in buckets
Beyond straw, you can cultivate mushrooms in buckets using coffee grounds. One of the main advantages to using coffee grounds as a substrate is that the brewing process pasteurises the grounds, allowing you to skip the additional steps needed for other substrates. Mix coffee grounds 50/50 with cardboard or sawdust for best results.
For wood-loving species, try supplemented sawdust. If you’d like to grow a wider range of mushrooms on sterilized substrate, try a supplemented sawdust mix of 60% hardwood sawdust, 20% wood chips, 18% bran and 2% gypsum. This requires pressure sterilization at 15 PSI (121°C) for 90-120 minutes.
Helpful resources for families and beginners
- North American Mycological Association (NAMA)
- Cornell Small Farms Mushroom Program
- Penn State Extension Mushroom Resources
- “Growing Gourmet and Medicinal Mushrooms” by Paul Stamets
- GroCycle Mushroom Growing Hub
Now you understand how to cultivate mushrooms in buckets successfully using research-backed methods. You’ll see better results if you start with oyster mushrooms and pasteurized straw before advancing to more challenging species and substrates.
Your next step: Source food-grade buckets and oyster mushroom spawn from reputable suppliers, or contact your local mycological society for hands-on workshops.