The Expert Step-by-Step Guide to Cultivating Yellow Oyster Mushrooms at Home.
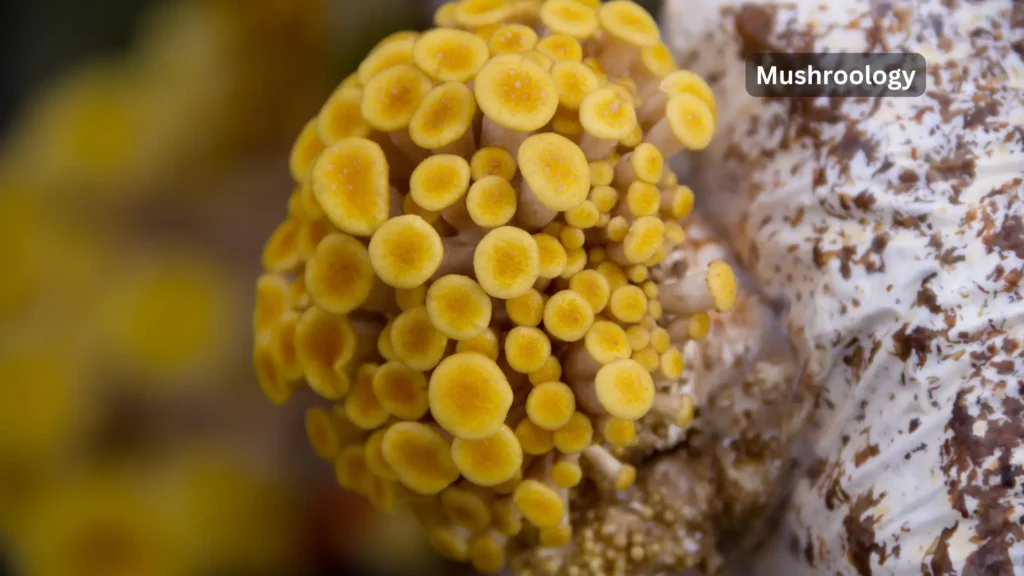
Yellow Oyster (aka Golden Oyster), scientifically known as Pleurotus citrinopileatus, is renowned for its spectacular golden to bright yellow caps. Having cultivated this species for years, I have distilled best practices into this complete guide. These mushrooms are one of the easiest to grow, offering reliable harvests and a delicious, mild flavor, making them ideal for the first-time grower.
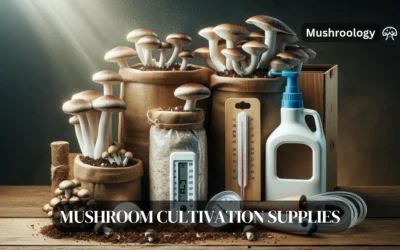
🛠️ Essential Equipment Checklist and Cost Breakdown
You can start growing Pleurotus citrinopileatus for an initial investment of approximately €140–280 ($150–300). Focus on securing quality spawn and climate control essentials.
Must-Have Supplies (The Essentials)
| Item | Recommended Specification | Estimated Cost |
| Growing Chamber | Clear plastic bin (10−20 L or 10−20 qt) | $15-25 |
| Substrate | Straw Pellets or Hardwood Pellets (≈2 kg or 5 lb) | $10-20 |
| Yellow Oyster Spawn | 1 kg grain spawn (reputable supplier) | $20-30 |
| Misting/Airflow | Spray bottle and Small USB Fan (for continuous FAE) | $15-25 |
| Monitoring | Digital Hygrometer/Thermometer Combo | $10-20 |
| Pasteurization Pot | Minimum 8 L (8 qt) capacity | $15-30 |
Where to buy yellow oyster mushroom spawn
This is super important – you need good yellow oyster mushroom spawn or nothing else matters. I’ve had the best luck ordering from specialty mushroom suppliers online. Look for spawn that’s bright white and smells fresh, kind of like mushrooms (duh). If it’s got any green or black spots, send it back immediately.
Set up your golden oyster mushroom growing space
Yellow oyster mushrooms are pretty forgiving, but they do have preferences. During the growing phase, yellow oyster mushrooms like it warm – around 75-85°F. Once they start fruiting, they prefer it a bit cooler, around 65-75°F.
I grow my yellow oyster mushrooms in a spare closet, but you could use:
- A basement corner
- A bathroom (they love humidity)
- A garage shelf
- Even under your kitchen sink
The key is finding somewhere you can control the temperature and humidity without driving yourself crazy.
Create the right environment for yellow oyster mushrooms
These mushrooms need high humidity – we’re talking 85-95%. Don’t panic though, it’s easier than it sounds. Here’s what works for yellow oyster mushrooms:
- The simple method: Just spray the inside of your container 2-3 times a day
- The lazy method: Put a wet towel near your containers
- The fancy method: Get a small humidifier
For air flow, yellow oyster mushrooms don’t need much. Just opening the container and fanning it for 30 seconds a few times a day works fine.
Prepare your growing medium for golden oyster mushrooms
Yellow oyster mushrooms aren’t picky eaters. They’ll grow on pretty much anything with cellulose. Here are your best options for growing yellow oyster mushrooms:
Straw (my favorite)
- Cheap and easy to find
- Works consistently well for yellow oyster mushrooms
- You can use wheat straw, barley straw, or even rice straw
Coffee grounds
- Free from coffee shops
- Already partially sterilized
- Mix with some cardboard for best results
Hardwood pellets
- Super clean and easy
- No chopping required
- Just add water and they expand
Preparing substrate for yellow oyster mushrooms
This is where most people mess up, so pay attention. You need to pasteurize your growing medium to kill off any competing molds or bacteria. Here’s the easiest way:
- For straw: Chop it into 2-4 inch pieces (kitchen scissors work fine)
- Heat some water to about 160-180°F – hot but not boiling
- Dunk your straw in the hot water for 60-90 minutes
- Drain it well – it should be moist but not dripping
Pro tip: If you squeeze a handful and only a drop or two comes out, you’ve nailed it for yellow oyster mushrooms.
The yellow oyster mushroom growing process
Week 1: Inoculation
This is where the magic starts. Once your substrate is cool, it’s time to add your yellow oyster mushroom spawn:
- Wash your hands really well (or wear gloves)
- Break up your spawn into small pieces
- Mix it thoroughly with your substrate – I use about 1 part spawn to 10 parts substrate
- Pack it all into your container
Don’t pack it too tight – yellow oyster mushrooms need some breathing room.
Week 2: golden oyster mushroom colonization
Now you wait and watch. Put your container somewhere warm and dark. Within 3-5 days, you’ll start seeing white fuzzy growth spreading through your substrate. This is the mycelium – basically the yellow oyster mushroom’s root system.
During this phase:
- Keep it warm (75-85°F)
- Don’t spray directly on the substrate
- Check daily but don’t mess with it too much
If you see any green or black mold, you’ll need to start over. It happens to everyone at least once with yellow oyster mushrooms, so don’t get discouraged.
Week 3: Fruiting yellow oyster mushrooms
Once your substrate is completely white (usually takes 7-14 days), it’s showtime! Move your container to a slightly cooler spot and:
- Drop the temperature to 65-75°F
- Start misting the walls of your container 2-3 times daily
- Give them light – indirect sunlight or a regular lamp works fine
- Fan them briefly when you mist
Within a few days, you’ll see tiny yellow oyster mushroom pins forming. These will quickly grow into full mushrooms.
Week 4: Harvesting yellow oyster mushrooms

This is the best part! Your yellow oyster mushrooms are ready when:
- The caps are 1-3 inches across
- The edges are starting to flatten out
- They’re bright yellow (not pale or white)
To harvest, just grab the cluster at the base and twist gently. Or use a clean knife to cut them off.
Troubleshooting yellow oyster mushroom problems
“My yellow oyster mushrooms aren’t growing”
Usually this means:
- Too dry – increase your misting
- Too cold – check your temperatures
- Not enough fresh air – fan more often
- No light – yellow oyster mushrooms need some light to fruit properly
“I see mold on my yellow oyster mushrooms!”
Green mold is the most common problem. If you see it:
- Remove that container immediately
- Don’t try to save it (trust me)
- Start over with better pasteurization
To prevent mold on yellow oyster mushrooms:
- Work clean
- Don’t over-wet your substrate
- Make sure you pasteurize properly
“My yellow oyster mushrooms are pale/white”
Yellow oysters need light to develop their color. Move them closer to a window or leave a light on longer.
“My yellow oyster mushrooms are growing weird shapes”
Usually means they need more fresh air. Yellow oyster mushrooms growing long stems with tiny caps? That’s them reaching for oxygen. Fan more often.
Getting multiple yellow oyster mushroom harvests
Here’s something cool – your substrate will produce multiple flushes of yellow oyster mushrooms. After your first harvest:
- Let it rest for a week
- Give it a good misting
- Return to fruiting conditions
- Wait for more yellow oyster mushrooms!
You can usually get 2-3 good flushes before the substrate is exhausted. The first flush is always the biggest.
Advanced yellow oyster mushroom growing tips
Want bigger harvests? Try these:
Add supplements
- Mix in 10% wheat bran for extra nutrition
- Add 1-2% gypsum for better substrate structure
- Try 5% soybean meal for protein boost
Perfect your timing
- Harvest right when caps start flattening
- Don’t wait too long or they get tough
- Morning harvests often have better shelf life
Scaling up yellow oyster mushroom production
Once you get the hang of it, you can easily grow more yellow oyster mushrooms:
- Start new bins weekly for continuous harvests
- Try different substrates to see what works best in your area
- Keep detailed notes on what works and what doesn’t
Experimenting with yellow oyster mushroom conditions
Every growing space is different. Don’t be afraid to experiment:
- Try slightly different temperatures
- Test various misting schedules
- Mix different substrates
Storing and using your yellow oyster mushrooms
Fresh yellow oyster mushroom storage
Fresh yellow oysters last about 5-7 days in the fridge. Store them in a paper bag, not plastic (they need to breathe).
Preserving yellow oyster mushrooms
Got too many yellow oyster mushrooms? Lucky you! Here’s how to save them:
Drying
- Slice thin and use a dehydrator at 135°F
- Or use your oven on the lowest setting
- Store in airtight containers
Freezing
- Sauté them first for best texture
- Cool completely before freezing
- Use within 6 months
Frequently asked questions about yellow oyster mushrooms
How much will I harvest from yellow oyster mushrooms? Expect about 1 pound of mushrooms per 5 pounds of dry substrate across all flushes.
Can I reuse my yellow oyster mushroom substrate? Not for growing more mushrooms, but it makes excellent compost.
Is it safe to eat yellow oyster mushrooms I grow? Absolutely, as long as you use proper spawn and don’t eat anything moldy.
What if my family doesn’t like mushrooms? Yellow oysters might change their minds – they’re milder and nuttier than store-bought mushrooms.
Can I sell my extra yellow oyster mushrooms? Check your local laws first, but many farmers markets welcome home growers.
Your next steps for growing yellow oyster mushrooms
Ready to start growing yellow oyster mushrooms? Here’s your action plan:
- Order your yellow oyster mushroom spawn from a reputable supplier
- Gather your supplies – you probably have most of them already
- Start small with one container to learn
- Take notes on what works in your space
- Join online forums to connect with other growers
Growing yellow oyster mushrooms is seriously rewarding. There’s nothing quite like harvesting mushrooms you grew yourself. Plus, once you master yellow oysters, you can try other varieties like blue oysters, lions mane, or even shiitake.
Remember, everyone fails sometimes when learning to grow yellow oyster mushrooms. I’ve thrown out plenty of moldy containers over the years. The key is to learn from each attempt and keep trying. Before you know it, you’ll be that person giving away yellow oyster mushrooms to all your friends.
Got questions about growing yellow oyster mushrooms? Drop them in the comments below. Happy growing!