Everything you need to know about cultivating Trametes versicolor at home
You can grow turkey tail mushrooms using three proven methods: grow kits (easiest, ready in 2-4 weeks), log cultivation (best yields, 6-12 months), or sawdust blocks (year-round control, 3-4 months). Beginners should start with grow kits costing $15-30 that include everything needed.
You’ve probably seen turkey tail mushrooms growing on dead logs during forest walks and wondered if you could cultivate these medicinal fungi at home.
Turkey Tail mushrooms (Trametes versicolor), also known as “cloud polypore” are gaining popularity due to their potential health benefits. These versatile fungi boast a beautiful fan-shaped appearance and are prized for their medicinal properties. Growing Turkey Tail mushrooms at home is surprisingly achievable, even for beginners with the right knowledge and equipment.
Top 3 turkey tail growing methods compared
| Method | Timeline | Cost | Difficulty | Best For |
|---|---|---|---|---|
| Grow Kits | 2-4 weeks | $15-30 | ⭐ | Beginners, indoor growing |
| Log Cultivation | 6-12 months | $5-10/log | ⭐⭐⭐ | Long-term yields, outdoor space |
| Sawdust Blocks | 3-4 months | $8-15 | ⭐⭐⭐⭐ | Year-round control, experienced growers |
Choose your cultivation method
Grow kit method
Ideal for: Complete beginners with limited space and equipment.
The grow kit method is the simplest way to get started with turkey tail cultivation. These kits come pre-inoculated with turkey tail mycelium and require minimal setup.
Pros:
- No specialized equipment needed
- Step-by-step instructions included
- High success rate
- Can be grown indoors year-round
Cons:
- Less customization
- Higher cost per harvest
- Usually smaller yields than DIY methods
How to grow turkey tail mushrooms on logs
Ideal for: Those with outdoor space and patience for longer-term results.
The log method is the most traditional and natural way to grow turkey tail mushrooms. It involves inoculating hardwood logs with turkey tail spawn.
Pros:
- Most natural growing environment
- Logs can produce for years
- Larger yields over time
- More sustainable
Cons:
- Longer waiting period for first harvest (10-12 months)
- Requires outdoor space
- More labor-intensive initially
Growing turkey tail mushrooms indoors with sawdust blocks
Ideal for: Intermediate growers looking for faster results than logs.
This method uses sterilized sawdust blocks supplemented with nutrients to grow turkey tail mushrooms indoors.
Pros:
- Faster colonization than logs
- Can be done indoors
- More control over growing conditions
- Higher yields than grow kits
Cons:
- Requires more equipment (pressure cooker/autoclave)
- More technical knowledge needed
- Higher contamination risk
Growing turkey tail mushrooms using a kit
If you’re new to mushroom cultivation, starting with a grow kit is the most straightforward approach. Here’s how to succeed with a turkey tail grow kit:
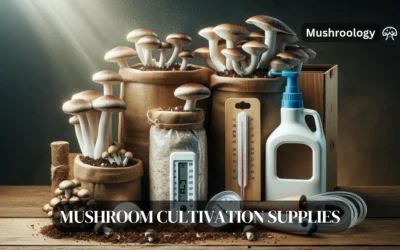
Materials needed
- Turkey tail mushroom grow kit
- Spray bottle with clean water
- Humidity tent (often included with kit)
- Well-lit location away from direct sunlight
Step-by-step process
- Unbox and inspect your kit. Check that the mycelium (white, thread-like growth) is visible and there’s no contamination (unusual colors or smells).
- Find an appropriate location. Choose a spot with indirect light and temperatures between 68-77°F (20-25°C). Avoid direct sunlight or heating/cooling vents.
- Follow the kit’s specific instructions. Most kits require you to open the bag, mist with water, and place in the humidity tent.
- Maintain proper humidity. Mist the inside of the humidity tent 1-2 times daily to maintain high humidity levels. Don’t spray directly on the growing substrate.
- Watch for primordia formation. Small bumps or “pins” will start to form, which will develop into turkey tail mushrooms. This typically begins 2-4 weeks after setting up the kit.
- Allow for proper air exchange. While humidity is important, so is fresh air. Open the humidity tent briefly each day to allow for air exchange.
- Be patient. Turkey tail mushrooms grow more slowly than culinary varieties like oyster mushrooms. Full development can take several weeks
Growing turkey tail mushrooms on logs
Log cultivation is the most traditional method for growing turkey tail mushrooms and produces the most natural results. Here’s how to do it:
Materials needed
- Freshly cut hardwood logs (oak, maple, beech, alder, or birch)
- Turkey tail spawn (dowel plugs or sawdust spawn)
- Drill with 12mm (1/2 inch) bit
- Hammer (for dowel plugs) or spawn applicator (for sawdust)
- Wax (cheese wax or beeswax)
- Brush for applying wax
- Heat source for melting wax
Step-by-step process
- Select appropriate logs. Choose hardwood logs cut from healthy living trees within the last 4-5 weeks. Logs should be 4-8 inches in diameter and 2-3 feet long
- Clean the logs. Brush off any dirt, moss, or lichen from the bark without damaging it. This helps prevent contamination from competing fung.
- Drill holes in the logs. Create holes approximately 1-1.5 inches deep using a 12mm drill bit. Space holes about 6 inches apart in a diamond pattern around the log.
- Inoculate the logs.
- For dowel spawn: Tap the dowels into the drilled holes with a hammer until they’re flush with the bark
- For sawdust spawn: Use an inoculator tool or improvise with a turkey baster to fill each hole with spawn
- Seal with wax. Melt the wax and apply it over each inoculated hole to prevent contamination and moisture loss. Some growers also seal the cut ends of the logs
- Place logs in an appropriate location. Find a shady, moist area outdoors. You can lay logs on the ground, lean them against a structure, or stack them in a log crib.
- Wait for colonization. Turkey tail mycelium needs about 10-12 months to fully colonize a log. During this time, maintain moisture by watering during dry periods.
- Watch for fruiting. The first mushrooms typically appear in late summer or early fall of the year following inoculation. Logs can continue producing for 3-5 years.
Growing turkey tail mushrooms on sawdust blocks
The sawdust block method for growing turkey tail mushrooms is indeed an excellent choice for intermediate growers seeking faster results than log cultivation. Here are the key details of this method:
Substrate Preparation
The ideal substrate mix for turkey tail mushrooms on sawdust blocks typically consists of:
- 78% hardwood sawdust or hardwood fuel pellets
- 20% wheat bran (or other nitrogen-rich supplements like rice bran)
- 1% gypsum
- 1% brown sugar
- Water to achieve 60-65% moisture content
Sterilization Process
Sterilization is crucial to prevent contamination. The substrate should be sterilized by:
- Boiling the moistened sawdust mixture in a large pot or container
- Maintaining the boil for 1-2 hours to eliminate competing microorganisms
- Allowing the mixture to cool before inoculation
Inoculation and incubation
After sterilization:
- Mix turkey tail spawn thoroughly into the cooled substrate
- Pack the inoculated mixture into filter-patch bags or containers with small air holes
- Incubate in a dark, warm environment (70-75°F or 21-24°C) for about 2-3 weeks
Colonization and fruiting
For optimal results:
- Allow the mycelium to colonize and form a thick layer for about 3 months in the high CO2 environment of the sealed bag
- Remove the top 1/4 to 1/3 of the bag to expose the colonized substrate
- Place in a fruiting chamber with proper humidity and indirect light
- Harvest the thick layer of fruit bodies that form on the exposed surface
Advantages of the sawdust block ,ethod
- Faster colonization compared to logs, with fruiting possible in as little as a few weeks
- Can be done indoors, allowing for year-round cultivation
- Provides more control over growing conditions, leading to more consistent yield
- Higher yields compared to grow kits
Challenges
- Requires specialized equipment like a pressure cooker or autoclave for proper sterilization
- Demands more technical knowledge and attention to sterile technique
- Higher risk of contamination if proper procedures are not followed
Tips for successful Turkey Tail cultivation
Here are some additional tips to enhance your chances of successfully cultivating Turkey Tail mushrooms at home:
Maintain optimal conditions:
Temperature: Aim for a consistent temperature range between 68°F and 77°F (20°C and 25°C) during the colonization and fruiting stages.
Humidity: Maintain high humidity levels, around 80-90%, throughout the fruiting stage. Regularly misting the fruiting chamber or using a humidifier can help achieve this.
Airflow: Provide adequate fresh air exchange to prevent stagnation and promote healthy fungal growth. Create small holes in the grow bags or fruiting chamber for passive air circulation.
Light: While direct sunlight should be avoided, some indirect sunlight can be beneficial during fruiting. Aim for around 12 hours of diffused light per day.
Prevent contamination:
- Sterilization: Ensure proper sterilization of all equipment and materials used in the cultivation process to minimize the risk of contamination. This is especially crucial for the DIY method.
- Cleanliness: Maintain a clean and hygienic environment throughout the cultivation process. Wash your hands thoroughly before handling any materials or mushrooms.
- Monitoring: Regularly inspect your grow kits or DIY setups for signs of mold or other contaminants. If contamination occurs, isolate and dispose of the affected materials promptly to prevent further spread.
Be patient!
- Patience: Cultivating mushrooms takes time. Be patient and allow the mycelium to colonize the substrate fully before expecting fruiting bodies to appear.
- Experimentation: As you gain experience, you can experiment with different substrates, spawn types, and fruiting conditions to optimize your results.
How to harvest turkey tail mushrooms properly
Proper harvesting techniques ensure continued production while maintaining mushroom quality for medicinal use.
When to harvest turkey tail mushrooms
You should harvest turkey tail mushrooms when they reach full size but before the edges become brittle and dry. Fresh specimens have vibrant colors and slightly flexible texture.
Timing indicators: Harvest when mushrooms are 2-6 inches (5-15 cm) across with distinct color zones. Avoid specimens with faded colors, insect damage, or completely rigid texture.
Seasonal considerations: Prime harvesting occurs during active growing periods in spring and fall when mushrooms are fresh and potent.
Harvesting technique and tools
Cutting method: Use sharp scissors or a knife to cut mushrooms at the base, leaving the attachment point intact. This allows potential regrowth from the same location.
Sustainable practices: Take only what you need and leave smaller specimens to mature. Harvest no more than 75% of mushrooms from any single location to support ecosystem health.
Processing fresh turkey tail after harvest
Cleaning process: Remove debris with a soft brush, avoiding water unless absolutely necessary. Trim any tough or damaged portions before processing.
How to store Turkey Tail Mushrooms
Storing turkey tail mushrooms properly is essential to maintain their quality, potency, and longevity. Here are the best methods for storing both fresh and dried turkey tail mushrooms:
Storing Fresh Turkey Tail Mushrooms
1. Refrigeration
- Container: Store fresh turkey tail mushrooms in a breathable container, such as a paper bag or a loosely covered container. Avoid plastic bags or airtight containers as they trap moisture and can cause the mushrooms to spoil quickly.
- Temperature: Place the container in the refrigerator at a temperature between 34-38°F (1-3°C).
- Moisture Control: To prevent excess moisture, place a dry paper towel or a clean cloth in the container with the mushrooms to absorb any residual moisture.
- Shelf Life: Fresh turkey tail mushrooms are best used within a week to ensure optimal flavor and texture.
Storing Dried Turkey Tail Mushrooms
1. Airtight Containers
Store dried turkey tail mushrooms in an airtight container to protect them from moisture and humidity. Glass jars or resealable bags with the air squeezed out are ideal.
Keep the container in a cool, dark place, such as a pantry or cupboard, to avoid exposure to light which can degrade the quality over time.
Label the container with the name and date of the dried mushrooms to keep track of their freshness.
Dried mushrooms can be stored for several years, but it is best to use them within a year for optimal flavor and potency.
2. Adding Moisture Absorbers
For long-term storage, consider adding an oxygen absorber or food-safe silica desiccant packet to the container. This helps to absorb any residual moisture and keeps the mushrooms fresh.
Freeze your Turkey Tail Mushrooms
Clean the mushrooms thoroughly and remove any dirt or debris.
Blanch the mushrooms by boiling them for 1-2 minutes, then immediately transfer them to a bowl of ice water to cool. This step helps preserve their quality and extend their shelf life.
Divide the mushrooms into portion sizes that you are likely to use at once. This makes it convenient to defrost only what you need.
- Place the portions in airtight containers, freezer bags, or vacuum-sealed bags.
- Label each container with the name and date.
- Store the containers in the freezer. Frozen turkey tail mushrooms can be stored for up to 12 months.
Make tinctures or extracts
1. Tinctures
- Preparation: Steep dried turkey tail mushrooms in alcohol (such as vodka) for several weeks.
- Storage: Store the tincture in a cool, dark place away from direct sunlight. Tinctures can last for several years if stored properly.
By following these storage methods, you can ensure that your turkey tail mushrooms remain fresh and potent, allowing you to enjoy their medicinal benefits for an extended period.
Where do turkey tail mushrooms grow?
Turkey tail mushrooms are highly adaptable and can be found in a variety of environments across the globe. Here are some key details about their natural habitat:
Turkey tail mushrooms are found almost anywhere in the world, including North America, Europe, Asia, and other regions. They are particularly prolific in North America and are one of the most common forest mushrooms.
Turkey tail mushrooms primarily grow on dead or decaying hardwood logs, stumps, and fallen branches. They are saprotrophic, meaning they feed on decomposing organic matter, which helps in nutrient recycling in forest ecosystems.
They are most commonly found on hardwood trees such as oak, beech, maple, and birch. Occasionally, they can also grow on coniferous trees like fir and pine.
These mushrooms can grow year-round, but they are most noticeable and abundant in the autumn and winter months when they release their spores.
Ecological Role
Turkey tail mushrooms play a crucial role in breaking down tough materials in wood, returning nutrients to the soil, and maintaining forest health.
They cause white rot in the wood they colonize, which helps decompose lignin and cellulose, the primary components of wood.
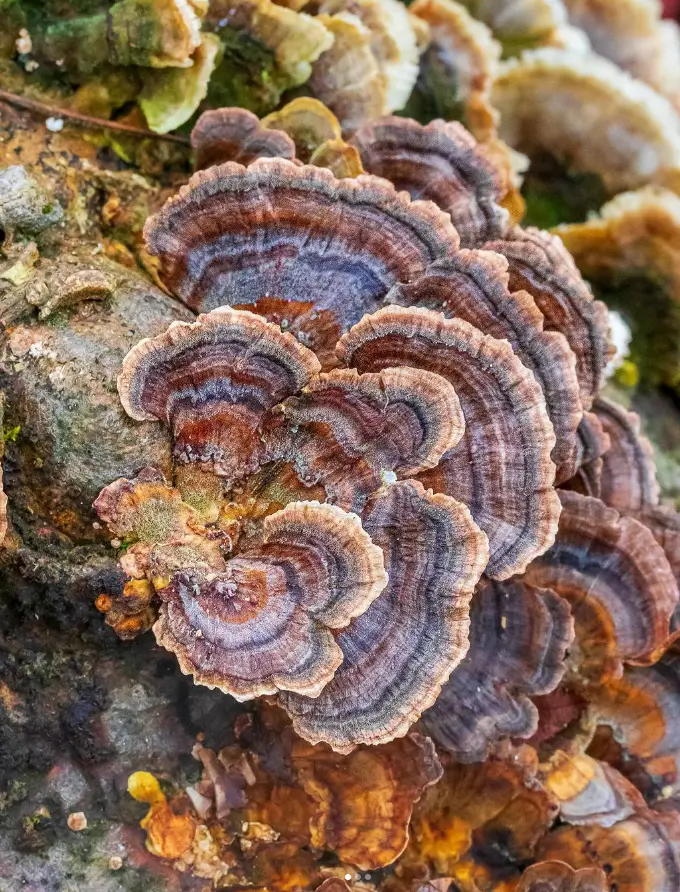
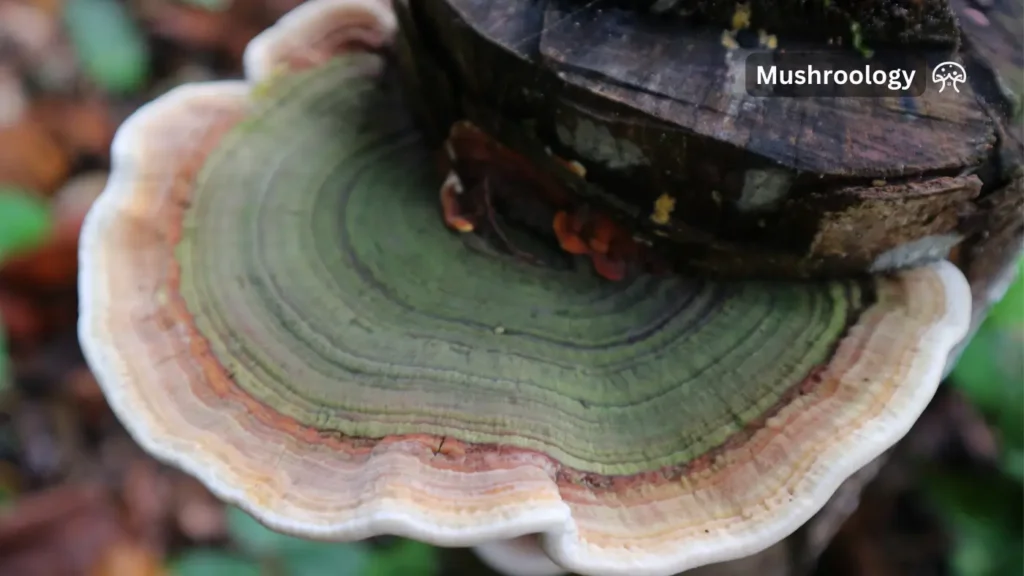
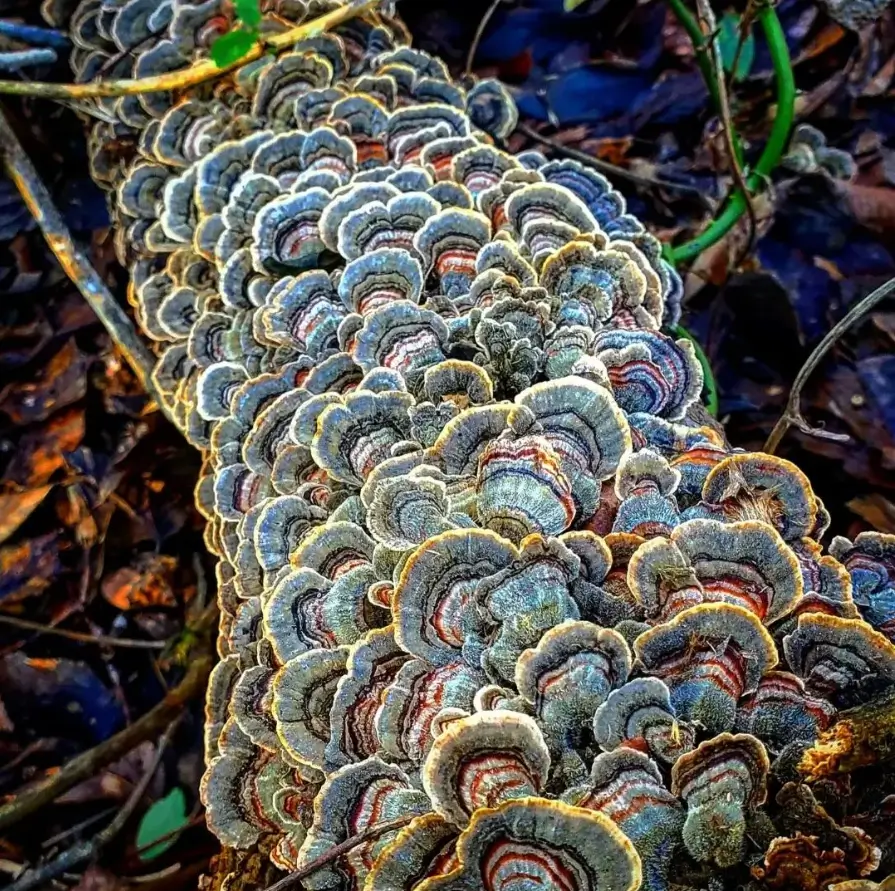
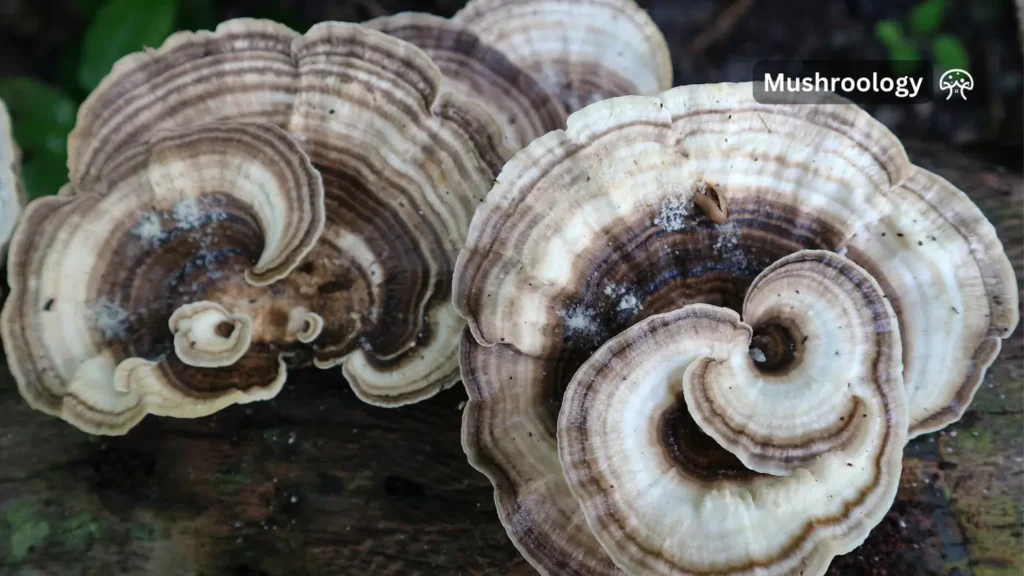
Turkey tail mushrooms are recognized by their multicolored, concentric zones on the cap, which resemble a turkey’s tail feathers. The underside of the cap is white and porous.
They often grow in groups, rows, or clusters, forming layered structures on the wood.
When foraging, look for them on the trunks of downed trees, dead stumps, or branches in deciduous forests. They are relatively easy to find due to their distinctive appearance and widespread presence.
Ensure proper identification by checking for the characteristic multicolored bands and white porous underside to avoid confusing them with lookalikes such as the false turkey tail (Stereum ostrea).
FAQs About Turkey Tail Mushroom
- What is turkey tail mushroom?
Turkey tail mushroom (Trametes versicolor) is a type of medicinal fungus that grows on dead logs and trees worldwide. It gets its name from the colorful stripes on its cap, which resemble the tail feathers of a wild turkey. It has been used in traditional medicine for centuries, particularly in Asia.
2. What are the potential health benefits of turkey tail mushroom?
Turkey tail is rich in antioxidants and polysaccharides, such as PSK (polysaccharide-K) and PSP (polysaccharide-peptide), that have been studied for their potential benefits on the immune system. Research suggests it may help boost the immune response in people with certain cancers when used alongside conventional treatments like chemotherapy. Additionally, it is being studied for its potential role in gut health and fighting infections.
3. How is turkey tail mushroom consumed?
Turkey tail is typically consumed as a supplement in capsule or powder form, or as an ingredient in teas and soups. It is not typically eaten as a culinary mushroom due to its tough texture.
4. Are there any side effects of turkey tail mushroom?
Turkey tail is generally considered safe for consumption, but some people may experience mild side effects such as upset stomach, nausea, or darkened stools. It’s essential to consult with your doctor before taking turkey tail supplements, especially if you are pregnant, breastfeeding, or have any underlying health conditions.
5. Where can I buy turkey tail mushroom?
Turkey tail mushroom supplements can be found at health food stores, pharmacies, and online retailers. It’s important to choose reputable brands that offer high-quality, pure extracts.
6. What is the best way to grow turkey tail mushrooms?
The most common and effective way to cultivate turkey tail mushrooms is on hardwood logs, such as oak, maple, or beech. You can also grow them on supplemented sawdust blocks or even indoors using grow kits.
7. What are the ideal conditions for growing turkey tail mushrooms?
Turkey tail mushrooms thrive in a shaded and humid environment. They prefer temperatures between 18-24°C (64-75°F) and high humidity levels. Proper ventilation is crucial to prevent mold growth. Logs should be kept moist but not waterlogged.
8. How long does it take to grow turkey tail mushrooms?
The time to fruiting for turkey tail mushrooms can vary, but it usually takes about 6-12 months for the mycelium to colonize the substrate and produce mushrooms. The timing can be affected by factors like temperature, humidity, and the type of substrate used.
9. How do I know when turkey tail mushrooms are ready to harvest?
Turkey tail mushrooms are typically ready to harvest when the edges of the fruiting bodies start to turn brown or when the mushrooms become brittle and dry. Harvesting at this stage ensures that the mushroom has reached its peak potency for medicinal purposes.
10. Can I grow turkey tail mushrooms indoors?
Yes, you can grow turkey tail mushrooms indoors using grow kits available from various suppliers. These kits typically contain a pre-colonized substrate, like sawdust or wood chips, and instructions for creating the ideal growing conditions indoors.