Your step-by-step roadmap to growing mushrooms at home successfully
You’ve probably walked past expensive gourmet mushrooms at the store and wondered if you could grow them yourself. The truth? Growing mushrooms at home is easier than most people think. You don’t need a farm, fancy equipment, or years of experience to get started.
Bottom Line: Beginner mushroom growers can harvest their first crop within 2-4 weeks using simple methods. Start with oyster mushrooms – they’re nearly foolproof and grow in temperatures between 65-75°F (18-24°C) with basic equipment costing under $50.
Why you should start growing mushrooms at home
Growing mushrooms at home gives you control over quality and freshness that store-bought varieties can’t match. Fresh mushrooms lose flavor and nutrients quickly, but homegrown ones stay at peak quality until you harvest them.
You’ll save money too. Gourmet oyster mushrooms cost $8-12 per pound in stores, but you can grow them for under $2 per pound at home. One growing kit produces 1-2 pounds (0.5-0.9 kg) of mushrooms over multiple harvests.
The North American Mycological Association reports that mushroom cultivation has grown 300% among hobby growers in the past decade. More families are discovering how satisfying it is to grow their own food, especially something as unique as mushrooms.
Health benefits you can’t ignore: Homegrown mushrooms contain higher levels of nutrients than store-bought varieties. They’re packed with protein, B vitamins, potassium, and antioxidants while being naturally low in calories and fat.
What mushrooms should beginners grow first
Not all mushrooms are equal for beginners. Some species forgive mistakes while others demand precision. Here’s what works best when you’re starting out:
Best beginner mushrooms:
- Oyster mushrooms (Pleurotus ostreatus): Grow fast, tolerate temperature swings, high success rate
- Shiitake (Lentinula edodes): Take longer but very forgiving, excellent flavor
- Wine cap mushrooms (Stropharia rugosoannulata): Grow outdoors on wood chips, almost maintenance-free
Avoid these as a beginner:
- Morel mushrooms (extremely difficult to cultivate)
- Button mushrooms (require composted substrate)
- Reishi (slow-growing, need precise conditions)
Oyster mushrooms are your best bet for first success. They grow in 2-3 weeks, tolerate temperatures from 55-75°F (13-24°C), and fruit reliably even with beginner mistakes.
How oyster mushrooms make the perfect beginner choice
Oyster mushrooms adapt to many growing conditions and substrates. Research from the American Mushroom Institute shows oyster varieties have the highest success rate among new cultivators – over 85% get successful harvests on their first attempt.
They’re also aggressive growers that outcompete most contaminants. This means small sterility mistakes won’t necessarily ruin your crop like they would with finicky species.
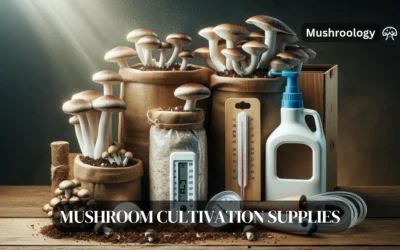
Basic equipment you need for mushroom growing
You don’t need expensive equipment to start growing mushrooms. Most beginners spend $30-60 on initial supplies and can reuse everything for multiple growing cycles.
Essential equipment list:
- Growing containers (plastic storage tubs work fine)
- Spray bottle for misting
- Thermometer and humidity gauge
- Growing substrate (straw, sawdust, or coffee grounds)
- Mushroom spawn (like seeds for mushrooms)
- Clear plastic bags with filter patches
Optional but helpful:
- Pressure cooker for sterilizing substrate
- Heat mat for temperature control
- Timer for misting schedules
You can find most supplies at hardware stores or order mushroom-specific items from specialty suppliers. Avoid buying expensive “mushroom growing systems” until you know you enjoy the hobby.
Safety Warning
- Never eat any mushroom you can’t identify with 100% certainty
- Only grow mushrooms from reputable spawn suppliers
- Contact your local mycological society for identification help
- The North American Mycological Association provides comprehensive safety guidelines for mushroom cultivation
Three proven methods for growing mushrooms at home
You can grow mushrooms using several different methods. Each has advantages depending on your space, budget, and goals.
Method 1: Ready-to-fruit growing kits (easiest)
Growing kits are perfect for absolute beginners. The substrate comes pre-colonized with mushroom mycelium – you just add water and wait for mushrooms to appear.
How growing kits work:
- Cut holes in the plastic bag following kit instructions
- Mist the cut areas 2-3 times daily
- Maintain humidity by covering with a humidity tent
- Harvest mushrooms in 7-14 days
Kits cost $15-25 and typically produce 1-2 pounds (0.5-0.9 kg) of mushrooms. They’re great for testing your interest before investing in equipment.
Method 2: Substrate bags (intermediate)
This method gives you more control and better value. You’ll prepare substrate, inoculate it with spawn, and grow mushrooms from start to finish.
Basic process:
- Prepare and sterilize substrate (straw, sawdust, coffee grounds)
- Mix cooled substrate with mushroom spawn
- Pack mixture into growing bags
- Incubate at proper temperatures until colonization completes
- Create fruiting conditions to trigger mushroom growth
This method costs less per pound of mushrooms and teaches you the complete process. Expect 4-6 weeks from start to harvest.
Method 3: Log cultivation (outdoor growing)
Log cultivation works great for shiitake and oyster mushrooms. You’ll inoculate hardwood logs with mushroom spawn and harvest mushrooms for 3-5 years.
Log growing basics:
- Cut fresh hardwood logs 3-8 inches (7.6-20 cm) in diameter
- Drill holes and insert mushroom plugs
- Seal holes with food-grade wax
- Keep logs moist and wait 6-18 months for first mushrooms
This method requires more patience but produces mushrooms for years. One log can yield 1-2 pounds (0.5-0.9 kg) of mushrooms annually.
Step-by-step process for your first mushroom crop
Let’s walk through growing oyster mushrooms using the substrate bag method. This gives you hands-on experience with the complete process.
Step 1: Prepare your substrate
Wheat straw works excellently for oyster mushrooms. You’ll need about 2-3 pounds (0.9-1.4 kg) of dry straw for one growing bag.
Substrate preparation:
- Chop straw into 2-4 inch (5-10 cm) pieces
- Pasteurize by soaking in 160°F (71°C) water for 2 hours
- Drain and cool to room temperature
- Squeeze out excess water – aim for 60-70% moisture
The substrate should feel like a wrung-out sponge. Too wet causes anaerobic conditions; too dry prevents mycelium growth.
Step 2: Mix substrate with spawn
Use about 10-20% spawn by weight for fastest colonization. For 2 pounds (0.9 kg) of substrate, you’ll need 3-6 ounces (85-170g) of spawn.
Inoculation process:
- Work in a clean area wiped down with alcohol
- Mix spawn thoroughly through cooled substrate
- Pack mixture into clear plastic growing bags
- Seal bags leaving some air space
Don’t worry about perfect sterility at home. Oyster mushrooms are aggressive enough to outcompete most contaminants with good technique.
Step 3: Incubation phase
Place inoculated bags in a dark, warm location at 70-80°F (21-27°C). A closet, basement, or spare room works perfectly.
What happens during incubation:
- White mycelium appears within 3-5 days
- Complete colonization takes 10-21 days
- Substrate turns completely white when ready
Don’t disturb bags during this phase. The mycelium needs stable conditions to establish itself throughout the substrate.
Step 4: Trigger fruiting
Once bags show complete white colonization, you’ll create conditions that trigger mushroom formation.
Fruiting setup:
- Cut 2-3 inch (5-7.6 cm) X-shaped slits in colonized bags
- Place bags in area with indirect light
- Maintain 80-90% humidity
- Provide fresh air exchange 4-6 times daily
You can create a simple fruiting chamber using a plastic storage tub with holes drilled for air exchange. Mist the walls (not directly on mushrooms) 3-4 times daily.
Step 5: Harvest your mushrooms
Oyster mushrooms are ready when caps flatten out and edges become wavy. This usually happens 5-10 days after pins appear.
Harvesting tips:
- Cut or twist entire clusters at the base
- Harvest before spores drop (mushrooms turn dusty)
- Process immediately or refrigerate in paper bags
- Expect 2-4 flushes over 6-8 weeks
Your first flush typically produces the largest mushrooms. Subsequent flushes may have smaller but more numerous mushrooms.
Common beginner mistakes and how you can avoid them
Most beginners make predictable mistakes that lead to failed crops. Here’s how to avoid the most common problems:
Mistake 1: Poor sterility during inoculation
- Problem: Contamination takes over before mushrooms establish
- Solution: Clean work area, use alcohol, work quickly but carefully
Mistake 2: Wrong temperature during incubation
- Problem: Slow or no colonization
- Solution: Use thermometer, maintain consistent 70-80°F (21-27°C)
Mistake 3: Not enough humidity during fruiting
- Problem: Mushroom pins abort or grow poorly
- Solution: Mist regularly, use humidity chamber, monitor with hygrometer
Mistake 4: Too much or too little air exchange
- Problem: Long stems with small caps, or no fruiting
- Solution: Balance fresh air with humidity retention
Mistake 5: Harvesting too late
- Problem: Tough, spore-covered mushrooms
- Solution: Harvest when caps are full but edges haven’t turned up
How much you can expect to harvest
Realistic expectations help you judge success and plan future growing cycles. Here’s what experienced home growers typically achieve:
Oyster mushroom yields:
- Growing kits: 1-2 pounds (0.5-0.9 kg) total
- Substrate bags: 20-40% of substrate dry weight
- First flush usually largest, 2-4 additional smaller flushes
Timeline expectations:
- Kit to harvest: 1-2 weeks
- Substrate preparation to harvest: 4-6 weeks
- Log inoculation to harvest: 6-18 months
Quality factors:
- Homegrown mushrooms stay fresh 7-10 days refrigerated
- Flavor peaks within 24 hours of harvest
- Nutritional content higher than store-bought varieties
Your yields will improve with experience. Most beginners see 50-75% of optimal yields initially, reaching full potential after 3-4 growing cycles.
Scaling up your mushroom growing operation
Once you’ve successfully grown your first crop, you might want to expand production. Here’s how to scale gradually:
Small expansion (2-4 bags):
- Use same techniques with more substrate bags
- Stagger inoculation dates for continuous harvests
- Investment: $50-100 additional
Medium operation (5-20 bags):
- Build dedicated growing space
- Add temperature and humidity controls
- Consider multiple mushroom varieties
- Investment: $200-500
Commercial consideration:
- Requires significant space and equipment
- Need reliable markets for product
- Consider local regulations and permits
- Investment: $2,000+
Most home growers find 4-8 bags provide plenty of mushrooms for family use plus some to share with friends.
Frequently asked questions about mushroom growing for beginners
Q: How long does it take to grow mushrooms from start to harvest?
A: Oyster mushrooms take 4-6 weeks from substrate preparation to harvest. Growing kits produce mushrooms in 1-2 weeks since colonization is already complete.
Q: What’s the easiest mushroom for absolute beginners to grow?
A: Oyster mushrooms are most forgiving for beginners. They tolerate temperature swings of 55-75°F (13-24°C) and have high success rates even with minor mistakes.
Q: How much space do you need for growing mushrooms at home?
A: A closet or spare room corner is sufficient. One growing bag needs about 1 square foot (0.09 m²) of space during fruiting.
Q: What equipment costs should beginners expect for mushroom growing?
A: Initial setup costs $30-60 for basic equipment. Growing kits cost $15-25 each. Ongoing substrate and spawn costs run $2-4 per pound of mushrooms produced.
Q: How do you know when mushrooms are ready to harvest?
A: Harvest oyster mushrooms when caps flatten out and edges become wavy, typically 5-10 days after pins appear. Avoid waiting until spores drop.
Q: Can you grow mushrooms year-round indoors? A: Yes, indoor growing allows year-round production with temperature control. Maintain 70-80°F (21-27°C) for incubation and 65-75°F (18-24°C) for fruiting.
Helpful resources for families and beginners
- North American Mycological Association (NAMA)
- American Mushroom Institute
- “The Mushroom Cultivator” by Paul Stamets and J.S. Chilton
- “Growing Gourmet and Medicinal Mushrooms” by Paul Stamets
- Local mycological society chapters for hands-on workshops
Next steps for continued learning:
- Join local mushroom clubs for community support
- Attend mushroom forays to learn about wild varieties
- Experiment with different substrate materials
- Try log cultivation for outdoor growing experience
Now you have everything needed to start growing mushrooms successfully. You’ll see better results if you begin with oyster mushrooms and focus on maintaining proper temperature and humidity.